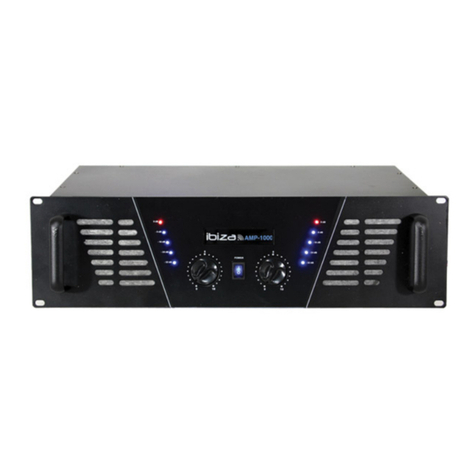
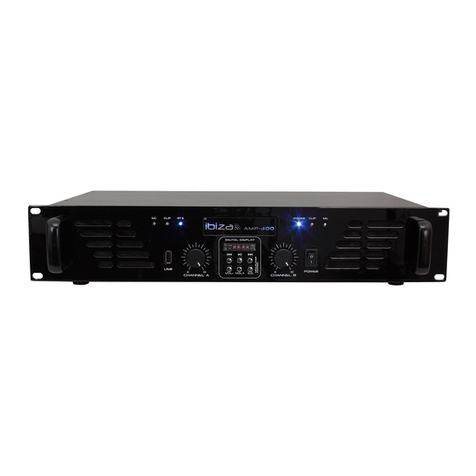
Ibiza sound AMP300USB-BT User manual

PA AMPLIFIER
WITH USB & BLUETOOTH
MANUAL
Ref.
EN - Instruction manual - p. 3
FR - Manuel d'Utilisation - p. 6
DE - Bedienungsanleitung - S. 9
NL - Handleiding - p. 12
PT - Manual de instruções - p. 15
RO - Manual de Utilizare - p. 18
SI - Navodila za Uporabo - s. 20
AMP300USB-BT (15-2351): 2 x 240W

MANUAL - AMP300USB-BT
2
REAR PANEL / ARRIÈRE / RÜCKSEITE / ACHTERPANEEL /
LIGAÇÕES TRASEIRAS / CONEXIONES TRASERAS /
PRIKLJUČKI NA ZADNJI PLOŠČI
FRONT PANEL / FAÇADE / FRONTSEITE / FRONTPANEEL / PAINEL FRONTAL /
PANEL FRONTAL / ČELNA PLOŠČA

MANUAL - AMP300USB-BT
3
INSTRUCTION MANUAL
Warnings
CAUTION
DO NOT OPEN THE HOUSING
SHOCK HAZARD
Explanation of signs
The triangle containing a lightning symbol is used to indicate whenever your health is at risk (due to electrocution, for
example).
An exclamation mark in a triangle indicates particular risks in handling or operating the appliance.
In accordance with the requirements of UK standards
Class I protection: Connect only to an earthed mains outlet
The product is for indoor use only
IMPORTANT SAFETY INSTRUCTIONS AND DANGER WARNINGS
• Please read the manual carefully and keep it for future reference.
• All safety instructions and warnings must be adhered to. They are part of the manual and must be kept with the manual.
• Any guarantee claims are rendered invalid if damage occurs due to non-observance of these operating instructions. We
assume no liability for any consequent damage.
• We assume no liability for personal injury or damage to property caused by incorrect handling or non-observance of the
safety instructions. Any guarantee claims expire in such cases.
• Unauthorized conversions and/or modications of the appliance are not permitted for safety and licensing reasons (CE).
• The appliance is approved for operation in dry, closed rooms only. Do not operate the device nearby water, such as in
bathrooms or nearby swimming pools.
• The appliance may not be exposed to extreme temperatures (< +5°C / > +35°C) in operation.
• The appliance may not be subjected to strong vibrations or heavy mechanical strain.
• The appliance may not be exposed to excessive moisture (due to dripping or sprayed water, for example).
• Do not place any recipients lled with liquids, such as glasses or vases, on top of or directly next to the appliance. They
could fall over, causing water to enter the appliance. Never pour out liquids above the appliance. Do not place any small
objects, such as coins or paper clips, on the appliance since they could fall inside the appliance. You run a high risk of cau-
sing a re or life-threatening electrocution! If any liquid or objects enter the appliance nevertheless, pull the mains plug
out of the socket immediately and contact a specialist.
• The appliance has been constructed according to protection class l and must be connected to an earthed mains outlet.
• 230V~ 50Hz mains socket may be used as source of power for the appliance. Never try to operate the appliance with any
other voltage.
• Only pull the mains plug out of the socket by the intended gripping surface. Do not pull it by the cable.
• Never plug the mains plug in or out with damp or wet hands.
• Always pull the mains plug out of the mains socket:
Before cleaning the appliance
If there is a thunderstorm
If you will not be using the appliance for a long period of time (>1 week)
• Electrical appliances must be kept out of the reach of children. Be particularly careful if children are present. Children are
not aware of the hazards involved in handing electrical appliances improperly. Children could attempt to poke objects into
the appliance. There is a life-threatening danger of electrocution.
• Do not leave the appliance unattended while operating it.
• Never place the appliance on an unstable or movable surface. Persons could be injured or the appliance damaged by it
falling down.
• When using a rack, make sure it is in a stable position and is transported securely. Installation on uneven, slanted surfaces
or stopping the rack abruptly during transport can result in the rack overturning or appliances falling from or out of the
rack and injuring people.
• Live components can be exposed by opening covers or removing components (unless this can be done
without tools). Contact points can also be live. If the appliance has to be opened in order to calibrate, service, repair or
replace components or assemblies, all of its poles must be disconnected from all sources of voltage rst. If the appliance
has to be kept open and under voltage during maintenance or repairs, this work may only be carried out by a specialist
who is familiar with the risks involved and the relevant regulations.

MANUAL - AMP300USB-BT
4
• Never connect the appliance directly after transferring it from a cold to a warm room. The condensation water that forms
could destroy the appliance or result in an electric shock. Allow the device to reach room temperature before connecting
it. Wait until the condensation water has evaporated. This can take some hours.
• Do not place any naked ames such as those of burning candles on or next to the appliance.
• Do not place the appliance on soft surfaces such as carpets or beds. Do not cover the air vents of the appliance. Do not
obstruct the air circulation with objects such as magazines, table cloths or curtains. This prevents the dissipation of heat
from the appliance and can result in overheating.
• Your amplier is a high power unit that must be installed at a well ventilated place far from heat, humidity, shocks and
dust to avoid malfunction, defaults, electrical shocks and the risk of re. The cooling air enters via the front panel and
leaves via the rear panel. The good ventilation is therefore of paramount importance. If you install the amplier in an
equipment rack or a ight case, make sure not to obstruct the air ow. Never install the amplier in a closed rack or ight
case as a part of the heat is evacuated by the metal ground plate. It is recommended to leave at least one free space
below the amplier.
• Only use the appliance in a moderate climate, not in tropical environments.
• All persons involved in operating, installing and servicing the appliance and putting it into service must be trained and
qualied accordingly and observe these operating instructions.
• Defective mains cables may only be replaced by specialists. Danger of shock hazard!
• If you are not sure about the correct connection or if questions arise which are not answered by the operating instructions,
please do not hesitate to contact support or a specialist of your choice. Consult a specialist if you are in doubt the opera-
ting principle or the safety of the product.
1.USB STICK SOCKET
2. Gain control
Input gain control allowing to attenuate the input signal that is sent to the various channels of the amplier.
The dB control range is as follows: Fully closed (the signal is at zero and not sent to the channels of the amplier) or fully
open (i.e. at rated power: the signal is not attenuated at all and sent at the input power into the amplier channels)
3. USB PLAYER CONTROLS
a: |<< : Use this button to re-start the track or to select the previous track.
b: Play/Pause: Each time you press this button, the operation changes from play to pause or from pause to play.
c: >>|: Use this button to select the next track.
d: VOL-: Use this button to control level down.
e: VOL+: Use this button to control level UP.
f: EQ:Allow you to select the eect.
g: LED DISPLAY: Display to MP3's information.
4. Power Switch
Press down the button to turn on this unit. The LED will illuminate when the power is on.
5. SIGNAL LED
Indicates the signal on input.
6. CLIP LED
Indicates the clipping of the amplier. when signal input level exceeds the output capacity of the amplier channel. If the led
ashes, reduce the input level.
7. BLUETOOTH LED
This LED indicates the Bluetooth working status. When you turn on the amplier, the Bluetooth feature is active and the light
starts ashing. The unit is ready to search and connect to a Bluetooth device. Activate the Bluetooth search on your smart-
phone and select "Bluetooth" in the list of found devices. If the unit connects successfully to a Bluetooth device, the light
ashes slowly for 2-3 seconds. Then the amplier is ready to play the music of your Bluetooth device.
If there is no connection after 1 minute, the unit switches into standby mode and the LED goes out.
8. POWER LED
The LED will illuminate when the power is on.
REAR CONNECTIONS
1. Line input
Jack sockets: These sockets are connected in parallel to the corresponding RCA connectors. Thus, you can connect a second

MANUAL - AMP300USB-BT
5
amplier in series to the rst unit to send the same signal into several ampliers in order to increase the audio power.
2. Speaker outputs
Binding posts or XLR/Jack (minimum load 4 Ohms)
Note : To avoid damage to the speakers, only use speakers that have the same impedance and power
rating as the amplier. Only use speaker cables and never signal cables as those used for micro-
phones, music instruments and audio equipment in general.
3. Power supply
Mains
Installation and Operation
Power On/O
Always switch on the amplier at last and switch it o at rst in your audio installation. Set all controls to the minimum in
order to avoid unpleasant and even dangerous noise.
Audio Connections
Prior to making any connections, switch o all units that you wish to interconnect. Only use high quality leads that are sui-
table for this application. Handle the cables with care and check the air ow regularly. Only pull the plugs, never the cable.
Do not use force to unplug a lead. Always roll the cables without making knots or bending them in order to ensure a long
lifetime, proper operation and optimal performance.
Prevention and Detection of Interference
• Make sure to install the amplier in a place far away from industrial and high frequency radiations. Avoid to install the
amplier near a radio, TV or mobile phone. These equipments are sources of interference.
• When you connect the other components of your installation, avoid the constitution of ground loops that are detrimental
to the excellent sound qualities of the amplier and potentially dangerous. He best way (although not always achievable)
to avoid ground loops is to connect the ground of all components to a central point (star connection). The central point of
a sound installation is the mixer.
• In order to determine the cause of interference, connect the dierent sections of the mixer in the following sequence to
the other units. Only make the next connection once you have checked the sound of the actual one.
SPECIFICATIONS
Music power ..................................................................................................................................................2 x 240W 4Ω
......................................................................................................................................................................2 x 160W 8 Ω
Total harmonic distortion ....................................................................................................................................... ≥0,5%
Freq. Range ...................................................................................................................................................20-20.000Hz
Noise......................................................................................................................................................................≥0,5dB
Channel separation (f=1kHz) ................................................................................................................................. ≥82dB
Input level ................................................................................................................................................................ ≥0dB
Input impedance ....................................................................................................................................................≥10kΩ
Bluetooth frequency range ........................................................................................................................2402-2480MHz
Max RF emission power ........................................................................................................................................2.21mW
Power supply .................................................................................................................................................230V~ 50Hz
Please Note: Specications and improvements in the design of this unit and this manual are subject to change without any
prior written notice.
Electric products must not be put into household waste. Please bring them to a recycling centre. Ask your local autho-
rities or your dealer about the way to proceed.

MANUAL - AMP300USB-BT
6
AMPLIFICATEUR DE PUISSANCE
MANUEL D’UTILISATION
Avertissements
ATTENTION
NE PAS OUVRIR LE BOITIER
RISQUE DE CHOC ELECTRIQUE
L’éclair dans le triangle attire l’attention sur un danger physique (due à une électrocution p.ex.).
Le point d’exclamation dans le triangle indique un risque dans la manipulation ou l’utilisation de l’appareil.
Explication des symboles
En conformité avec les exigences de la norme CE
Appareil de classe I: Brancher uniquement sur une prise avec terre
Utilisation uniquement à l'intérieur
CONSIGNES DE SÉCURITÉ
• Nous déclinons toute responsabilité pour des dommages aux biens et aux personnes dus à une mauvaise manipulation ou
le non-respect des consignes de sécurité. Le droit de garantie ne s’applique pas.
• Des modications non-autorisées de l’appareil sont interdites pour des raisons de sécurité et de licence (CE).
• Utiliser uniquement à l’intérieur dans une pièce sèche et fermée. Ne pas utiliser à proximité d’eau tel que dans une salle
de bains ou à proximité d’une piscine.
• Ne pas exposer l’appareil à des températures extrêmes (<5°C / >35°C) pendant le fonctionnement.
• Tenir à l’abri des vibrations fortes et des contraintes mécaniques.
• Tenir à l’abri de l’humidité extrême (due à de l’eau pulvérisée p.ex.)
• Ne pas poser de récipients remplis de liquides tels que des verres ou des vases, sur ou à proximité immédiate de l’appa-
reil. Ils risquent de tomber et de déverser le liquide dans l’appareil. Ne jamais verser de liquides au-dessus de l’appareil.
• Ne pas placer de petits objets tels que des pièces ou des trombones sur l’appareil car ils risquent de tomber à l’intérieur
de l’appareil. Vous risquez de provoquer un incendie ou une électrocution. Si un liquide ou un objet pénètre dans l’appa-
reil, débranchez immédiatement la prise secteur et contactez votre revendeur.
• L’appareil fait partie de la classe de protection l et doit être impérativement branché sur une prise secteur avec terre.
• L’appareil doit être alimenté en 230V~ 50Hz. Ne jamais essayer d’alimenter l’appareil avec une autre tension.
• Pour débrancher la che secteur, tirez toujours sur la che, jamais sur le cordon.
• Ne jamais brancher ou débrancher la che secteur avec des mains mouillées.
• Débranchez toujours l’appareil du secteur:
avant de le nettoyer
pendant un orage
en cas de non-utilisation prolongée (>1 semaine)
• Tenir des appareils électriques hors de la portée des enfants. Soyez particulièrement vigilants en présence d’enfants. Les
enfants ne sont pas conscients du danger d’un appareil électrique. Ils pourraient essayer d’insérer un objet à l’intérieur de
l’appareil ce qui représente un grave danger d’électrocution.
• Ne pas laisser l’appareil sans surveillance pendant son fonctionnement
• Ne jamais placer l’appareil sur une surface instable ou mobile. L’appareil risque de blesser une personne ou de s’abîmer
en tombant.
• L’arrêt brutal pendant le transport peuvent faire basculer le rack en faisant tomber l’appareil.
• En ouvrant le boîtier, vous accédez à des composants sous tension (sauf si vous pouvez y accéder sans outils). Des points
de contacts peuvent également être sous tension. S’il faut ouvrir l’appareil pour le calibrer, l’entretenir, le réparer ou
remplacer des composants, toutes les bornes doivent d’abord être débranchées des sources de tension. S’il faut garder
l’appareil ouvert et sous tension pendant la maintenance ou la réparation, ce travail ne doit être eectué que par un spé-
cialiste qui connait les risques encourus et la règlementation en vigueur.
• Ne jamais brancher l’appareil immédiatement après un passage d’un endroit froid dans un endroit chaud. L’eau de
condensation qui se forme, risqué d’endommager l’appareil ou provoquer un choc électrique. Attendez que l’appareil ait
atteint la température ambiante avant de le brancher. Attendez que l’eau de condensation se soit évaporée ce qui peut
prendre quelques heures.

MANUAL - AMP300USB-BT
7
• Ne pas placer de amme ouverte telle qu’une bougie sur ou à côté de l’appareil.
• Ne pas placer l’appareil sur une surface molle telle qu’un tapis ou un lit. Ne pas obstruer les orices de ventilation. Ne pas
empêcher la circulation d’air par des objets tels que des magazines, nappes ou rideaux. Ceci empêche la dissipation de la
chaleur et peut entraîner une surchaue.
• Utiliser l’appareil uniquement à un environnement modéré. Ne pas utiliser dans un environnement tropical.
• Toutes les personnes impliquées dans l’utilisation, l’installation et la maintenance de cet appareil doivent être formées et
qualiées et respecter ces consignes.
• Remplacer les câbles secteur défectueux uniquement par un spécialiste. Risque d’électrocution!
• Ne pas laisser trainer le matériel d’emballage car il constitue un danger potentiel pour de jeunes enfants.
• Si vous n’êtes pas sûr de la bonne connexion ou si vous avez des questions auxquelles le mode d’emploi ne répond pas,
n’hésitez pas à demander conseil à un spécialiste ou votre revendeur.
1. PORT USB
Branchez votre cordon USB sur ce port.
2. Contrôle de Gain
Contrôle du gain d’entrée qui permet d’atténuer le signal d’entrée qui est envoyé dans les diérents canaux de l’amplica-
teur.
La plage de variation des valeurs dB est la suivante :
Entièrement fermé (le signal est à zéro et n’est donc pas acheminé vers les canaux de l’amplicateur) ou entièrement ouvert
(c'est-à-dire à puissance nominale : le signal n’est pas atténué du tout et acheminé avec la même puissance qu’il est arrivé).
3. COMMANDES USB
a) |<< : Cette touche permet de revenir au début du titre en cours ou au début du titre précédent.
b) Play/Pause: A chaque pression sur cette touche, le fonctionnement bascule entre lecture et pause.
c) >>|: Utilisez cette touche pour sélectionner le titre suivant.
d) VOL- : Baissez le volume du lecteur MP3
e) VOL+ : augmentez le volume du lecteur MP3
f) EQ : Sélectionnez un pré-réglage d’égalisation
g) Acheur à LED : Ache les informations MP3
4. INTERRUPTEUR M/A
Appuyez pour mettre l’appareil sous tension. La LED s’allume lorsque l’amplicateur est sous tension.
5. LED DE SIGNAL
Indique le niveau du signal à l’entrée.
6. LED DE CLIPPING
Lorsque le niveau d’entrée du signal dépasse la capacité de sortie de l’amplicateur, la LED clignote. Réduisez immédiate-
ment le niveau d’entrée.
7. VOYANT BLUETOOTH
Cette LED indique l'état de fonctionnement Bluetooth. Lorsque vous allumez l'amplicateur, la fonction Bluetooth est active
et le voyant commence à clignoter. L'appareil est prêt à rechercher et à se connecter à un appareil Bluetooth. Activez la
recherche Bluetooth sur votre smartphone et sélectionnez "Bluetooth" dans la liste des appareils trouvés. Si l'appareil se
connecte avec succès à un périphérique Bluetooth, le voyant clignote lentement pendant 2 à 3 secondes. L'amplicateur est
alors prêt à diuser la musique de votre appareil Bluetooth.
S'il n'y a pas de connexion après 1 minute, l'amplicateur passe en mode veille et la LED s'éteint.
8. LED d’ALIMENTATION
Cette LED s’allume lorsque l’amplicateur est sous tension
BRANCHEMENTS À L’ARRIÈRE
1. Entrée ligne
Jacks : Ces connecteurs sont connectés en parallèle aux connecteurs RCA correspondants. Cela permet de brancher un deu-
xième amplicateur en série sur le premier. Il est donc envisageable d’envoyer le même signal dans plusieurs amplicateurs
an d’obtenir un son plus puissant.
2. Sortie Haut-parleurs
Bornier ou XLR/Jack (impédance minimum 4 Ohms)
Note : An de ne pas endommager les haut-parleurs, ne branchez que des haut-parleurs qui corres-
pondent en impédance et en puissance aux valeurs de l’amplicateur. Utilisez exclusivement des

MANUAL - AMP300USB-BT
8
câbles haut-parleur et jamais de câbles signal tels qu’ils sont utilisés pour des microphones, des
instruments de musique et des appareils audio en général.
3. Alimentation
Secteur
INSTALLATION
Mise sous tension et Arrêt
Mettez toujours l’amplicateur sous tension en dernier, après tous les autres composants de votre installation audio et étei-
gnez-le en premier. Réglez tous les contrôles au minimum an d’éviter des bruits désagréables et potentiellement domma-
geables.
Installation et Mise en Service
Votre amplicateur est un appareil de haute puissance. Il doit être installé à un endroit bien ventilé, à l’abri de la chaleur, de
l’humidité, des chocs et de la poussière. Vous éviterez ainsi des dysfonctionnements, des défaillances, des chocs électriques
et le risque d’incendie. L’air de refroidissement pénètre par les orices en façade et s’échappe par les ouvertures au dos de
l’appareil. Une bonne ventilation est donc primordiale. Si vous installez l’amplicateur dans un rack ou un ight case, veillez
à ne pas obstruer le ux d’air. N’installez jamais l’amplicateur dans un rack ou un ight case fermé étant donné qu’une
partie de la chaleur se dissipe également par le fond métallique. Il est recommandé de laisser au moins un compartiment
(1U) en dessous de l’amplicateur libre.
Branchements Audio
Avant d’eectuer des branchements, veillez à éteindre tous les appareils que vous souhaitez connecter ensemble. N’utilisez
que des câbles de qualité appropriés à cette utilisation. Manipulez les câbles avec soin et vériez régulièrement la circula-
tion d’air. N’attrapez les cordons que par les ches. Ne jamais débrancher un cordon avec force. Enroulez toujours les câbles
sans faire de nœuds ni de pliures an d’augmenter leur durée de vie, d’assurer un bon fonctionnement et une performance
optimale.
Prévention et Détection d’Interférences
Assurez-vous que l’amplicateur sera installé à un endroit exempt de radiations industrielles ou de hautes fréquences.
Evitez d’installer l’amplicateur à proximité d’un poste de radio, de télévision ou d’un téléphone portable. Ces appareils sont
sources de parasites.
Lorsque vous connectez les autres composants de votre installation audio, évitez la formation de boucles de masse qui
diminuent les excellentes qualités sonores et constituent un risque potentiel. La meilleure manière (bien que pas toujours
réalisable) pour éviter des boucles de masse, consiste à relier la masse de tous les appareils à un seul point central (bran-
chement en étoile). Le point central d’une installation de sonorisation est la table de mixage.
An de déterminer la cause des interférences, branchez les diérentes sections de la table de mixage dans l’ordre suivant
sur les autres appareils. Ne continuez les branchements d’un autre appareil que lorsque vous aurez vériez le son.
CARACTERISTIQUES TECHNIQUES
Puissance musicale........................................................................................................................................2 x 240W 4Ω
......................................................................................................................................................................2 x 160W 8 Ω
Distorsion harmonique totale.................................................................................................................................. ≥0,5%
Bande passante ............................................................................................................................................20-20.000Hz
Bruit ......................................................................................................................................................................≥0,5dB
Séparation des canaux (f=1kHz) ........................................................................................................................... ≥82dB
Niveau d’entrée ........................................................................................................................................................≥0dB
Impédance d’entrée................................................................................................................................................≥10kΩ
Gamme de fréquence Bluetooth ............................................................................................................... 2402-2480MHz
Puissance d'émission RF maximale .....................................................................................................................2,21 mW
Alimentation ..................................................................................................................................................230V~ 50Hz
NOTE IMPORTANTE : Les produits électriques ne doivent pas être mis au rebut avec les ordures ménagères. Veuillez les
faire recycler là où il existe des centres pour cela. Consultez les autorités locales ou votre revendeur sur la façon de les
recycler.
MANUAL - AMP300USB-BT
9
LEISTUNGSVERSTÄRKER
BEDIENUNGSANLEITUNG
Bitte lesen Sie vor der ersten Inbetriebnahme sorgfältig die Anleitung durch und behalten Sie sie für spätere Bezugnahme
auf.
Warnung
VORSICHT
NICHT DAS GEHÄUSE ÖFFNEN
STROMSCHLAGGEFAHR
Zeichenerklärung
Der Blitz im Dreieck weist auf ein Gesundheitsrisiko hin (z.B. Stromschlag).
Das Ausrufezeichen im Dreieck weist auf besondere Gefahren beim Umgang oder Betrieb des Geräts hin.
Entspricht den Richtlinien der CE
Schutzklasse I: Nur an eine geerdete Netzsteckdose mit Schutzkontakt anschließen
Nur für Innengebrauch
Sicherheitshinweise
• Die Garantie gilt nicht, wenn die Schäden durch Nichtbeachtung dieser Bedienungsanleitung entstanden sind. Wir
übernehmen für den daraus entstandenen Schaden keine Haftung.
• Wir übernehmen für Personen- und Sachschäden keine Haftung, wenn diese durch unvorschriftsmäßige Handhabung oder
Nichtbeachtung der Anleitung entstanden sind. Der Garantieanspruch verfällt in diesem Fall.
• Aus Sicherheitsgründen darf das Gerät nicht verändert oder umgebaut werden.
• Das Gerät darf nur in trockenen, geschlossenen Räumen benutzt werden. Nicht in Wassernähe wie Badezimmern oder am
Swimmingpool benutzen.
• Das Gerät vor extremen Temperaturen schützen (< +5°C / > +35°C)
• Das Gerät vor starken Erschütterungen und schwerer mechanischer Belastung schützen.
• Das Gerät vor starker Feuchtigkeit schützen (z.B. vor Tropf- bzw. Sprühwasser)
• Keine mit Flüssigkeit gefüllten Behälter wie Gläser oder Vasen auf oder direkt neben das Gerät stellen. Sie können
umfallen und Wasser kann ins Gerät dringen. Niemals Flüssigkeiten über dem Gerät einschenken. Keine Kleinteile wie
Münzen oder Briefklammern aufs Gerät legen. Sie können ins Gehäuse dringen. Es besteht Feuer- und Stromschlaggefahr!
Falls doch einmal Flüssigkeiten oder Gegenstände ins Gerät dringen sollten, ziehen Sie sofort den Netzstecker ab und
benachrichtigen Sie einen Fachmann
• Das Gerät entspricht der Schutzklasse I und muss unbedingt an eine geerdete Netzsteckdose angeschlossen werden.
• Das Gerät muss mit 230V~ 50Hz Netzstrom versorgt werden. Das Gerät niemals mit einer anderen Spannung betreiben.
• Beim Abziehen des Netzsteckers immer an der dafür vorgesehenen Stelle anfassen. Niemals am Kabel ziehen.
• Niemals den Netzstecker mit nassen oder feuchten Händen anfassen.
• In folgenden Fällen immer sofort den Netzstecker abziehen:
Vor dem Reinigen des Geräts
Bei Gewitter
Bei längerem Nichtgebrauch (>1 Woche)
• Elektrogeräte außerhalb der Reichweite von Kindern aufbewahren. In Anwesenheit von Kindern besonders vorsichtig
sein. Kinder sind sich der Gefahren bei falscher Handhabung von Elektrogeräten nicht bewusst. Sie könnten versuchen,
Gegenstände ins Gerät zu stecken und einen Stromschlag erleiden.
• Das Gerät während des Betriebs nicht unbeaufsichtigt lassen.
• Niemals auf eine unstabile oder bewegliche Fläche stellen. Das Gerät kann beim Fallen Personen verletzen und schweren
Schaden nehmen.
• Spannungsführende Teile können beim Önen des Gehäuses oder beim Herausnehmen von Teilen (außer Teilen, die ohne
Werkzeug ausgewechselt werden können) freigelegt werden. Auch Kontaktpunkte können unter Spannung stehen. Wenn
das Gehäuse zum Eichen, Reparieren oder Ersetzen von Teilen oder Modulen geönet werden muss, müssen zuerst alle
Anschlussstellen von der Spannungsquelle getrennt werden. Wenn das Gerät während der Wartung oder Reparatur oen
und unter Spannung stehen muss, darf dies nur von einem Fachmann vorgenommen werden, der die Gefahren und die

MANUAL - AMP300USB-BT
10
entsprechenden Sicherheitsvorschriften kennt.
• Niemals das Gerät sofort einschalten, wenn es von einer kalten Umgebung in einen warmen Raum kommt. Das
Kondenswasser, das sich bildet, kann das Gerät zerstören oder zu Stromschlag führen. Lassen Sie das Gerät erst auf
Raumtemperatur kommen, bevor Sie es anschließen. Warten Sie, bis das Kondenswasser verdampft ist. Das kann einige
Stunden dauern.
• Kein oenes Feuer wie brennende Kerzen auf oder neben das Gerät stellen.
• Das Gerät nicht auf eine weiche Fläche wie Teppiche oder Betten stellen. Nicht die Belüftungsschlitze verstopfen. Nicht die
Luftzirkulation mit Gegenständen wie Zeitschriften, Tischtüchern oder Gardinen behindern. Dies verhindert die Wärmeab-
fuhr des Geräts und führt zu Überhitzung.
• Das Gerät nur in gemäßigten Klimazonen, nicht in tropischer Umgebung benutzen.
• Defekte Kabel nur von einem Fachmann ersetzen lassen. Stromschlaggefahr!
• Wenn Sie sich über den richtigen Anschluss nicht im Klaren sind oder wenn Fragen auftreten, die nicht von der Anleitung
beantwortet wurden, wenden Sie sich bitte an einen Fachmann.
FRONTSEITE
1. USB Port
Schließen Sie Ihr USB Gerät hier an.
2. Verstärkungsregler
Der Eingangsgainregler bestimmt, mit welcher Stärke das Eingangssignal in die Kanäle des Verstärkers eingeschleift wird.
Der dB Regelbereich geht von:
Ganz geschlossen (das Signal ist auf Null abgeschwächt und wird nicht in die Kanäle eingeschleift) bis ganz oen (d.h. Nenn-
leistung: das Signal wird gar nicht abgeschwächt und so wie es in den Verstärker kommt, in die Kanäle weitergeleitet).
3. USB REGLER
a) |<<: Mit dieser Taste zum Anfang des laufenden oder zum Anfang eines vorigen Titels zurückgehen.
b) Play/Pause: Bei jedem Druck auf diese Taste schaltet das Gerät zwischen Play und Pause um.
c) >>|: Mit dieser Taste den nächsten Titel wählen.
d) VOL-: Vermindert die Lautstärke des MP3 Spielers
e) VOL+: Erhöht die Lautstärke des MP3 Spielers
f) EQ: Zur Wahl eines Eekts
g) LED DISPLAY: Zeigt die MP3 Informationen an
4. Betriebsschalter
Zum Ein- und Ausschalten.
5. SIGNAL LED
Zeigt an, dass ein Signal am Eingang anliegt.
6. CLIP LED
Leuchtet, wenn der Pegel des Eingangssignals die Ausgangsleistung des Verstärkerkanals übersteigt. Wenn die LED blinkt,
sofort den Eingangspegel reduzieren.
7. BLUETOOTH LED
Diese LED zeigt den Bluetooth-Status an. Wenn Sie den Verstärker einschalten, ist die Bluetooth-Funktion aktiv und das Licht
beginnt zu blinken. Das Gerät ist bereit, ein Bluetooth-Gerät zu suchen und sich mit ihm zu verbinden. Aktivieren Sie die
Bluetooth-Suche auf Ihrem Smartphone und wählen Sie „Bluetooth“ in der Liste der gefundenen Geräte aus. Wenn sich das
Gerät erfolgreich mit einem Bluetooth-Gerät verbindet, blinkt das Licht 2-3 Sekunden lang langsam. Dann ist der Verstärker
bereit, die Musik Ihres Bluetooth-Geräts abzuspielen.
Besteht nach 1 Minute keine Verbindung, schaltet der Verstärker in den Standby-Modus und die LED erlischt.
8. BETRIEBS LED
Leuchtet, wenn das Gerät eingeschaltet ist.
VERBINDER AUF DER RÜCKSEITE
1. Line Eingang
Klinke: Diese Verbinder sind parallel an die entsprechenden Cinch Verbinder angeschlossen. Dadurch kann ein zweiter
Verstärker in Serie an den ersten angeschlossen werden, um dasselbe Signal in mehrere Verstärker zu schleifen und so eine
höhere Ausgangsleistung zu erzielen.
2. Lautsprecherausgang
Klemmanschluß oder XLR/Klinke (Mindestimpedanz 4 Ohm)

MANUAL - AMP300USB-BT
11
Hinweis: Um die Lautsprecher nicht zu beschädigen, dürfen nur Lautsprecher angeschlossen werden,
die die richtige Impedanz aufweisen und die Leistung des Verstärkers verarbeiten können. Nur Lauts-
precherkabel verwenden. Niemals Signalkabel benutzen, so wie sie für Mikrofone, Musikinstrumente
und Audiogeräte im Allgemeinen verwendet werden.
3. Versorgung
Netzstrom
INSTALLATION
Ein- und Ausschalten
Den Verstärker in einer Audioanlage immer als letztes einschalten und als erstes Gerät ausschalten. Alle Regler ganz herun-
terfahren, um unangenehme und potentiell schädliche Geräusche zu vermeiden.
Installation und Bedienung
Der Verstärker ist ein leistungsstarkes Gerät, das an einem gut belüfteten Platz, fern von Hitze, Feuchtigkeit, Erschütterun-
gen und Staub installiert werden muss. Das vermeidet Betriebsstörungen, Defekte, Stromschläge und Feuergefahr. Die
kühle Luft ießt durch die Önungen auf der Frontseite ins Gerät und wird durch die Rückseite wieder ausgestoßen. Eine
gute Belüftung ist von größter Wichtigkeit. Wenn Sie den Verstärker in ein Geräterack oder Flight Case einbauen, achten Sie
darauf, die Luftzirkulation nicht zu beeinträchtigen. Bauen Sie niemals den Verstärker in ein geschlossenes Geräterack oder
Flight Case, da ein Teil der Hitze auch durch den Metallboden abgeführt wird. Es ist ratsam, mindestens ein freies Fach unter
dem Verstärker frei zu lassen.
Audio Anschlüsse
Bevor Sie die Anschlüsse vornehmen, schalten Sie alle betroenen Geräte aus. Nur geeignete Qualitätskabel benutzen. Die
Kabel sorgfältig behandeln und regelmäßig die Luftzirkulation überprüfen. Immer am Stecker ziehen, niemals am Kabel. Nie-
mals ein Kabel mit Gewalt abziehen. Wickeln Sie die Kabel auf, ohne dass sich Knoten oder scharfe Knicke bilden. Das erhöht
ihre Lebensdauer, Zuverlässigkeit und Leistung.
Vorbeugung und Feststellung von Störungen
Vergewissern Sie sich, dass der Verstärker an einem Ort ohne industrielle oder Radiostrahlung aufgestellt wird. Stellen Sie
den Verstärker nach Möglichkeit nicht in der Nähe eines Radios, Fernsehers oder Handys auf, da diese Geräte Störquellen
darstellen.
Beim Anschluss der anderen Geräte Ihrer Audioanlage vermeiden Sie die Bildung von Masseschleifen, die die ausgezeich-
neten Klangqualitäten des Verstärkers beeinträchtigen und eine mögliche Gefahr darstellen. Der beste Weg (aber nicht
immer durchführbar), um Masseschleifen zu vermeiden, besteht darin, die Masse aller Geräte an einen zentralen Punkt
anzuschließen (Sternenaufbau). Der zentrale Punkt einer Anlage ist das Mischpult.
Um die Ursache der Störung festzustellen, schließen Sie die verschiedenen Teile des Mischpults in folgender Reihenfolge an
die anderen Geräte an. Nehmen Sie den nächsten Anschluss erst vor, nachdem Sie den Ton geprüft haben.
TECHNISCHE DATEN
Musikleistung........................................................................................................................................... 2 x 240W 4Ohm
......................................................................................................................................................................2 x 160W 8 Ω
THD......................................................................................................................................................................... ≥0,5%
Frequenzbereich ............................................................................................................................................20-20.000Hz
Rauschfaktor.......................................................................................................................................................... ≥0,5dB
Kanaltrennung (f=1kHz) ......................................................................................................................................... ≥82dB
Eingangspegel ..........................................................................................................................................................≥0dB
Eingangsimpedanz.............................................................................................................................................≥10kOhm
Bluetooth-Frequenzbereich ......................................................................................................................2402-2480 MHz
Max. HF-Emissionsleistung ................................................................................................................................. 2,21 mW
Versorgung ....................................................................................................................................................230V~ 50Hz
WICHTIGER HINWEIS: Elektrogeräte gehören nicht in den Hausmüll. Sie müssen in speziellen Betrieben recycelt
werden. Bringen Sie sie zu einer speziellen Entsorgungsstelle für Elektrokleingeräte (Wertstohof)!

MANUAL - AMP300USB-BT
12
VERMOGENSVERSTERKER
HANDLEIDING
Waarschuwing
LET OP
NIET DE BEHUIZING OPENEN
GEVAAR VOOR ELECTRISCHE SCHOKKEN
Verklaring van de tekens
De bliksem in de driehoek vestigt de aandacht van de gebruiker op een elektrische schokrisico.
De driehoek met het uitroepteken vestigt de aandacht van de gebruiker op belangrijke gebruik- of onder- houdsinstruc-
ties.
Voldoet aan de europese CE richtlijnen
Elektrische veiligheidsklasse I - alleen op een stopcontact met randaarde aansluiten
Alléén voor gebruik binnenshuis
BELANGRIJKE VEILIGHEIDS EN RISICO WAARSCHUWINGEN
• Aandachtig de handleiding lezen en bewaren.
• Alle veiligheidsinstructies en waarschuwingen moeten worden nageleefd. Ze maken deel uit van de handleiding en moet
worden bewaard met de handleiding.
• Aanspraak op garantie vervalt als er schade optreedt als gevolg van niet-naleving van deze gebruiksaanwijzing. Wij zijn
niet aansprakelijk voor eventuele daaruit voortvloeiende schade.
• Wij zijn niet aansprakelijk voor persoonlijk letsel of schade aan eigendommen veroorzaakt door ondeskundig gebruik of
niet naleving van de veiligheidsinstructies. Elke aanspraak op garantie vervalt in dergelijke gevallen.
• Onbevoegde conversies en / of wijzigingen van het apparaat zijn niet toegestaan voor reden van veiligheid en vergunnin-
gen (CE).
• Het apparaat is goedgekeurd voor gebruik in droge, gesloten ruimtes alleen. Niet het apparaat in de buurt van water,
zoals in de badkamer of zwembaden gebruiken.
• Het toestel tijdens de werking niet aan extreme temperaturen blootstellen (< +5°C / > °35°C).
• Het apparaat mag niet worden blootgesteld aan sterke trillingen of zware mechanische belasting.
• Het apparaat mag niet worden blootgesteld aan overmatig vocht (als gevolg van druppels of spatwater, bijvoorbeeld).
• Plaats geen ontvangers gevuld met vloeistoen, zoals glazen of vazen, op of direct naast het apparaat. Ze kunnen
omvallen, waardoor water in het apparaat binnendringt. Giet nooit vloeistoen uit boven het toestel. Plaats geen kleine
voorwerpen, zoals munten of paperclips, op het toestel, aangezien zij zou kunnen vallen in het apparaat. Zij kunnen brand
of stroomslag veroorzaken! Als er vloeistof of voorwerpen in het apparaat dringen, trek dan onmiddellijk de stekker uit het
stopcontact en raadpleeg een deskundige.
• Het apparaat is gebouwd volgens beschermingsklasse I en moet alleen op een stopcontact met randaarde aangesloten
worden.
• Het toestel benodigd een aansluitspanning van 230V~ 50Hz .Verzoek nooit het toestel via een andere spanning te voe-
den.
• Trek de stekker alleen uit het stopcontact via de ervoor bepaalde oppervlak. Niet aan het kabel trekken.
• Nooit de stekker met vochtige of natte handen aanraken.
• Altijd de stekker uit het stopcontact trekken
Alvorens u het toestel schoonmaakt
in geval van onweer
Indien u het toestel over een langere tijd niet gebruikt (>1 week)
• Elektrische apparaten buiten het bereik van kinderen houden. Wees vooral voorzichtig wanneer er kinderen aanwezig
zijn. Kinderen zijn zich niet bewust van de gevaren die betrokken zijn bij elektrische apparaten. Kinderen kunnen proberen
voorwerpen in het apparaat te stekken. Er is een levensbedreigend gevaar van stroomslag.
• Laat het apparaat niet onbeheerd tijdens het gebruik.
• Plaats het apparaat nooit op een instabiele of beweegbare ondergrond. Mensen kunnen gewond raken of het apparaat
wordt beschadigd door het vallen.
• Sluit nooit het apparaat direct na de overdracht van een koude naar een warme kamer. Het condenswater dat hierbij ge-
vormd wordt kan een elektrische schok veroorzaken. Laat het apparaat eerst op kamertemperatuur komen voordat u het
aansluit. Wacht tot het condenswater verdampt is. Dit kan enkele uren duren.
• Plaats geen open vlammen, zoals brandende kaarsen op of naast het apparaat.

MANUAL - AMP300USB-BT
13
• Plaats het apparaat nooit op zachte oppervlakken zoals tapijten of bedden. Niet de ventilatieopeningen van het apparaat
afdekken. Niet de luchtcirculatie met voorwerpen zoals tijdschriften, tafellaken en gordijnen verstoppen. Dit voorkomt de
afvoer van warmte uit het apparaat en kan leiden tot oververhitting.
• Gebruik het apparaat alleen in een gematigd klimaat, niet in een tropische omgeving.
• Defecte stroomkabels mogen enkel vervangen worden door specialisten. Gevaar van elektrische schok!
• De preventie van ongevallen en de reglementen van de werkgevers’ WA-verzekering moet worden waargenomen in com-
merciële installaties.
• Als u niet zeker bent over de correcte aansluiting of als er vragen zijn die niet worden beantwoord door de gebruiksaanwi-
jzing, contacteer een specialist. Raadpleeg een specialist indien u twijfel heeft aan het werkingsprincipe of de veiligheid
van het product
REGELINGEN AAN HET VOORPANEEL:
1.USB PORT
Sluit uw USB device op deze port aan.
2. GAIN CONTROLE
Controle van de ingangsversterking die toestaat externe signalen, die door de verschillende kanalen van de versterker ges-
tuurd worden, te verzachten.
De dB wijdte controle gaat als volgt:
Volledig gesloten (het signaal is nul en is dus niet verstuurd naar de kanalen van de versterker) of volledig open (valt te zeg-
gen op nominale spanning: het signaal word helemaal niet verzonden met dezelfde spanning als de binnenkomende).
3. USB CONTROLES
a) |<<: Gaat naar het begin van de lopende track of kiest de vorige track.
b)Play/Pauze: Bij iedere druk op deze toets schakelt het toestel tussen afspelen en pauze.
c) >>|: Kiest de naaste track.
d) VOL-: Vermindert het volume van de MP3 speler.
e) VOL+: Verhoogt het volume van de MP3 speler.
f) EQ: Kies het gewenste eect.
g) LED DISPLAY: Toont MP3 informatie.
4. Aan/uit schakelaar
Drukken om de unit aan te schakelen. De LED licht op wanneer de unit aangeschakeld is.
5. SIGNAAL LED
Toont het signal op de ingang.
6. CLIP LED
Wanneer het signaal niveau het uitgangsvermogen van de versterker overschrijdt, itst deze led. Minder onmiddellijk het
ingangsniveau. I
7. BLUETOOTH LED
Deze LED geeft de Bluetooth-status aan. Wanneer u de versterker inschakelt, is de Bluetooth-functie actief en begint het
lampje te knipperen. Het apparaat is klaar om te zoeken en verbinding te maken met een Bluetooth-apparaat. Activeer de
Bluetooth-zoekfunctie op uw smartphone en selecteer "Bluetooth" in de lijst met gevonden apparaten. Als het apparaat met
succes verbinding maakt met een Bluetooth-apparaat, knippert het lampje 2-3 seconden langzaam. Dan is de versterker
klaar om de muziek van je Bluetooth-apparaat af te spelen.
Als er na 1 minuut geen verbinding is, schakelt de versterker over op stand-by en gaat de led uit.
8. POWER LED
Licht op wanneer de versterker ingeschakeld is.
AANSLUITING ACHTERPANEEL:
1. Invoer lijn
Jacks : Deze aansluitingen zijn parallel aangesloten op de overeenstemmende RCA aansluitingen. Dit laat toe een tweede
versterker in serie aan te sluiten op de eerste. Het is dus aan te raden hetzelfde signaal door verschillende versterkers te
sturen teneinde een sterker geluid te bekomen.
2. Uitgang luidspreker
Bindende posten of XLR/jack (impedantie van minimum 4 Ohms)
Nota: Verbind alleen luidsprekersystemen met het toegestane vermogen en impedantie sterktes op
de versterker om mogelijke schade aan de luidsprekers te vermijden. Gebruik enkel en alleen luids-

MANUAL - AMP300USB-BT
14
prekerkabels en nooit signaalkabels zoals deze gebruikt voor microfonen, muzikale instrumenten en
audio apparaten in het algemeen.
3.Voeding
Lichtnet
INSTALLATIE
Onder spanning en uitgeschakeld
Stel de versterker steeds als laatste onder spanning, na het instellen van alle andere onderdelen en schakel hem als eerste
uit. Regel alle controles op een minimum om onaangename en mogelijk beschadigende geluiden te vermijden.
Installatie en ingebruikstelling
Uw versterker is een toestel met een hoge spanning. Hij moet geïnstalleerd worden in een goed verluchte omgeving,
beschut tegen warmte, vocht, schokken en stof. U zult aldus stoornissen, defecten, elektrische schokken en brandgevaar
vermijden. De afkoelingslucht dringt door de openingen in de voorgevel en ontsnapt door de openingen aan de rug van het
apparaat. Een goede ventilatie is dus primordiaal. Als u de versterker in rack of ight plaatst, zorg ervoor de stroom van
lucht niet te hinderen. Plaatst nooit de versterker in rack of in een gesloten ight case aangezien een deel van de hitte zich
eveneens door de metalen bodem verdrijft. Het wordt aanbevolen om minstens een onderdeel (1U) onder de versterker te
laten.
Audio aansluitingen
Wees er altijd zeker van dat alle toestellen die u wenst aan te sluiten uitgeschakeld zijn. Gebruik altijd kabels van goede
kwaliteit en behandel deze zorgvuldig om problemen te voorkomen. Kijk regelmatig de luchtcirculatie na. Neem de kabels
enkel via de ches vast. Ontkoppel nooit gewelddadig een kabel. Rol de kabels steeds op zonder knopen of plooien om hun
levensduur, goed gebruik en optimale prestatie te verhogen.
Preventie en identiceren van geruis
Waarborg u dat de versterker niet in de buurt van industriële stralingen of hoge frequenties geplaatst word. Installeer je
toestel niet in de buurt van een radio of televisie systemen en vermijdt contact met mobiele telefoons aangezien deze ruis
kunnen veroorzaken.
Wanneer u de andere componenten van uw audioinstallatie aansluit, vermijdt de vorming van gespen die de voortreelijke
geluidskwaliteiten verminderen en een potentieel risico vormen. De beste manier (hoewel niet altijd haalbaar) om gespen te
vermijden, bestaat erin om de massa van alle apparaten te verbinden met slechts één centraal punt (vertakking in ster). Het
centrale punt van een installatie voor de plaatsing van een geluidsinstallatie is het mengpaneel. Teneinde de oorzaak van de
interferenties te bepalen, sluit de verschillende afdelingen van het mengpaneel in volgende volgorde op de andere appa-
raten aan. Ga enkel door met het aansluiten van andere toestellen indien u het geluid heeft nagekeken.
SPECIFICATIES
Muziekvermogen........................................................................................................................................... 2 x 240W 4Ω
..................................................................................................................................................................... 2 x 160W 8 Ω
THD......................................................................................................................................................................... ≥0,5%
Freq. bereik ...................................................................................................................................................20-20.000Hz
Ruis........................................................................................................................................................................≥0,5dB
Kanaalscheiding (f=1kHz)....................................................................................................................................... ≥82dB
Ingangsniveau ..........................................................................................................................................................≥0dB
Ingangsimpedantie .................................................................................................................................................≥10kΩ
Bluetooth-frequentiebereik ....................................................................................................................... 2402-2480MHz
Max. RF-emissievermogen ..................................................................................................................................2,21 mW
Voeding .........................................................................................................................................................230V~ 50Hz
BELANGRIJK: De elektrische producten mogen niet naast het huisvuil geplaatst worden. Gelieve deze te laten recy-
cleren daar waar er centra’s hiervoor voorzien is. Raadpleeg de plaatselijke autoriteiten of uw verkoper ivm de manier
van recycleren.

MANUAL - AMP300USB-BT
15
AMPLIFICADOR DISCO
MANUAL DE INSTRUÇÕES
Explicação dos símbolos
ATENÇÃO
NÃO ABRA A CAIXA
PERIGO DE ELETROCUSSÃO
Antes de ligar o aparelho à rede eléctrica certique-se que este está de acordo com as especicações técnicas.
Consulte as especicações técnicas no m do manual.
O aparelho não deve ser exposto a líquidos, ambientes excessivamente húmidos nem colocar pesos ou recipientes com
líquido sob o aparelho.
A unidade está em conformidade com os padrões CE
Apenas para uso interno
Classe de proteção I. Requer uma conexão à terra
INSTRUÇÕES DE SEGURANÇA IMPORTANTES E AVISOS DE PERIGO
• Não nos responsabilizamos por danos causados a bens ou pessoas, devido ao manuseio inadequado ou não-conformidade
com as instruções de segurança. A garantia não se aplica.
• A alteração não autorizada da unidade está proibida por razões de segurança e licença (CE).
• Use apenas em ambientes fechados e locais secos e fechados. Não utilize perto de água, como numa casa de banho ou
perto de uma piscina.
• Não expor a temperaturas extremas (<5 ° C /> 35 ° C) durante a operação.
• Manter afastado de vibrações fortes e stress mecânico.
• Mantenha longe da humidade extrema (por exemplo, spray de água).
• Não coloque objectos cheios de líquidos, tais como copos ou vasos, sobre ou perto da unidade. Eles podem cair e verter o
líquido para dentro do dispositivo. Nunca derrame líquidos sobre o dispositivo.
• Não coloque objectos pequenos como moedas e clipes de papel no dispositivo, pois podem cair dentro da unidade. Pode
provocar um incêndio ou choque eléctrico. Se um líquido ou um objecto estranho entrar na unidade, desligue imediata-
mente da tomada e contacte o seu revendedor.
• Para desligar o cabo de alimentação, puxe sempre pela cha e nunca pelo cabo.
• Nunca desligue o cabo de alimentação com as mãos molhadas.
• Desligue sempre o cabo de alimentação:
- Antes de limpar
- Durante uma tempestade
- Em caso de não-uso (> 1 semana)
• Mantenha os aparelhos eléctricos fora do alcance das crianças. Ser especialmente vigilantes quando as crianças estão
presentes, pois as mesmas não estão cientes do perigo de um dispositivo eléctrico e poderiam tentar inserir um objecto
dentro da unidade o que representa um grave perigo de electrocussão.
• Não deixe aparelho sem vigilância enquanto em operação
• Nunca coloque o aparelho sobre uma superfície instável ou móvel. A unidade pode ferir uma pessoa ou sofrer danos devi-
do à queda.
• Ao abrir a caixa, não existem componentes visíveis (a menos que possa aceder sem ferramentas). Os pontos de contacto
também podem ser ligados. Se abrir o dispositivo para calibrar, manter, reparar ou substituir componentes, deverá ter em
conta que todos os terminais devem primeiro ser desligados de todas as fontes de energia. Se manter o dispositivo aberto
e ligado a corrente durante a manutenção ou reparação, o mesmo deverá ser executado por um especialista que conhece
os riscos e os regulamentos aplicáveis.
• Existe um folheto informativo para o laser na parte de trás. Não remova os sinais de alerta do dispositivo. Não abra o
dispositivo ao tentar aceder ao interior.
• Nunca ligar o dispositivo imediatamente depois de uma passagem de um local frio para um lugar quente. A condensação
que se forma pode danicar o aparelho ou provocar o choque eléctrico. Aguarde até que o aparelho atinja a temperatura
ambiente antes de ligar. Aguarde até que a condensação evapore o que pode levar várias horas.
• Não coloque chamas, tais como velas acesas, sobre ou perto da unidade.
• Não coloque o aparelho sobre uma superfície macia, como tapete ou na cama. Não bloqueie as aberturas de ventilação.
Não bloqueie a circulação de ar por objectos, tais como revistas, toalhas ou cortinas. Isso impede a dissipação de calor e
pode causar sobreaquecimento.
• Use o aparelho apenas num ambiente moderado. Não utilizar num ambiente tropical.

MANUAL - AMP300USB-BT
16
• Todas as pessoas envolvidas na utilização, instalação e manutenção deste equipamento devem ser treinadas e qualica-
das e devem seguir estas directrizes.
• Os cabos de alimentação com defeito devem ser substituídos por um especialista. Risco de choque eléctrico!
• Não deixe material na embalagem, pois é um potencial perigo para as crianças.
• Em locais públicos, deve cumprir com as regulamentações relativas à prevenção de acidentes e o código seguro em ma-
téria de responsabilidade civil.
• Se não tiver a certeza da ligação correcta ou se tiver alguma dúvida que o manual de instruções não possa responder,
não hesite em procurar aconselhamento de um especialista ou no seu revendedor
CONTROLOS DO PAINEL FRONTAL:
1. ENTRADA USB
Ligue a pen USB nesta entrada
2. Controlo de Gain
Entrada de controlo de Gain que permite atenuar o sinal de entrada que é enviado para os varios canais do amplicador.
O alcance de controlo de dB é o seguinte:
Totalmente fechado (o sinal está em zero e não é enviado para os canais do amplicador) ou totalmente aberto (em potência
nominal: o sinal não é atenuado e é enviado ao sinal de potência de entrada para os canais do amplicador).
3. CONTROLOS USB
a) | <<: Utilize este botão para reiniciar a faixa ou para seleccionar a faixa anterior.
b) Play / Pause: Cada vez que pressionar este botão, inicia ou para a reprodução.
c) >> |: Utilize este botão para seleccionar a faixa seguinte.
d) VOL-: Utilize este botão para diminuir o volume.
e) VOL +: Utilize este botão para aumentar o volume.
f) EQ: Permite que seleccione o efeito.
g) Display LED: Mostra a informação MP3.
4. INTERRUPTOR DE ALIMENTAÇÃO
Pressione o botão para ligar o aparelho. O LED acende quando o aparelho está ligado.
5. LED DE SINAL
Indica o sinal na entrada.
6. LED CLIP
Indica o Clipping no amplicador quando o nível de sinal de entrada exceder a capacidade de saída do canal do amplicador.
Se o LED piscar, reduza o nível de entrada.
Exibe o estado de funcionamento Bluetooth. Quando ligado, o LED Bluetooth pisca lentamente, o que signica que está
pronto para ligar-se a um dispositivo Bluetooth. Se a ligação não for encontrada depois de 1 minuto, o LED sai e entra em
modo de espera. Se a ligação Bluetooth for efectuada com um dispositivo, a luz pisca lentamente, cerca de 2-3 segundos
pisca uma vez. Neste ponto, pode usar o dispositivo de bluetooth para ouvir a música do canal correspondente.
7. LED BLUETOOTH
Este LED indica el estado de Bluetooth. Cuando enciende el amplicador, la función Bluetooth está activa y la luz comienza
a parpadear. La unidad está lista para buscar y conectarse a un dispositivo Bluetooth. Active la búsqueda de Bluetooth en su
teléfono inteligente y seleccione "Bluetooth" en la lista de dispositivos encontrados. Si la unidad se conecta con éxito a un
dispositivo Bluetooth, la luz parpadea lentamente durante 2-3 segundos. Entonces el amplicador está listo para reproducir
la música de su dispositivo Bluetooth.
Si no hay conexión después de 1 minuto, el amplicador cambia al modo de espera y el LED se apaga.
8. LED POWER
O LED irá acender quando a energia esta ligada.
LIGAÇÕES TRASEIRAS
1. Entrada Line
Fichas Jack: Essas chas são ligadas em paralelo as ligações RCA correspondentes. Assim pode ligar um segundo ampli-
cador em série à primeira unidade a enviar o mesmo sinal para vários amplicadores de modo a aumentar a potência de
som.
2. Saídas de Colunas
XLR/Jack (carga mínima 4 Ohms)

MANUAL - AMP300USB-BT
17
Nota: Para evitar danos nas colunas, use apenas colunas com a mesma impedância e potência que o
amplicador. Use apenas cabos de colunas e nunca cabos de sinal utilizados em microfones, instru-
mentos musicais e equipamentos de áudio em geral.
3. Fonte de Alimentação: Tomada
INSTALAÇÃO
Power On/O
Ligue o amplicador por último e desligue-o em primeiro lugar quando em instalação áudio. Coloque todos os controlos no
mínimo de modo de evitar o ruído desagradável e até perigoso.
Instalação e Operação
O seu amplicador é uma unidade de alta potência que deve ser instalada num local bem ventilado e longe do calor, humi-
dade, choques e poeiras de modo a evitar mau funcionamento, defeitos, choques eléctricos e risco de incêndio. O ar de re-
frigeração entra através do painel frontal e saí através do painel traseiro. A boa ventilação é, portanto, de suma importância.
Se instalar o amplicador numa rack de equipamentos ou numa mala, certique-se de que não obstrui o uxo de ar. Nunca
instale o amplicador numa rack fechado ou ight case pois parte do calor é libertado pela placa de metal inferior. Recomen-
da-se deixar pelo menos um espaço livre por baixo do amplicador.
Ligações Áudio
Antes de efectuar quaisquer ligações, desligue todos os aparelhos que pretende interligar. Usar apenas cabos de alta qua-
lidade adequados a esta aplicação. Manuseie os cabos com cuidado e verique o uxo de ar regularmente. Só puxar pelas
chas, nunca pelo cabo. Não use força para desligar um cabo. Sempre enrolar os cabos sem fazer nós ou dobras de modo a
garantir uma vida longa, bom funcionamento e desempenho ideal.
Prevenção e Detecção de Interferência
Certique-se de que instala o amplicador num lugar longe de radiações de frequência industrial. Evite instalar o ampli-
cador perto de um telefone, TV, rádio ou telemóvel. Estes equipamentos são fontes de interferência.
Quando ligar outros componentes na sua instalação, evite a constituição de loops de terra que são prejudiciais à qualidade
de som do amplicador e potencialmente perigoso. É a melhor maneira (embora nem sempre realizável) para evitar loops
de terra é ligar a todos os componentes para um ponto central (ligação star). O ponto central de uma instalação de som é a
mesa de mistura.
A m de determinar a causa da interferência, ligue as diferentes secções da mesa de mistura às outras unidades na seguinte
sequência. Apenas fazer a ligação da próxima depois de vericar o som.
ESPECIFICAÇÕES
Potência ........................................................................................................................................................ 2 x 240W 4Ω
......................................................................................................................................................................2 x 160W 8 Ω
Distorção Harmónica Total ...................................................................................................................................... ≥0,5%
Frequência ....................................................................................................................................................20-20.000Hz
Ruído...................................................................................................................................................................... ≥0,5dB
Separação de Canal (f=1kHz)................................................................................................................................. ≥82dB
Nível de Entrada ....................................................................................................................................................... ≥0dB
Impedância de Entrada...........................................................................................................................................≥10kΩ
Faixa de frequência Bluetooth ..................................................................................................................2402-2480MHz
Potência máxima de emissão de RF ....................................................................................................................2,21mW
Fonte de Alimentação ................................................................................................................................... 230V~ 50Hz
Observe: As especicações e melhorias no design desta unidade e deste manual estão sujeitas a alterações sem aviso
prévio por escrito.
Produtos eléctricos não devem ser colocados no lixo doméstico. Por favor, traga-os a um centro de reciclagem. Consulte
as autoridades locais ou o seu revendedor sobre como proceder

MANUAL - AMP300USB-BT
18
AMPLIFICATOR DE PUTERE
MANUAL DE UTILIZARE
RECOMANDARI DE SIGURANTA
CAMP MAGNETIC
ATENTIE! Nu asezati echipamente cu amplicare mare, cum ar preamplicatoare sau casetofoane direct peste sau sub
unitate. Acest aparat are un camp magnetic puternic, care poate induce zgomote in dispozitive neecranate, care sunt situate
in apropiere. Campul are zone puternice deasupra sau sub unitate. Localizati amplicatorul in partea de jos a suportului si
preamplicatorul sau alte echipamente sensibile in partea de sus.
ATENȚIE
NU DESCHIDEȚI CARCASA
PERICOL DE ELECTROCUTARE
AVERTISMENT! Pentru a reduce riscul unui soc electric, feriti echipamentul de ploaie sau umezeala!
Semnul exclamarii in interiorul unui triunghi este folosit pentru a alerta utilizatorul cu privire la existenta unor instructiu-
ni importante de functionare si intretinere.
Simbolul alaturat va alerta utilizatorul in privinta riscului unui soc electric.
În conformitate cu cerințele standardului CE.
Produsul este destinat doar utilizării în interior
Clasei de protecție I
• Pentru a preveni socul electric, nu scoateti capacele de sus sau de jos.
• Nu veti gasi piese de schimb in interiorul aparatului.
• Apelati la personalul de service calicat.
• Deconectati cablul de alimentare inainte de a scoate capacul din spate pentru a accesa interiorul aparatului – aceasta
operatie se va efectua numai de catre personal calicat.
• Nu plasati pe aparat surse de foc deschis, cum ar lumanari aprinse.
• Unitatea ar trebui sa e utilizata numai in zonele cu clima moderata.
• Acest aparat trebuie sa e curatat doar cu un material uscat. Nu utilizati solventii sau alti detergenti de curatare.
• O distanta minima de 0,5 m in jurul aparatului trebuie sa e pastrata pentru a asigura o ventilatie sucienta pentru a
evita supraincalzirea.
• Nu plasati pe aparat surse de foc deschis, cum ar lumanari aprinse.
• Oriciile de aerisire nu trebuie blocate prin acoperirea lor cu obiecte, cum ar ziare, fete de masa, perdele, etc.
• Feriti aparatul de scurgeri sau stropiri cu apa.
• Nu puneti obiecte pline cu lichid pe aparat , cum ar vaze de ori.
• Amplicatorul face parte din CLASA I aparate electrice. Acesta trebuie conectat la o priza cu pamantare de protectie.
• In cazul in care cablul de alimentare trebuie deconectat in regim de urgenta, accesul la priza de perete trebuie sa e rapid
si usor.
CARACTERISTICI
1.MUFA STICK USB
Intrare stick USB.
2. Control amplicare
Controlul amplicarii permite atenuarea semnalului de intrare, care este trimis catre intrarea ale amplicatorului.
Gama de control dB este urmatoarea: Complet inchis (semnalul este la zero si nu este trimis la intrarea amplicatorului) sau
complet deschis (adica semnalul nu este atenuat deloc si este trimis la intrarea amplicatorului)
3. COMENZI USB
Player-ul USBare urmatoarele comenzi:
a: |<< ANTERIOR: Folositi acest buton pentru a reporni piesa sau a selecta piesa anterioara.
b: Redare/Pauza: Cu ecare apasare a butonului, modul de functionare se va schimba de la redare la pauza sau de la pauza
la redare.
c: >>| URMATORUL: Folositi acest buton pentru a selecta piesa urmatoare.
d: VOL-: Folositi acest buton pentru a reduce nivelul volumului.
e: VOL+: Folositi acest buton pentru a mari nivelul volumului.

MANUAL - AMP300USB-BT
19
f: EQ: va permite sa selectati efectul.
g: AFISAJ LED: aseaza informatiile MP3.
4. Comutator pornire: Apasati butonul pentru a porni aparatul. LED-ul se va aprinde atunci cand aparatul este pornit.
5. LED SEMNAL: Indica semnalul la intrare.
6. LED CLIP: Indica depasirea nivelului maxim al amplicatorului. Daca LED-ul palpaie, reduceti nivelul de intrare.
7. LED BLUETOOTH
Acest LED indică starea Bluetooth. Când porniți amplicatorul, funcția Bluetooth este activă și lumina începe să clipească.
Unitatea este gata să caute și să se conecteze la un dispozitiv Bluetooth. Activați căutarea Bluetooth pe smartphone-ul dvs.
și selectați „Bluetooth” în lista de dispozitive găsite. Dacă unitatea se conectează cu succes la un dispozitiv Bluetooth, lumi-
na clipește încet timp de 2-3 secunde. Apoi amplicatorul este gata pentru a reda muzica dispozitivului dvs. Bluetooth.
Dacă nu există nicio conexiune după 1 minut, amplicatorul trece în modul standby și LED-ul se stinge.
8. LED PORNIRE
LED-ul se va aprinde cand aparatul este pornit.
CONEXIUNI SPATE
1. Intrare linie
Mufe jack: Aceste mufe sunt conectate in paralel cu conectorii RCA corespunzatori. Astfel, puteti conecta un al doilea am-
plicator in serie la prima unitate pentru a trimite acelasi semnal la mai multe amplicatoare, in scopul de a creste puterea
audio.
2. Iesiri difuzor
Iesiri sau mufe XLR/Jack (sarcina minima 4 ohmi)
Nota: Pentru a evita deteriorarea difuzoarelor, utilizati numai difuzoare care au aceeasi impedanta si
putere mai mare ca amplicatorul. Utilizati numai cabluri speciale pentru difuzoare si nu cabluri de
semnal ca si cele utilizate pentru microfoane, instrumente muzicale si echipamente audio, in general.
3. Alimentare
Retea
SPECIFICATII
Putere ...........................................................................................................................................................2 x 240W 4Ω
......................................................................................................................................................................2 x 160W 8 Ω
Distorsiune armonica totala .................................................................................................................................. < 0,5%
Raspuns in frecventa ....................................................................................................................................20-20.000Hz
Zgomot ..................................................................................................................................................................≥0,5dB
Separare canale (f=1kHz) ...................................................................................................................................... ≥82dB
Nivel intrare ............................................................................................................................................................. ≥0dB
Impedanta intrare ..................................................................................................................................................≥10kΩ
Interval de frecvență Bluetooth ................................................................................................................2402-2480MHz
Putere maximă de emisie RF ..............................................................................................................................2,21 mW
Alimentare ....................................................................................................................................................230V~ 50Hz
PRECICLAREA CORECTA A ACESTUI PRODUS
Simbolul alăturat indică faptul că deșeurile de echipamente electrice și electronice nu se reciclează împreună cu deșeu-
rile menajere. Pentru a preveni un posibil pericol față de mediul inconjurător sau față de sănătatea dumneavoastră din
cauza reciclarii necontrolate a deșeurilor, vă rugăm să separați acest produs de alte tipuri de deșeuri și să-l reciclați în mod
responsabil. Reciclarea controlată a aparatelor de uz casnic joacă un rol vital în refolosirea, recuperarea și reciclarea echipa-
mentelor electrice și electronice duceți la un centru de reciclare. Pentru mai multe detalii adresați-vă autorităților locale sau
distribuitorului dumneavoastră.

MANUAL - AMP300USB-BT
20
OJAČEVALEC
NAVODILA ZA UPORABO
VARNOSTNA PRIPOROČILA
MAGNETNO POLJE
POZOR! Ne postavljajte naprave občutljive, kot so predojačevalci ali magnetofoni neposredno nad ali pod ojačevalec. Ta
naprava ima močno magnetno polje, ki lahko povzroči brnenje v nezaščitenih napravah, ki se nahajajo v bližini. Polje ima
najmočnejše poti ravno nad in pod enoto. Postavite ojačevalec na dnu, predojačevalec ali druge občutljive opreme na vrhu.
POZOR
NE ODPIRAJTE OHIŠJA
NEVARNOST UDARA
Klicaj v trikotniku se uporablja za opozarjanje uporabnika na pomembna navodila za uporabo in vzdrževanje.
Strela v trikotniku se uporablja za opozarjanje uporabnika na nevarnost električnega udara.
V skladu z zahtevami CE standarda
Izdelek je namenjen samo za uporabo v zaprtih prostorih
Zaščitni razred I
• Za preprečitev električnega udara, ne odpirajte zgornjih ali spodnjih pokrovov.
• Ni uporabniških delov za popravilo.
• Za popravilo se obrnite na usposobljeno osebje za servisiranje.
• Odklopite napajalni kabel, preden odstranite pokrov zadnje plošče za dostop do glavnega stikala.
• Ne postavljajte gorečih virov, kot so sveče, na napravo.
• Naprava se sme uporabljati samo v zmernih podnebjih.
• To enoto je treba čistiti le s suho krpo. Izogibajte se uporabi topil ali drugim čistilom.
• Najmanjša razdalja okoli naprave mora biti 0.5m, da se zagotovi zadostno prezračevanje in prepreči pregrevanje.
• Ne postavljajte gorečih virov, kot so sveče, na napravo.
• Prezračevalne odprtine se ne smejo biti ovirane s pokrivanjem prezračevalnih odprtin s predmeti, kot so časopisi, prti,
zavesami, itd
• Ne izpostavljajte kapljanju ali brizganju vode.
• Ne postavljajte predmetov, napolnjenih z vodo, kot so vaze, na aparatu.
• Ojačevalec je del CLASS I električnih naprav. Tako da mora biti priključen na omrežno vtičnico z zaščitno ozemljitveno
povezavo.
• Kje se vtikač ali sponka uporablja kot pripomoček za odklop, dostop za odklop mora biti preprosto dostopen.
• Kadar se za odklop uporablja GLAVNO STIKALO, dostop za odklop mora biti preprosto dostopen.
OPOZORILO! Da bi zmanjšali nevarnost električnega šoka, ne izpostavljajte naprave dežju ali vlagi!
LASTNOSTI
1.USB VTIČNICA
Vhod za USB ključ
2. Kontrola ojačanja
Vhodna kontrola ojačanja omogoča kontrolo vhodnega signala, ki bo poslan na različnih kanalov ojačevalnika.
Območje dB kontrole je, kot sledi: Popolnoma zaprt (signal na ničli in ni poslan kanalu ojačevalca) ali povsem odprt (pri naziv-
ni moči: signal ni oslabljen in je poslan na vhodni moči v ojačevanje kanalov)
3. USB KONTROLE
Kontrole USB predvajalnika
a: |<< : Uporabite ta gumb za ponovni zagon skladbo ali izbor prejšnje skladbe.
b: Play/Pause: Vsakič, ko pritisnete na ta gumb, se funkcija spremeni iz predvajanja v pavzo in obratno.
c: >>|: Uporabite ta gumb za izbor naslednje skladbe.
d: VOL-: Uporabite ta gumb za zmanjšanje nivoja glasnosti.
e: VOL+: Uporabite ta gumb za zvišanje nivoja glasnosti.
f: EQ:Vam omogoča da izberete efekt.
Other manuals for AMP300USB-BT
1
This manual suits for next models
1
Table of contents
Languages:
Other Ibiza sound Amplifier manuals

Ibiza sound
Ibiza sound AMP-300 User manual

Ibiza sound
Ibiza sound AMP Series User manual

Ibiza sound
Ibiza sound DIGI-AMP300 User manual

Ibiza sound
Ibiza sound AMP1000USB-BT User manual

Ibiza sound
Ibiza sound PORT1 User manual

Ibiza sound
Ibiza sound AMP300-MKII User manual

Ibiza sound
Ibiza sound KA220USB User manual

Ibiza sound
Ibiza sound AMP300USB-BT User manual

Ibiza sound
Ibiza sound SA500 User manual

Ibiza sound
Ibiza sound PORT-6 User manual