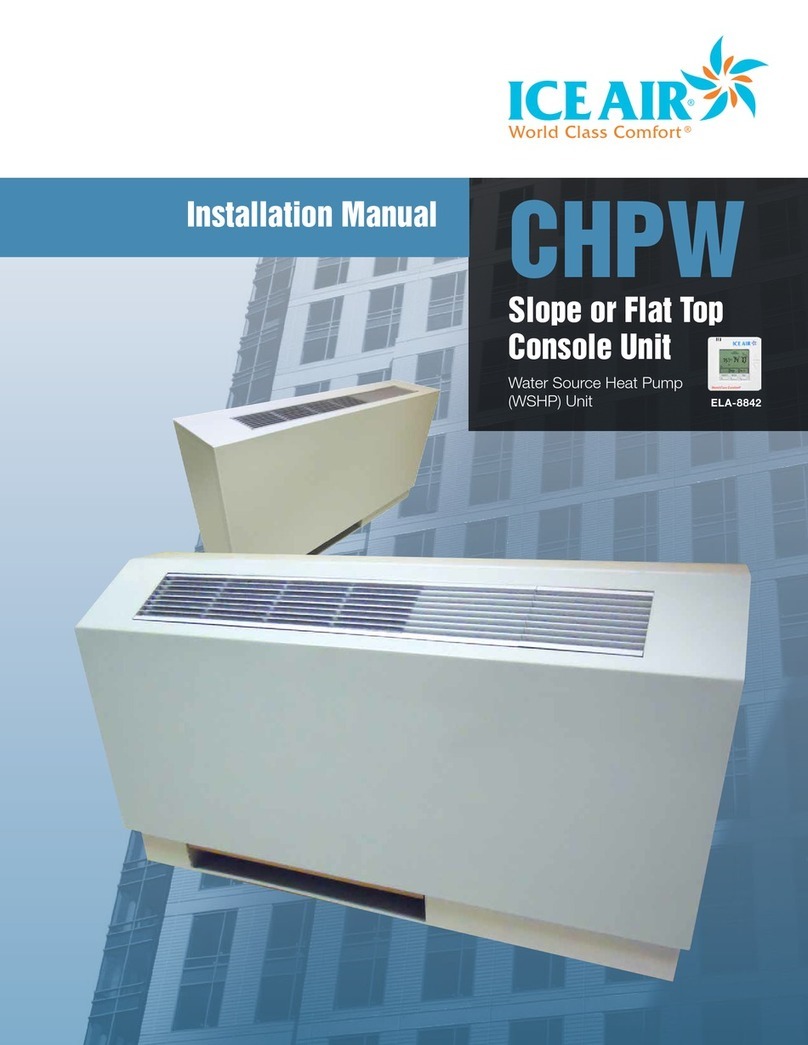
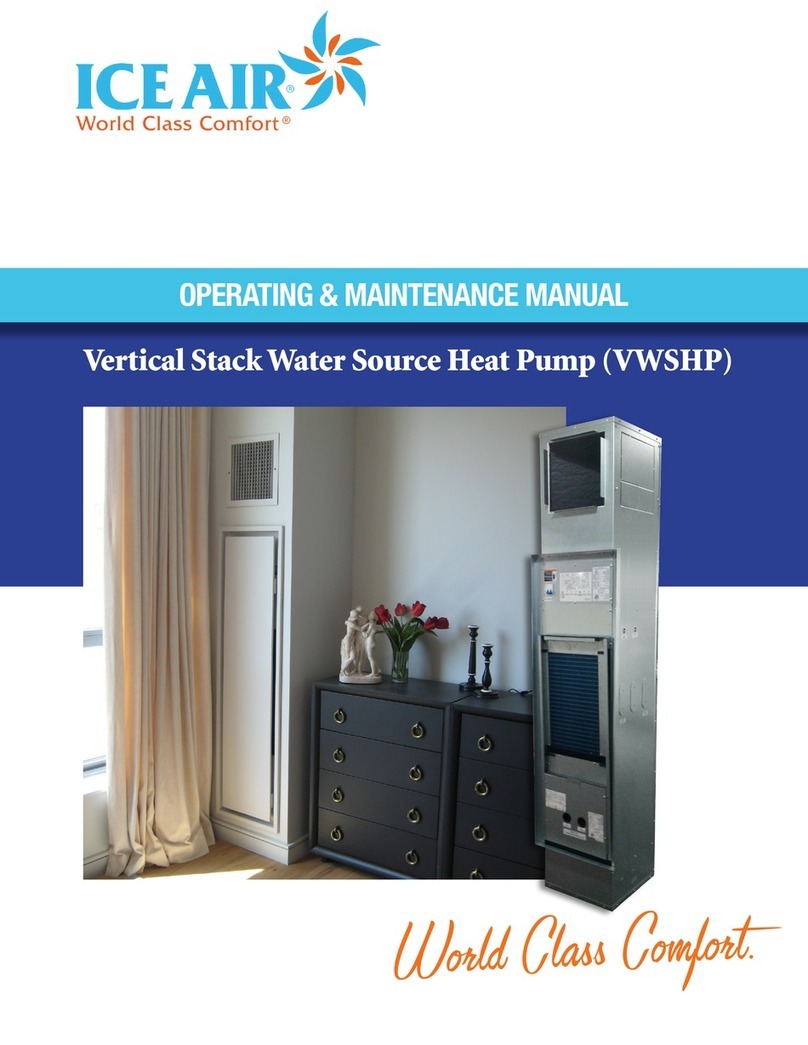
ICE AIR CHPW Operating instructions

CHPW
Slope or Flat Top
Console Unit
Water Source Heat Pump
(WSHP) Unit
Operating and
Maintenance Manual
ELA-8842

Precautions and preparations listed are for general knowledge and to define basic guidelines. Local codes and existing practices should be observed and preformed by a professional.
Due to Ice Air’s ongoing product development programs, the information in this document is subject to change without notice.
2
Welcome
Congratulations on your selection of the Ice Air Water Source Heat
Pump (WSHP). The WSHP is a combination cooling and heating
unit that provides an efficient room by room source for comfort
conditioning of your living environment.
Ice Air WSHP Console units are built to a high standard of quality and
reliability, employing commercial grade components and heavy duty,
galvanized sheet metal casings. With proper maintenance and usage,
Ice Air WSHPs should provide many years of efficient, quiet and
trouble-free comfort.
To enhance the use of your Ice Air equipment, you will want to
read and carefully follow all of the instructions contained in this
Operating and Maintenance Manual. We recommend that you pay
special attention to the Safety and Warning Information section at
the beginning of this Manual, and to the various safety advisories
throughout this Manual.
Please retain this Manual for your future reference. We suggest that
you keep it with other important documents and product manuals.
If your unit has optional features, they will be explained in a separate
instruction sheet specific to that option.
On behalf of Ice Air, and our network of distributors and dealers, we
are happy to welcome you to our base of satisfied customers!
Contents
Welcome........................................................ 2
Consumer Safety Information/Guidelines ... 3
Components and Parts View ........................ 4
Controls......................................................... 5
LCD Programmable Operation..................6-8
Maintenance ............................................9-10
Troubleshooting .......................................... 11
Project Nomenclature................................. 12
Warranty/Contact Information ................... 16
Location Model No. Serial No.
Living Room
Master Bedroom
Bedroom
Dining Room
Other
We recommend that you record the following information
about your Ice Air product(s).

Precautions and preparations listed are for general knowledge and to define basic guidelines. Local codes and existing practices should be observed and preformed by a professional.
Due to Ice Air’s ongoing product development programs, the information in this document is subject to change without notice.
3
Consumer Reference Information
For safe and optimal enjoyment of your Ice Air unit, please read
the following consumer safety and operating notes carefully before
operating your equipment!
p
! RECOGNIZE THIS SYMBOL AS A SAFETY PRECAUTION.
p
!WARNING: Ice Air will not be responsible for any injury or
property damage arising from improper service, or service
procedures. If you install or perform service on this unit, you
assume responsibility for any personal injury or property
damage which may result. Many jurisdictions require a license
to install or service heating and air conditioning equipment.
p
!WARNING HIGH VOLTAGE: Disconnect all power before
servicing or installing unit. Multiple power sources may be
present. Failure to do so may cause property damage,
personal injury or death.
Safety Guidelines
Read this entire manual before operating the unit.
p
!WARNING: This unit MUST be serviced only by professionally
trained and qualified technicians. Do NOT attempt to maintain or
service this unit on your own – severe injury and death can occur
from electric shock, moving parts, and other hazards.
• Your Ice Air unit must be properly installed and commissioned
to operate correctly. Improper unit installation, adjustment or
commissioning, and/or improper heating system installation and
connection can lead to equipment malfunction and hazardous
operating conditions, and may void your warranty. If you have
any doubt about the proper installation of your Ice Air unit,
please contact your property manager at once to have a qualified
technician inspect the equipment.
• Your Ice Air units must each be wired on an individual, dedicated
electrical circuit with the correct voltage and proper amperage
(capacity) to match the unit nameplate requirements.
• Each unit’s electrical circuit must have a proper overcurrent
protection device, employing an approved circuit breaker or fuse
of the proper rating under NEMA and local building codes.
p
!WARNING: Every unit contains refrigerant within a sealed and
pressurized refrigerant system. This system must not be opened
or tampered with and any refrigeration system repairs MUST be
carried out by trained technicians. Refrigerant must be properly
handled and recycled per EPA regulations and guidelines.
p
!WARNING: Do NOT operate the unit with frayed, burnt or
damaged electrical wires!
p
!WARNING: Do NOT operate the equipment when in doubt –
have it inspected first!
IMPORTANT: It is not the intent of this maintenance manual to
correct any installation deficiencies. If you have any doubt about the
proper initial installation (or re-installation after servicing) of your Ice
Air unit(s) – noisy or inefficient unit operation, frayed or damaged
electrical connections, improper unit appearance, etc. – please
contact a trained servicer or building maintenance staff immediately.
The following physical conditions must be maintained for
proper unit operation:
Air flow must be unobstructed into and out of the unit return air
opening.
• Have the unit filter properly cleaned and serviced to prevent air
blockage from dirt and dust within the filter media.
Intended for indoor use only.
Proper installation and operating environment must be maintained.
Therefore:
• Do not operate the unit in corrosive environments such as
chemical plants, refineries or salt spray areas.
• Operate only with proper electrical service and protective circuit
breakers or fuses in place.
• Operate only with all unit and enclosure sheet metal parts in
place and properly installed.
• In areas of high concentrations of dirt, dust, pet dander or
pollutants, clean the filter often (at least monthly).
• Do not clean the unit with any solvents or cleaning solutions that
may damage the equipment.
• Understand and follow the unit operating instructions before
using your Ice Air equipment.

Precautions and preparations listed are for general knowledge and to define basic guidelines. Local codes and existing practices should be observed and preformed by a professional.
Due to Ice Air’s ongoing product development programs, the information in this document is subject to change without notice.
4
Components and Parts View
DISCHARGE GRILL
ENCLOSURE
BASE
COOLING/HEATING CHASSIS
ENCLOSURE FRONT COVER
CONTROL ACCESS DOOR
FAN DECK
UNIT MOUNTED CONTROLS
RETURN PIPE
SUPPLY PIPE
CHASSIS FRONT COVER
FLAT TOP CONSOLE
UNIT SHOWN
SLOPE TOP FLAT TOP

Precautions and preparations listed are for general knowledge and to define basic guidelines. Local codes and existing practices should be observed and preformed by a professional.
Due to Ice Air’s ongoing product development programs, the information in this document is subject to change without notice.
5
Controls
All standard Ice Air units are equipped with
microprocessor control board ELA-9830 with
the following thermostat options.
If your unit has 3rd party wall mounted or
remote controls, see the separate operating
instructions supplied with those controls.
7-Day Programmable (Optional)
• 5/2 or 7-day programs for highest
efficiency
• Factory or field-set temperature limits
• Large clear display – in any lighting
condition
• Auto changeover mode
• Easy to program
Wireless Thermostat (Optional)
• Easy programming
• Settings for morning, day, evening and
night
• Clear backlit display readable in any
lighting condition
• Auto changeover mode
• Optional remote temperature sensor
Nest “Learning Thermostat” (Optional)
• Programmable to save energy
• Remembers temperatures and time/day
to create customized schedule
• Easy to install and program – self-
learning technology
• Sleek, ultra-modern, efficient design
• Integrates with mobile devices/smart
phones (Nest Mobile app)
• Clear backlit display readable in any
lighting condition
• Auto changeover mode
• Optional remote temperature sensor

Precautions and preparations listed are for general knowledge and to define basic guidelines. Local codes and existing practices should be observed and preformed by a professional.
Due to Ice Air’s ongoing product development programs, the information in this document is subject to change without notice.
6
LCD Programmable Operation
Feature List
•
Operates on 2-stage Heat and 2-stage Cool
•
7 programs (Mo, Tu, We, Th, Fr, Sa, Su) or 5-2 programs
(Mo-Fr, Sa-Su)
•
4 Separate Time and Temperature Settings for each mode
•
Heat and Cool set points for each program
•
EPROM stores Heat and Cool program settings
•
Temporary Program Override
•
Permanent Program Override
•
Compressor Short Cycle Protection
•
LCD Backlighting
•
Low Temperature Protection
•
Lockout Safety feature
Operating Specifications
•
Temperature Measurement: 0°C ~ 40°C/32°F ~ 99°F
•
Accuracy: ±0.5°C/1°F
•
Voltage: 18-30VAC
•
Temperature Controllable Range: 5°C~35°C/55°F ~ 95°F
•
Resolution: 0.5°C/1°F
•
Operating Temperature: 0 – 50°C/32 – 122°F
•
Storage Temperature: 5 – 50°C/41 – 122°F
User Interface
Button Press Hold
UP/Override mode UP/Permanent Override mode
DOWN/Override mode DOWN/Permanent Override mode
ON/OFF ON/OFF --------
MODE Set operation mode Internal Setting
FAN Set fan speed/Confirm --------
The temperature reading that is on constant display is the ambient
room temperature.
The Cool limit setting is 55°F to 95°F.
The Heat limit setting is 51°F to 91°F.
Operation
Normal Mode:
1. Press ON/OFF to turn on thermostat.
2. Press MODE to change the system mode.
3. There are three operation modes:
Cool mode, Heat mode, Auto mode.
Cool Mode
1. To activate Cool mode, press the MODE button until
COOL displays.
2. Press UP/DOWN arrow buttons to your desired temperature.
3. Compressor will cycle when temperature reaches the set point.
After compressor stops, allow at least 3 minutes before restarting
(this applies only if you have manually turned the unit off or reset
the thermostat – during normal running conditions, the unit will
automatically allow for the required restart delay).
Heat Mode
1. To activate Heat mode, press the MODE button until
HEAT displays.
2. Press UP/DOWN arrow buttons to your desired temperature.
3. The unit will cycle until the set temperature is achieved and then
will continuously cycle to maintain the set temperature.
Auto Mode
1. To activate Auto mode, press the MODE button until
AUTO displays.
2. Press UP/DOWN arrow buttons to set desired Heat temperature.
3. Wait 5 seconds for COOL to appear.
4. Press UP/DOWN arrow buttons to set desired Cool temperature.
5.
The unit will automatically cycle between Heat and Cool modes if
unit exceeds desired set points. The temperature reading that is
on constant display is the ambient room temperature.
Controls

Precautions and preparations listed are for general knowledge and to define basic guidelines. Local codes and existing practices should be observed and preformed by a professional.
Due to Ice Air’s ongoing product development programs, the information in this document is subject to change without notice.
7
Changing Program Schedule and Temperature Limits
Enter internal setting mode by pressing and holding
MODE button for 5 seconds.
Press ON/OFF twice to select Settings (Settings is flashing)
1. Press MODE button to select Edit “Settings.”
2. Use UP/DOWN to select 7 Day or 5-2 Day.
3. Press MODE to edit Heat temperature limit.
4. Use UP/DOWN to set temperature. Default internal setting:
Heat limit 90°F
5. Press MODE to edit Cool temperature limit.
6. Use UP/DOWN to set temperature. Default internal setting:
Cool limit 60°F
7. Press FAN when complete. The Cool limit setting should be at
least 4°F higher than the Heat limit setting.
8. If no button is pressed for 15 seconds, it will return to normal
mode automatically.
Temporary Program Override
1. When thermostat is ON, the program set point can be
temporarily overrode by pressing UP or DOWN. OVERRIDE icon
will turn on. Press UP or DOWN to select the set point.
2. In Heat mode, Heat set point can be adjusted.
3. In Cool mode, Cool set point can be adjusted.
4. In Auto mode, Heat set point will be set first and press UP or
DOWN to set the Heat set point. Press FAN to confirm the Heat
set point. Cool set point will be set second and press UP or
DOWN to set the Cool set point. Press FAN to confirm the Cool
set point.
5. Temporary Override will be canceled if user changes the
operation mode or the unit enters the next program time session.
Permanent Override
1. Hold UP and DOWN button for 2 seconds to enter Permanent
Override mode. Permanent Override icon will turn on.
2. In Heat mode, Heat set point can be adjusted.
3. In Cool mode, Cool set point can be adjusted.
4. In Auto mode, Heat set point will be set first and press UP or
DOWN to set the Heat set point. Press FAN to confirm the Heat
set point. Cool set point will be set second and press UP or
DOWN to set the Cool set point.
5. Permanent Override will be canceled if user changes the
operation mode or turns off the unit.
6. Hold FAN button 5 seconds to cancel the Permanent
Override mode.
Set Day and Time
Enter internal setting mode by pressing and holding
MODE button for 5 seconds.
Time Setting
Set Clock/Day is flashing
1.
Press MODE button to select Edit Clock/Day.
2.
Use UP/DOWN buttons to adjust hours (12 hr).
3.
Press MODE to select minutes.
4.
Use UP/DOWN buttons to adjust minutes.
5.
Press MODE to select days.
6.
Use UP/DOWN buttons to adjust days. Press FAN when
complete.
Programming Your Thermostat
Enter internal setting mode by pressing and holding
MODE button for 5 seconds.
Press ON/OFF to select Schedule (Schedule is flashing)
1.
Press MODE button to select EDIT SET SCHEDULE.
2.
Use UP/DOWN to select DAY.
3.
Press MODE to edit.
4.
Use UP/DOWN to select Time (adjustable in 10 minute
increments).
5.
Press MODE to edit Heat setting.
6.
Use UP/DOWN to select temperature.
7.
Press MODE to edit Cool setting.
8.
Use UP/DOWN to select temperature.
9.
Press MODE to set next time frame.
10.
Follow the screen, and repeat steps 2 through 9 to adjust 7-day
schedule programming.
11.
Press FAN when complete.
12.
If no button is pressed for 15 seconds, it will return to normal
mode automatically.
Below is the default program.
The default selection is 5-2 day program.
Days Event Time Heat Cool
MON-FRI WAKE 6:00 AM 70º F (21º C) 78º F (26º C)
LEAVE 8:00 AM 62º F (17º C) 85º F (29.5º C)
RETURN 6:00 PM 70º F (21º C) 78º F (26º C)
SLEEP 10:00 PM 62º F (17º C) 82º F (28º C)
SAT-SUN WAKE 6:00 AM 70º F (21º C) 78º F (26º C)
LEAVE 8:00 AM 62º F (17º C) 85º F (29.5º C)
RETURN 6:00 PM 70º F (21º C) 78º F (26º C)
SLEEP 10:00 PM 62º F (17º C) 82º F (28º C)

Precautions and preparations listed are for general knowledge and to define basic guidelines. Local codes and existing practices should be observed and preformed by a professional.
Due to Ice Air’s ongoing product development programs, the information in this document is subject to change without notice.
8
Sequence of Operation for Water Source Heat Pump
Cooling Cycle
• Set the thermostat for Cooling.
• If applicable, the motorized valve opens as long as the
thermostat calls for Cooling.
• This sends a 24-volt signal to the terminal to the compressor
contactor and the compressor starts.
• At the same time a 24-volt signal flows through the fan relay
and the blower starts in HIGH speed, if the unit is in Auto Fan
Mode. If the unit is in manual mode, set by the user, then the fan
continuously blows in the user set speed.
• If in Auto Fan Mode, once the thermostat is within 2 degrees of
set point, the fan drops to LOW speed.
• Once the thermostat is satisfied, it sends a 24-volt signal to the
compressor contactor and compressor turns OFF.
• If in Auto Fan Mode, this ends the 24-volt signal to the indoor
blower relay and the blower stops.
• If LOW or HIGH fan speed is manually selected the fan will
continue to blow.
Heating Cycle
• Set the thermostat for Heating
• If applicable the motorized valve opens as long as the thermostat
calls for Heating.
• This sends a 24-volt signal to the terminal to the compressor
contactor and the compressor starts.
• At the same time a 24-volt signal flows through the fan relay
and the blower starts in HIGH speed, if the unit is in Auto Fan
Mode. If the unit is in manual mode, set by the user, then the fan
continuously blows in the user set speed.
• If in Auto Fan Mode, once the thermostat is within 2 degrees of
set point, the fan drops to LOW speed.
• Once the thermostat is satisfied, it sends a 24-volt signal to the
compressor contactor and compressor turns OFF.
• If in Auto Fan Mode, this ends the 24-volt signal to the indoor
blower relay and the blower stops.
• If LOW or HIGH fan speed is manually selected the fan will
continue to blow.
PLEASE NOTE: Other thermostats are available including:
System compatible with other 3
rd party thermostats not shown here.
For more information go to:
www.ice-air.com/thermostats
Habitat Wireless
Thermostat
Digital Touchscreen
Thermostat

Precautions and preparations listed are for general knowledge and to define basic guidelines. Local codes and existing practices should be observed and preformed by a professional.
Due to Ice Air’s ongoing product development programs, the information in this document is subject to change without notice.
9
Maintenance
Your Ice Air unit is designed to provide
many years of efficient, trouble-free comfort
conditioning service. To ensure equipment
longevity and efficiency, please make sure
that the following simple maintenance
procedures are followed. This manual
assumes that your unit has been installed
by a qualified installation professional, and
is operating properly prior to maintenance
service.
Have your unit periodically inspected by
a properly trained service professional or
building maintenance staff person. The unit
should be checked for the safe and proper
functioning of all of its systems at least
once a year. The following recommended
maintenance procedures should be carried
out only by trained personnel with strict
adherence to the Safety Guidelines outlined
at the beginning of this manual. These
procedures MUST be followed to ensure
your safety and the safety of the person
maintaining the equipment!
Indoor Air Filter
It is recommended that you clean the indoor
air filter after every 350 to 400 hours of
unit operation – more frequently if the unit
is running in an environment of high dust,
pet dander or other pollutants in the indoor
atmosphere.
Condensate Drain Pan and Drain Hoses
Check the unit condensate drain pan and
drain hoses annually to ensure proper
condensate drainage. If any foreign matter
build-up in the drain pan is found, clean the
drain pan and drain hoses – frequency of
cleaning depends on the level of dirt and
pollutants that may be present in the indoor
environment.
Evaporator Coil
Check and clean (if necessary) the unit
evaporator coil annually.
Evaporator Motor and Blower Assembly
Check and clean for dust and dirt build up as
necessary.
Compressor
Annual check should be performed to detect
potential problems.
Condenser (Water Heat Exchanger)
Water coil maintenance is not required. If the
unit installation is located in a system with
water problem history, it is best to establish
a periodic maintenance program. It is the
building’s responsibility to maintain a water
system that should provide your unit with
treated and filtered water to keep water
flowing freely through your equipment.
With these simple maintenance procedures
carried out on a proper maintenance
schedule, your unit should provide many
years of trouble-free service. The procedures
are covered in greater detail on the following
pages and should be implemented by trained
personnel. But there are certain items that
you, the apartment owner or tenant, can do
to ensure proper unit function:
• Keep the area around your unit clear of
objects that may block air flow into the
unit – furniture, carpets and rugs, etc.
may restrict air movement.
• Keep the top of your cabinet free of
objects that may block air flow out of the
unit – plants, paperwork and books, etc.
should not be placed on or above the
discharge grille area.
• Keep drapes, blinds and other window
treatments clear of the air discharge
area – any blockage of discharge air will
have a negative impact on the unit and
on its ability to properly condition the
room.
General Unit Inspection
Visually inspect unit at least once a month.
Pay special attention to hose assemblies and
connections. Repair any leaks and replace
deteriorated hose immediately to avoid
potential costly damage to your property due
to component failure.

Precautions and preparations listed are for general knowledge and to define basic guidelines. Local codes and existing practices should be observed and preformed by a professional.
Due to Ice Air’s ongoing product development programs, the information in this document is subject to change without notice.
10
Evaporator Motor and Blower Assembly
If there is evidence of dirt or dust build-up in
the evaporator motor or blowers, they should
be cleaned either by vacuum cleaning (if
working in an apartment) or by removing the
unit to a workshop location and cleaning with
compressed air.
p
!WARNING: Always obey safety
guidelines for using compressed air
in this latter case.
Your Ice Air unit has permanently lubricated
motor bearings that do not require additional
lubrication. Blowers and motors are factory
assembled for quiet performance – if there
is any excessive noise and vibration from this
assembly, it should be serviced by a qualified
technician.
Condenser (Water Heat Exchanger)
Generally, if water flow exceeds 3 gpm per
ton, the water velocities should keep your
coil free of scaling of debris that could lead
to erosion and fouling.
Air Filter
1. Remove Air Filter.
2. If reusable, wash Air Filter in warm water
and biodegradable cleaner.
3. Rinse with clean water and allow to dry
completely.
4. Replace Air Filter.
5. As an alternate cleaning method, the
filter may be cleaned on both sides using
a vacuum cleaner and a soft brush type
attachment.
6. If your filter is disposable, replace with
new filter.
IMPORTANT: Do not operate unit without
filters.
Evaporator Coil
Check the coil for cleanliness and uniformity
of fins. If the coil is dirty, vacuum clean with
a soft brush attachment. This is the only form
of cleaning that should be carried out within
an apartment. If the coil requires additional
cleaning, the unit must be removed and
cleaned using compressed air and/or
washed. These operations MUST be carried
out in a facility properly equipped to handle
this type of work in a safe and professional
manner.
Roomside Component Cleaning
IMPORTANT: Power MUST be disconnected
before carrying out any of the following
cleaning!
To access the components within the chassis
of the unit:
1. Unit must be in OFF Position.
2. Disconnect unit from power source.
3. Remove the unit front cover/access door
by unscrewing the retaining screws
that hold it in place. You will then have
access to the unit components.
NOTE: Pictures of components and parts
may vary depending on your model.

Precautions and preparations listed are for general knowledge and to define basic guidelines. Local codes and existing practices should be observed and preformed by a professional.
Due to Ice Air’s ongoing product development programs, the information in this document is subject to change without notice.
11
Troubleshooting
IMPORTANT: It is not the intent of this maintenance manual to
resolve any problems with the operation of your Ice Air unit.
Please contact a trained servicer or building maintenance
staff immediately if your unit fails to perform properly.
1. Contact a trained service technician to conduct full unit
diagnostics and repair to equipment.
2. Record any unit that does not operate noting the unit serial
number on your report.
If unit is not operating, conduct the following checks:
1. Check the electrical connections.
2. Check the voltage and current against the electrical
specifications on the unit nameplate.
3. Look for wiring errors. Check for loose screw connections in both
line and low voltage terminals.
4. Check the water supply piping for proper water connection.
5. Check for dirty filters.
6. Check indoor fan for proper operation.
7. Check that unit did not cycle off due to improper thermostat
settings.
8. Check for fault codes on the control board – consult the Board
Troubleshooting Table.
Board Troubleshooting Table
WSHP Board
ELA-8843/9830
Error Codes (VA.7 and up)
Board LED Code
Troubleshoot GuideYellow Green Red
Normal OFF ON OFF Normal Operation
High Pressure OFF OFF FLASH Low/no water flow, dirty coaxial coil, cap tube blockage, entering water temp is too high
Low Pressure FLASH OFF OFF Low charge, dirty filter, dirty evaporator coil
Evaporator Too Cold FLASH OFF FLASH Dirty filter, dirty evaporator coil, fan motor failure, low gas
Coaxial Winter Protection FLASH ON OFF Water too cold during off mode
Temperature Probe Failure OFF FLASH OFF Loose/disconnected probe wire, bad probe
High/Low Voltage OFF OFF ON Site voltage, bad transformer
Condensate Overflow ON OFF OFF Clogged condensate drainage
Coaxial Water Too Cold ON OFF FLASH Water too cold during on mode, low gas
p
! RECOGNIZE THIS SYMBOL AS A SAFETY PRECAUTION.
p
!WARNING: Ice Air will not be responsible for any injury or
property damage arising from improper service or service
procedures. If you install or perform service on this unit, you
assume responsibility for any personal injury or property
damage which may result. Many jurisdictions require a license
to install or service heating and air conditioning equipment.
p
!WARNING HIGH VOLTAGE: Disconnect all power before
servicing or installing unit. Multiple power sources may be
present. Failure to do so may cause property damage,
personal injury or death.

Precautions and preparations listed are for general knowledge and to define basic guidelines. Local codes and existing practices should be observed and preformed by a professional.
Due to Ice Air’s ongoing product development programs, the information in this document is subject to change without notice.
12
Product Nomenclature
Model Selection 8 CHPW 09 P X F 1 S X X U U G X F X X X W X A
1 2 3 4 5 6 7 8 9 10 11 12 13 14 15 16 17 18 19 20 21
Primary Part
Item
#
Matrix
Name
Code
String
Value
Description
1POWER
8208V/1PH/60HZ
7277V/1PH/60HZ
5115V/1PH/60HZ
2UNIT TYPE CHPW Console WSHP
3CAPACITY
(BTUH)
09 9,000 (~3/4-Ton)
13 13,000 (~1-Ton)
16 16,000 (~1-1/4-Tons)
19 19,000 (~1-1/2-Tons)
4MOTOR PPSC Motor
EEC Motor
5DISCONNECT
FFused Disconnect
NNon-Fused Disconnect
PLine Cord With Plug (18")
XTerminal Block with Cover
6UNIT CONFIG.
FFlat Top
EFlat Top with Removable Chassis
SSloped Top
RSloped Top with Removable Chassis
TFlat Top with Front Intake
UFlat Top with Removable Chassis and Front Intake
VSloped Top with Front Intake
WSloped Top with Removable Chassis and Front Intake
CCustom Enclosure
7ENCLOSURE
COLOR
1Antique White
2Arctic White
3Custom
8INSULATION SStandard Insulation (12.7 mm (1/2") Fiberglass)
F1/2” Foil Faced Insulation
9P-TRAP IInternal P-Trap
XNo P-Trap
10 RISERS XRiser Options Not Applicable
11 PIPE
ORIENTATION
LLeft Hand
RRight Hand
UUniversal (allows for field connection on either side)
12 WIRE WHIPS
AWall mounted with 6.5-foot wire whip
BWall mounted with 10-foot wire whip
CWall mounted with 12-foot wire whip
DWall mounted with 30-foot wire whip
EWall mounted with 50-foot wire whip
FStandard 18" wire whip
UUnit mtd controls
13 DRAIN PAN
GPowder Coated Galvanized Drain Pan
SStainless Steel Drain Pan
XNo Drain Pan
Item
#
Matrix
Name
Code
String
Value
Description
14 COMPRESSOR
BLANKET
BSound Attenuation Blankets
XNo Compressor Blanket
15 CONTROLS
CNon-Programmable LCD Touchpad Thermostat (ELA-12690)
DNon-Programmable LCD Thermostat (ELA-8842 via dip
switch)
E7-Day Programmable LCD Thermostat (ELA-8842)
F7-Day Programmable Touchscreen Thermostat (ELA-13086)
GNest Thermostat (ELA-10665)
HHabitat Wireless Wi-Fi Thermostat with Water Leak Detector
(ELA-13161)
INon-Programmable LED Touchpad Thermostat (ELA-10328)
XField Mounted By Others
16 MOTORIZED
VALVES
A2-Way Motorized Valve NO
B2-Way Motorized Valve NC
CCustom Valve Option
D3-Way Motorized Valve NO
E3-Way Motorized Valve NC
XNo Valve Option
17 FLOW VALVES
AAutoflow Valve (HAYS 2510/2517)
BAutoflow Valve/Shutoff combo (HAYS 2519)
HAutoflow Valve (HAYS 2515) [high GPM only]
CAutoflow Valve w/PT Ports (YR Flow Valve)
MManual Balancing Valve
YY-Strainer
FAutoflow Valve w/PT Ports (YR Flow Valve) + Strainer
DAutoflow Valve + Strainer
EAutoflow Valve/Shutoff combo + Strainer
GManual Balancing Valve + Strainer
XNo Flow Valves
18 CONDENSATE
PUMP
IInternal Condensate Pump
EExternal Condensate Pump
XNo Condensate Pump
19 FILTERS
AMERV 8 Filter
BMERV 12 Filter
CMERV 13 Filter
WWashable Filter
PFiberglass Filter
XNo Filter
20 AIR VENTS
MManual Air Vent
TBleed Tee
XNo Air Vent
21
VALVE
SHIPPING
OPTIONS
AAssembled
SShipped Loose
XNo Valves

Precautions and preparations listed are for general knowledge and to define basic guidelines. Local codes and existing practices should be observed and preformed by a professional.
Due to Ice Air’s ongoing product development programs, the information in this document is subject to change without notice.
13
Notes or Technical Comments

Precautions and preparations listed are for general knowledge and to define basic guidelines. Local codes and existing practices should be observed and preformed by a professional.
Due to Ice Air’s ongoing product development programs, the information in this document is subject to change without notice.
14
Notes or Technical Comments

Precautions and preparations listed are for general knowledge and to define basic guidelines. Local codes and existing practices should be observed and preformed by a professional.
Due to Ice Air’s ongoing product development programs, the information in this document is subject to change without notice.
15
Notes or Technical Comments

Precautions and preparations listed are for general knowledge and to define basic guidelines. Local codes and existing practices should be observed and preformed by a professional.
Due to Ice Air’s ongoing product development programs, the information in this document is subject to change without notice.
16
Twelve (12) Month Warranty of entire
Packaged Terminal Equipment
Ice-Air, LLC (“Ice Air” or the “Company”) warrants, solely
to the person or entity that directly purchased the packaged
terminal system from the Company (the “Original Owner”), that
the entire packaged terminal system is free from defects in
material and workmanship for a period of twelve (12) months
from the date of delivery (the “Twelve Month Warranty”).
Any part or portion thereof which becomes defective under
normal use during the period of this warranty will be repaired
or replaced, provided Ice Air’s examination shall prove to
its satisfaction that the part was or became defective under
normal use. Ice Air’s obligations under this warranty are
subject to the satisfaction of the conditions set forth in the last
paragraph of this Section and are limited to: (a) repairing the
defective part or (b) furnishing a replacement part provided
the defective part is returned to Ice Air, without shipping
damage, transporting charges prepaid. No reimbursement will
be made for expenses incurred in making field adjustments or
replacements unless specifically authorized in writing by the
Company.
Except as otherwise provided in the last sentence of this
paragraph, the Company is not obligated under this warranty
for field labor such as service for inspection, removing,
packing and/or reinstalling water source unit, nor for the
return transportation charges. In addition, the Company is not
obligated under this warranty to make reimbursement of the
labor or service charges of any other party. Notwithstanding
the foregoing, labor provided by or at the direction of the
Company during the twelve (12) month period from the
date of delivery referred to in the initial paragraph above, in
connection with the Twelve Month Warranty of parts provided
in the initial paragraph above, is included in such warranty,
solely in the case in which a packaged terminal system is sold
by the Company to an Original Owner for use in a new facility
to be constructed and located in the greater New York City
metropolitan area. For the avoidance of doubt, except in the
case described in the preceding sentence, the Company has
no obligation under this warranty to provide for field labor or to
make reimbursement of the labor or services charges of any
other party, provided, however, that the Company, in its sole
and absolute discretion, may elect to do so, so long as (i) such
election is set forth in a writing signed by the Company and (ii)
the facility at which the applicable packaged terminal system
is or will be installed is located in the greater New York City
metropolitan area (the “Metropolitan Area”).
The obligations of the Company set forth in the preceding
paragraphs of this Section are in all cases subject to the
satisfaction of the following conditions: (x) the Company
shall have received proof, satisfactory to the Company, of
the purchase by the Original Owner from the Company of
the packaged terminal system that is the subject of the
Original Owner’s claim, (y) all amounts due and payable to
the Company on or prior to the date of such claim in respect
of such packaged terminal system shall have been paid in full
and (z) nothing shall exist or occur that relieves the Company,
in accordance with the terms of this agreement, from the
performance of its warranty obligations hereunder.
OPTIONAL Extended Refrigeration
Circuit Warranty
2nd – 5th year compressor parts only; labor not included
The Optional Extended Refrigeration Circuit Warranty MUST
be purchased from Ice Air within thirty (30) days from date of
delivery to be valid. The hermetically sealed refrigeration circuit
(consisting of the motor, compressor assembly, evaporator
coil, coaxial / condenser coil, and interconnecting tubing)
is warranted to the Original Owner for four additional years
from date of the expiration of the twelve-month Warranty.
Components under this warranty will be supplied at Ice Air’s
expense provided the failed component is returned to Ice Air.
This optional warranty does not include any other parts of the
equipment such as fans, fan motors, controls, cabinet parts,
electrical relays, capacitors, protective devices, or wiring. Ice
Air is not obligated under this warranty for field labor such as
service for inspection, removing, packing, and/or reinstalling
the refrigeration circuit, nor for return transportation charges.
In addition, the Company is not obligated under this warranty
to make reimbursement of the labor or service charges of any
other party. Ice Air reserves the right to make a handling and
inspection charge in the case of parts or equipment improperly
returned as defective and/or as being in warranty.
To obtain assistance under the parts warranty or to purchase
the optional extended warranty, simply contact Ice Air
Customer Service at 80 Hartford Avenue, Mount Vernon, New
York 10553 Phone 914-668-4700.
Additional warranty options include:
2nd – 5th year full unit parts only warranty
2nd – 5th year compressor parts and labor
warranty, so long as such labor is performed in the NY
Metropolitan Area
2nd – 5th year complete parts and labor warranty (Full
unit coverage), so long as such labor is performed in
the NY Metropolitan Area.
All Warranties (which must be purchased separately)
constitute the Original Owner’s sole remedy. They are given in
lieu of all other warranties. Ice Air is not liable for incidental or
consequential damages, whether the theory is breach of this
or any warranty, negligence, or strict tort. No person (including
any agent, salesman, dealer, or distributor) has authority to
expand Ice Air’s obligation beyond the terms of these express
warranties, or to state that the performance of the product
is other than that published by Ice Air. In addition, neither
the Original Owner nor any such person has the right to sell,
transfer or assign, or attempt to sell, transfer or assign, any
rights of the Original Owner in or to the warranties provided for
herein, no such sale, transfer or assignment shall be binding
upon Ice Air and any such sale, transfer or assignment is null
and void and of no force or effect.
General Conditions
The above warranties are void if Ice Air’s equipment has
been damaged, misused, subjected to abnormal use or
service or its serial number has been altered, defaced, or
removed, or payment for the equipment is in default. Ice Air
is not responsible for service to correct conditions due to
misapplication, faulty or improper installation, inadequate
wiring, incorrect voltage conditions or unauthorized opening
of the refrigeration circuit, nor forconsequential damages.
In case Ice Air’s equipment is installed in conjunction with
cabinets, grills, louvers, controls, or other parts manufactured
by others, these warranties shall apply only to Ice Air’s
manufactured portion of the equipment. The conditions of
the standard warranty plan are effective for 12 months from
the date of equipment delivery. Ice Air reserves the right to
make a handling and inspection charge in the case of parts or
equipment improperly returned as defective and/or as being
warranty.
Important Disclaimers
Ice Air Has No Responsibility For:
(A) Certain Damages
The following are the responsibility of the user. None of the
following constitutes a manufacturing defect, and each is
expressly excluded from the warranty plan:
1) Failure of unit to operate satisfactorily due to improper
amount of air on evaporator coil or air supply to air cooled
condensers.
2) Damage to unit or unsatisfactory operation due to improper
cleaning of evaporator coil or use of unit in corrosive
atmosphere locations such as chemical plants, refineries, or
salt spray areas.
3) Damage to unit from unsatisfactory operation due to blown
fuses, inadequate or interrupted electrical service, use of
improper electrical protective devices or operation of unit
on power supply other than covered by nameplate rating
of unit.
4) Damage due to failure to properly maintain unit.
5) Damage due to transportation or handling prior to and
during installation.
6) Damage due to accident or from alteration, improper
installation or tampering.
7) Failure to clean or replace filter timely.
8) Misapplication of equipment.
9) Damage due to deviation from original design and intended
use of equipment.
10) Damage due to use of additional accessories either
unapproved or approved but modified or manipulated.
(B) Installation
Ice Air is not responsible for the design, execution, and
performance of the installation method or any of the accessory
items used during installation such as seals, caulking,
weatherproofing, supporting structures, attachment means,
louvers and frames supplied by others.
(C) Check, Test and Start
Check, Test and Start of the air conditioners by an experienced
person is the responsibility of the installing contractor. This
consists of physically confronting each conditioner operating
in both heating and cooling modes and correcting any minor
deficiencies noted. After the equipment leaves the factory, it
may become damaged or maladjusted during transportation
or on the job. Sometimes wires are disconnected accidentally,
or fan motors move on their bases due to rough handling,
causing fans to strike; a component(s) may be inoperable.
The correction of such conditions is part of the Check, Test
and Start. Note that unless otherwise specifically agreed to
in writing, Ice Air has no obligation to perform, nor does the
price of its equipment include field labor in connection with
the performance of, these Check, Test, and Start procedures
(or the like).
80 Hartford Avenue, Mount Vernon, NY 10553
Tel: 877-ICE-AIR-1 (877-423-2471)
Fax: 914-668-5643
email: service@ice-air.com
www.ice-air.com
© 2023 by Ice Air, LLC ICE6064.2 11/23
Limited Warranty
Other manuals for CHPW
2
Table of contents
Other ICE AIR Heat Pump manuals
Popular Heat Pump manuals by other brands

Danfoss
Danfoss Optyma Slim Pack OP-LPQE Series instructions

AERMEC
AERMEC NRW 27 Technical and Installation Booklet

Samsung
Samsung CNH NDB Series Technical data book

AFRISO
AFRISO PrimoTherm 180-1 operating instructions

Aquacal
Aquacal GBB installation manual

poolstar
poolstar POOLEX JETLINE PREMIUM FI Series Installation and user manual

atecpool
atecpool SIROCCO AVHP265 user manual

Trane Technologies
Trane Technologies Axiom EXW Installation, operation and maintenance

Aquacal
Aquacal 100 Quick Start, Run & Check

CANVAC
CANVAC Q HEAT T Series user manual

Carrier
Carrier WeatherMaker 50KCQ A04 Series installation instructions

Fujitsu
Fujitsu Waterstage DHW Series operating instructions