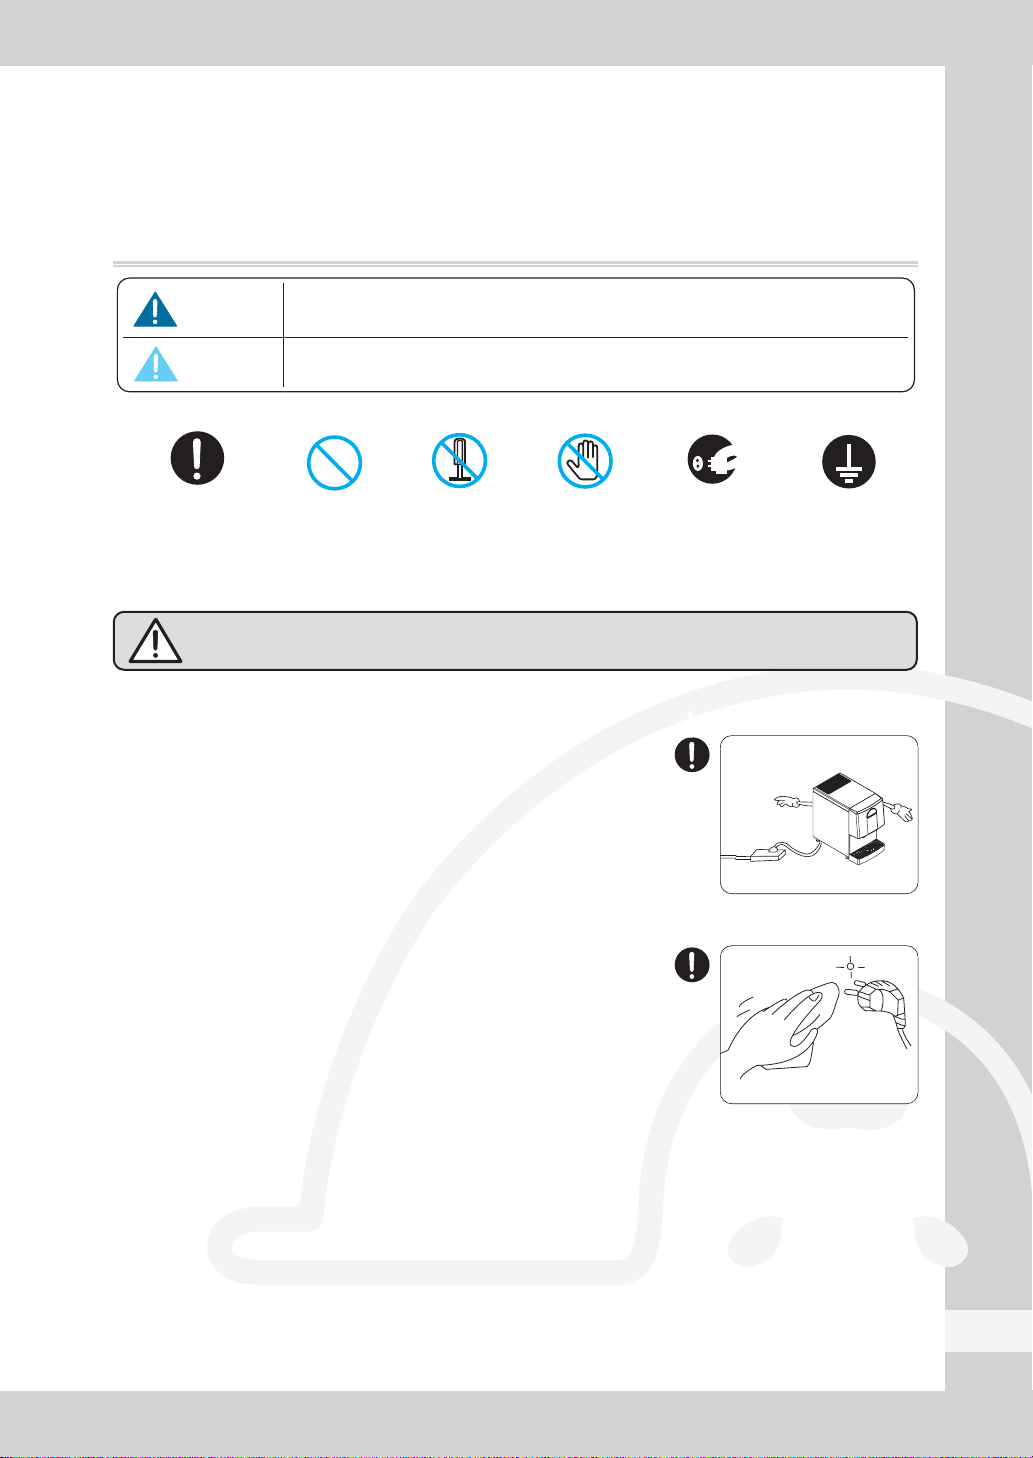
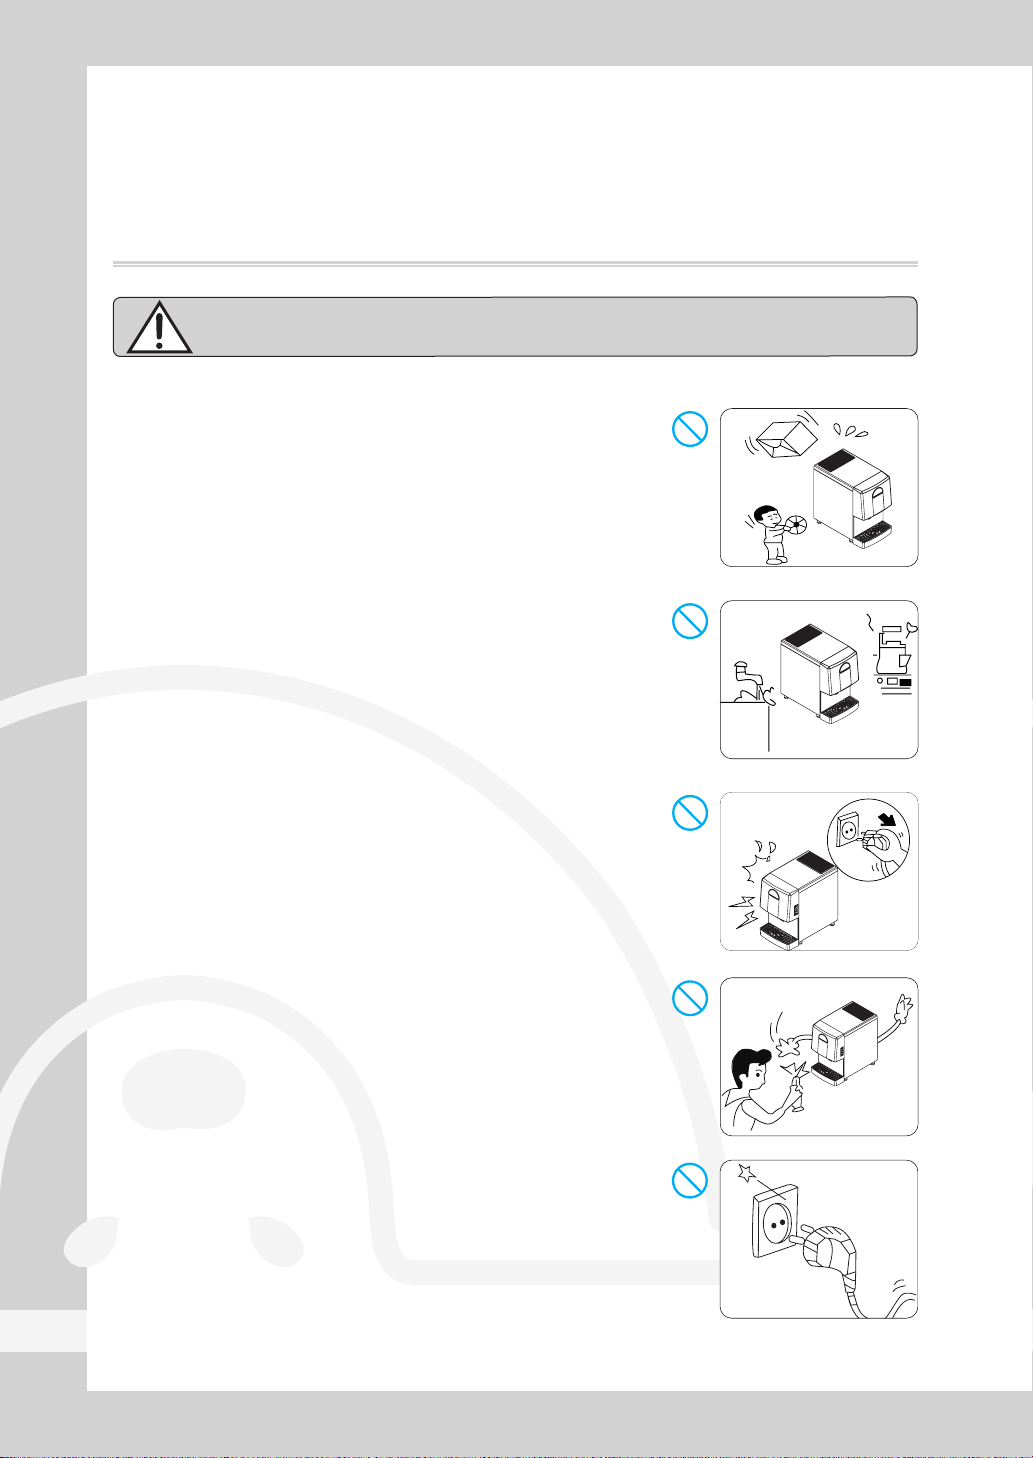
icetro ID-0160-AN User manual

I c e / W a t e r D i s p e n s e r
User's Manual
MODEL : ID-0160-AN
※ This machine cannot be used in any other country
where the electric voltage for its power supply is not available.
※ This product is designed for indoor installation.
Please be sure to install it indoors.
※ The external appearance, design, color, and/or components
of this machine may be changed without prior notice for the sake
of the Company's product manufacture.
※ Please read the preparations for safety.
※ For maximum hygiene, be sure to clean and sterilize the product
on a daily basis.

2
We Think of Customer Satisfaction
INDEX
1. Safety Precautions 3~7
8
9~10
11~15
11~12
13
14
15
16~19
17
18
19
19
20
20
21~24
2 1
22
23~24
25
26
27
28
4. How to install
- The installation place
- How to Disassemble the Panel
- Connection method for water supply and drainage
- About grounding
2. Product Specification
3. Appearance and Size
5. How to start the product
- Button operation
- Function button description (FND display window)
- Three drainage functions
(forced drainage, automatic draining, water drainage)
- Stop switch
7. Maintenance, repair and disinfection
- Maintenance schedule
- Cautions for cleaning the external panel(stainless steel)
- How to clean and disinfect
6. Required precautions to prevent frost
- Water removal in water tank and evaporator
9. Error type
8. Circuit diagram
10. Before Requesting Service
11. Product Warranty
- Always keep the instruction manual in an accessible and visible place. -

3
Warning
1. Safety Precautions
When there is a risk of causing physical problems such as death or serious injury
in the event of improper use.
When injury or damage to property such as house or furniture may occur
in the event of improper use.
Warning
Caution
SHOULD BE DONE PROHIBITION GROUNDEDDO NOT
DISASSEMBLE
DO NOT
TOUCH
DISCONNECT
POWER PLUG
◆ An electrical fire may be caused by a receptacle holding
more than one item.
◆ Do not use an adapter or an extension cord.
Use a single receptacle for the ice machine.
◆ A fire may occur if plug is not cleaned.
Clean the plug if covered in foreign material or dust etc.
with a clean, dry towel.
Clean the plug

4
We Think of Customer Satisfaction
Warning
◆ The objects or containers may fall and cause water to leak
and the insulation may be weakened, resulting in a fire
due to a short circuit.
◆ Insulation may be weakened, resulting in short circuit,
electric shock, or fire.
◆ If you continue operating in abnormal conditions,
there is a risk of fire or electric shock.
◆ There is a risk of fire due to electric shock or short circuit.
◆ Risk of explosion or fire.
Do not place heavy objects or containers containing
water on the ice maker.
Do not install the product in a humid place or
where there is a risk of water splashing.
Do not use
If the product malfunctions, such as smoke or burning
smell, unplug the power cord to stop operation.
Do not use
Do not use if the outlet is loose or has a problem.
Do not use
Do not use flammable spray around the ice maker.

5
Warning
◆ Ignition or abnormal operation is dangerous and may cause more trouble.
◆ There is a danger of the ice maker twitching or falling, resulting in injury.
◆ In particular, please do not let children hang on the reservoir not fixed
to the product
◆ There is a danger of electric shock.
◆ The ice reservoir may break or become damaged.
◆ The cord or plug may be peeled and there is a risk of fire
or electric shock.
◆ If the cord or plug is peeled or damaged, be sure to ask the service
to replace it.
Disassembly forbidden
Do not modify or repair the product yourself.
Prohibition
Do not let children hang on the product.
Do not touch
Do not touch or pull on the power plug with wet hands.
Do not touch
Do not damage the inside of the ice maker with a sharp tool.
Prohibition
Do not allow electrical cords or plugs to be pinched or twisted.

6
We Think of Customer Satisfaction
Warning
About the power strip
When using multi-tap, please use 250V, 16A or more.
◆ It may cause electric shock or fire.
◆ It may cause fire or spark when unplugged by plug wire or driver.
◆ There is a risk of machine failure or electric shock due to short circuit.
◆ Do not plug in multiple plugs at the same time. Connecting multiple plugs
to a power strip will cause a fire.
Disconnect power plug
When not in use for a long time, remove ice and water
(to prevent winter frost), and unplug the power cord
from the outlet.
Disconnect power plug
When cleaning dust or replacing parts,
unplug the power plug first.
Disconnect power plug
When unplugging, grasp the plug body and remove it
Grounded
Please be sure to ground.

7
Caution
◆ New users need a manual for safe use.
◆ There is a risk of injury if you slip on the ice maker or get hands
or feet in the bottom of the side.
◆ The bottom of the ice maker have iron plates and
various parts which may cause injury.
◆ If it is plugged in immediately, it may cause a trouble in operation
of the freezer and it may cause malfunction of the ice maker.
Caution
If there is a risk of slippery water or oil on the floor near
the ice maker, please wipe it.
Hand over
When transferring this ice maker to another person,
please hand it along with the instruction manual
Do not put your hands or feet on the bottom of the ice maker.
If you unplug the power plug from the wall outlet and plug
it back in again, wait at least 5 minutes before reinserting.
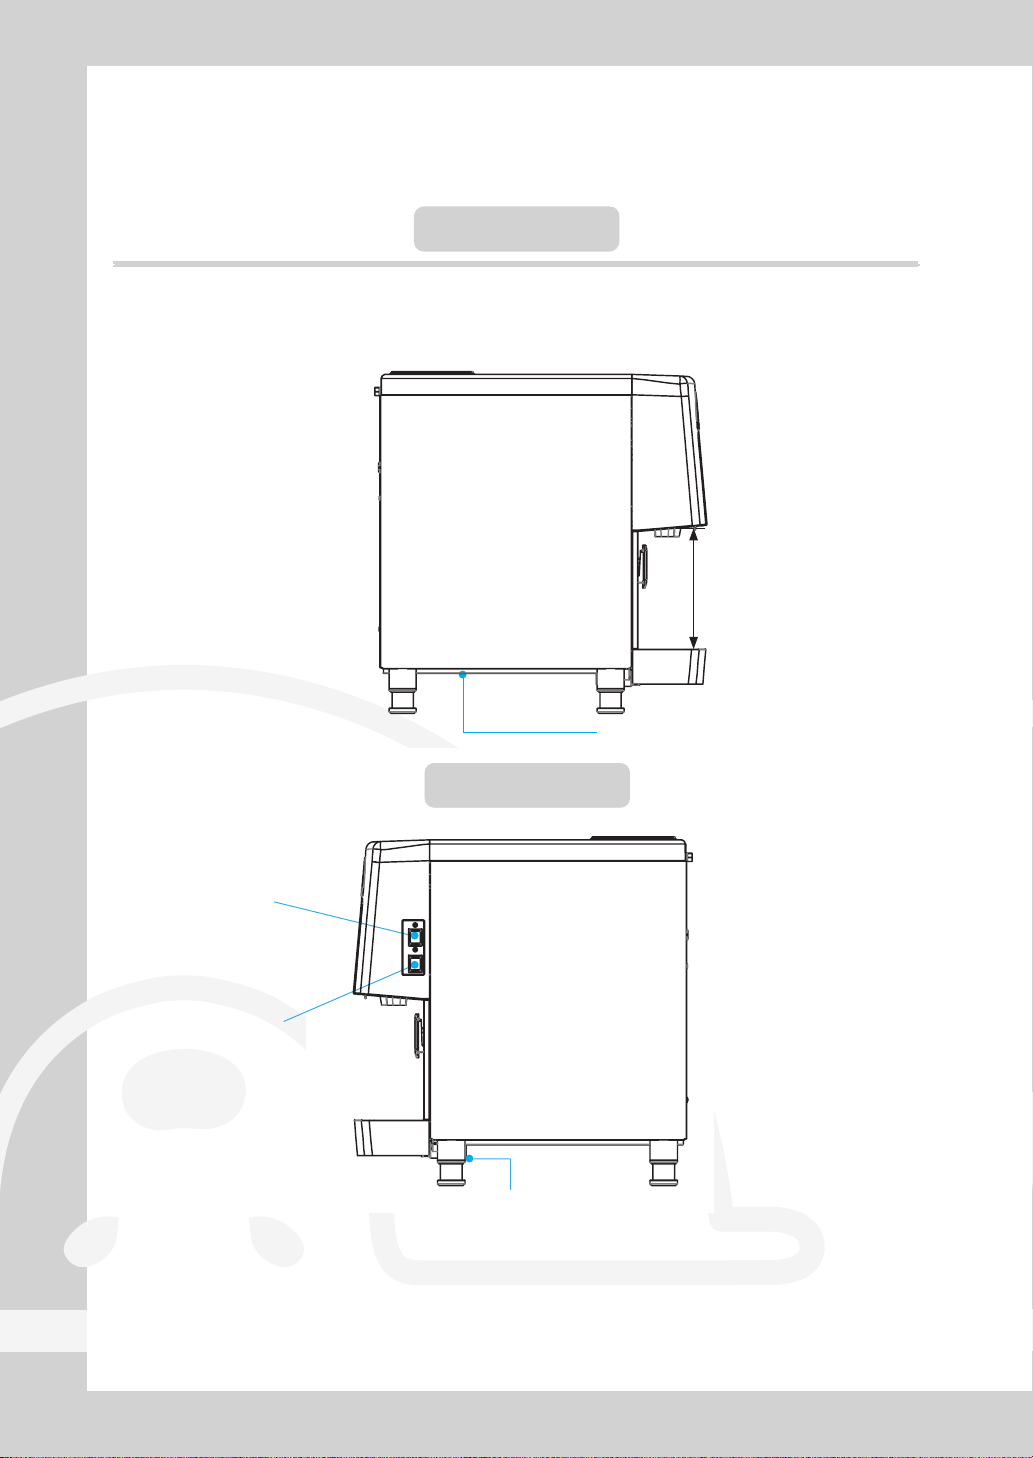
For areas where water contains much calcareous sediments, be sure to install
a calcium filter at the water inlet port (calcium may reduce the lifecycle
of the product).

8
We Think of Customer Satisfaction
2. Product Specification
Category Specification
Model
ID-0160-AN
Ice shape
Nugget
※ Maximum capacity
Ambient temperature 50℉,
Water temperature 50℉
160 lb/day (73kg/day)
Storage capacity
6.2lb (2.8kg)
※ Size (W X D X H)
- Foot excluded
13.8" X 23.8" X 22.8"
(350X605X580mm)
Power Supply
AC 115 V 60 ㎐, 1PH
Current consumption
2.75 A
Weight Before packaging
101 lb (46kg)
After packaging
117 lb (53kg)
Compressor
1/6 HP
Condensation method
Air-cooled
Refrigerant
R-134A
Deceleration
motor
Power Supply
AC 115 V 60 ㎐, 1PH
Rated output
40 W
Discharging method
Solenoid
Installation
environment
standard
Specification
50~100 ℉ (10 ~ 38 ℃)
Water temperature
50~90 ℉ (10 ~ 32 ℃)
Supply water
pressure
20~80psi
※ Maximum production is based on ambient temperature and water temperature 50 ℉.
However, the deviation may occur depending on the conditions of the installation
environment, and the deviation may increase at high temperature conditions such as
the summer season.
※※ Depending on the specifications of the reservoir, the size may be different,
please check before purchase.

9
3. Appearance and Size
Front
Top Bottom
Rear
23.9
Upper vent
25~25.4
Drainbox
Height-adjustablefeet
Iceexit
Icedischargelever
13.8
Displaypanel
13.8"(350mm)
25~25.6"(634~650mm)
23.8"(605mm)
Waterinlet
Drainoutlet

10
We Think of Customer Satisfaction
좌측면
우측면
Icemaking/wash
switch
Drainoutlet(drainbox)
Powerswitch
Bottomfilter
208
8.7"(220mm)
Left
Right

11
4. How to install
The installation place is like this ...
[Please follow the procedures when moving the machine]
⊙ Where there is no heat source ...
◆ Install in a place where there is no heating device such as
a fireplace or a gas range, and do not install in an area
outside the range of 50~100℉.
⊙ Where the space with the wall is reserved ...
◆ For normal operation, install the ice maker at least 7.8"
away from the wall.
◆ For cleaning and maintenance of the auger, 39.4"
space should be reserved above the top of the ice maker.
※ Never block the upper vents and do not place any load on it.
20cm 39.4"
※ Two people should hold the bottom
of the machine together to move it.
※ Do not hold onto the door
of the machine.
It might damage the door.
Optimal
Temperature
Rear side
of ice
making
system
(X)(O)
7.8"
Wall

12
We Think of Customer Satisfaction
⊙ Please install in hygienic place.
◆ Ice is used for edible purposes, so please always install
the product in a sanitary and clean place.
⊙ Installation should be indoors.
◆ Install the drain hose at an angle so that drainage is good.
◆ Do not install outdoors.
⊙ Install in a child-restricted area.
◆
Please be careful about the safety accident of a child
and do not let dangerous jokes such as picking up
the ice in particular.
⊙ Where good ventilation is secured...
◆ If the ventilation is poor, the ICE MAKING
ability will decrease.
◆ It is recommended to install it on a flat surface because
there is a possibility that the product will fall and cause injury
when the installation is made in a sloping place.
⊙ Installation is on a flat ...
◆ Unstable installation may cause vibration and noise.
(Installed within 1˚)
for
◆ Make sure to observe the following.
● Since the product makes use of water, proper water supply and draining facility are required.
● Water may leak during installation or operation for diverse reasons. Thus, proper draining must be prepared.
Since there is danger of electric shock due to moisture from leak, be sure to observe the following:
1. When installing the product indoors, be sure to have a natural drainage facility and make
the floor waterproof, especially if the floor may get damaged due to leak.
2. A draining outlet must be available at the installation site; be sure to connect the drain hose.
3. Make sure that the floor is sloped so that any leaked water gets drained away
even if the drain hose gets dislodged or damaged. Install a water overflow prevention
wall to prevent damage.
※ Adjust the height by turning the footing if the floor is sloped to set it stably.
※ The manufacturer will not be liable for any problem arising from failure to comply
with the warnings above, dislodged / damaged water supply hose, or inappropriate drain facility.
Warnning

13
How to Disassemble the Panel
1. Top Panel: Loosen the 2 rear screws, push the top panel back,
and lift it up to disassemble.
4. Front Cover: After removing the top panel, remove the fixing screws
and disassemble by tilting it forward.
2. Side Panels: Remove the front drain box and the top panel, loosen
the front and rear lower screws, and then spread the bottom left
and right, then lift up to separate.
3. Front Panel: Loosen the two lower left and right screws, pull the lower part
toward the front, and lower it to disassemble.
※ Please assemble in the reverse order of disassembly.
※ Ice Chute Cover: It is disassembled by pulling the
lower part toward the front. When assembling, align it
with the upper groove and push the lower part upward
to fix the hook.
(If the ice outlet cover is removed, the dispensing
operation does not work)
Frontpanel
Sidepanel
Sidepanel
Top Panel

14
We Think of Customer Satisfaction
If the temperature of the ICE MAKING water supply is too high, the amount of ICE MAKING
may be reduced, If the water pressure is too low, it may not be possible to freeze.
In this case, an auxiliary hydraulic pump should be installed.
Connect the ø6.35 PE TUBE to the bottom right of the product as shown in the picture
and secure the clip to prevent hose detachment.
[ Connection of water and drainage hoses ]
Division Proper water temperature Water pressure Hose to be used
ICE MAKING water supply 50~90℉ 20~80psi NPT 3/8"
ICE MAKING drainage - - NPTF 3/4"
Connection method of water supply and drainage
Please connect a hose with an inner diameter of Φ20mm(Φ0.78") or more for the ice
making drain hose and the drain outlet should be 5cm(1.97") above the drain floor level.
(If the drain outlet dip in the drainage, the drainage may flow back into the ice maker
and damage the product and the floor.)
※ After the installation is complete, please operate the product and check whether
there is leakage in the water supply and drainage parts.
Be careful not to bend the drainage hose during
the installation and also confirm that the hose is not
exposed to fire or sharpness which may result
in the hose burst.
(This will become the cause of the PL accident
and the manufacturer shall not be held responsible.)
Waterinlet
Drainoutlet
Drainfloorlevel
Ice-makerdrainoutlet
Drainbox
5cm(1.97")or more
Option

15
About grounding
※ Please be sure to ground to prevent electric shock.
⊙ Grounding method - When there is a grounding
terminal
terminal
Do not ground in these places.
Never connect to a gas pipe, water pipe, pipe, lightning rod,
telephone line, or connection.
※Plastic water pipes and non-insulated materials do not have a grounding effect.
POWER
OUTLET
Copper plate
Equal to or
more than
75 cm
Ground wire
A Ground wire A Ground wire
Grounding
terminals
Grounding
is not
needed
Incaseofpluggingtheicemakerintoanpower
outletequippedwithagroundingterminal,extra
groundingisunnecessary.
Incaseofpluggingtheicemakerintoanpower
outletwithoutagroundingterminal,connectthe
groundwiretothecopperplateandthenburyit
undertheground.

16
We Think of Customer Satisfaction
⊙ Water supply hose protection
Do not place heavy objects on the water supply
hose leading to the water supply, or keep the hose
from treading.
⊙ Proper water pressure, water temperature,
ambient temperature
Please use this ice maker only in the area where water
pressure is 20~80psi, water temperature is 50~90℉
and ambient temperature is 50~100
℉
.
◆ This icemaker operates only on rating volts.
Plug it into a rating outlet only.
◆ Please open the faucet and let the water supply.
◆ Open the front door and turn on the power switch to start the
Ice making operation.
◆ Turn the ICE MAKING-OFF-WASH switch to ICE MAKING
◆ There is a slight difference depending on the ambient
temperature and water temperature, ice starts to be generated
from about 3 minutes after starting the ice making operation,
After about 70 minutes, the reservoir will be full of ice.
(You can use ice after about 10 minutes.)
Please connect only the water you can drink.
1. Power connection
2. Water supply
3. ICE MAKING operation
4. Start ice production
5. How to start the product
ICE MAKING
OFF
WASH switch
Power switch
Water pressure: 20~80psi
Water temperature: 50~90℉
Ambient temperature: 50~100℉
ONLY ON
VOLTS!
ON
OFF
OPERATION
ICE
WASH
OFF
l
ㅇ
l
ll
ㅇ

17
Button Operation
ICE WATER ICE&WATER
ICE button lamp
-
If you turn on the power, this will always come in first. The initial water subtraction
is done three times and then the ICE MAKING operation is proceeded. If you put
the cup in the ice exit, you can discharge the ice for the time set in F1.
WATER button lamp
- Press the button to light up. If you put the cup on the ice exit, you can
discharge the water for the time set in F1.
ICE + WATER button lamp
- Press the button to light up. If you put the cup on the ice exit,
you can simultaneously discharge ice and water for the time set in F1.
When ERROR occurs
- ICE-WATER-ICE & WATER button will flicker in order and will disappear
when restarting after the action against the ERROR.
Service cycle setting notification (parts check / replacement cycle notification)
- If the motor is running for more than 10,000 hours, the corresponding lamp
blinks for 5 seconds in the initial stage of the ice maker.
- If the motor is operated for more than 11,000 hours, all the buttons will blink
for 5 seconds in 1 hour cycle.
※ If all the buttons are flashing, it is a signal to check / replace regular
replacement parts and you should contact the customer service center
(paid service).
Failure to check / replace parts may result in higher repair costs.

18
We Think of Customer Satisfaction
F. 1 (Maximum Discharge Time)
① SOLENOID Maximum operating time adjustment function.
② 3rd, 4th digits: 20 seconds (5 seconds ~ 30 seconds, Set Unit of one second).
F. 2 (Complete removal of ice in the reservoir)
① This function can be entered in "OFF" state of ICE MAKING-OFF-WASH switch.
② Press two buttons (WATER, ICE) simultaneously for 3 seconds and Button part LED lights up.
③
Press the discharge lever for continuous operation of SOLENOID and the motor. Keep 'ON' state.
F. 3 (Automatic ice discharge function)
① When ICE, WATER & ICE button is selected, ice is automatically emitted for the set time.
② Automatic operation is not possible when OFF is set. (Manual operation)
③ Automatic discharge is performed for the set time of At01 ~ 99.
F. 4 (Initial water subtraction function)
① It operates first when "ICE MAKING" switch is operated.
② FND 1st, 2nd digits (drain time) 30 seconds (oF ~ 99 seconds, Set Unit of one second)
③ Water supply operation after drainage to high water level.
④ FND 3rd, 4th digits (number of repetitions) Standard: 3 times (1 ~ 9 times)
F. 5 (Automatic drain function)
① It operates when "ICE MAKING" switch is operated.
② FND 1st, 2nd digits (drain time): 2 seconds (oF ~ 9 seconds, Set Unit of one second)
③ FND 3rd, 4th digits (drain interval): 1.0 hour (0.5 ~ 9.5 hours, every 30 minutes)
F. 6 (ICE + WATER volume control)
① 1st, 2nd digits Ice time Default 5 seconds (up to 99 seconds)
② 3rd, 4th digits Water time Default 5 seconds (up to 99 seconds)
F. 7 (UV LAMP time adjustment)
① 1st, 2nd digit lighting time Default 3 minutes (99 minutes possible)
② 3rd, 4th digits off time Default 1 hour (9 hours available)
F. 8 (Notify service period setting)
①
A.1.0 After using 10,000 hours, the corresponding mode LED blinks for 5 seconds (for the first 5 seconds during ice making)
② A.1.1 After using 11,000 hours, all LEDs blink for 5 seconds (1 hour cycle)
F. 9 (Cumulative uptime)
①
The FND display is displayed in year, month, day, and hour, and is displayed in order from right to left.
② Cumulative operation time of product is expressed in hour unit.
③ Calculation example: 12 months for 1 year, 30 days for 1 month, 24 hours for 1 day.
F. 10 (Change temperature unit)
Function of setting the unit of temperature in degrees Celsius or Fahrenheit
F. 11 F. 12 F. 13
Evaporation inlet temperature display
Evaporation outlet temperature display
Choose ice and water discharge method
ordE : Discharge ice first and then discharge water
join : Simultaneous discharge of ice and water
Function Button Description (FND Display Window)
※ Setting value reset function
- Pressing three buttons of UP,
DOWN, and SET for 3 seconds
at the same time will set all
setting values to default values

19
Three Draining Functions(Forced Draining, Automatic Draining, Water Draining)
Stop switch
1) Forced drainage function (Must be implemented to prevent freezing in winter storage.
Please also use this function for cleaning the inside.)
- Turn on the power switch and press the
"DOWN + SET" button simultaneously for 3 seconds with any signal on the
FND display. (30 seconds)
2) Automatic drain function (F. 5)
- Turn on the power switch and turn the ice making
switch to "ICE MAKING" to start the operation.
①
FND 1st, 2nd digits (drain time): 2 seconds (oF ~ 99 seconds, Set Unit of one second).
② FND 3rd, 4th digits (drain interval): 1.0 hour. (0.5 to 9.5 hours, every 30 minutes)
3) Initial water draining function (F. 4)
- Turn the power switch off and then on again (the ICE MAKING-OFF-WASH switch
at "ICE MAKING" position) to operate the function.
① Clean the water line and ice making cylinder thoroughly.
② FND 1st, 2nd (drain time) 30 seconds (oF ~ 99 seconds, Set Unit of one second).
③ Water supply operation to high water level after drainage.
④ FND 3rd, 4th digits (number of repetition) Reference: 3 times (1 ~ 9 times).
With the power switch turned on, turn the
"ICE MAKING-OFF-WASH" switch to center OFF,
then the ice making stops and the motor runs for
another 60 seconds.
This function protects the motor by removing the ice
remaining in the product.
If you sell the remaining ice even when it is
OFF, ice discharging will be done.
(At this time, water, water + ice will not work.)
ICE MAKING
-OFF-WASH switch
Power switch
ON
OFF
OPERATION
ICE
WASH
OFF
l
ㅇ
l
ll
ㅇ
MODE

20
We Think of Customer Satisfaction
6.
Required Actions to prevent frost
If the ambient temperature falls below 32℉ , water will freeze inside the machine and machine
operation will be impossible.
If you do not use for a long period of time in winter, be sure to completely remove the ice making
water inside the body by following the instructions below. If you do not remove the ice making
water or if it is insufficient, it will cause serious damage to the product.
This shall not be guaranteed by the manufacturer and may result in a lot of repair costs.
Please observe the following points.
Caution
1. Turn on the power switch and press the
DOWN + SET button at the same time for
3 seconds with any signal on the FND window.
Forced drainage will be done for 30 seconds.
2. Turn off the power switch and disconnect the power
plug from the outlet.
3. Remove the left panel → the front panel.
4. Remove the evaporator cylinder drain hose clamp
and remove the hose, and wait until the ice in the
evaporator cylinder completely melts down.
(It is possible to remove internal water quickly by
using compressed air gun etc.)
5. Reassemble the evaporator cylinder drain hose
and tighten the clamp.
6. Assemble in the order of left panel → upper panel
→ front panel
Water Removal in Water Tank and Evaporator
Clamp
ON
OFF
OPERATION
ICE
WASH
OFF
l
ㅇ
l
ll
ㅇ
MODE
Other manuals for ID-0160-AN
1
Table of contents
Other icetro Water Dispenser manuals
Popular Water Dispenser manuals by other brands

ClearStream
ClearStream 600DAT manual

GE
GE FX12M installation instructions

Culligan
Culligan HE 1.25 Series owner's guide

Hoshizaki
Hoshizaki DM-200B instruction manual

Hellenbrand
Hellenbrand AQUA Systems SmartChoice Gen II O3 Installation, operation and service manual

BWT
BWT AQA Perla Installation and operating manual