manuals.online logo
Brands
  1. Home
  2. •
  3. Brands
  4. •
  5. Icom
  6. •
  7. Receiver
  8. •
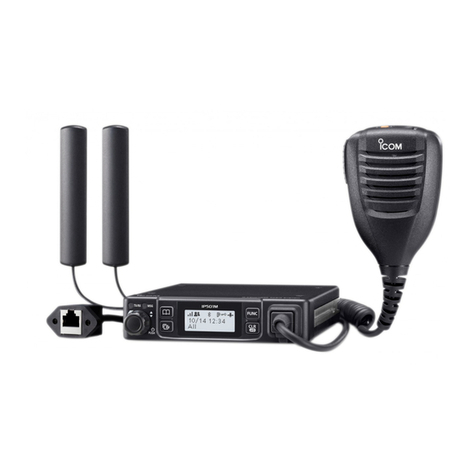
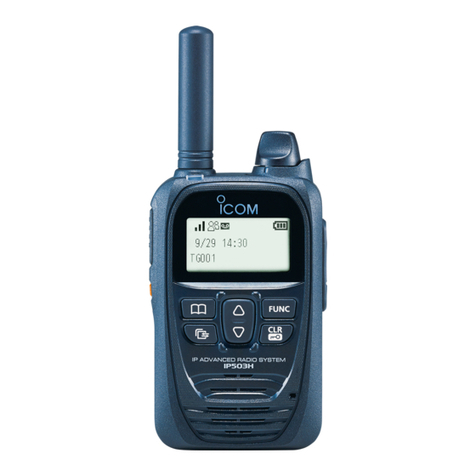
  9. Icom IP501H User manual

Icom IP501H User manual

GUIDE
1. SUPPLIED ACCESSORIES
2. PANEL DESCRIPTION
3. ATTACHING THE BELT CLIP
4. ATTACHING THE ANTENNA/HAND STRAP
• Battery pack(BP-272)…………………… 1 • Belt clip (MB-135) ……………… 1 • Antenna …………………………… 1
• Hand strap ………………………………… 1
*1 Ask your dealer about the assigned function.
*2 While connecting an optional speaker microphone, the audio is
not output from the internal speaker.
NOTE: Instructions and screens on this guide may differ,
depending on the settings.
NOTE: You can use only the supplied antenna.
LRemove the battery pack before attaching the belt clip.
IP ADVANCED RADIO SYSTEM
Supplied
hand strap
Hold this part to turn.
When connecting optional equipment
• Be sure to turn OFF the
power before connecting
or disconnecting optional
equipment to or from the jack.
• Remove the cable by holding
the plug not cable.
• Insert the plug securely when
connecting the cable.
CAUTION:
Attach the jack cover when no optional equipment is connected.
Jack cover
Plug
Turn OFF
Supplied antenna
Antenna
[PTT] switch
[Option]
key*1
[PWR/VOL]
dial
Function
screen
Keypad
(Refer to
page 3.)
Microphone
Speaker*2
[TX/RX] indicator
IP501H
IP503H
Slide the belt clip in the direction of the arrow until
the belt clip locks in place, and makes a ‘click’ sound.
Supplied belt clip
Battery pack
q
w
Lift the tab up q, and slide the belt clip in
the direction of the arrow w.
Thank you for choosing this product.
READ ALL INSTRUCTIONS carefully and completely
before using this product.
11. TRANSMITTING AND RECEIVING
While holding down [PTT], speak into the microphone
at your normal voice level.
• The [TX/RX] indicator lights red while [PTT] is pushed.
1
When a Call is received, the [TX/RX] indicator lights
green.
2
Turning OFF the power
Turn [PWR/VOL] maximum counter clockwise until it
makes a "click" sound.
All Call transmitting screen
All
10/4 12:57
All
10/4 12:58
Blinks when a Call is received
Receiving an All Call
While receiving a call, push [PTT] to talk in the full
duplex mode* like a telephone call.
• In the Full Duplex mode, the [TX/RX] indicator lights
orange.
3
Icom, Icom Inc. and the Icom logo are registered trademarks of Icom Incorporated (Japan) in Japan, the United States, the
United Kingdom, Germany, France, Spain, Russia, Australia, New Zealand and/or other countries.
A7415D-2EX-1 Printed in Japan
© 2017–2019 Icom Inc.May 2019
1-1-32 Kamiminami, Hirano-ku, Osaka 547-0003, Japan
Lights red
Lights orange
Lights green
Hold
down
Hold down
Microphone
Microphone
Speaker
Turn
*Depending on a preset. Ask your dealer for detail.
- 1 -
- 4 -
9. ABOUT THE KEY OPERATIONS
10. ABOUT THE CALL TYPES(CALLING PARTY)
8. TURNING ON THE POWER/ADJUSTING THE AUDIO LEVEL
Turning ON the power Adjusting the audio output level
zTurn [PWR/VOL] to adjust the audio output level.
• The volume can be adjusted between 0 and 32.
zTurn [PWR/VOL] clockwise to the 12 o'clock position.
• A beep sounds.
LThe dial rotation is made tight to resist dust and water
intrusion.
The signal strength is represented by 3 bars.
In the 3G mode, the received signal strength is indicated by
the icon. In the LTE mode, the icon is displayed.
LWhen the transceiver location is out of the service area,
or cannot receive the control signal, the (out-of-area)
icon blinks.
NOTE: If the output level is set to the minimum, the beep
does not sound.
Standby screen Volume adjustment screen
Turn
Turn
All
10/4 12:57
Volume: 10
[Address] key*
Selects a calling party or group from this list.
Push [▲]/[▼] to select “All Call,” “Group Call”
or “Individual Call.”
[FUNC] key*
Selects the message, Pres-
ence or Talk group to send.
All
Gather immediately
Message
(Example: A message is selected.)
Depending on a preset, you can select the calling party or
group by pushing [Address]. Otherwise, you can call only
preset party that is displayed on the stand-by screen.
[▲]/[▼] key
Push to scroll the screen
or move the cursor.
All
10/4 12:57
Sales8
10/4 12:57
All Call screen Individual Call Screen
Calling Type Icons*1
: All/Group Call
: Talkgroup Call*2
: Individual Call
: Phone Call*2
LInstructions and screens in this guide may differ, depending on a preset.
*May be usable, depending on a preset.
*1Blinks when a call or message is received.
*2May be usable, depending on a preset.
[Call history] key*
Selects the call history.
Push
[▲]/[▼]
to select the "TX log," "RX log," "TX
MSG log," "RX MSG log," "TX TEL log" or "RX
TEL log."
• Hold down until “Emergency” is displayed
to send an emergency call, depending on a
preset.
Individual
Individual 00001
00001
Address book: Individual [CLR/LOCK] key
Push to return to the previous
screen from a function screen.
Hold down for 1 second to turn the
Key Lock function ON or OFF.
L[PTT] switch and [PWR/VOL] dial can be
used even while the Key Lock function
is ON.
All
10/4 12:57
(Example: Key Lock function is ON.)
Fully charge the battery pack when the first time of
use or has not been used for more than 2 months.
WARNING! NEVER charge the transceiver during a
lightning storm. It may result in an electric shock, cause
a re or damage the transceiver. Always disconnect the
power adapter before a storm.
• Turn OFF the transceiver power before charging.
Otherwise, the battery may not be fully charged.
• Insert the transceiver (battery attached to the transceiver)
into the charger as shown to the right.
• Charging indicator lights orange while charging. When
the battery pack is fully charged, lights green.
If the indicator blinks in orange, read the IP501H/IP503H
instruction manual on the Icom web site.
• The charger automatically restarts charging when the
attached battery pack voltage drops.
• Disconnect the AC cable from the outlet when the
charger is not in use.
7. CHARGING THE BATTERY PACK(Using the BC-202IP2)
5. ATTACHING THE BATTERY PACK
Follow the order (q~ w) in the illustration below.
CAUTION
Even when the transceiver's power is
OFF, a small current still ows in the
transceiver. Remove the battery pack
when not using it for a long time. Oth-
erwise, the battery will become ex-
hausted.
NOTE: Turn OFF the power before
remove the battery pack
in order (q~ w) in the
illustration to the right.
Battery
Spec item BP-272
Operating time
17 hours (approximately)
TX:RX:Stand-by=5 : 5 : 90 (seconds)
Charging time
3.5 hours (approximately)
Charging with the BC-202IP2
LThe supplied battery pack is the BP-272.
• Immediately stop using the battery pack if it emits an
abnormal odor, heats up, or is discolored or deformed. If
any of these conditions occur, contact your Icom dealer or
distributor.
LWhen the battery charge is almost exhausted, the
battery status indicator “ ” starts blinking, and warning
beeps sound every 30 seconds. Charge the battery pack
immediately.
L
When “LOW BATTERY” is displayed and beeps sound, the
transceiver power will be automatically turned OFF soon.
NOTE: Operating time may be shorter, depending on the
operating condition such as the roaming frequency.
Frequently roaming makes the operating time
shorter.
6. CHARGING TIME AND OPERATING TIME
Battery pack
q
q
w
Rapid charger (Optional BC-202IP2)
AC outlet
Charging indicator
Battery pack
[Transceiver + Battery pack]
BC-123S
(Supplied with
BC-202IP2)
Charging: Orange
Charged: Green
*Self-tapping screws (3.5x30 mm) (User supplied)
*
Turn OFF
About the remaining battery voltage indication
Blink
sufficient
capacity
exhausted
a little.
nearing exhaustion
(Charging is necessary)
Exhausted
(Charging required)
After attaching, check that
the battery pack is securelly
attached. (2 sliding locks are
in the place.) q
w
RDANGER
•
Use and charge only specied Icom battery packs with
Icom transceivers or Icom chargers. Only Icom battery
packs are tested and approved for use with Icom
transceivers or charged with Icom chargers. Using
third party or counterfeit battery packs or chargers may
cause smoke, re, or cause the battery to burst.
• Use the battery only with the transceiver for which
it is specied. Never use a battery with any other
equipment, or for any purpose that is not specied in
this instruction manual.
• Read the "PRECAUTION" leaet that is supplied
with the IP501H/IP503H, before attempt to charging
the battery pack.
- 2 - - 3 -
Other manuals for IP501H

3

This manual suits for next models

1

Other Icom Receiver manuals

Icom iC- r8500 User manual

Icom

Icom iC- r8500 User manual

Icom IC-R30 Setup guide

Icom

Icom IC-R30 Setup guide

Icom IC-R5 User manual

Icom

Icom IC-R5 User manual

Icom IP100H User manual

Icom

Icom IP100H User manual

Icom IC-RX7 User manual

Icom

Icom IC-RX7 User manual

Icom IC-R100 User manual

Icom

Icom IC-R100 User manual

Icom IC-R5 Manual

Icom

Icom IC-R5 Manual

Icom IC-R10 User manual

Icom

Icom IC-R10 User manual

Icom IC-R9000L User manual

Icom

Icom IC-R9000L User manual

Icom IC-R9000L User manual

Icom

Icom IC-R9000L User manual

Icom FP-561 User manual

Icom

Icom FP-561 User manual

Icom COMMUNICATIONS RECEIVER IC-R3 User manual

Icom

Icom COMMUNICATIONS RECEIVER IC-R3 User manual

Icom IC-R72 User manual

Icom

Icom IC-R72 User manual

Icom IC-RP1510 User manual

Icom

Icom IC-RP1510 User manual

Icom IC-R30 Installation guide

Icom

Icom IC-R30 Installation guide

Icom IC-R100 User manual

Icom

Icom IC-R100 User manual

Icom IC-R75 User manual

Icom

Icom IC-R75 User manual

Icom IC-R8600 User manual

Icom

Icom IC-R8600 User manual

Icom IC-RX7 User manual

Icom

Icom IC-RX7 User manual

Icom IC-R72 User manual

Icom

Icom IC-R72 User manual

Icom IC-A25N Installation guide

Icom

Icom IC-A25N Installation guide

Icom mxa- 5000 User manual

Icom

Icom mxa- 5000 User manual

Icom IC-PCR1000 User manual

Icom

Icom IC-PCR1000 User manual

Icom IC-R20 User manual

Icom

Icom IC-R20 User manual

Popular Receiver manuals by other brands

Sony FA-WRR1 operating instructions

Sony

Sony FA-WRR1 operating instructions

Sony HBD-TZ130 Service manual

Sony

Sony HBD-TZ130 Service manual

Dish Network Home Network installation instructions

Dish Network

Dish Network Home Network installation instructions

Pioneer VSX-1017AV-K Service manual

Pioneer

Pioneer VSX-1017AV-K Service manual

J.I.L SX-400 owner's manual

J.I.L

J.I.L SX-400 owner's manual

Sirius Satellite Radio Orbiter SR4000 user guide

Sirius Satellite Radio

Sirius Satellite Radio Orbiter SR4000 user guide

DTM System NANO II Series user manual

DTM System

DTM System NANO II Series user manual

Yamaha HTR-2067 owner's manual

Yamaha

Yamaha HTR-2067 owner's manual

JVC RX-6010VBKC manual

JVC

JVC RX-6010VBKC manual

Harman Kardon DPR 2005 owner's manual

Harman Kardon

Harman Kardon DPR 2005 owner's manual

Pioneer dvh-885avbt owner's manual

Pioneer

Pioneer dvh-885avbt owner's manual

Denon AVR-3313CI Getting started guide

Denon

Denon AVR-3313CI Getting started guide

Eddystone 1990R/2-S Service manual

Eddystone

Eddystone 1990R/2-S Service manual

Lemco Compact Line 2-Headend Series Operation manual

Lemco

Lemco Compact Line 2-Headend Series Operation manual

CDVI ERONE SEL2641R433-XPL1V quick start guide

CDVI

CDVI ERONE SEL2641R433-XPL1V quick start guide

Samsung HCN5529WX/XAA Service manual

Samsung

Samsung HCN5529WX/XAA Service manual

National NC 303 manual

National

National NC 303 manual

Yanglousi Technology H-011 instructions

Yanglousi Technology

Yanglousi Technology H-011 instructions

manuals.online logo
manuals.online logoBrands
  • About & Mission
  • Contact us
  • Privacy Policy
  • Terms and Conditions

Copyright 2025 Manuals.Online. All Rights Reserved.