14
Phonebook:
The Phonebook feature allows you to store a list of phone
numbers for fast dialing. The IP2061 can store up to 200
entries.
Browse the Phonebook
1. Press the Phonebook key.
Or,
press the LCD Menu soft key and use the navigation
keys to select Phonebook. Press OK
2. Select Index to browse by phonebook table entry
number, select Name to browse by name, select
Group to browse by one of four group designations
(Family, Friends, Colleague, or VIP). Select None to
browse phonebook entries that have not been
assigned to a group.
3. Once you have selected a phonebook contact you can
press the Dial soft key to call.
Edit the Phonebook
1. Press the Phonebook key.
Or,
press the LCD Menu soft key and use the navigation
keys to select Phonebook. Press OK.
2. Select New and press OK.
3. Enter the phone number using the dial pad then press
OK.
4. Press the Edit soft key to edit the Name, Ring Type,
Group, and press OK.
5. To delete an entry, press the Del soft key to delete that
entry.
Ring Type
The IP2061 allows you to select a one of eleven distinctive ring
types for your phone. (Default = 0).
1. Press the LCD Menu soft key and use the navigation
keys to select Ring Type and press the OK.
3
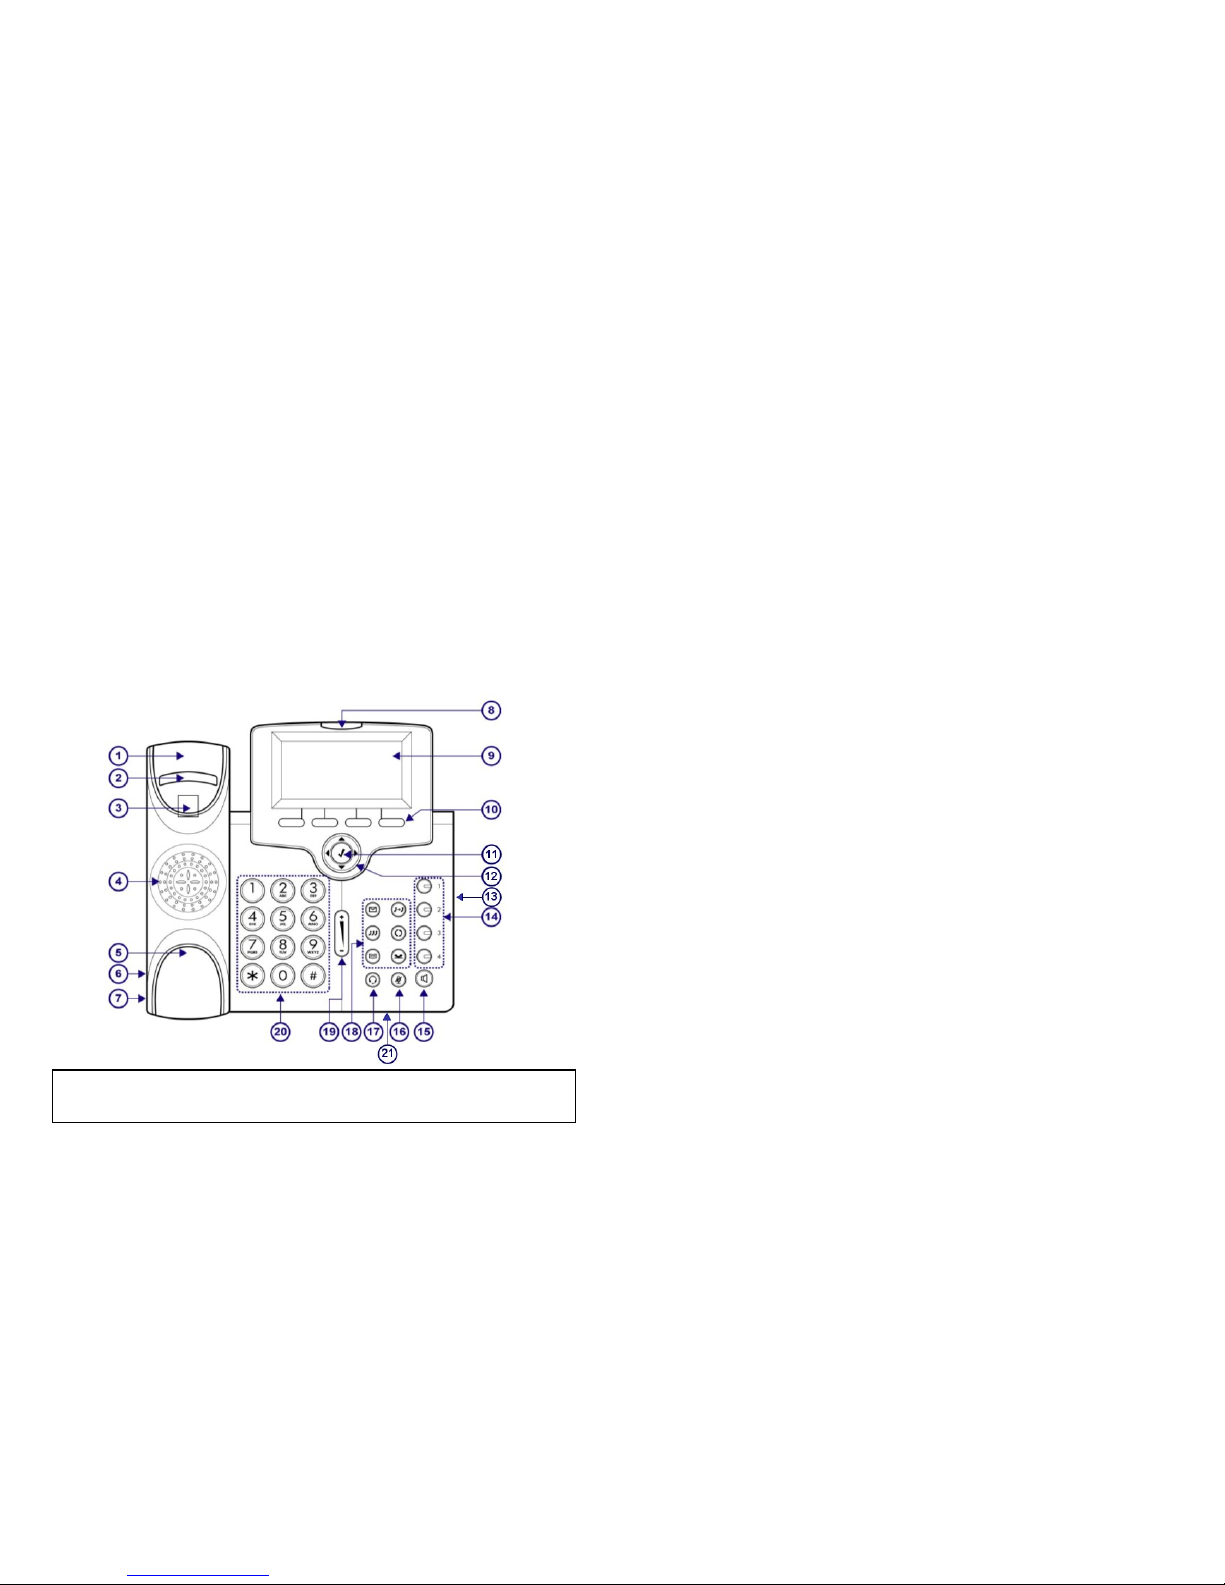
No Part Name Description
1Handset Cradle (Top) For the placement of handset
(receiver end).
2Hook switch On-hook / off-hook switch.
3Handset Hook Secures the handset when the stand
is set at 60oor when wall-mounted.
4Speaker Provides sound for ringing and
hands-free conversation.
5Handset Cradle
(Bottom)
For the placement of handset
(transmitter end).
6Handset Jack RJ-9 handset jack for connecting the
handset cord.
7Headset Jack RJ-9 headset jack for connecting a
headset.
8
Message LED
Indicates an incoming call, new
voice message, or registration
notification.
9Telephone Display
The six-line backlit LCD displays
features such as the time, date,
telephone number, caller ID, line/call
status, number of messages and soft
key menus.
10
Soft keys
Each of the four soft keys activates
the feature option displayed on the
bottom line of the LCD. Soft key
feature availability is dependent on
the state of the telephone.
11
[3] OK / Enter Key
Use the √key to confirm a menu
setting or a dialed telephone
number.
12
Navigation Control
Keys
The four navigation arrows
allow you to scroll through text and
select features on the telephone
display.