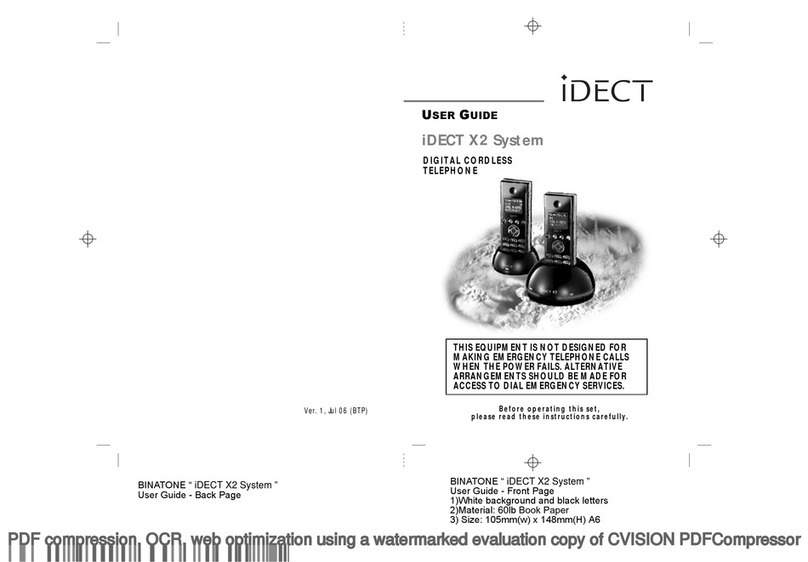
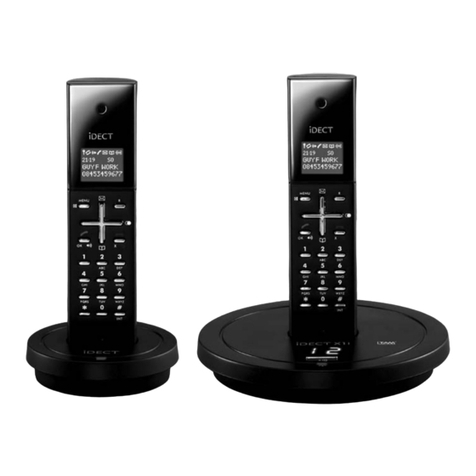
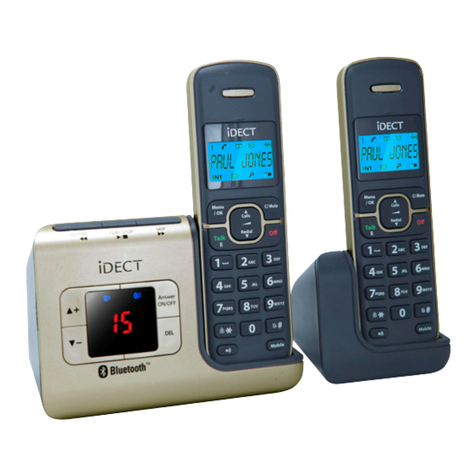
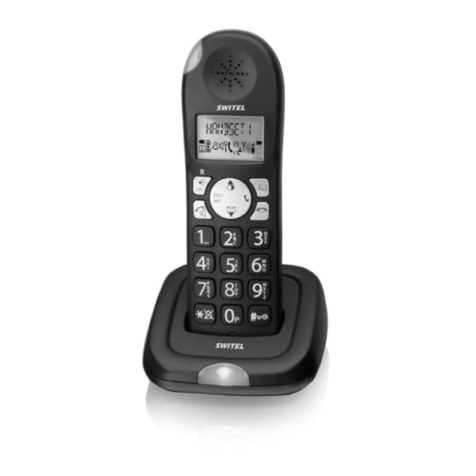
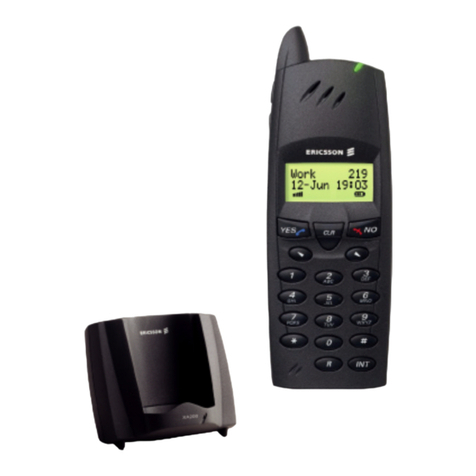
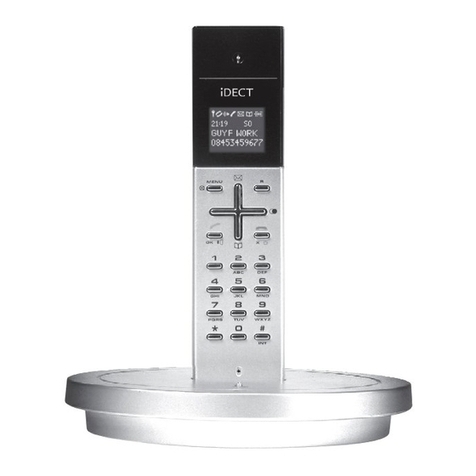
iDect K1 User manual

Digital cordless telephone
User
Guide
with Caller Display
and SMS Messaging
Before you use this phone system, please read this User Guide carefully
This equipment is not designed for
making emergency calls when there’s
an electrical power failure. You should
make alternative arrangements for
dialling emergency services when
necessary.
Color profile: Generic CMYK printer profile
Composite Default screen
Ver 1, Aug 06 (BTP)
and hands-free Speakerphone

Important note — emergency calls
The iDECT K1 is not designed for making emergency
calls if the mains power fails. So you should make
alternative arrangements for access to Emergency
Services.
(This means that you should also have a basic
phone, that does not need mains power, connected
to your line so that you can make calls during a
power failure.)
If you need help …
The Help Line is available from 9.00 am to 5.00 pm,
Monday to Friday, on
0845 345 9677
Calls are charged at Local Call rate.
Unpacking your iDECT K1 system
In the box are:
■the cordless handset (up to five, depending on
which iDECT K1 system you’ve bought)
■the base unit
■two batteries and a battery compartment
cover for each handset
■atelephone line cable for the base unit
■amains power lead and adapter for the base
unit
■up to four charger pods, each with a separate
mains power lead and adapter, for multi-handset
systems
Keep the packaging materials in a safe place in
case you later need to transport the unit. Keep
your sales (till) receipt, which is your guarantee.
Before you can use the handset to make calls
you’ll need to fit and fully charge the batteries,
as described on page 8. Please read the
notes on page 9 before you install the base unit.
Color profile: Generic CMYK printer profile
Composite Default screen

PHONE /SPEAKERPHONE button
Press to begin, answer or end a phone call.
Press during a call to switch the speakerphone
on and off.
(Note: the speakerphone wont work if
the batteries are low.)
HANDSET LOCATOR (PAGE) button
Press to make all registered handsets ring
(this is useful if you've forgotten where you
Where to find it
Charger LED
This comes on when you the
handset's batteries are being charged.
Left and right Soft buttons
Press to select the functions shown above them
on the display (for example, Redial or Menu.)
#/R (Recall) button
You may need the Recall function during a call if your iDECT K1
is connected to a PBX, or if you use BT’s Select Services.
HANG UP /ON–OFF / X (Cancel) button
Press to end a call.
Press while using menus to cancel and return to idle mode.
Press and hold for 4 seconds to turn the handset on and off.
Arrow buttons
Press or during a call to adjust the volume in the earpiece.
Press to navigate through the menu on the display.
Press in idle mode for short-cut functions
*/INT (Intercom) button
Press and hold for 1 second to make an intercom
call (if you have more than one handset).
To subscribe to network features like Caller Display and Call Waiting, simply
call your network service provider (the company that supplies your line).
You dont need to do anything special on your iDECT K1 phone to set
these features up.
If the display is blank
Press the button to switch
the handset on
Color profile: Generic CMYK printer profile
Composite Default screen
IN USE light
This comes on when you have a connection to the telephone
line, and flashes when the unit is ringing for an incoming call.
put a handset).
—
to go straight to the
menu. SMS text
messages
to go straight to a list of
(CID) records. Caller
Display
to go straight to a list of
entries. Phone
Book
Short cuts
1 NEW SMS
Menu
2 NEW CALLS
05/02 16:12

Help Line: 0845 345 9677 (Local Call rate) 1
JANE 1
When this shows ‘nearly empty’ ( ), put the handset on
the base unit or charger pod as soon as possible, to charge
the batteries.
While the batteries are being charged, the symbol blinks.
Appears when you have a connection to the outside line.
Flashes when there’s an incoming call to be answered
(even if the ringer is turned off).
Appears when the speakerphone is turned on.
Symbols on the display
The handset’s number (if you
have more than one handset on
your iDECT K1system)
The handset’s name
The time and date
Intercom
call
Handset
ringer off
Flashes while your handset is ringing for an intercom call, and
comes on steadily when the call’s connected.
While an incoming ring, handset rings in silence, see page 36
to change ringer volume.
Signal
level This is on steadily when there’s a radio link between the handset
and base unit. lashes while the handset is trying to establish a
link .
.
It f
to the base unit
If this symbol flashes while you’re on a call, move closer to
the base unit
Battery
charge
level
Phone
Speakerphone
New call Appears when you have missed incoming calls or new SMS
(if you subscribe to Caller Display or SMS).
What the symbols mean
The duration of each call is shown on the display from 5 seconds
after you press the PHONE button for a line, until 10 seconds
after you end the call.
Color profile: Generic CMYK printer profile
Composite Default screen
05/02 16:30

Contents
Read these notes first 6
Choosing a site for the base unit and
charger pod 6
Radio signals between handset and
base unit 6
Mains power connection 6
Installation and set-up 7
Before you start 9
Electrical safety 9
Interference 9
‘Out of range’ warning 9
Switching on and off 10
Making and answering calls 11
Using the speakerphone 11
To make a call 11
To answer a call 11
To end a call 11
Earpiece volume 12
To mute the mouthpiece 12
Last Number Redial (LNR) 12
To delete a number in Redial list
To store a Redial number in
Phone Book 13
The Phone Book (memory dialling) 14
To store a number 14
To call a stored number 15
To edit a Phone Book entry 15
To delete a Phone Book entry 16
To delete all Phone Book entries 16
Caller Display 17
To check Caller Display records 18
To return a call 18
To store a Caller Display number in
the Phone Book 18
To delete a Caller Display record 19
2
Contents
Help Line: 0845 345 9677 (Local Call rate) 3
Handset settings 41
Auto answer 41
Base unit settings 44
Base unit PIN 44
Troubleshooting 47
Cleaning and care 53
Guarantee and service 54
Technical details 55
Connection and conditions for use
You can connect your iDECT K1 to a direct exchange line (DEL) — a line
connected to a local exchange, with its own phone number; to an
extension socket connected to a DEL; or to an extension on an approved
compatible PBX. Do not connect the iDECT K1 as an extension to a payphone.
The ringer equivalence numbers (RENs) of all instruments (phones,
fax machines, etc.) connected to an exchange line must not add up to
more than 4 — otherwise, one or more of them may not ring and/or
answer calls correctly. The iDECT K1 has a REN of 1, and most other
telephones have a REN of 1 unless marked otherwise.
Color profile: Generic CMYK printer profile
Composite Default screen
12
To copy the Phone Book between
handset(s) 16
To delete all Caller Display record 19
Using a multi-handset system 29
To make an intercom call 29
To answer an intercom call 30
To end an intercom call 30
To transfer a call 30
To shuttle between two calls 31
To set up a three-way conference 31
New Call tone 32
To page all handsets from the
base unit 32
Handset registration 34
To register a new handset to your
base unit 34
To de-register a handset 35
To register to a different brand of
base unit 35
SMS text messaging — read
this first 20
Caller Display 20
Registering for the SMS service 20
The SMS Send and Receive numbers 21
SMS message boxes 22
SMS text messaging 23
To write and send a text message 23
To read your messages 25
To reply to a message 27
To delete a message from the Outbox
or Drafts Box 27
To check or change the Send and
Receive numbers 28
To select a base unit 33
To change dial mode 45
Date and time 45
To change the flash time 46
Sound settings 36
Handset ringer 36
Base ringer 37
Internal ring 37
Tone setting 39
iSleep 39
To change the handset name 41
Display language 42
To adjust display contrast 42
Returning to the default settings 43

Menu Structure
iDECT K1 Menu Structure
Key Tone
Volume
Melody
Timerfinish
Level 1~5
Level off, 1~3
Once
Daily
Batter
y
Low
Out of Range
Volume
iSleep Of
f
BS Ring
Tone
Timer Start
Timerfinish
Timer Start
Charge Tone
Melody 1~10Melody
Sound Setting Handset Volume
HS Ring
Internal Ring Melody Melody 1~20
Volume
Delete Entry
PB Transfer
Delete All
Earpiece
Speaker
Level off, 1~5
Melody 1~20
List End Tone
Phonebook New Entry
View Entry
Edit Entry
Scroll with
navigation
button
Default HS Confirm
Contrast Level 1~3
Enter PIN
Base Auto 1--
Handset Set Auto Answer
Register HS
Select Base
Language
Handset Name IDECT
Base 1 2 3 4
Long
Pause Time 0S~4S
Pulse
Flash Time Short
Medium
Date & Time hh:mm DD-MM-YY
Default BS Confirm
Dial Mode DTMF
Base Set Change PIN Enter PIN
Remove HS Unregistered 1--
SMS Center2
Terminal Nr
Draft SMS Screen
SMS Screen
Delete All
Info/Status
Service Center SMS Center 1
Send SMS
Call
Save SMS
Delete
Delete
Delete All
Outbox SMS screen Edit SMS
Edit SMS
Send SMS
Save to P.Book
Call
Delete
Delete All
Forward
Reply
Use Text
Edit Screen Number
Send SMS
Save SMS
Delete
Delete All
SMS Write
Inbox
Call Log Save to P.Book
4Help Line: 0845 345 9677
(Local Call rate)
5
Enter new PIN
Enter PIN

Read these notes first
Choosing a site
for the base
unit and
charger pod
The base unit and charger pod(s) should be placed on a
level surface, in a position where:
■the mains adapter plug will reach an easily accessible
230-V AC switched mains supply socket — never try
to lengthen the mains power cable
■the base unit’s telephone line cable will reach your
telephone line socket or extension socket (the charger
pod does not have a telephone line connection)
■it is not close to another telephone — this can cause
radio interference
■it is not close to a sink, bath or shower, or anywhere
else where it might get wet
■it is not close to other electrical equipment — fridges,
washing machines, microwave ovens, fluorescent
lights, TVs etc.
Radio signals
between
handset and
base unit
To use your handset and base unit together, you must
be able to establish a radio link between them. Be
aware that:
■Any large metal object — like a refrigerator, a mirror
or a filing cabinet — between the handset and the
base unit may block the radio signal.
■Other solid structures, like walls, may reduce the
signal strength.
Mains power
connection IMPORTANT — The iDECT K1 base unit and charger
pod must be used with the mains adapter supplied with
the unit. Using any other adapter will result in non-
compliance with EN60950, and will invalidate any
approval given to this apparatus.
!Make sure mains power to the base unit stays switched
on. The iDECT K1 needs electrical power for normal
operation; not just for charging the batteries.
6
Installation and set-up
Help Line: 0845 345 9677 (Local Call rate) 7
1
3
5
4
Choose a suitable
site for the base
unit
Plug the mains adapter into
a 230 V AC, 50 Hz mains
socket, with the switch on
the socket set to OFF
Plug the mains adapter into a 230 V AC,
50 Hz mains socket, with the switch on
the socket set to OFF
Switch on at the mains socket(s)
If you have one or more charger pods …
2
Use the telephone line
iDECT K1 —
do not use any other
telephone line cord
cord supplied with your
Connect the
mains power
lead and the
telephone line
cord into the
underside of
the base unit
Installation and set-up

6Fit two rechargeable batteries in
each handset
Help Line: 0845 345 9677 (Local Call rate) 9
7Charge the batteries for 15 hours
Before you use the handset for the
first time, it’s important to charge
the batteries fully.
The handset ‘beeps’ when it’s correctly
in position on the charging cradle.
Leave the handset on the charging
cradle for 15 hours.
Make sure the mains socket is
switched on if you want to use
the phone — it will not work
without electrical power
Connect the base unit to the telephone line
Switch off power at the mains socket
Insert the telephone line plug into
the socket as shown
Switch mains power back on
8
Use the plug to
raise the shutter
before pushing
it into the socket
NOTE: the charger pod does not have
a connection to the telephone line.
The navigation buttons
In the instructions, these buttons are
represented by arrows, as shown here.
SMS text
messages
(CID)
Caller Display
Phone Book
Before you start
Electrical
safety
■
DON’T let the base unit or charger pod get wet.
Electrical equipment can cause serious injury if used
while you are wet or standing in water.
■
If the base unit or charger pod ever falls into water,
DON’T retrieve it until you have unplugged the power
lead from the mains and the telephone line plug from
the telephone socket (base unit only); then pull it out by
the unplugged cables.
■
NEVER use your iDECT K1 outdoors during a thunder-
storm — unplug the base unit from the telephone line
and the mains socket when there are storms in your
area. Damage caused by lightning is not covered by the
guarantee.
Interference If the sound quality gets worse as you move around
while on a call, this is probably caused by interference
between the handset and the base unit, perhaps
because you are too near to another phone or other
electrical equipment.
Move to a different position to clear the interference.
If you do not move, your call may be cut off.
!Radio interference in the environment may occasion-
ally cause a short break in the link between the
handset and the base unit while you are on a call.
The ‘signal level’ on symbol handset’s display may
flash until the link is restored.
‘Out of range’
warning If you hear a warning tone during a call, and/or the
sound in the earpiece becomes faint or distorted, you
may be going out of range of the base unit. Move
nearer to the base unit within 20 seconds, until the
tone stops. Otherwise, your call may be cut off.
8

10
Switching on and off
To switch the
handset on
and off
To switch the handset off (in case you need to
save battery power when the handset is away
from the base unit):
◗Press the HANG UP button and hold it for
4 seconds
To switch the handset back on:
◗Briefly press the HANG UP button,
or replace the handset on the base unit or
Notes ■When the handset is switched off, it can’t be used for
making calls, including emergency calls.
■When the handset is switched off, it won’t ring for
incoming calls, but the base unit will ring. To answer a
call when the handset is switched off, you need to
switch it back on. It may take a few moments for the
handset to re-establish a radio link with the base unit.
Help Line: 0845 345 9677 (Local Call rate) 11
charger pod
Making and answering calls
Using the
speakerphone You can switch between speakerphone and
earpiece mode during calls at any time by
button. The display will show if speaker on.
To make a call
1
Key in the telephone number
If you make a mistake, press the soft key
<=I
to clear digits one by one from the display.
2
Press the button
(You can dial the number after you press the
button to get Dial tone if you prefer,
but you can’t correct any mistakes if you do it
this way. If you press the button before
you dial, the display shows [calling].
To answer a
call When there's an incoming call,
◗
Press to answer the call
To end a call
◗
Press the button
The
IN USE
light on the base unit will goes out
◗
Or just replace the handset on the base unit
Press the áor âbutton to adjust volum
when speaker is on, there are three
volume levels.
The speakerphone won't work if the battery is low.
!
Or you can press right soft key
Silence
to
make handset silence, if you don't want to
◗
è
answer the call.

12
Earpiece
volume During a call, to adjust the volume in the earpiece
or speakerphone:
◗Press the áor âbutton
There are three volume levels. After you end the
call, the volume will stay at the level you’ve set.
To mute the
mouthpiece During a call, to mute the mouthpiece so the
person on the other end can’t hear you:
◗Press the soft key
To un-mute the mouthpiece, press the soft key
again.
Last Number
Redial (LNR) To make a repeat call to one of the last 10
numbers you dialled (up to 24 digits) :
1Press the right soft key
2Press the áor âbutton if necessary until
the number is displayed
3Press the button to dial the number
To delete
Redial list 1Press the right soft key , then the áor â
button until the number is displayed
2Press the soft key Option
èThe display shows [Delete] and [Delete All]
[Delete] only delete selected redial number ,
[Delete All] will delete all redial list.
3Press soft key OK to confirm what you selected
Making and answering calls
Help Line: 0845 345 9677 (Local Call rate) 13
To store a Redial
number in the
Phone Book
1
Press the Redial button, then the áor â
button until the number is displayed
2
Press
Option
button
è
The display shows [
Save to P.Book
]
3
Key in a name then press
OK
4The display show [
enter Number
], you
can edit the number then press
OK
5
Select the [
VIP Tone
] press
OK
to confirm
Making and answering calls
è
There are 20 melodies [
Melody 1
]
to [
Melody 20
]
Buttons to press for text characters — press the button repeatedly
until you get the character you want
7PQRS7ß
2ABC2ÄàâÂÆÇ 8TUV8ÜÙúû
3DEF3ëéèê 9WXYZ9
4GHI4Ìíîï 0
_"'
5JKL5 *+
6MNO6ÖòóôØÑ #
upper case/lower case
-/ \
=<>()
0,.: ¿
¿
!;
%
1[space] 1@&$¥£§#

14
The Phone Book (memory dialling)
You can store up to 200 numbers in the Phone Book.
Each number can have up to 24 digits, and can be
stored with a name of up to 12 characters (including
spaces).
To store a
number 1Press the Menu button then press OK
2Press the Option button
3Select [New Entry ] then press OK
4Key in a name and press OK
5Key in a number and press OK
The display shows [Enter Number]
è
6Select ring tone [Melody1-Melody20]
and press OK to confirm.
* This is a short-cut method. You can also press the
Phone Book button followed by the MENU button. Or you
can simply press of .
** Refer to the diagram on page 13 if you’re not sure how to
key in text using the numbered keypad.
*** If you use Caller Display, it’s best to store the number with
the full national dialling code, even if it’s a local number.
You’ll still be charged at Local rate when you call the number.
The display shows [
Enter Name
]
è
7
Press button to go back standby mode
â
To call a
stored number
è
The display shows the name and number
in the Phone Book.
2
Press the áor âbutton to go to the
number you want
OR you can search by pressing a button on the
numeric keypad for the first letter of the name,
then using the áand âbuttons if necessary.
3
Press the button to dial the number
To edit a
Phone Book
entry
1
âbutton to go to the number you want
2
Press
Option
then use âbutton to
select [
Edit Entry
]
3
Press
OK
button
è
The display shows [
Enter Name
],
[
Enter Number
] & [
Tone
] section.
4Edit the name , number or Tone and
5
Press to go back standby mode
1
Press the
Menu
then
OK
buttton
Press the
Menu
then
OK
buttton
press
OK
to confirm
The Phone Book (memory dialling)
Help Line: 0845 345 9677
(Local Call rate)
15

The Phone Book (memory dialling)
16
To delete a
Phone Book
entry
1Press the Menu then OK buttton
2Press or to go to the number you want
3Press Option button
4Use or to select [Delete Entry]
5Press OK to confirm
To delete all
Phone Book
entries
3Use or to select [Delete All]
4Press OK button
The display shows [Delete All?]
è
Press OK to confirm
Help Line: 0845 345 9677 (Local Call rate) 17
1
Press the
Menu
then
OK
buttton
2
Press
Option
button
Caller Display
!
To subscribe to this feature, you need to contact your
service provider, who will tell how much it will cost.
Caller Display lets you see the phone numbers of your
callers on the handset’s display, before you answer. The
iDECT K1 will store the numbers of the last 30 callers
(whether or not you answered the call) so you can call
them back later. When the Caller Display list is full, the
next incoming number will overwrite the oldest one.
If you’ve got new Caller Display records, the symbol
is shown on the display.
The record number
is onwards.#01
Here are some
examples of
Caller Display
records:
A call from someone whose name
and number are stored in your
Phone Book.
indicates that you’ve received
two calls from this number (the one
shown is the most recent).
2x
A call from someone whose
name and number are not
stored in your Phone Book.
There has been just one call
from this number ( )
1x
A call from someone who withheld
their number by dialling 141 (or
whose service provider withheld
their number).
A call from someone whose number
is unavailable (for example, an
international call).
#01 NEW <02>
Option Esc
Jane
02084329876
05/02 16:12
#01 NEW <02>
Option Esc
02084329876
05/02 16:12
#01 NEW <02>
Option Esc
WITHHELD
05/02 16:12
#01 NEW <02>
Option Esc
UNAVAILABLE
05/02 16:12
To copy the
Phone Book
between
1
Press the
Menu
then
OK
buttton
handsets
If you have more handsets system, when you
have stored names and numbers in one handset's
Phone Book, you can copy them to other handsets.
3
Use or to select [
PB Transfer
] then press OK
The display shows other handsets which you
èhave registered.
2
Press Option button
4Use or to select handset you want, then press OK
The handset you selected rings, press the
è
left soft key [
Accept
] to accept copying, or the
right soft key [
Reject
] to cancel copying.
After copying the phonebook, the display shows
è
[
Finish
] and goes back to idle mode.
è
è
è
è
è
è
è
è
è
è
è
è

18
To check
Caller Display
records
1
2Press to go to [Call Log ] menu
3Press OK button to view the record(s)
4Press button to go back to
standby mode
To return a
call To ring back someone who’s called you:
4Press or go to the number you want
5Press button to dial the number
To store a
Caller Display
number in
the Phone
Book
4Press or go to the number you want
5Press Option button
6
7Key in the name, number & select ring tone
8Press OK to confirm
9Press to go back to standby mode
Caller Display
Help Line: 0845 345 9677 (Local Call rate) 19
Press the button
Menu
1
2
Press to go to [
Call Log
] menu
3
Press
OK
button to view the record(s)
Press the button
Menu
1
2
Press to go to [
Call Log
] menu
3
Press
OK
button to view the record(s)
Press the button
Menu
Press or go to Select [
Save to P.Book
]
then press
OK
To Delete a
Caller Display
record
To Delete all
Caller Display
record
Caller Display
1
2
3
Use or button to select the number
Press the button
Press to go to the [
Call Log
]
Menu
then press
OK
you want
4
5
Press Option button
Select [
Delete
] by or button
6
Press OK to confirm
1
2
Press the button
Press to go to the [
Call Log
]
Menu
then press
OK
3
4
Press Option button
Select [Delete All ] by or button
5
Press
OK
to confirm
or press the short-cut button
è
è
è
è
è
è
è
è
è
è
è
è

SMS text messaging — read this first
SMS stands for short message service — also called
text messaging, or just texting. Users whose phones
support SMS can send each other messages with up to
160 characters (140 characters on mobile phones).
Your iDECT K1 can send and receive SMS messages
to and from mobile phones and compatible land-line
phones. You can also send messages to non-SMS
phones; the messages will be converted into speech.
!The SMS service is provided by BT. If your network
provider (the company that supplies your telephone
line) is not BT, and you find you can’t send or receive
text messages, check that the network provider
supports the BT SMS service in your area.
Caller Display IMPORTANT — to use the SMS service, you must
subscribe to the Caller Display service (see also page
17) from your network provider; you can’t use the
SMS service without Caller Display.
Registering for
the SMS
service
By sending your first SMS text message, you auto-
matically register for the service, and you’ll receive a
text message welcoming you. You may also receive
other text messages with information about the service.
It is occasionally possible to become de-registered
from the BT SMS service — for example, when a
message cannot be delivered because your SMS phone
is switched off. If this happens, you’ll start to receive
text messages as spoken calls from the Messaging
Centre.
Usually, you can automatically re-register by simply
sending another text message. If you have problems,
turn to page 50 for advice.
20
The SMS Send
and Receive
numbers
Your iDECT K1 is preprogrammed with two
telephone numbers for the SMS service — the Send
number and the Receive number. These are:
BT service numbers
Send
telephone
number
1470P1709400
The 1470 ensures that your number is not
withheld on this call, even if you normally
withhold it*.
The Pinserts a pause before dialling the
number.
Receive
telephone
number
080058752
Terminal
number 9(all messages)
* The SMS service will not work if your number is not sent
to the network when you send messages.
It’s important to leave these numbers as they are. If
they’ve been accidentally changed, you’ll need to
reprogram them as described on page 28.
SMS text messaging — read this first
Help Line: 0845 345 9677 (Local Call rate) 21
(SMS
Center 1)
(SMS
Center 2)

22
SMS message
boxes Your iDECT K1 has three message boxes:
■The Inbox, which holds messages you’ve received
from other people (incoming messages).
■The Outbox, where a copy of each message you’ve
sent is stored.
■Draft Box, where you can store complete or part-
written messages to send later.
The total number of messages that can be stored in the
message boxes is 20. If you reach the limit of 20 stored
messages, the handset’s display shows SMS Full
and your iDECT K1 won’t receive any new SMS
messages until you delete some messages to make
room (see pages 27 for details of how to delete
messages).
When SMS memory is full, you can still send or forward
a message from any of the message boxes. But no copy
will be stored in the Outbox after you’ve sent it.
SMS text messaging — read this first
SMS text messaging
To check that the SMS text messaging service is working
OK on your line, it’s a good idea to send your first text
message to yourself. Simply follow the instructions
below, keying in your own phone number — including
the full dialling code — at step 5. The message should
arrive in your Inbox shortly afterwards.
To write and
send a text
message
1Press the short-cut button
(0r press the left Soft button [Menu], then
use the or button to scroll to SMS and
select it by pressing the left Soft button [OK])
uThe display gives you the options:
Write — to write a message
Inbox — to go to your Inbox. The number of
new messages and the total number of messages
in your Inbox are shown (for example, (02/07)
means you have two new messages and seven
messages altogether).
Outbox — to go to your Outbox. The number
of messages in your Outbox is shown.
Draft — to go to your Draft Box.
Service Center — to check or change the
SMS Send and Receive numbers.
2Press the left Soft button [OK] to select
Write
uThe display shows
3Write your message
Each time you press a numbered button, the
line at the bottom of the display shows the
characters you can type by pressing this button
repeatedly.
Help Line: 0845 345 9677 (Local Call rate) 23
Buttons to press for text characters — press the button repeatedly
until you get the character you want
7PQRS7ß
2ABC2ÄàâÂÆÇ 8TUV8ÜÙúû
3DEF3ëéèê 9WXYZ9
4GHI4Ìíîï 0
_"'
5JKL5 *+
6MNO6ÖòóôØÑ #
upper case/lower case
-/ \
=<>()
0,.: ¿
¿
!;
%
1[space] 1@&$¥£§#
è
è
è
Write

While writing, you can:
—use the #(hash) key to switch between
upper-case (capital letters) and lower-case
(the first letter of the message is always
upper-case);
—use the and buttons to move to the
beginning or end of the message;
—use the right Soft button [Esc] to delete
unwanted characters.
When your message is ready —
4Press the left Soft button [OK]
uThe display shows Number:
5
6
Key in the recipient’s phone number, including
the full dialling code (even if it’s a local number)
Or press the right soft button [PBook] to
search for a number in the Phone Book
(The number must be stored in the Phone Book
with the full dialling code, even if it’s a local
number.)
7
Press the left Soft button [OK]
uThe display shows Send SMS
Press the left Soft button [OK] to send the
message
uThe display shows Message Sending . . .
for a few moments.
continued overleaf …
SMS text messaging
24
àIf you hear an
error tone… If you hear a double high-pitched ‘beep’ it means the
message was not sent and shows [Failed ]
you can go to your Drafts Box and delete the message
(see page 27). See pages 50 to 51 for possible reasons
solutions.
To read your
messages Incoming text messages are stored in your Inbox.
If there are new messages in your Inbox, SMS is
displayed above the left Soft button.
1Press the short-cut button
OR press the left Soft button [Menu], then
use the or button to scroll to SMS and
select it by pressing the left Soft button [OK]
2If necessary, scroll to Inbox and press the
left Soft button [OK] to select it
uThe display shows the numbers or name
of messages.
3Press the left Soft button [R ead] to display
the full text
4Press the left Soft button [Option ] for menu
options
uThe display gives you the options:
Forward — forward the message
SMS text messaging
Help Line: 0845 345 9677 (Local Call rate) 25
Save SMS
è
è
è
è
è
" ! " means is new message.
Reply
— reply the message
Use Text
— edit the message
Save to PBook
— Store the Sender's number
in phone book

SMS text messaging
26
Call — make the call to this sender.
DeleteAll
— clear the Inbox.
5Use the or button to go to the option
you want, then press the left Soft button [OK]
to select it
à… and to
store a caller’s
number in the
Phone Book
If you select Save to PBook, the display shows
Enter Name
à… or to
delete
messages
from the
Inbox
If you select Delete
◗Press the left Soft button [OK] to delete
this message, or the right Soft button [Esc]
to cancel without deleting the message.
If you select Delete All, you’ll be asked:
Delete All?
◗Press the left Soft button [OK] to delete all
messages from the list, or the right Soft
button [Esc] to cancel
To reply to a
message 1Go to the message you want to reply to, as
described under ‘To read your messages’
2Scroll to Reply and press the left
Soft button [OK ] to select it
3keying in your reply
4Press the left Soft button [OK ]
uThe display shows the number of the person
who sent the message.
5Press the left Soft button [OK]
uThe display shows Send SMS
6Press the left Soft button [OK ] to send the
message
To delete a
message from
the Outbox or
Drafts Box
1Press the left Soft button [Menu ], then use
the or button to scroll to SMS and
select it by pressing the left Soft button [OK ]
2Scroll to Outbox or Draft and press the
left Soft button [OK ] to select it
3
4
Press the left Soft button [Read ]
options
5Use the or button to go to
Delete , then press the left Soft
button [OK] to deletet it
SMS text messaging
Help Line: 0845 345 9677 (Local Call rate) 27
Delete — delete this message from the Inbox.
è
è
1
Key in a number and press OK
The display shows [
Enter Number
]
2
Select ring tone [
Melody1-Melody20
]
and press
OK
to confirm.
è
3
Press button to go back standby mode
Save SMS
Press the left Soft button [
Option]
for menu
è
è
è
è

To check or
change the
Send and
Receive
numbers
You should not normally need to change these
numbers — they should stay as listed on page 33.
1Press the short-cut button
(or press the left Soft button [Menu], then
use the or button to scroll to SMS and
select it by pressing the left Soft button [OK])
2Scroll to and press the left Soft button
[OK] to select it
uThe display gives you the options:
SMS Center 1 <Send numbers>
SMS Center 2 <Receive numbers>
Terminal Nr.
3Scroll to the option you want and press the
left Soft button [OK] to select it
4If necessary, edit the number
To insert a pause in the number, press and
hold the *(star) button for 2 seconds.
5Press the left Soft button [OK] to confirm
SMS text messaging
28
Using a multi-handset system
If you have an iDECT K1 multi-handset system, you
already have more than one handset registered to your
base unit. You can register additional handsets — up to
five per base unit. With two or more handsets, you can:
■
make intercom calls from one handset to another
■
transfer an outside call from one handset to another
■
shuttle between an outside call and an intercom call
■
set up a three-way conference call
Each handset’s number (1to 5) is shown on its display.
!
Only one handset can be connected to the outside
line at once. If you try to make a call while another
handset is already on the line, you’ll hear Busy tone.
To make an
intercom call There are two ways to make an intercom call.
First method:
1
Press and hold button for 2 sconds
until the INT symbol flashes on the display
2
Key the available handset number or press
All
to call all handsets
è
The other handset rings, and its display
[
Calling handset #
]
Help Line: 0845 345 9677
(Local Call rate)
29
è
è
è

To answer an
intercom call The ringing tune for intercom calls is different from that
for outside calls.
When someone makes an intercom call to you, your
handset’s display shows [Call from #] with the number
of the handset calling you.
◗Press to answer
To end
an intercom
call
◗Press button
◗Or simply replace the handset on the base
unit or charger pod
To transfer a
call When you’re talking on an outside call (a call
you’ve either made or answered), you can
transfer it to another handset:
1Press and hold button until the Intercom
symbol flashes on the display.
Then key in the number of the other handset
(or All to call all other handsets)
èThe outside call is put on hold and the other
handset rings. When the other handset user
answers, you can speak to her/him.
If the other user does not answer, you can get
back to the outside call at any time by pressing
2Press button to hang up and transfer
If you prefer, you can press to transfer
the outside call before the other handset
answers your intercom call. If the user hasn’t
answered after 30 seconds, the outside call will
come back to you and your handset will ring.
Using a multi-handset system
30
To shuttle
between two
calls
When you have made or answered an outside
call and then made an intercom call, you can
shuttle from one to the other, like this:
◗
putting the other on hold
You can transfer the outside call to the other
handset by pressing while you’re
connected to the intercom call
If you press while you’re connected
to the outside call, you’ll disconnect it.
To set up a
three-way
conference
1Make or answer an outside call
2Press and hold the button then key in
the number of the other handset (or All to
call all other handsets)
èThe outside call is put on hold and the other
handset rings.
When the other user answers:
3Press Option button and select [Conference]
To end the
conference ◗Press the button
Using a multi-handset system
Help Line: 0845 345 9677 (Local Call rate) 31
by or button, then press
OK
button
the call
the right soft key [
Back
]
Press Option button and select [
Switch Calls
]
by or button to speak to each in turn,
è
The displays shows Conference
è
è
è
è

New Call tone When you are on an intercom call and an
outside call comes in, you’ll hear New Call
tone to tell you that someone is calling you.
To answer the outside call and end the
intercom call:
◗Press the right Soft button [Back]
◗Press the button to answer.
To page all
handsets
from the
base unit
To make all registered handsets ring (this is
useful if you’ve forgotten where you put a
handset):
◗Press the HANDSET LOCATOR button
èHandsets ring for up to 30 seconds and their
displays show [Paging]
To stop the ringing before 30 seconds:
◗EITHER press the HANDSET LOCATOR
◗OR press on any handset
Using a multi-handset system
32 Help Line: 0845 345 9677 (Local Call rate) 33
on the base unit
button again
To select
a base unit If your handset is registered to more than one
base unit, it will automatically select the one with
which can best set up a radio link (usually the
nearest one). Or you can select a base unit manually.
You don't need this function if you have only one
base unit.
1
2
3
Press the button
Press to go to the [
Handset Set
]
è
The display shows [
Base
]
Menu
then press
OK
Press or to select [
Select Base
]
then press
OK
[
Auto 1 2 ...
]
4
Key number 0 for Auto, 1 or 2 to select
the base you want
Using a multi-handset system
OR press to end the intercom call.
è
Handset rings
5
Press the left soft button
OK
è
è
Table of contents
Other iDect Cordless Telephone manuals
iDect
iDect Combo User manual
iDect
iDect X1 User manual
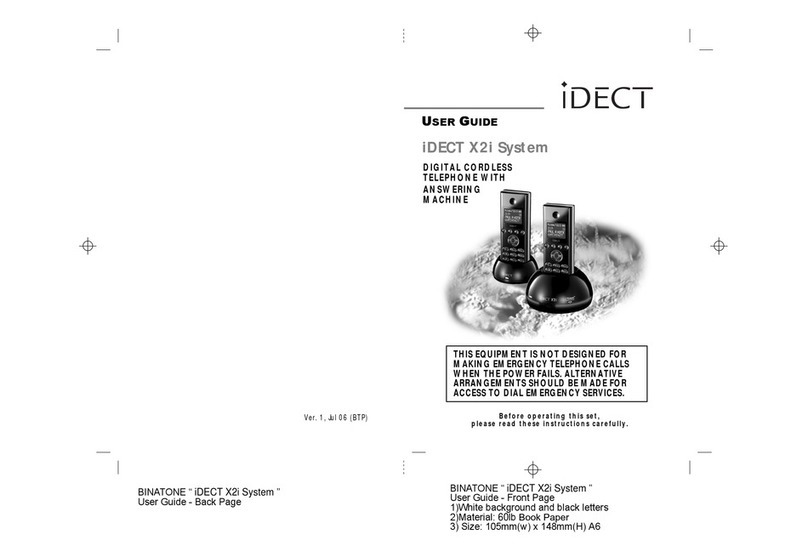
iDect
iDect X2i System User manual
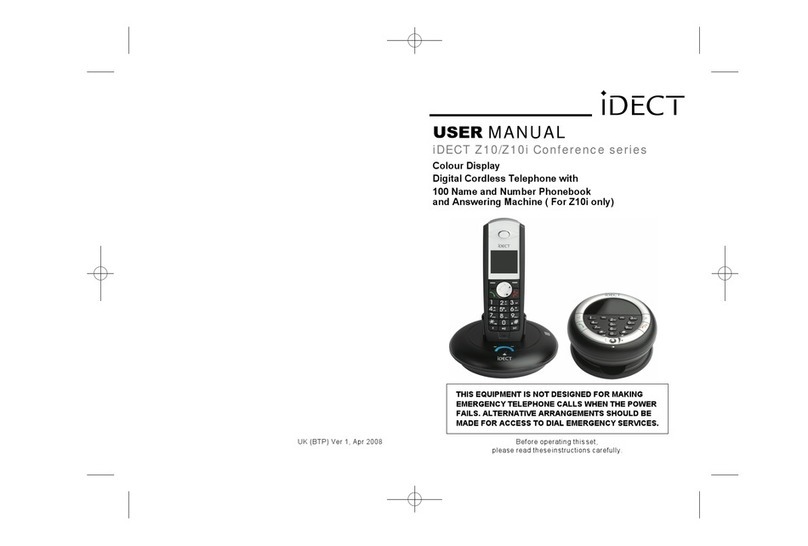
iDect
iDect Z10 Conference series User manual
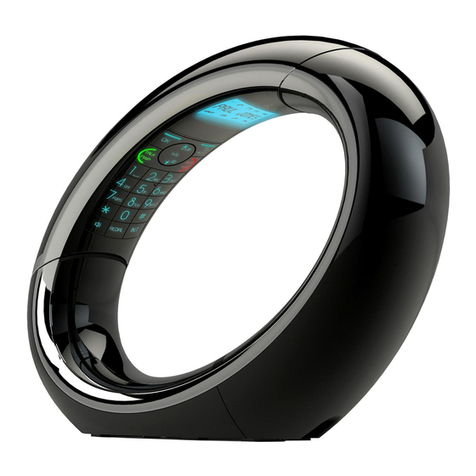
iDect
iDect Eclipse Plus User manual
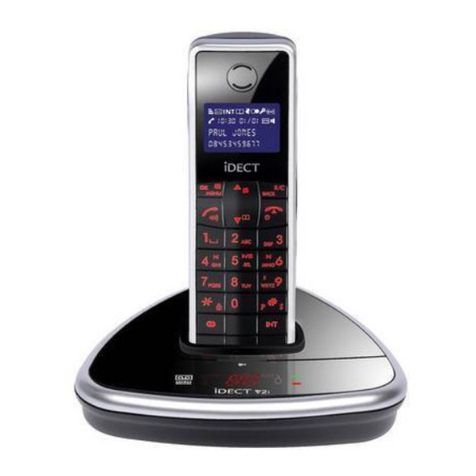
iDect
iDect iDECT V2i System User manual
iDect
iDect Z1 Series User manual
iDect
iDect X2 User manual
iDect
iDect X2i System User manual
iDect
iDect Solo Single User manual
