Idromatic Astra Steamer Hybrid User manual

Instruction Manual
Idromatic s.r.l. - via Petrarca n°127 - 46030 Borgoforte (MN) –Italy - p.iva e cod. fiscale: 02096330200

English
1
ENGLISH
WARNING!
Before usage read this manual carefully and follow the instructions so as to avoid improper and dangerous (to people,
animals and objects) operations while using the steamer.
The manufacturer is not responsible for and reserves the right to not apply the warranty to:
Damage caused by normal wear and tear, abnormal use or conditions, misuse, neglect, abuse, accident, improper
handling or storage, exposure to moisture, unauthorized modifications, alterations, or repairs, improper installation,
improper use of any electrical source, undue physical or electrical stress, operator error, non-compliance with
instructions or other acts which are not the fault of manufacturer, including damage or loss during shipment.
Certified Product
Idromatic s.r.l.
via Petrarca n°127
46030 Borgoforte (MN) - Italy
p.iva e cod. fiscale –VAT: 02096330200
website: www.idromatic.it
tel. +39 0376 648756
fax. +39 0376 649140

English
2
TABLE OF CONTENTS
1. PACKAGING DIMENSIONS AND CONTENTS
3
2. SPECIFICATIONS
3
3. MAIN CONTROLS AND NORMAL OPERATIONAL SIGNALS
4
4. SAFETY RULES
5
5. PRELIMINARY OPERATIONS
7
6. STEAM: GETTING STARTED
11
7. STEAM: START UP, REGULAR OPERATION AND SHUTTING DOWN
12
8. STEAM: WORKING WITH THE SANDBLASTING KIT
13
9. PRESSURE WASHER: GETTING STARTED
15
10. PRESSURE WASHER: START UP, REGULAR OPERATION AND SHUTTING DOWN
16
11. MAINTENANCE PLAN
16
12. STEAM MAINTENANCE : DESCALING
18
13. STEAM MAINTENANCE : CLEANING BOILER SENSORS
19
14. STEAM MAINTENANCE : CLEANING WATER FILTERS
20
15. STEAM MAINTENANCE : CLEANING FUEL FILTERS
21
16. STEAM MAINTENANCE : CLEANING/ADJUSTING SPARK ELECTRODES
22
17. PRESSURE WASHER MAINTENANCE
23
18. TROUBLESHOOTING
24
19. WIRING DIAGRAM
27
CONFORMITY DECLARATION
28
WARRANTY CONDITIONS
29
SAFETY STATEMENT
30
English
3
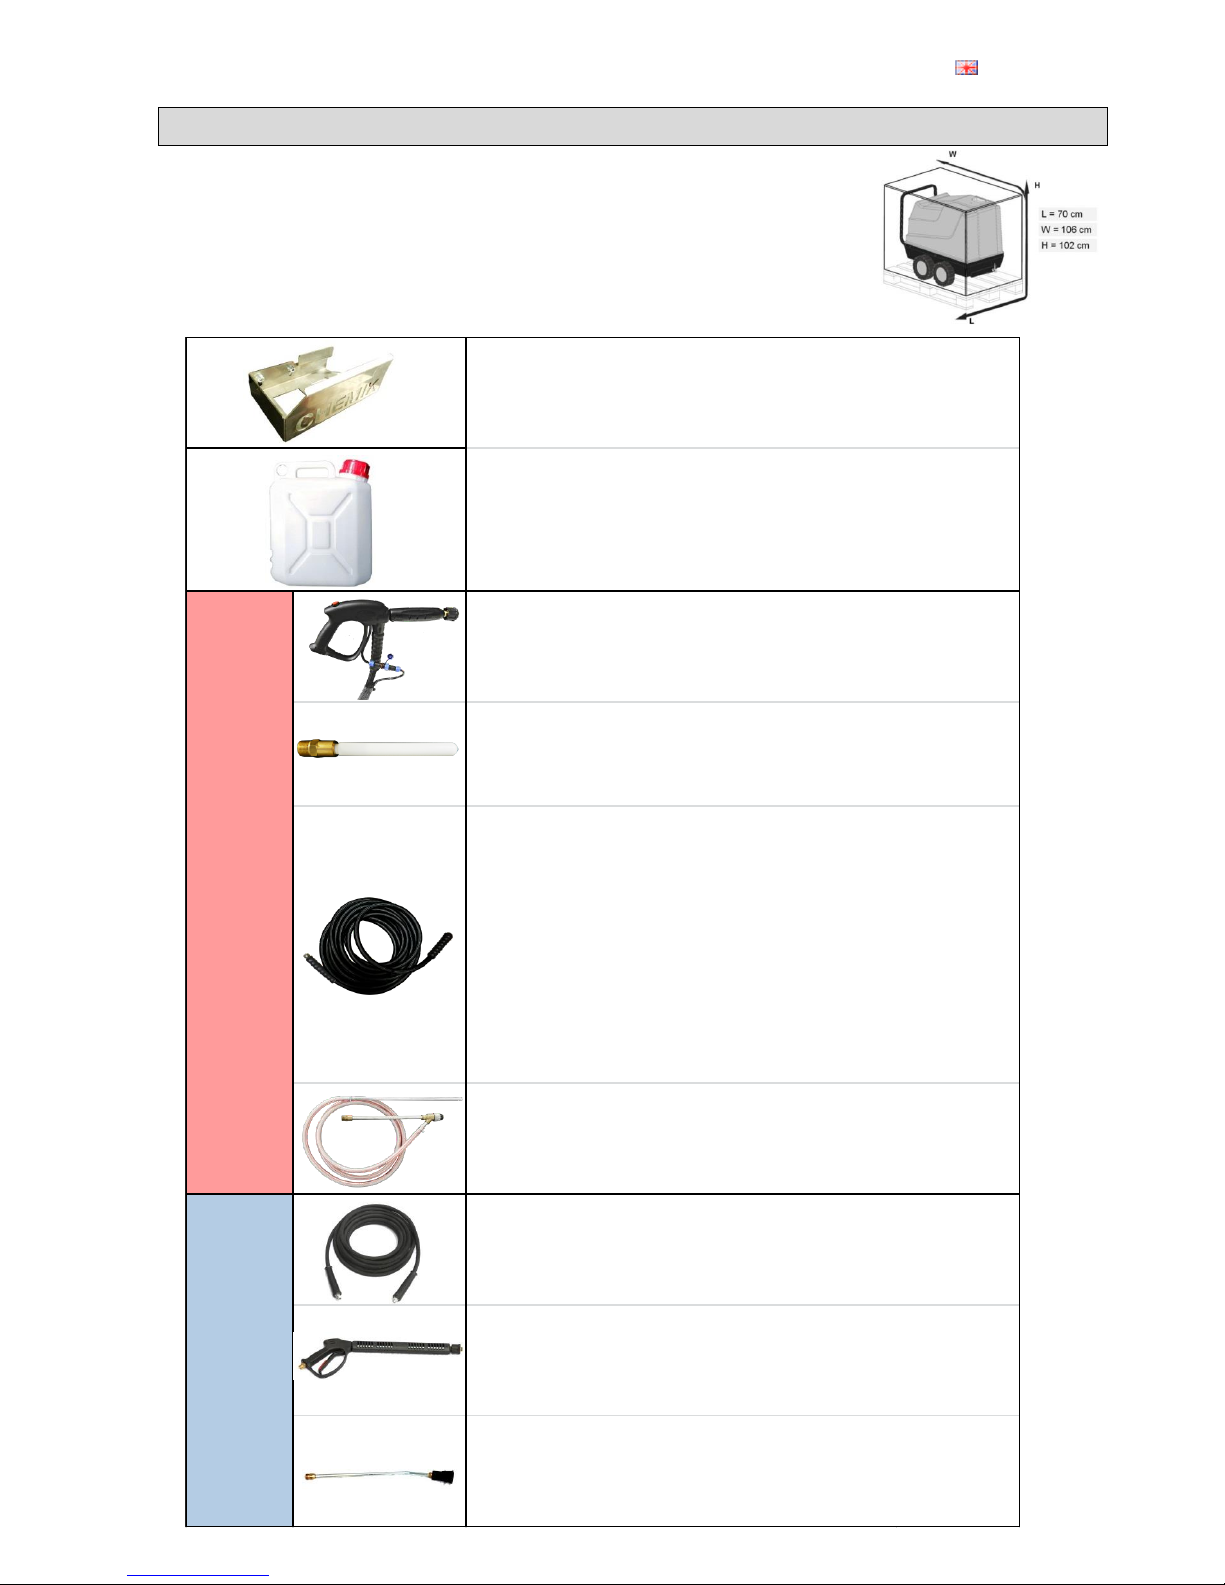
Gun (M22 F fitting)
5L detergent container
Detergent container support bracket
+ N°2 8x30 screws
+ N°2 D8 washers
PRESSURE
WASHER
STEAM
120cm lance + adjustable nozzle
RL26 automatic gun
10m HP R1 hose
Sandblasting kit (for steam - sold separately)
10m hose with rubber burn protection
Teflon nozzle with M22 adaptor
1. PACKAGING DIMENSIONS AND CONTENTS
PACKAGING DIMENSIONS
L=70cm
W=106cm
H=102
Table of contents
Popular Electric Steamer manuals by other brands

Andrew James
Andrew James Food Steamer user guide

Eloma
Eloma Joker B Installation and Technical Connections

Clatronic
Clatronic DG 3547 instruction manual

Heaven Fresh
Heaven Fresh NaturoPure HF 8333 instruction manual

Memco
Memco 6625B Operating and maintenance instructions

Hastings
Hastings DIRECT GAS FIRED ELECTRIC STEAM Installation and service instructions


