iFan IF3266 User manual
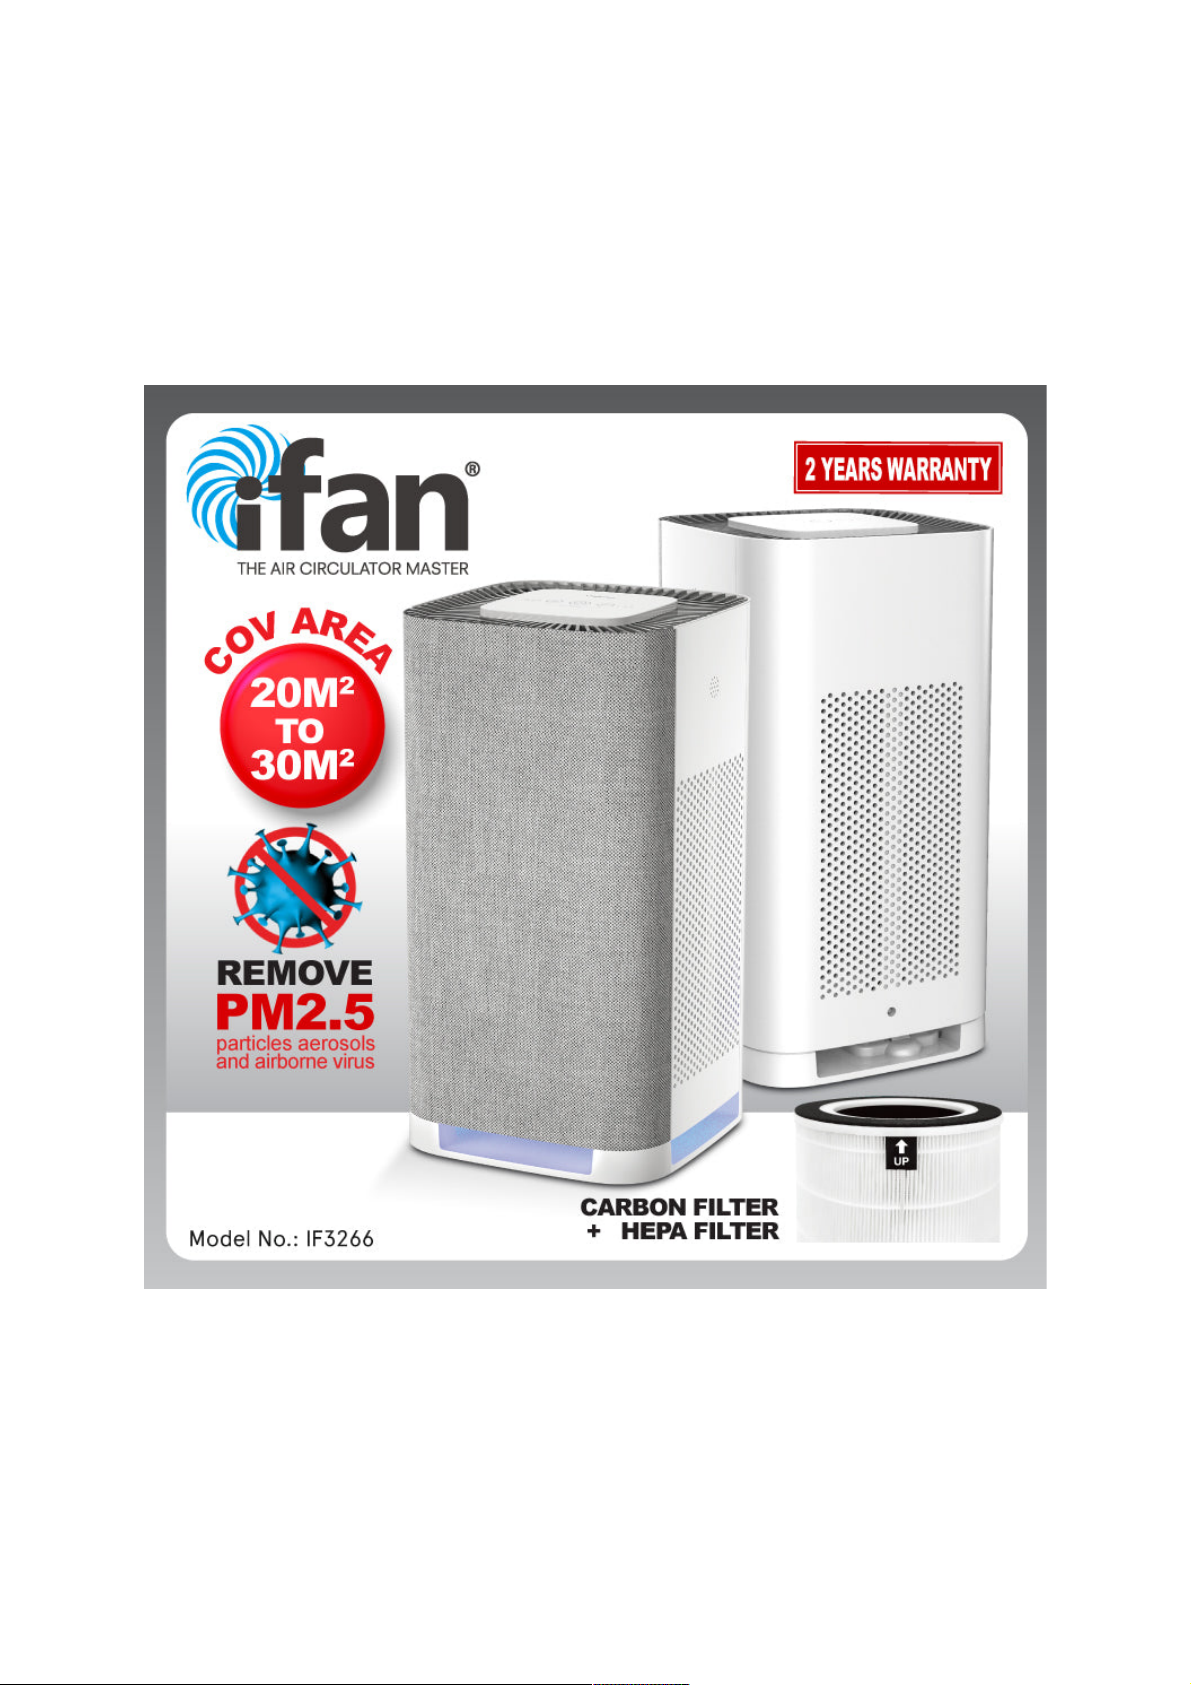
AIR PURIFIER HEPA FILTER
IF3266

Parts & Description s
LIST OF COMPONENTS
1.
Front Cover
2.
Filter
3.
Air Outlet
4.
Control Panel
5.
Air Inlet
6.
UV-C Light
7.
Main Body
8.
Dust Tray
9.
Mosquito Tray
Front Cover
②
Filter
!
①
!
③
!
⑤
!
④
!
&⑥
!
!
⑦
Air Outlet
Control Panel
Air Inlet
Main Body
UV-C Light
②
!
&!
⑨
Dust Tray (under Filter)
Mosquito Tray
(under Main Body)

Control Panel’s Buttons and their Functions
Button
Function
Steps
Timer
Touch the Timer button in the Standby state to set the
duration of 2h, 4h or 6h.
Power
Touch the Power button to ON or OFF the appliance.
On Start-up, the Ambient Light and Negative Ion
Generator are turned on by default.
Wind
Speed
Touch the Wind Speed button to adjust the fan speed.
Mosquito
Catching
Function
During operation, press and hold the Timer + Wind
Speed buttons together for 3s to turn on/off the Mosquito
Catching Function.
Ambient
LED light
During operation, press and hold the Timer button for 3s
to turn on/off the Ambient LED light.
Timer Power Wind Speed
③
④

Warnings s
ATTENTION :
Read this booklet carefully as it contains important instructions for a safe installation,
use and maintenance.
Important instructions to be kept for future reference.
The following basic precautions should always be followed when using electrical
appliances:
1. Read all instructions before using the appliance.
The Appliance
2. This appliance must be used only for the purpose it was expressly designed; any
use NOT complying with the instructions contained in the manual is considered
inappropriate and dangerous. The manufacturer is NOT responsible for possible
damages caused by the inappropriate and/or unreasonable use.
3. The installation/assembly of the appliance will be made in accordance with the
indications of the manufacturer. A wrong procedure may cause damages to
persons, animals or objects, for which the manufacturer cannot be considered
responsible.
4. Before use, check the integrity of the appliance and power cable. DO NOT
operate the appliance when its Motor Unit is damaged. In case you are not sure,
contact a qualified person. If the power cable is damaged, it must be replaced by
the manufacturer or its service agent, or a qualified technician in order to avoid a
shock hazard.
5. Before powering the appliance make sure the rating (voltage and frequency)
corresponding to the grid and the socket is suitable for the plug of the appliance,
and that the wall socket is properly grounded.
6. Avoid the use of adapters and/or extension cables; if their use is absolutely
necessary, use only materials in compliance with the current safety regulations
and according to the electrical parameters of the adapters.
7. The appliance must NOT be switched on using external timers and/or other
remote control appliances which are not specified in this manual.
8. Only use original components & accessories provided by the manufacturer. Any
non-original component or accessory (e.g. Filters, etc.) NOT recommended by
the manufacturer (including those made by other manufacturers or by the same
manufacturer but for other models) may cause injuries to persons or damage to
the appliance.
9. The packing materials (plastic bags, expanded polystyrene, etc.) must be kept
out of the reach of children or disabled persons since they represent potential
sources of danger.

Location
10. This appliance is NOT suitable to be used or stored near heat sources (open
flame, ovens, heaters, stoves, etc.) and/or in an explosive environment (in the
presence of flammable substances such as gas, vapour, mist or dust, in
atmospheric conditions when, after ignition, the combustion is spread in the air).
Items containing these substances should never be placed in the appliance, and
never be used to clean the appliance in order to avert the risk of fire or
explosion.
11. The appliance should NOT be placed on a surface, or in the vicinity of, objects
which can be damaged by heat, such as carpets or plastics. DO NOT locate
multiple portable socket outlets or power supplies at the bottom or rear of the
appliance. During operation, as heat is transferred away from the appliance, the
surface that the appliance is placed upon as well the surface immediately above
or adjacent to it may become very hot. If the appliance is operated on wooden
furniture, use a protective pad to prevent damage to delicate finishes. There
should be at least 20 cm of free space from the back, left & right sides, and the
top of the appliance to allow adequate air circulation. Never put things on top of
the appliance.
12. Avoid placing the power cable on abrasive or sharp surfaces or in positions
where it can be damaged easily. Avoid placing heavy objects on the cable. The
cable must NOT be placed under carpets, or covered with throw rugs, runners or
similar. Arrange the cable away from the high traffic area, and where it will NOT
be tripped over. DO NOT pull or carry the appliance by the cable.
13. DO NOT operate the appliance next to an open window while it is raining.
Rainwater splashing onto the appliance may cause an electric shock.
14. DO NOT use or store the appliance outdoors. Store and use the appliance only
indoors, or in any case, protected from weathering such as rain, direct radiation
of the sun and dust.
Operation
15. If you are using the appliance for the first time, you should:
a. Clean the exterior parts of the appliance with warm water & dish-washing
agent with a soft cloth and wipe dry. DO NOT use metal scouring pads. Make
sure that the Motor Unit DOES NOT come into contact with water.
b. Check that the Air Outlet and Fan Blades are NOT damaged.
c. Hold both sides of the Front Cover and slide the Front Cover upwards. The
Front Cover detaches from the Main Body. Take out the Filter and remove the
plastic bag around the Filter.
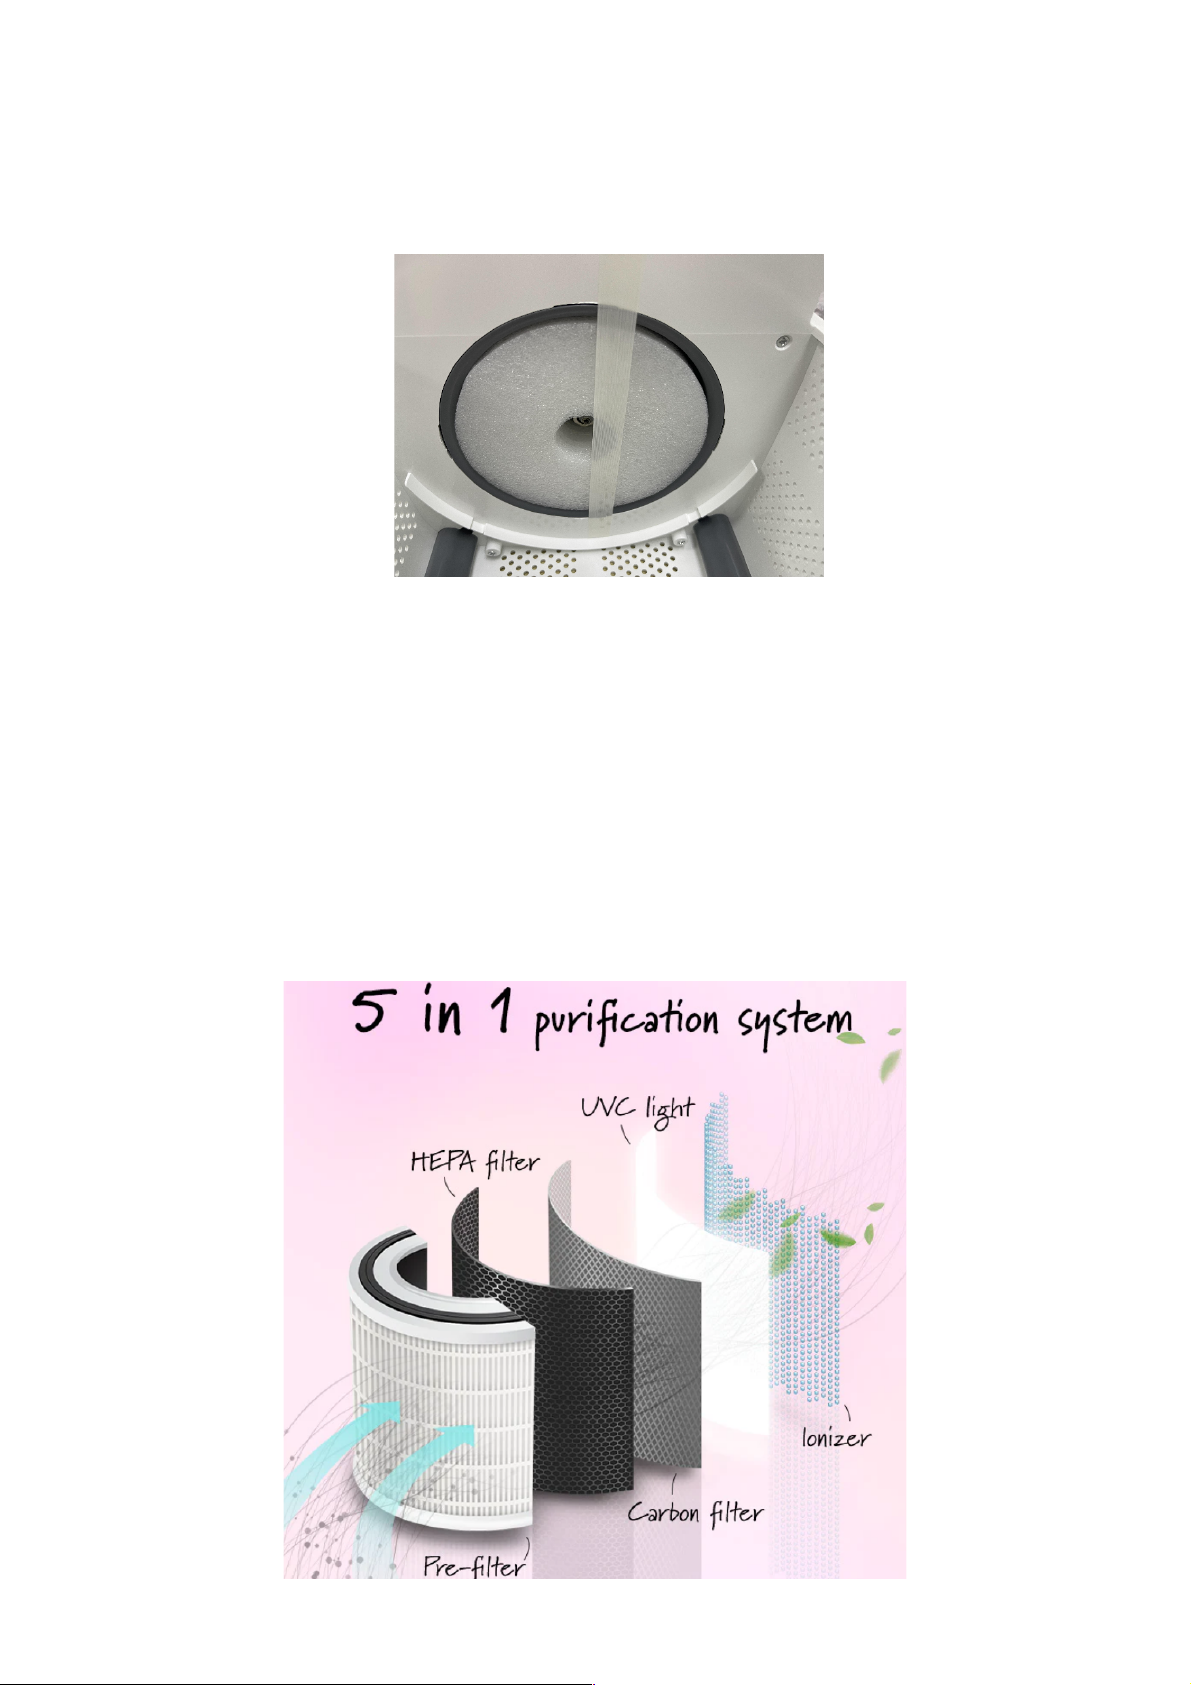
Remove the Styrofoam protection below the Motor Unit and above the normal
position of the Filter in the Main Body.
Replace the Filter in the correct position in the Main Body.

Operate the appliance with the Filter inserted (without the plastic bag),
the Styrofoam protection removed and the Front Cover locked in place.
d. Place the appliance upright on a horizontal, stable, dry and heat-resistant
surface. Damage may occur if the appliance is placed on an incline or
decline.
e. To turn ON : Insert one end of the power cable into the socket at the back of
the Main Body and the plug of the power cable directly into the wall socket
and switch ON. Ensure that the plug fits tightly into the socket. Touch the
Power button to switch the appliance ON.
f. On Start-up, the Ambient Light and Negative Ion Generator are turned on by
default.
g. (optional) Touch the Wind Speed button for the Fan speed you desire (Low –
1, Mid – 2, High – 3).
h. To turn OFF : Touch the Power button to switch the appliance OFF.
i. Make sure to remove any label or protective sheet which may prevent its
proper functioning.
DO NOT:
• use the appliance without the Filter in place, or without removing the plastic
bag around the Filter;
• operate the appliance in a room (or location) with high air humidity, such as a
bathroom, shower or swimming pool, as moisture can accumulate in the
appliance and cause an electric shock;
• cover the appliance during functioning;
• obstruct totally nor partially the Air Inlet & Air Outlet;
• place the appliance on a soft surface such as a mattress, pillow, cushion or
sofa, as this could cause the appliance to tip over, blocking the Air Inlet & Air
Outlet;
• insert objects or body parts (including clothing and hair) through the Air
Inlet/Outlet to avoid personal injury or damage to the appliance when in
operation. The blades are rotating at very high speeds, which may lead to
injury to your fingers and hands;
• attempt to force the fan blades to turn or stop the blades from turning, which
may lead to the motor overheating. If the motor is operating, but the Fan
Blades do not move, switch the appliance off;
• touch the power, Timer or Wind Speed buttons too forcefully;
• use the appliance near curtains or textiles;
• use the appliance to dry wet clothes;
• use any spray (e.g. pesticides, insecticides, etc.) in the room;
• add aromatic oil to the Filter;
• use any of the following agents as a cleaner: alcohol, gasoline, thinner, or
benzene;

• operate the appliance at temperatures lower than 0 °C or higher than 40 °C,
and operate the appliance for more than 6 hours without turning it off for at
least 30 minutes to let the appliance cool down for a total usage of 12 hours a
day – failure to heed this warning may result in motor failure;
• leave the appliance unsupervised during operation.
16. During operation, DO NOT touch the appliance with wet body parts, and it is
recommended to have between you and the standing surface, an isolating
element (for example, wearing shoes with rubber soles).
17. DO NOT soak the appliance (especially the Motor Unit) in water or other liquids,
wash it under the tap, or let any liquid flow into the internal casing of the
appliance to prevent electric shock. In case of accidental fall in water, DO NOT
try to take it out, but first of all switch OFF the appliance.
18. Switch the appliance OFF before unplugging the appliance. Plug and unplug the
power cable firmly holding it with dry hands. Always unplug the power cable to
avoid overheating and if it is NOT used for a long period, before storing,
assembling & disassembling, cleaning or performing any maintenance operation.
Before storing, cleaning or maintenance operations, leave to cool for 30 minutes.
19. In case of malfunction or anomaly during the functioning, switch the appliance
OFF immediately, turn off the power and check the cause of the anomaly, if
possible, with the support of a qualified person.
20. If smoke is observed coming out of the appliance, switch the appliance OFF &
detach the plug of the power cable from the wall socket immediately.
21. This appliance is NOT intended for commercial use but to be used in households
and similar applications, such as:
• Staff kitchen areas in shops, offices & other working environments;
• By clients in dormitories, hotels, motels & other residential environments;
• Bed and breakfast type environments.
22. This appliance can be used by children aged from 8 years and above and
persons with reduced physical, sensory or mental capabilities or lack of
experience and knowledge if they have been given supervision or instruction
concerning use of the appliance in a safe way and understand the hazards
involved. Children shall NOT play with the appliance. Cleaning and user
maintenance shall NOT be made by children unless they are older than 8 and
supervised. Keep the appliance and its cable out of reach of children less than 8
years old.
23. Save these instructions.
HOW TO USE s
Operating the Air Purifier
1. Place the appliance upright on a horizontal, stable, dry and heat-resistant
surface. DO NOT place the appliance on a soft surface such as a mattress,
pillow, cushion or sofa, as this could cause the appliance to tip over, blocking the
Air Inlet & Air Outlet.
2. Insert one end of the power cable into the socket at the back of the Main Body
and the plug of the power cable directly into the wall socket and switch ON.
Ensure that the plug fits tightly into the socket.
3. Touch the Power button to switch the appliance ON.
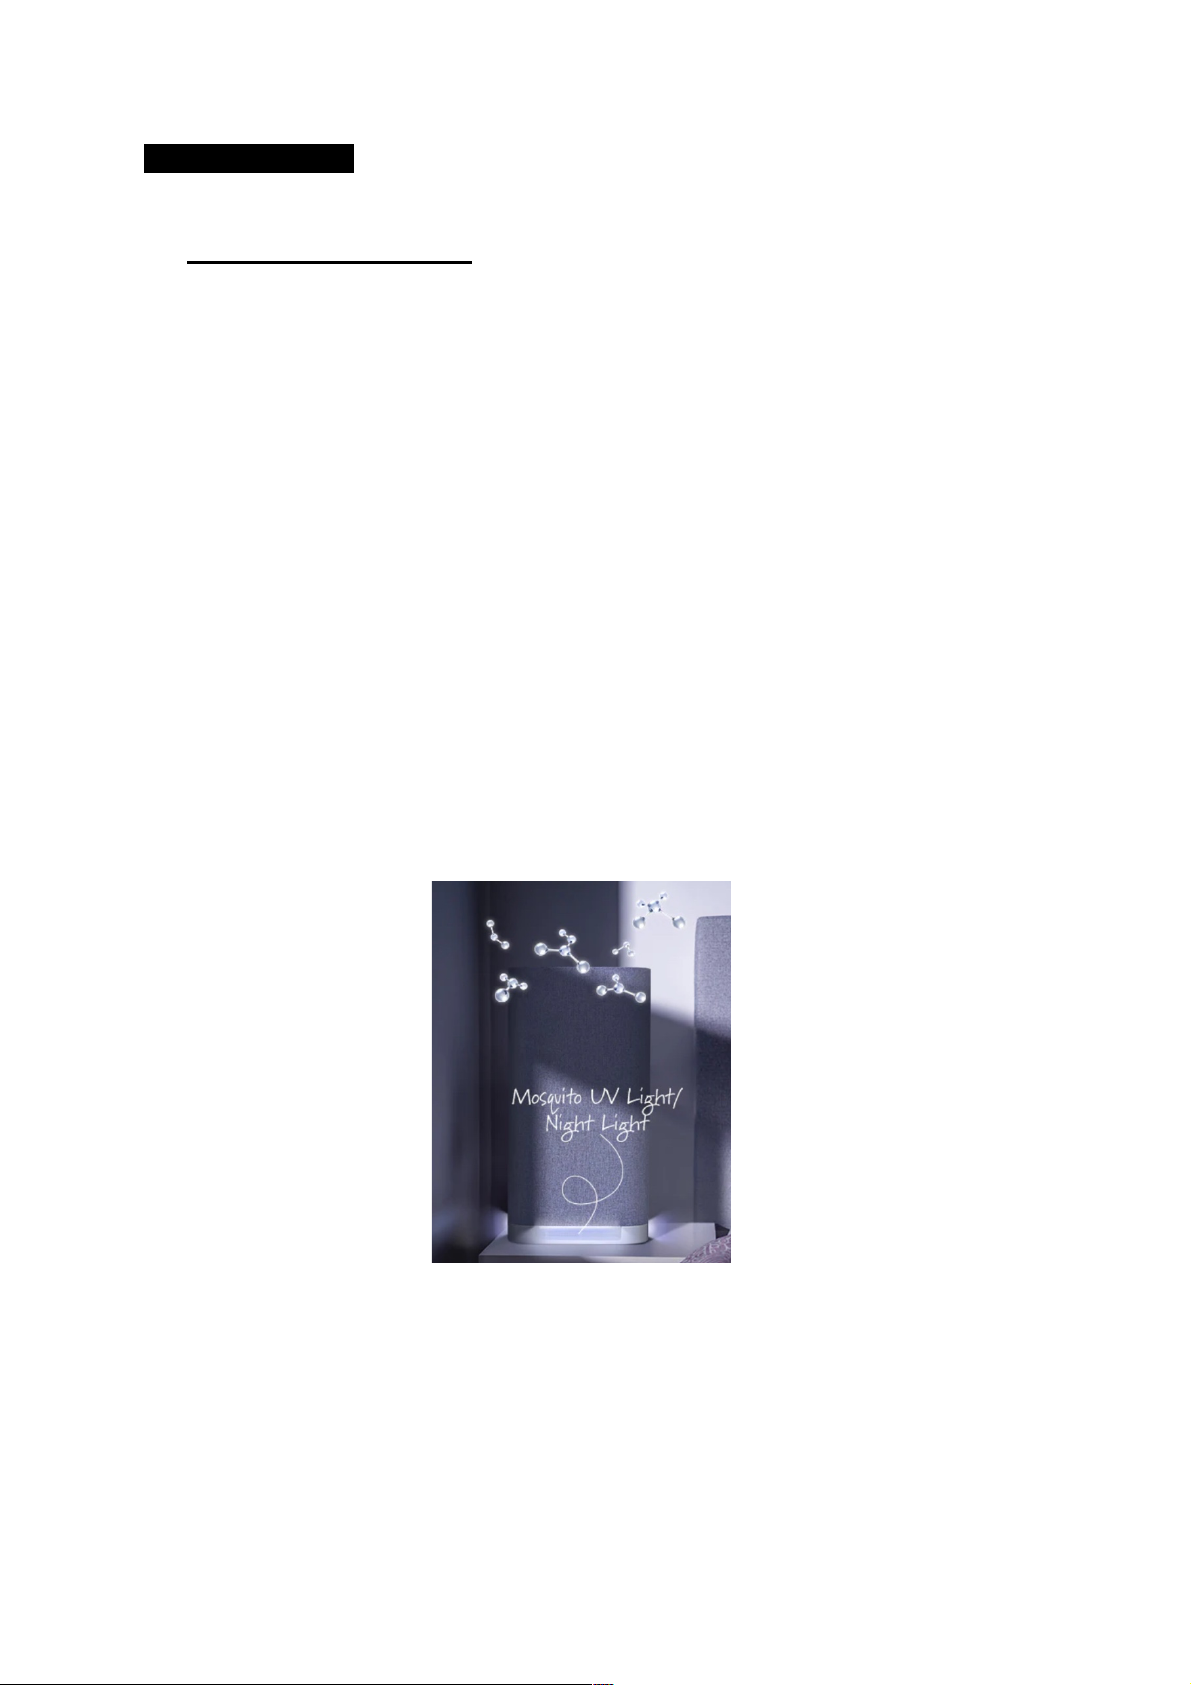
4. During operation, the Ambient LED Light and Negative Ion Generator are turned
on by default. The appliance works as an air purifier by releasing negative ions
into the surroundings.
5. To turn off (or on again) the Ambient LED Light, press and hold the Timer button
for 3 seconds.
6. (optional) Touch the Wind Speed button for the Fan speed you desire (Low – 1,
Mid – 2, High – 3).
7. (optional) To turn on (or off) the Mosquito Catching Function, press and hold the
Timer + Wind Speed buttons together for 3 seconds.
8. (optional) You can select the desired time for the appliance to operate for 2
hours, 4 hours or 6 hours if you wish. Press the Timer button once for 2 hours,
twice for 4 hours and 3 times for 6 hours.
9. Touch the Power button to switch OFF (or switch ON again) the appliance.
10. Unplug the power cable from the wall socket when not in use and before
cleaning or replacing the Filter, or cleaning the appliance.
CLEANING s
1. When the service life of the Filter has expired, the appliance emits three beeps
"ding"~ "ding"~"ding"~ and the 3 buttons of the Control Panel keep flashing.
2. Touch the Power button to switch the appliance OFF. Unplug the power
cable from the wall socket when not in use and before cleaning or replacing the
Filter, or cleaning the appliance.
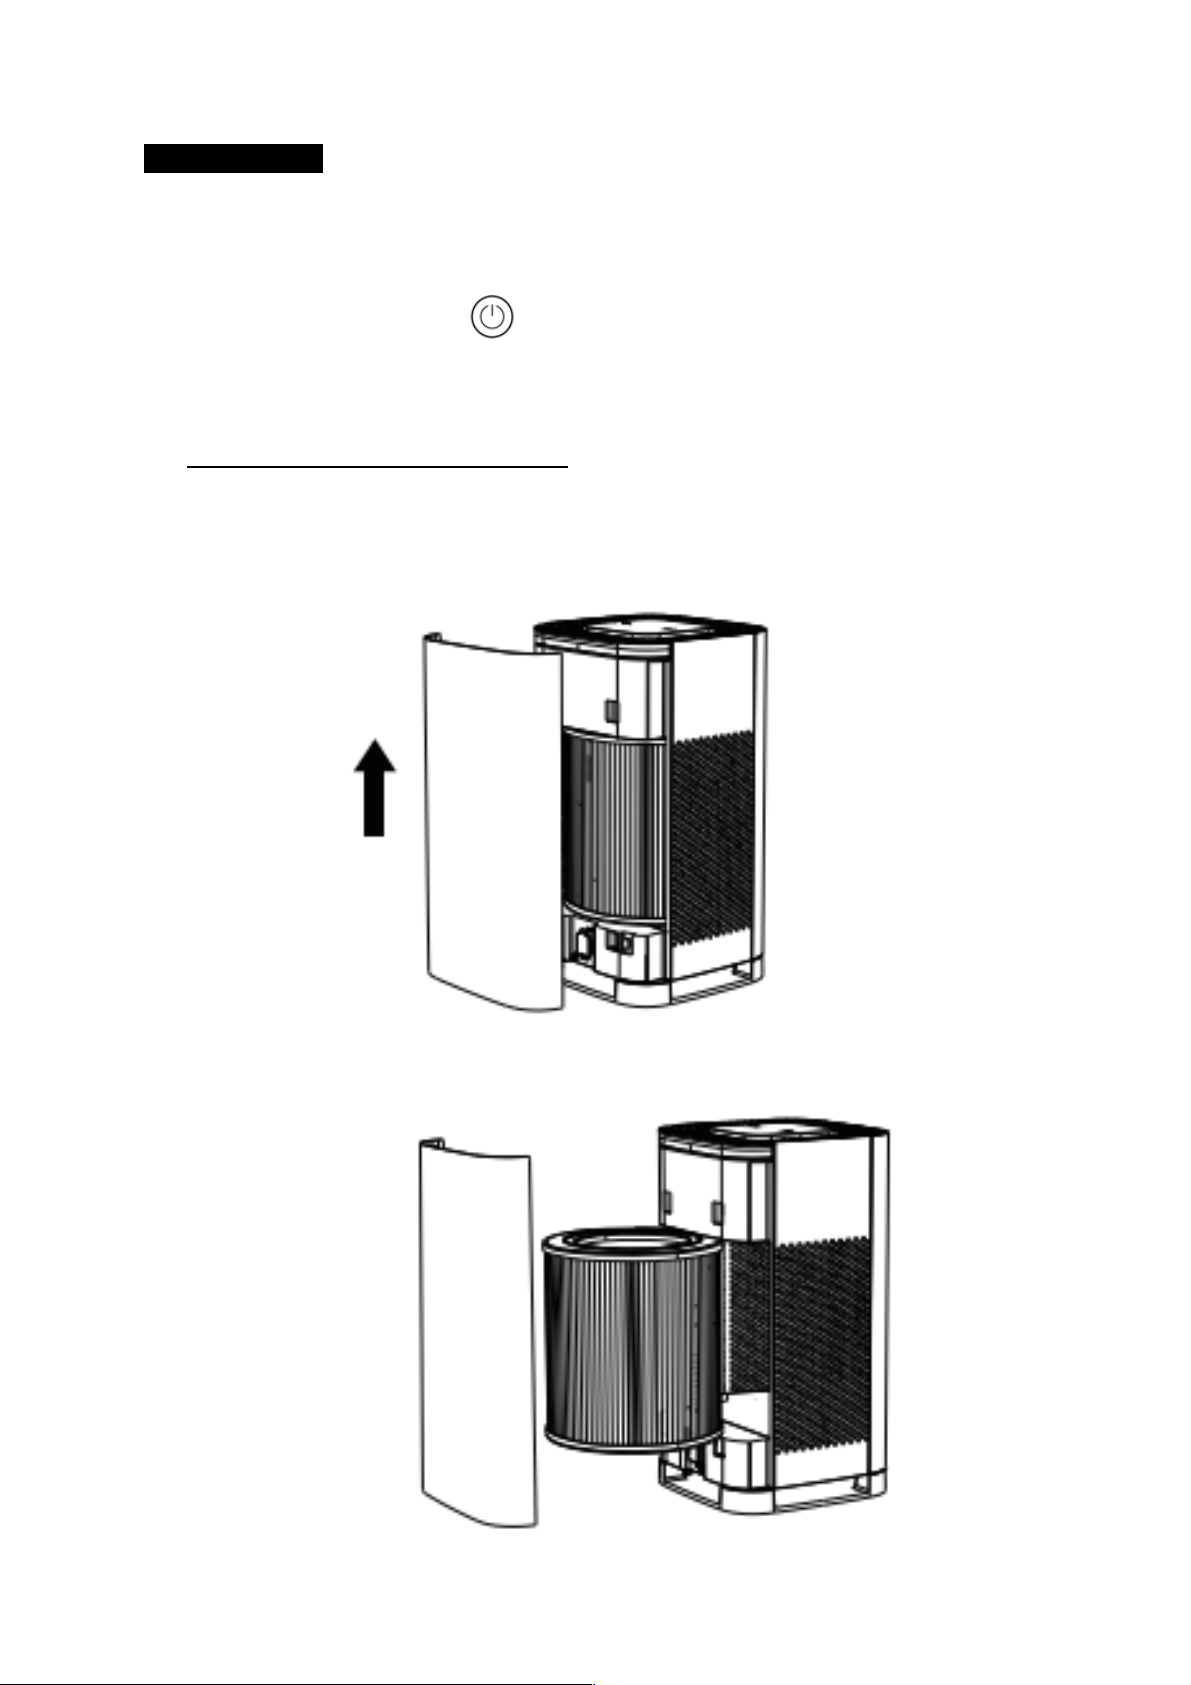
Removing and Inserting the Filter
3. Hold both sides of the Front Cover and slide the Front Cover upwards. The Front
Cover detaches from the Main Body.
4. Remove the Filter. Wrap the Filter with a plastic bag to avoid pollutants falling to
the floor.
5. If the appliance is being operated for the first time, remove appliance for the first
time, remove the Styrofoam protection below the Motor Unit and above the
normal position of the Filter in the Main Body.
6. The Filter consists of 3 filters: Preliminary Filter, HEPA Filter and Charcoal Filter.
It is recommended to clean the Filter once every month. If the operating
environment is poor, the cleaning frequency should be increased. If the Filter is
blocked, it will lead to poor air purification, increase the power consumption and
eventually lead to the breakdown of the appliance.
Note: due to the different pollution levels of the actual environment, the life cycle
of each Filter will be different. In households with a large number of smokers, the
Filter replacement cycle may be shortened to once in every 6 months. If bad
odours are released from the Air Outlet, it means that the Filter’s filtration and
adsorption volume is saturated. The Filter should be cleaned first and if there is
no improvement, it should be replaced.

7. The Filter is either cleaned if it had not reached its replacement cycle, or thrown
away if it has. Please note that a Filter that reaches its replacement cycle cannot
be used even if it is cleaned up. Please treat it as non-combustible waste.
8. Use a vacuum cleaner to clean the surface dust on the Filter when the surface is
dusty, which can extend the service life of the Filter. The vacuum cleaner can
also be used to suck up dirt from the Air Inlet and Air Outlet.
Note: The Filter that has reached the replacement cycle cannot be reused even
if it is clean. Please dispose of it as non-combustible garbage.
9. If a new Filter is required, take the new Filter out of the plastic bag. Place the
new/cleaned Filter in the correct position in the Main Body.
10. After the Filter is replaced, reset the Filter reminder; press and hold the Timer +
Power buttons + together for 3 seconds to reset the Filter life timer.
General cleaning
11. Clean the exterior parts of the appliance thoroughly with warm water (below
40°C) & dish-washing agent and a damp cloth, and immediately wipe dry. Take
special care that the Control Panel is kept dry and that the Motor Unit DOES
NOT come into contact with water.
DO NOT use a scrubbing brush.
DO NOT use any of the following agents as a cleaner: gasoline, thinners, or
benzene.
12. Never run water over the appliance as malfunctions may occur if water seeps
inside the appliance.
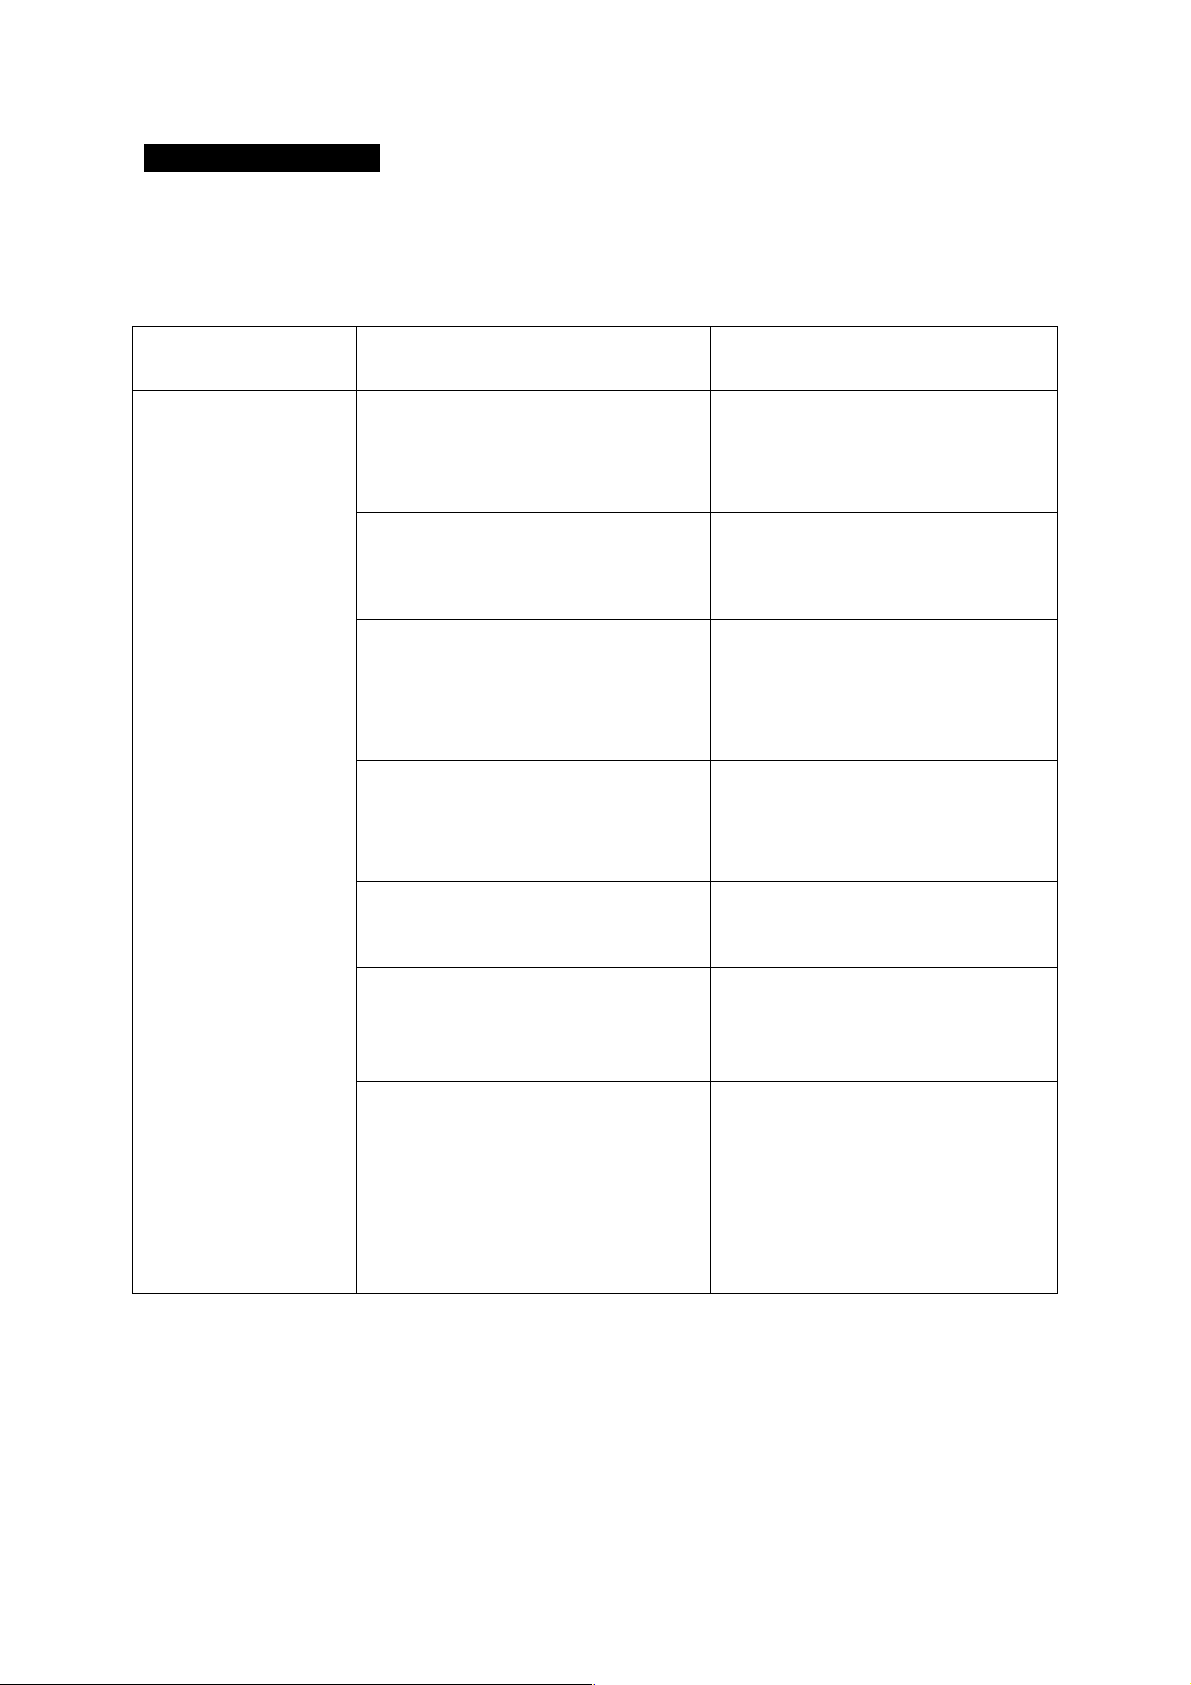
Problem Solving s
If your air purifier is not working properly, please check the following before sending
it for repairs.
Problem
Possible Causes
How to Solve
The appliance
does not work
The plug is not properly
inserted into the wall socket.
Insert the plug into the wall
socket. Do not use adaptors
or extensions.
The wall switch is not switched
on.
Ensure that the wall switch is
switched on.
The motor has overheated.
Disconnect the power cable
from the wall socket and leave
the motor to cool.
The power cable is defective.
Have the power cable
replaced at the authorised
Service Centre.
Lack of power.
Check that the power cable is
not loose.
Motor or PCBA breakdown.
Have the appliance checked
at the authorised Service
Centre.
The Filter had not been
installed correctly in position,
and is preventing the Front
Panel from closing.
Remove the Front Cover and
check the alignment of the
Filter.
If needed, re-install the Filter.
Close the Front Cover.

Bad odours are
released from
the Air Outlet of
the appliance
The Filter’s filtration and
adsorption volume is
saturated.
Have the Filter replaced.
The odour concentration of
the indoor air is too high.
Open nearby windows for
ventilation, and check if the bad
odour is emanating from the
appliance itself.
The purification
effect is not
significant, and
the air quality is
not significantly
improved
The Filter had not been
installed.
Install the Filter.
The appliance is tucked
within narrow confines or
near obstacles that affect the
ability of the appliance to
draw in air.
Place the appliance on a flat,
stable surface or remove the
obstacles.
The Filter is too dirty.
Clean or replace the Filter.
The appliance
is too noisy
Foreign objects have fallen
into the appliance.
Check to see whether there is
any blockage, and if so, attempt
to remove them. If the foreign
object(s) is wedged too deeply,
bring the appliance to the
authorised Service Centre.
The appliance has been
situated on uneven ground.
Place the appliance on a flat,
stable surface.
The parts may have been
incorrectly assembled.
Check to see whether the Filter
or parts around it had been
incorrectly re-positioned during
the last replacement or
cleaning.
The Fan speed is set too
high.
Set a lower speed.
The Filter is too dirty.
Have the Filter replaced.
The Filter is being installed
upside down.
Adjust the correct orientation of
the Filter and align it with the
bottom slot.
ENVIRONMENTAL TIP s
This appliance, along with all other electronic appliances, should, when it is no
longer capable of functioning, be disposed with the least possible environmental
damage according to the local regulations in your area. In most cases you can
discard the appliance at your local recycling center.
DISPOSAL: Do not dispose this product as unsorted municipal waste. Collection of
such waste separately for special treatment is necessary.
SPECIFICATION s
MODEL / FILTER
IF3266 / IF3266FIT
RATED VOLTAGE & POWER
220 – 240 V ~50 – 60 Hz 24 W
NEGATIVE ION OUTPUT
10 million per cubic metre
CLEAN AIR DELIVERY RATE
200 cubic metres per hour
COVERAGE AREA
20 – 30 square metres
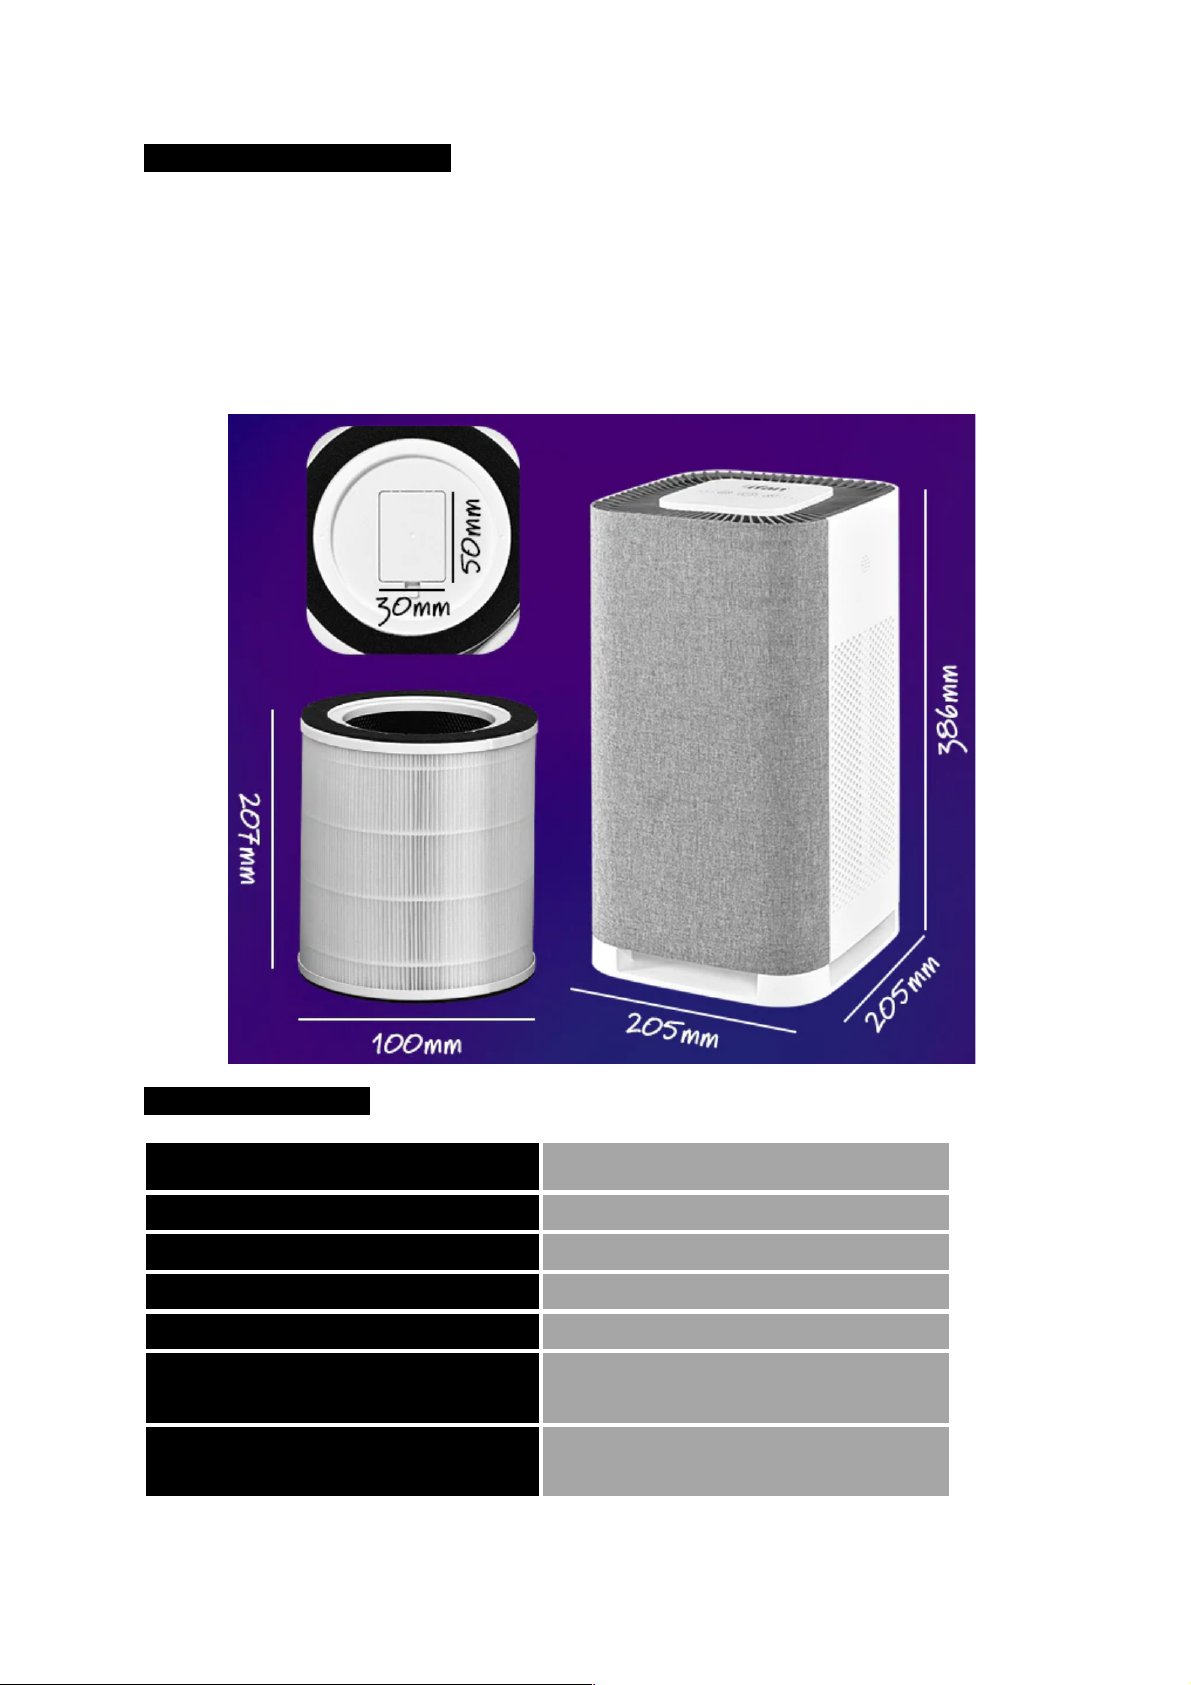
DIMENSIONS (APPLIANCE)
205 (L) x 205 (D) x 386 (H) mm
8.1 (L) x 8.1 (D) x 15.2 (H) inch
DIMENSIONS (FILTER)
100 (L) x 100 (D) x 207 (H) mm
3.9 (L) x 3.9 (D) x 8.2 (H) inch

WARRANTY s
Warranty Conditions
1. This warranty provides against defective materials and manufacturing faults
throughout for two years from the date of purchase of the appliance. The
warranty on the Compressor is 10 years subject to the same conditions as
above.
2. This warranty also does not cover normal wear and tear, replacement of
consumable materials and accessories, and the cost of maintenance of the
appliance.
3. This warranty does not cover the repair or replacement of part/s damaged by
misuse, accidents, negligence, alterations, or modifications in any way, or repairs
done by any repair organisation without the prior consent of PowerPac Electrical
Pte Ltd.
4. Repair and service are to be performed at: 5 Changi South Lane #03-01
Singapore 486045. A transport fee will be charged for personal doorstep
service.
5. The original purchaser of the appliance must furnish proof of purchase to our
Service Centre with the email or number as registered during submission of
warranty when this appliance is sent for repair/service. Failure to do so may
delay the receipt of said repair/service by the customer.
6. Under no circumstances whatsoever shall the serial number be erased, defaced
or altered by the customer and/or his representatives, or the dealer and/or his
agents. Failure to ensure this shall invalidate the warranty.
7. This warranty is deemed to be void if the defect is cause by the attack of
household pests, fire, lightning, natural disasters, pollution, abnormal voltage or
the usage of generators.
8. This warranty is valid in Singapore only.
9. This warranty will be honoured subject to the customer’s registration of the
warranty inclusive of original invoice or valid purchase receipt. Failure to present
these documents will result in denial of service. However, if the customer still
requests that the defective appliance be repaired, PowerPac Electrical Pte Ltd
may, at its discretion, repair the appliance but impose a labour charge, as well as
the costs of the replacement parts, to be borne solely by the customer.
10. Please refer to the attached picture for the location of
one of our appliance’s serial number, as an example.

Please complete the on-line registration warranty form available on our website.
There is no further requirement to send us any hard copy as part of our efforts to
save the environment.
In accordance with the terms and conditions of this limited warranty as stated above,
PowerPac Electrical Pte Ltd, at its expense shall provide free services for the
appliance within the warranty period from its date of purchase from our Authorised
dealers.
Table of contents


