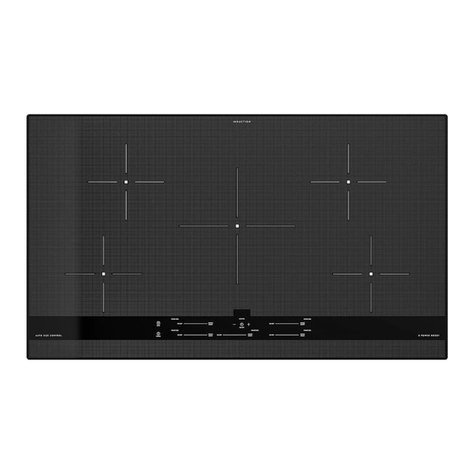
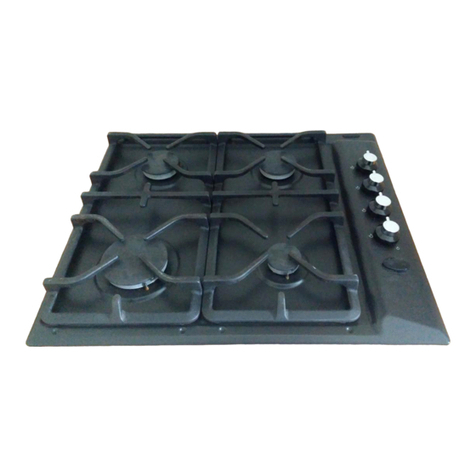
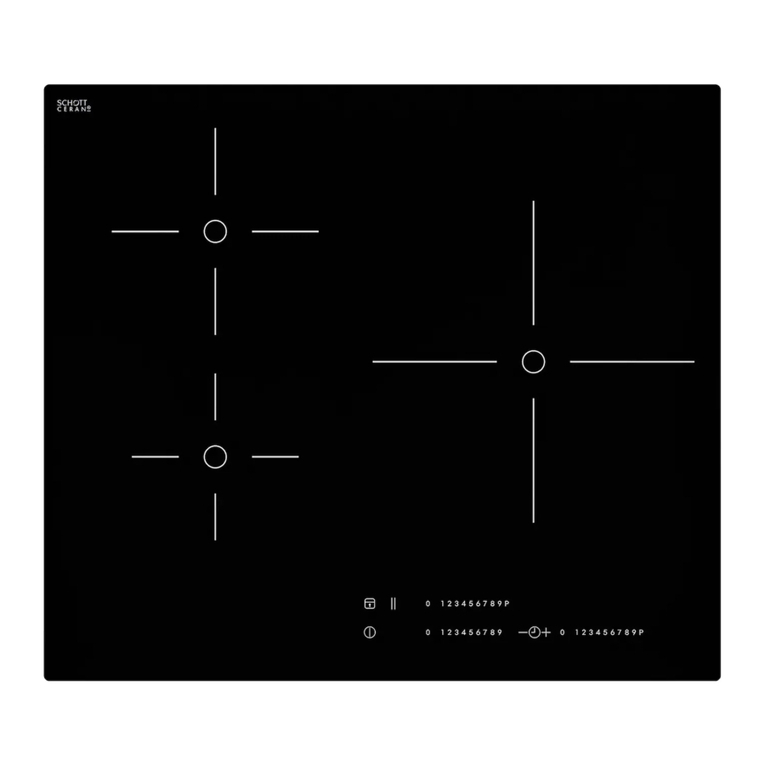
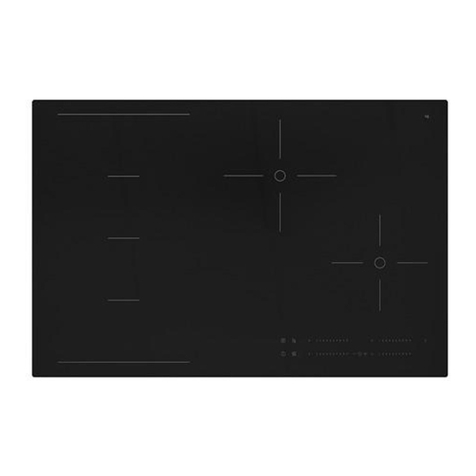
IKEA HACKSTAD User manual

en
es
fr
HACKSTAD
BLACKSTAD
ÄLMESTAD

2
en
Contents
English 3
Español 24
Français 49
Please record your model and serial numbers below for
reference.
Registre su modelo y número de serie a continuación para
referencia.
Veuillez enregistrer vos numéros de modèle et de série ci-
dessous pour référence.
Purchase Date / Fecha de compra / Date d’achat
Model Number / Número de modelo / Numéro de modèle
Serial Number / Número de serie / Numéro de série
Please refer to the last page of this manual for the
full list of IKEA appointed After Sales Service Pro-
vider and relative national phone numbers.
Veuillez vous reporter à la dernière page de ce man-
uel pour obtenir la liste complète des fournisseurs
de services après-vente désignés par IKEA et les
numéros de téléphone nationaux correspondants.
Consulte la última página de este manual para ver
la lista completa de proveedores de servicios pos-
venta designados por IKEA y los números de telé-
fono nacionales correspondientes.
NOTE
Please attach sales receipt here for future refer-
ence.
Adjunte el recibo de compra aquí para referencia
futura.
Veuillez joindre le reçu de vente ici pour référence
future.
Serial and Model Number Location /
Ubicación de la placa de serie / Em-
placement de la plaque signalétique

3
en
Read all instructions before using this ap-
pliance.
This manual contains important safety
symbols and instructions. Please pay at-
tention to these symbols and follow all
instructions given.
Do not attempt to install or operate your
appliance until you have read the safety
precautions in this manual. Safety items
throughout this manual are labeled with a
WARNING or CAUTION statement based on
the risk type.
Warnings and important instructions ap-
pearing in this guide are not meant to
cover all possible conditions and situations
that may occur. Common sense, caution,
and care must be exercised with installing,
maintaining, or operating your appliance.
DEFINITIONS
This is the safety alert symbol. It is
used to alert of potential personal injury
hazards. Obey all safety messages that
folow this symbol to avoid possible injury
or death.
WARNING
Indicates a potentially hazardous situation
which, if not avoided, may result in death
or serious injury.
CAUTION
Indicates a potentially hazardous situa-
tion which, if not avoided, may result in
minor or moderate injury.
IMPORTANT
Indicates installation, operation or main-
tenance information which is important
but not hazard-related.
NOTE
Indicates a short, informal reference –
something written down to assist the
memory or for future reference.
IMPORTANT INSTRUCTIONS FOR UN-
PACKING AND INSTALLATION
IMPORTANT
Read and follow the below instructions
and precautions for unpacking, installing,
and servicing your appliance.
Remove all tape and packaging before us-
ing the appliance. Destroy the carton and
plastic bags after unpacking the appliance.
Never allow children to play with packaging
material. Do not remove the wiring label
and other literature attached to the appli-
ance. Do not remove model/serial number
plate.
Cold temperatures can damage the elec-
tronic control. When using this appliance
for the first time, or when the appliance
has not been used for an extended period
of time, be sure the appliance has been in
temperatures above 32ºF (0ºC) for at least
3 hours before turning on the power to the
appliance.
Never modify or alter the construction of
the appliance by removing the leveling
legs, panels, wire covers, anti-tip brackets/
screws, or any other part of the appliance.
IMPORTANT SAFETY INFORMATION
CONTENTS
Important Safety Information........................ 3
Before Setting Surface Controls ...................... 8
Setting Surface Controls ...........................14
Care and Cleaning................................19
Before You Call ..................................21
Warranty ......................................22

4
en
IMPORTANT SAFETY INFORMATION
Be sure to have an appropriate foam-type
fire extinguisher available, visible, and eas-
ily accessible located near the appliance.
GROUNDING INSTRUCTIONS
WARNING
• Avoid fire hazard or electrical shock.
Failure to follow this warning may
cause serious injury, fire, or death.
• Avoid fire hazard or electrical shock.
Do not use an adapter plug, use an
extension cord, or remove grounding
prong from the power cord. Failure to
follow this warning may cause serious
injury, fire, or death.
Proper Installation—Be sure your appli-
ance is properly installed and grounded by
a qualified technician. In the United States,
install in accordance with the National Fuel
Gas Code ANSI Z223.1/NPFA No. 54, latest
edition and National Electrical Code NFPA
No. 70 latest edition, and local electri-
cal code requirements. In Canada, install
in accordance with CAN/CGA B149.1 and
CAN/CGA B149.2 and CSA Standard C22.1,
Canadian Electrical code, Part 1-latest
editions and local electrical code require-
ments. Install only per installation instruc-
tions provided in the literature package for
this appliance.
For personal safety, this appliance must be
properly grounded. For maximum safety,
the power cord must be securely connected
to an electrical outlet or junction box that
is the correct voltage, is correctly polarized
and properly grounded, and pro- tected by
a circuit breaker in accordance with local
codes.
It is the personal responsibility of the con-
sumer to have the appropriate outlet or
junction box with the correct, properly
grounded wall receptacle installed by a
qualified electrician. It is the responsibility
and obligation of the consumer to contact a
qualified installer to assure that the electri-
cal installation is adequate andis in confor-
mance with all local codes and ordinances.
See the installation instructions packaged
with this appliance for complete installa-
tion and grounding instructions.
IMPORTANT INSTRUCTIONS FOR
USING THE APPLIANCE
WARNING
• Storage In or On Appliance—Flam-
mable materials should not be stored
in an oven or microwave, near surface
burners or elements, or in the stor-
age or warmer drawer (if equipped).
This includes paper, plastic, and cloth
items, such as cookbooks, plastic
ware, and towels, as well as flammable
liquids. Do not store explosives, such
as aerosol cans, on or near the appli-
ance.
• Do not leave children alone—Children
should not be left alone or unattend-
ed in the area where appliance is in
use. They should never be allowed to
sit or stand on any part of the appli-
ance, including the storage drawer,
lower broiler drawer, warmer drawer,
or lower double oven.
5
en
IMPORTANT SAFETY INFORMATION
WARNING
• Do not store items of interest to chil-
dren in the cabinets above the appli-
ance or on the backguards of ranges.
Children climbing on or near the ap-
pliance to reach items could be seri-
ously injured.
• Do not allow children to climb or play
around the appliance. The weight of
a child on an open oven door may
cause the appliance to tip, result-
ing in serious burns or other injury.
An open drawer when hot may cause
burns. Stepping, leaning, or sitting on
the door or drawers of this appliance
can result in serious injuries and also
cause damage to the appliance.
• Never cover any slots, holes or pas-
sages in the oven bottom or cover
and entire rack with materials such as
aluminum foil. Doing so blocks air flow
through the oven and may cause car-
bon monoxide poisoning. Aluminium
foil linings may also trap heat, causing
a fire hazard.
• Do not use oven or warmer drawer (if
equipped) for storage.
• Never use your appliance as a space
heater to heat or warm the room.
Doing so may result in carbon monox-
ide poisoning and overheating of the
appliance.
CAUTION
• When heating fat or grease, watch it
closely. Grease may catch fire if it be-
comes too hot.
• Do not use water or flour on grease
fires. Smother fire or flame or use dry
chemical or foam-type extinguisher.
Cover the fire with a pan lid or use
baking soda.
CAUTION
• Use dry potholders. Moist or damp
potholders on hot surfaces may result
in burns from steam. Do not let pot-
holders touch hot cooking areas. Do
not use towels or other bulky cloths.
• Do not heat unopened food contain-
ers build-up of pressure may cause
container to burst and result in injury.
• Wear proper apparel - Loose-fitting
or hanging garments should never be
worn while using the appliance. Do not
let clothing or other flammable materi-
als contact hot surfaces.
• Do not touch surface burners or ele-
ments, areas near these burners or el-
ements, interior surfaces of the oven,
or the warmer drawer (if equipped).
Surface burners and elements may
be hot even though they appear cool.
Areas near surface burners and ele-
ments may become hot enough to
cause burns. During and after use,
do not touch, or let clothing or other
flammable materials touch these areas
until they are cool. These areas may
include the cooktop, surfaces facing
the cooktop, oven vent areas, oven
door, and oven window.
• Do not attempt to operate the appli-
ance during a power failure. If the
power fails, always turn off the appli-
ance. If the appliance is not turned
off and the power resumes, electric
surface elements may resume opera-
tion when power is restored. Once the
power resumes, reset the clock and
the oven function.

6
en
IMPORTANT SAFETY INFORMATION
IMPORTANT INSTRUCTIONS FOR
GLASS AND CERAMIC COOKTOPS
Do Not Clean or Operate a Broken Cooktop.
If cooktop should break, cleaning solutions
and spillovers may penetrate the broken
cooktop and create a risk of electric shock.
Contact a qualified technician immediately.
Clean cooktop glass with caution. If a wet
sponge or cloth is used to wipe spills on
a hot cooking area, be careful to avoid a
steam burn. Some cleaners can produce
harmful fumes if applied to a hot surface.
Avoid scratching the cooktop glass with
sharp objects.
IMPORTANT INSTRUCTIONS FOR
USING YOUR INDUCTION COOKTOP
WARNING
If an oven installed underneath is per-
forming self-clean, then the surface cook-
ing unit must be turned off.
CAUTION
Persons with a pacemaker or similar med-
ical device should exercise caution using
or standing near an induction unit while
it is in operation, as the electromagnetic
field may affect the working of the pace-
maker or similar medical device. It would
be advisable to consult your doctor or
the pacemaker or similar medical device
manufacturer about your particular situa-
tion.
Know which knob or key controls each
surface heating area. Place cookware with
food on the cooking area before turning it
on. Turn the cooking area off before remov-
ing the cookware.
Cookware handles should be turned inward
and not extend over adjacent surface ele-
ments. — To reduce the risk of burns, igni-
tion of flammable materials, and spillage
due to unintentional contact with the uten-
sil, the handle of the cookware should be
positioned so that it is turned inward, and
does not extend over other cooking areas.
Glazed cooking utensils — Only certain
types of cookware are suitable for cook
top service and must be magnetic to work
properly on the induction zones. Check the
manufacturer’s recommendations for cook
top use to ensure that the cookware is
compatible with induction cooking.
Improper cookware may break due to sud-
den changes in temperature. Check the
cookware manufacturer’s recommendations
for cooktop use.
Use proper pan size - This appliance is
equipped with one or more surface units
of different sizes. Select cookware with flat
bottoms that match the surface unit size.
Using the proper cookware on the cooking
area will improve efficiency.
Never leave surface elements unattended.
Boil-overs may cause smoking and greasy
spills that may ignite. A pan that has boiled
dry could be damaged and may damage
the cooktop.
When you are flaming foods under a venti-
lating hood, turn on the fan.

7
en
IMPORTANT SAFETY INFORMATION
IMPORTANT INSTRUCTIONS FOR
CLEANING YOUR APPLIANCE
CAUTION
Before manually cleaning any part of the
appliance, be sure all controls are turned
off and the appliance is cool. Cleaning a
hot appliance can cause burns.
Clean the appliance regularly to keep all
parts free of grease that could catch fire.
Do not allow grease to accumulate. Greasy
deposits in the fan could catch fire.
Always follow the manufacturer’s recom-
mended directions for use of kitchen clean-
ers and aerosols. Be aware that excess resi-
due from cleaners and aerosols may ignite
causing damage and injury.
Clean venitlating hoods frequently - Grease
should not be allowed to accumulate on
hood or filter. Follow the manufacturer’s in-
structions for cleaning vent hoods.
IMPORTANT INSTRUCTIONS FOR
SERVICE AND MAINTENANCE
Do not repair or replace any part of the ap-
pliance unless specifically recommended in
the manuals. All other servicing should be
done only by a qualified technician. This re-
duces the risk of personal injury and dam-
age to the appliance.
Always contact your dealer, distributor, ser-
vice agent, or manufacturer about problems
or conditions you do not understand.
Ask your dealer to recommend a qualified
technician and an authorized repair service.
Know how to disconnect the power to the
appliance at the circuit breaker or fuse box
in case of an emergency.
Remove the oven door from any unused
oven if it is to be stored or discarded.
Do not touch a hot oven light bulb with
a damp cloth. Doing so could cause the
bulb to break. Handle halogen lights (if
equipped) with paper towels or soft gloves.
Disconnect the appliance or shut off the
power to the appliance before removing and
replacing the bulb.
WARNING
California Residents: for cancer and re-
productive harm information, visit www.
P65Warnings.ca.gov
Important: This appliance has been tested
and found to comply with the limits for a
class B digital device, pursuant to Part 18
of the FCC rules (United States) and ICES-
001 (Canada). These limits are designed to
provide reasonable protection against harm-
ful interference in a residential installation.
This unit uses and can radiate radio fre-
quency energy and, if not installed and used
in accordance with the instructions, may
cause harmful interference to radio com-
munications. However there is no guarantee
that interference will not occur in a particu-
lar installation. If this unit does cause harm-
ful interference to radio or television recep-
tion, which can be determined by turning
the unit off and on, the user is encouraged
to try to correct the interference by one or
more of the following measures:
• Reorient or relocate the receiving anten-
nae.
• Increase distance between unit and re-
ceiver.
• Connect the unit into an outlet or a cir-
cuit different from that to which the
receiver is connected.

8
en
BEFORE SETTING SURFACE CONTROLS
What is Electromagnetic Induction?
Most cooking uses radiant heat that must pass
through the cookware to get food hot. Induction is a
process that induces heat with an energy reaction.
When each cooking zone is turned on, power goes
to a coil under the cooktop. The powered coil cre-
ates an electromagnetic field. The electromagnetic
field reacts with compatible materials in cookware,
creating heat in the cookware itself. The power level
controls the heating level, delivering precise results.
Induction Features
Because heat starts in the cookware instead of the
cooktop, induction offers several advantages.
Cleaner cooking: Because induction works by
heating the cookware and not the cooktop, spills
don’t cook or stick to the surface.
Cooler Cooktop: An induction cooktop will be cool-
er when you remove cookware than a conventional
cooktop would be. The only radiant heat produced in
induction is from the cookware itself, so the kitchen
stays cooler, too.
Fast Heating: Cookware will heat up faster than on
a conventional electric cooktop. Pay close attention
to avoid scorching food when starting to cook. You
may need to use a lower setting for cooking food
than you are used to.
Precise Control: The heat going into the cookware
will change immediately when you change the set-
ting of the cooking zone.
Even Heating: Cookware will typically heat more
evenly on an induction cooktop, so you are less
likely to have hot or cool spots in the cookware.
Energy Efciency: Because induction creates heat
directly in the pan, it uses less electricity than a
conventional cooktop.
CAUTION
Although induction cooking zones do not produce
heat, they can become hot from contact with hot
cookware. Burns may occur if a cooking zone
or the surrounding area is touched before it has
cooled to a safe temperature.
Before Using Your Cooktop
Before using your cooktop for the first time, apply a
ceramic cooktop cleaning cream (available in most
hardware, grocery, and department stores) to the
ceramic surface. Clean and buff with a clean paper
towel. Cooktop cleaning creams leave a protective
finish on the glass that will make cleaning easier
when the cooktop is soiled from cooking and help
prevent scratches and abrasions.
Sounds
The magnetic field over the induction cooking zone
may cause cookware to vibrate, creating a buzzing
or humming noise. These sounds are not unusual,
especially at high settings.
Cookware that is not per-
fectly flat on the bottom
may vibrate slightly against
the cooktop.
A loose handle may vibrate
in its socket.
Multi-material cookware may
allow small vibrations in its
structure.
Figure 1: Induction sounds
Sounds are less likely to occur with heavier, higher
quality cookware.
An induction cooktop may also produce faint clicking
sounds from the electronic switches that maintain
the desired cooking temperature. You may also hear
a fan that cools the electronics inside the cooktop.
NOTE
Be sure to read detailed instructions for induction
cooktop cleaning in the “Care and Cleaning” sec-
tion and “Before You Call” checklist section of this
Use and Care Manual.

9
en
Using Proper Cookware
The size and type of cookware used will influence
the heat setting needed for best cooking results. Be
sure to follow the recommendations for using proper
cookware as illustrated in Figure 2.
Check for flatness by ro-
tating a ruler across the
bottom of the cookware
(see Figure 2). Cook-
ware should have flat
bottoms that make good
contact with the entire
surface of the heating
element (see Figure 2).
Figure 2: Ruler test
The Magnet Test
To see if a piece of cookware will work on your
induction cooktop, try to stick a magnet to it (see
Figure 4).
Cookware Material Types
Cookware material is especially important when us-
ing an induction cooktop. The cookware must con-
tain magnetic iron or steel to work on an induction
cooktop. Common materials for induction cookware
include the following:
• Stainless Steel - Slow heat conductor. Durable,
easy to clean, and resists staining. Some types
of stainless steel will not work on an induction
cooktop. Use the magnet test (see “Figure 4:
Magnet test”) to check stainless steel cookware.
• Cast Iron - A slow heat conductor that retains
heat very well. Cooks evenly once cooking tem-
perature is reached.
• Porcelain-enamel on metal - Heating charac-
teristics will vary depending on the base mate-
rial. Porcelain-enamel on a compatible metal will
work on an induction cooktop. Use the magnet
test to check porcelain-enamel cookware.
Cookware sold as induc-
tion-ready will often have
a symbol printed on the
bottom by the manufac-
turer.
Figure 3: Induction symbol
Magnet
Sticks
Magnet
Falls
Figure 4: Magnet test
If the magnet clings firmly to the bottom of the
cookware, it will work on your induction cooktop. If
the magnet clings weakly or not at all, the cookware
will not heat up on your induction cooktop.
CAUTION
Proper cookware on an operating induction cooking
zone will heat up very quickly. If an empty piece of
cookware is left on an operating induction cooking
zone, the rapid change in temperature may warp
or damage the cookware.
Do NOT place hot cookware on the control panel.
The heat may damage the electronic parts.
BEFORE SETTING SURFACE CONTROLS
To see if a piece of cookware will work on your in-
duction cooktop, try to stick a magnet to it. If the
magnet clings firmly to the bottom of the cookware,
the cookware will work on your induction cooktop
Figure 5: Keep hot cookware away from con-
trols

10
en
Pan Sensing
When the cooktop is on, the cooking zones auto-
matically detect when cookware is placed on the
zone. The control for that zone will light up, making
it easy to know which section of the control to use
for that cooking zone.
Figure 6 shows conditions that can prevent pan
detection.
If you remove a pan from an active cooking zone,
the zone will turn off after 30 seconds.
If the cooktop does not detect cookware in any zone
for 30 seconds, the whole cooktop will turn off .
Minimum and Maximum Pan Size
The cooktop graphics are guides to minimum and
maximum pan size for each cooking zone. For best
results, use cookware that matches the size of the
cooking zone.
Figure 7: Min / max pan size
The inner ring on each cooking zone indicates the
smallest pan size for the zone (Figure 7).
The outer ring on the cooktop graphic indicates the
largest pan size for that zone (Figure 7).
Cookware that is too small for a zone may not acti-
vate the cookware detection sensor. Cookware that
is much larger than a cooking zone will still cook,
but may be slower and uneven. If your cookware is
not a perfect match, it is best to use a zone a little
smaller than the bottom of the cookware.
BEFORE SETTING SURFACE CONTROLS
• Cookware centered correctly
on cooking zone.
• Flat pan bottom and straight
sides.
• Pan rests completely and is
level on the cooktop
surface.
• Pan is properly balanced.
• Pan bottom rests on cooktop
edge.
• Cookware not centered on
cooking zone.
• Curved or warped pan bottoms
or sides.
• Heavy handle tilts pan.
• Cookware base material has
good magnetic characteristics.
• Cookware base material is
non-magnetic.
Magnet
Sticks
Magnet
Falls
Figure 6: Pan sensing conditions
Figure 8: Cookzone sizes, 4 zones
Figure 9: Cookzone sizes, 5 zones

11
en
When the cooktop is locked for safety, two options
are available to unlock it:
Complete unlock:
1. Press the Power key to turn the cooktop on.
2. Press the Lock key and hold it for 4 seconds. The
lock will deactivate.
3. Press the Power key to turn the cooktop off .
Hot Surface Indicator
When a cooking zone is turned
off ,it may remain hot due to
contact with hot cookware. The
Hot Surface Indicator (H) will
come on and remain visible until
the cooking zone cools to a safe
temperature.
Figure 10: Hot Surface indicator
BEFORE SETTING SURFACE CONTROLS
Key-Stuck Function
If a control key is held for more than 10 seconds,
the cooktop will sound an alert of 5 tones. If the
key is still held after the alert sound, the cooktop
will switch off . This function will also activate if the
a zone slider is continually held or adjusted for 10
seconds.
Key-Stuck could be activated by such things as leav-
ing objects on the cook zone controls, some spills on
the controls, or resting hands on the controls.
Lock or Unlock the Cooktop
The lock function deactivates most
of the controls on the cooktop to
keep cooking zones from being
changed by accident.
Figure 11: Lock key
To lock the controls while cooking:
1. Set the cooking zones to the desired settings.
2. Press the Lock key.
To unlock the controls, press the Lock key again.
Even with the controls locked, you can turn a cook-
ing zone off by pressing its On/Off key.
To set the lock for child safety:
1. Press the Power key to turn the cooktop on.
2. Press the Lock key and hold it for 4 seconds. The
lock icon will turn red.
3. Press the Power key to turn the cooktop off .
Temporary unlock:
1. Press the Power key to turn the cooktop on.
2. Hold the lock key for 4 seconds.
3. Set the cooking zones.
When the cooking process is finished and the
cooktop is turned off , the Lock function will be still
active.
CAUTION
• Although induction cooking zones do not di-
rectly generate heat, they can become hot
from contact with hot cookware. Burns may
occur if a cooking zone or the surrounding area
is touched before it has cooled to a safe tem-
perature.
• Do not place flammable items such as plas-
tic salt and pepper shakers, spoon holders, or
plastic wrapping on top of the range when it
is in use. Heat radiating from cookware could
cause these items to melt or ignite. Potholders,
towels, or wooden spoons could catch fire if
placed too close to hot cookware.
• Do not use aluminum foil to line any part of
the cooktop. Improper installation of these lin-
ers may result in risk of electric shock or fire.
If these items melt on the cooktop, they will
damage the cooktop.
BEFORE SETTING SURFACE CONTROLS

12
en
BEFORE SETTING SURFACE CONTROLS
CAUTION
• Although induction cooking zones do not di-
rectly generate heat, they can become hot
from contact with hot cookware. Burns
may occur if a cooking zone or the surrounding
area is touched before it has cooled to a safe
temperature.
• Do not place flammable items such as plas-
tic salt and pepper shakers, spoon holders, or
plastic wrapping on top of the range when it
is in use. Heat radiating from cookware could
cause these items to melt or ignite. Potholders,
towels, or wooden spoons could catch fire if
placed too close to hot cookware.
• Do not use aluminum foil to line any part of
the cooktop. Improper installation of these lin-
ers may result in risk of electric shock or fire.
If these items melt on the cooktop, they will
damage the cooktop.
Moving Cookware on a Smooth Cooktop
It’s best to lift cookware before moving it on the ce-
ramic glass cooktop. Cookware that has a rough or
dirty bottom can mark and scratch the ceramic glass
surface. Always start with clean cookware.
Figure 12: Move cookware carefully on cooktop
Power Management
Your induction cooktop has 2 or 3 generators and
4 or 5 cooking zones, depending on the model. A
generator may power 1 or 2 cooking zones. If you
use more than one cooking zone on high power at
the same time and they are on the same generator,
the cooktop may need to manage power to the two
cooking zones.
Figure 13: Power management, 4 cook zones
Figure 14: Power management, 5 cook zones
To get the best performance from your cooktop,
start cooking on only one cooking zone. After the
first piece of cookware has reached cooking tem-
perature, then start cooking on the second cooking
zone.

13
en
Home Canning
Be sure to read and observe all the following points
when home canning with your appliance. Check with
the USDA (United States Department of Agriculture)
Web site and be sure to read all the information they
have available as well as follow their recommenda-
tions for home canning procedures.
• Use only a completely flat bottom canner with no
ridges that radiate from the bottom center when
home canning. Heat is spread more evenly when
the bottom surface is flat. Use a straight-edge to
check canner bottom.
• Make sure the diameter of the canner does not
exceed 1 inch beyond the surface element mark-
ings or burner.
• It is recommended to use smaller diameter can-
ners on electric coil and ceramic glass cooktops
and to center canners on the burner grates.
• Start with hot tap water to bring water to boil
more quickly.
• Use the highest heat setting when first bringing
the water to a boil. Once boiling is achieved, re-
duce heat to lowest possible setting to maintain
that boil.
• Use tested recipes and follow instructions carful-
ly. Check with your local Cooperative Agricultural
Extension Service or a manufacturer of glass jars
for the latest canning information.
• It is best to can small amounts and light loads.
Do not leave water bath or pressure canners on high
heat for an extended amount of time.
BEFORE SETTING SURFACE CONTROLS

1. Lock: Lock the cooktop controls to prevent ac-
cidental activation of cooking zones.
2. Power: Press to turn on or turn off the cooktop.
3. Cooking Zone Indicator: The LEDs indicate
cook zones. The one corresponding to the con-
trol’s cook zone turns red.
4. TempControl (only for BLACKSTAD and
ÄLMESTAD): Activates TempControl feature.
When pressed, this feature uses a temperature
sensor to monitor heat and adjust the power
to main- tain a consistent temperature during
cooking. See page 16.
5. Cooking Zone On/Off: When cookware is on
the cooking zone, press to turn the zone ON/
OFF.
6. Cooking Zone Power Level: Slide a finger
across or press a number to set the power level.
Level 1 is low, level 9 is high, and P is the most
powerful setting.
SETTING SURFACE CONTROLS
17
9
2 4 5
3
8
8a
8b
8c
6
7. Bridge (only for BLACKSTAD and ÄLMES-
TAD): The Bridge indicator is visible on Zone
1 if both left cooking zones detect cook-
ware. The Bridge function makes the
two left cooking zones work together
to heat a long piece of cookware, like a
griddle
8. Timer Indicator: Shows the time currently left
on the timer.
9. Serve Warm: Activates the Serve Warm fea-
ture.
a. Reduce Time (-): Press to reduce the
amount of time on the timer.
b. Timer On/Off: Press to turn the countdown
timer on or off.
c. Increase Time (+): Press to increase the
amount of time on the timer.
Serve Warm will set all of the cooking zones to a
low power level to keep foods warm.
14
en

Setting induction cooking zones Suggested induction cooking zone settings
Start most cooking operations on a higher setting
and then turn to a lower setting to finish cooking.
The suggested settings found in Table 1 below are
based on cooking with medium-weight stainless steel
pans with lids. Settings may vary when using other
types of pans.
SETTING SURFACE CONTROLS
IMPORTANT
Do not leave empty cookware on an operating
cooking zone. Cookware will heat very quickly and
may be damaged or warped if left on the cooking
zone empty.
NOTE
A cooking zone will not become active without
proper cookware in position. See “Key-Stuck Func-
tion” on page 11.
If the cooktop does not detect cookware within 30
seconds, it will turn off.
NOTE
• The size and type of the cookware used and
the amount and type of food being cooked will
influence the setting needed for best cooking
results.
• The Max setting is available after activating a
cooking zone by pressing the MAX key. The
cooktop will remain on Max for up to 10 min-
utes. After 10 minutes, the cooking zone will
automatically change to the high (9) setting.
• The Hot Surface indicator (Hot) will show in
the setting indicator when heat is detected in a
cook zone that has been turned off. The indica-
tor will remain on until the heated surface area
has cooled sufficiently.
Figure 15: Induction cooking zone control
To operate an induction cooking zone:
1. Turn the cooktop on by pressing the Power key.
2. Place correctly sized cookware on the cooking
zone. The controls for a zone won’t activate un-
less cookware is detected.
3. Press the On/Off key for the active cooking
zone. The indicator will turn red.
4. Set the cooking zone to the desired level (refer
to Table 1) by pressing the number of the de-
sired setting or P.
5. When cooking is complete, turn the induction
cooking zone OFF by pressing its On/Off key or
the Power key before removing the cookware.
If all of the zones are off, the cooktop will auto-
matically power off in 30 seconds.
At any time, you can change the setting for an ac-
tive cook zone by pressing the number of the new
setting.
IKEA Induction Recommendations
Temp
Range Pow-
er
Level
Description
Low 1 Keep foods warm
Medium
Low 2-4 Continue cooking,
poach, stew
Medium 5-6 Maintain a slow
boil, thicken
sauces and gra-
vies, steaming,
cooking
Medium
High 7-8 Continue a rapid
boil, fry, or deep
fry
High 9 Start most foods,
maintain water at
a boil, pan cook-
ing, searing
Power
Boil P Start heating
pans that contain
large amounts of
food or to bring
pots of water to
boil
Table 1: Suggested induction cooking zone set-
tings
Simmer 185 - 200°F
Keep
Warm
145°-
160°F
15
en

NOTE
To get an idea of how hot a piece of cookware will
get at a particular setting, try the Magnet Test
(page 9). The more strongly a magnet clings to
the cookware, the hotter that cookware will get at
any particular setting on the cooktop.
To get consistent results, use the same piece of
cookware for particular cooking tasks.
When using small amounts of oil for frying or sau-
téing, add the oil after the pan is preheated.
Keep an eye on your cookware during preheat. In-
duction is powerful, and letting cookware get too
hot while empty may warp or damage it.
SETTING SURFACE CONTROLS
TempControl (only for BLACKS-
TAD and ÄLMESTAD)
TempControl uses a temperature
sensor to maintain a consistent tem-
perature when cooking. When cool
batter, liquid, or food is added to a
hot pan, the pan cools down a little.
TempControl senses this change and will use extra
power to maintain the desired temperature setting.
The feature also lets you know when your cookware
is preheated, so making pancakes or sautéing fresh
food has better results.
The temperature of your cookware will depend on
the level you select and the material of the cook-
ware you use. Experiment a little to determine what
works for you for cooking various dishes. Different
pots and pans will hold at different temperatures,
so you will need to learn how your cookware works
with this feature.
Figure 16: TempControl Indicator
TempControl is available for some cooking zones
when they are active.
Press the TempControl Indicator to activate the
TempControl function. The indicator turns red. Press
a number key to select one of the 9 preset cooking
levels.
Figure 17: TempControl Set
Preheat Indicators
While the cooking zone is heating, the square above
the TempControl Indicator will flash. When the tem-
perature is reached, the square will stay lit steadily.
Figure 18: TempControl heating indicator
You can change the TempControl setting at any time
by pressing another number key. The animated
sequence of squares will start again until the new
temperature is reached.
To deactivate the TempControl function, press the
TempControl Indicator.
16
en

SETTING SURFACE CONTROLS
Bridge Function (only for BLACKS-
TAD and ÄLMESTAD
The Bridge function allows you to use
an extra-long piece of cookware such
as a griddle on the left side of your
cooktop.
If one of the left cook zones is active and
cookware is detected in both of the left
zones, the bridge function becomes available and the
Bridge Indicator will light up.
Figure 19: Bridge Indicator
Touch the Bridge Indicator to activate the bridge
function. The Bridge Indicator will turn red. The
cook zone indicator for the other bridge cook zone
will also turn red, and the cook zone setting for both
of the bridged zones will match. The setting controls
for the front left zone will control both of the bridged
zones as long as the bridge function is active.
Figure 20: Active bridge function
At any time, you can change the setting for the
bridged cook zones by pressing the number of the
new setting on the active control.
To deactivate the bridge function, press the Bridge
Indicator or deactivate one of the bridged cooking
zones by pressing its On/Off key.
Serve Warm
Serve Warm allows you to keep cooked
food warm for serving. When you ac-
tivate Serve Warm, all active cooking
zones will be set to a low setting.
To activate Serve Warm, press the Serve Warm In-
dicator. The indicator will turn red, and you will see
the settings change on the active cooking zones.
To deactivate Serve Warm, press the Serve Warm
Indicator again. All of the active cooking zones will
turn off. You can also press the main Power key to
turn the cooktop off.
CAUTION
Serve Warm is not intended to cook food. Only
use Serve Warm with food that is already cooked.
Cover pots with lids to maintain proper serving
temperature.
17
en

Setting the Timer
The cooktop has a timer function to remind you
when food has been cooking for a specified amount
of time.
SETTING SURFACE CONTROLS
Figure 21: Cooktop Timer
To set the timer:
1. Press the Timer On/Off key ( ) to activate the
timer. The countdown timer and the + and -
keys will become visible. The timer will show 00.
2. Press + and - to set the desired number of min-
utes. You can press and hold the + or - key to
change the number of minutes faster.
The timer will start counting down a few seconds
after you have finished setting it, when the specified
time has elapsed, the timer will flash, and a tone
will sound. Press the +, the -, or the Timer On/ Off
key ( ) to stop the signal.
At any time, you can adjust the remaining time with
the + and - keys.
At any time, you can deactivate the timer by press-
ing the Timer On/Off key ( ).
IMPORTANT
When the timer stops or the tone sounds, the
cooking zones will continue to operate. The timer
does not affect the cooking zone settings in any
way.
18
en

19
en
CARE AND CLEANING
Remove spills and any heavy soiling as soon as pos-
sible. Regular cleaning will reduce the difficulty of
major cleaning later.
Figure 22: Use cleaners with caution
CAUTION
Before cleaning any part of the appliance, be sure
all controls are turned off and the appliance is
cool.
If ammonia or appliance cleaners are used, they
must be removed and the appliance must be thor-
oughly rinsed before operating. Follow manufac-
turer’s instructions and provide adequate ventila-
tion.
Cooktop Maintenance
Consistent and proper cleaning is essential to main-
taining your ceramic glass cooktop.
Prior to using your cooktop for the first time, apply
a ceramic cooktop cleaning cream (available in most
hardware, grocery, and department stores) to the
ceramic surface. Clean and buff with a clean paper
towel. This will make cleaning easier when soiled
from cooking. Cooktop cleaning creams leave a pro-
tective finish on the glass to help prevent scratches
and abrasions.
Sliding pans on the cooktop can cause metal mark-
ings on the cooktop surface. These marks should be
removed immediately after the cooktop has cooled
using cooktop cleaning cream. Metal marks can be-
come permanent if not removed prior to future use.
Cookware (cast iron, metal, ceramic, or glass) with
rough bottoms can mark or scratch the cooktop
surface.
Do not:
• Slide anything metal or glass across the cook-
top.
• Use cookware with dirt or dirt build up on the
bottom; always use clean cookware.
• Use your cooktop as a cutting board or work
surface in the kitchen.
• Cook foods directly on the cooktop surface with-
out a pan.
• Drop heavy or hard objects on the ceramic glass
cooktop; they may cause it to crack.
Figure 23: Cooktop care

20
en
Cooktop Cleaning
CAUTION
Before cleaning the cooktop, be sure the controls
are turned to OFF and the cooktop is cool. The
glass surface could be hot from contact with hot
cookware, and burns may occur if the glass sur-
face is touched before it has cooled sufficiently.
WARNING
Do not use a cooktop cleaner on a hot cooktop.
The fumes can be hazardous to your health, and
can chemically damage the ceramic-glass sur-
face.
For light to moderate soil:
For light to moderate soil: Apply a few drops of
cooktop cleaning cream directly to the cooktop. Use
a clean paper towel to clean the entire cooktop sur-
face. Make sure the cooktop is cleaned thoroughly,
leaving no residue. Do not use the towel you use to
clean the cooktop for any other purpose.
For heavy, burned on soil:
Apply a few drops of cooktop cleaning cream di-
rectly to the soiled area. Rub the soiled area using
a non-abrasive cleaning tool, applying pressure as
needed. Do not use the pad you use to clean the
cooktop for any other purpose.
If soils remain, carefully scrape soils with a metal
razor blade scraper held at a 30 degree angle to
the surface. Finish cleaning with cooktop cleaning
cream.
30°
Figure 24: Cooktop cleaning
IMPORTANT
Damage to the ceramic glass cooktop may occur
if you use an abrasive type cleaning pad. Only
use cleaning products that have been specifically
designed for ceramic glass cooktops.
CARE AND CLEANING
Other manuals for HACKSTAD
1
This manual suits for next models
4
Table of contents
Languages:
Other IKEA Cooktop manuals

IKEA
IKEA ICS300RQ04 User manual

IKEA
IKEA W10675927A User manual

IKEA
IKEA Lagan HGA4K User manual

IKEA
IKEA ICR410RB03 User manual

IKEA
IKEA ICS500VB0 User manual

IKEA
IKEA MOJLIG User manual

IKEA
IKEA HOB 450 User manual

IKEA
IKEA ELECTRIC COOKTOP User manual

IKEA
IKEA ICS500VB0 User manual

IKEA
IKEA BRANNPUNKT User manual