The Child Lock indicator ashes.
2. Press
OK button to conrm.
The Child Lock indicator is shown.
To deactivate the Child Lock Function, repeat
the procedure until the Child Lock indicator
disappears.
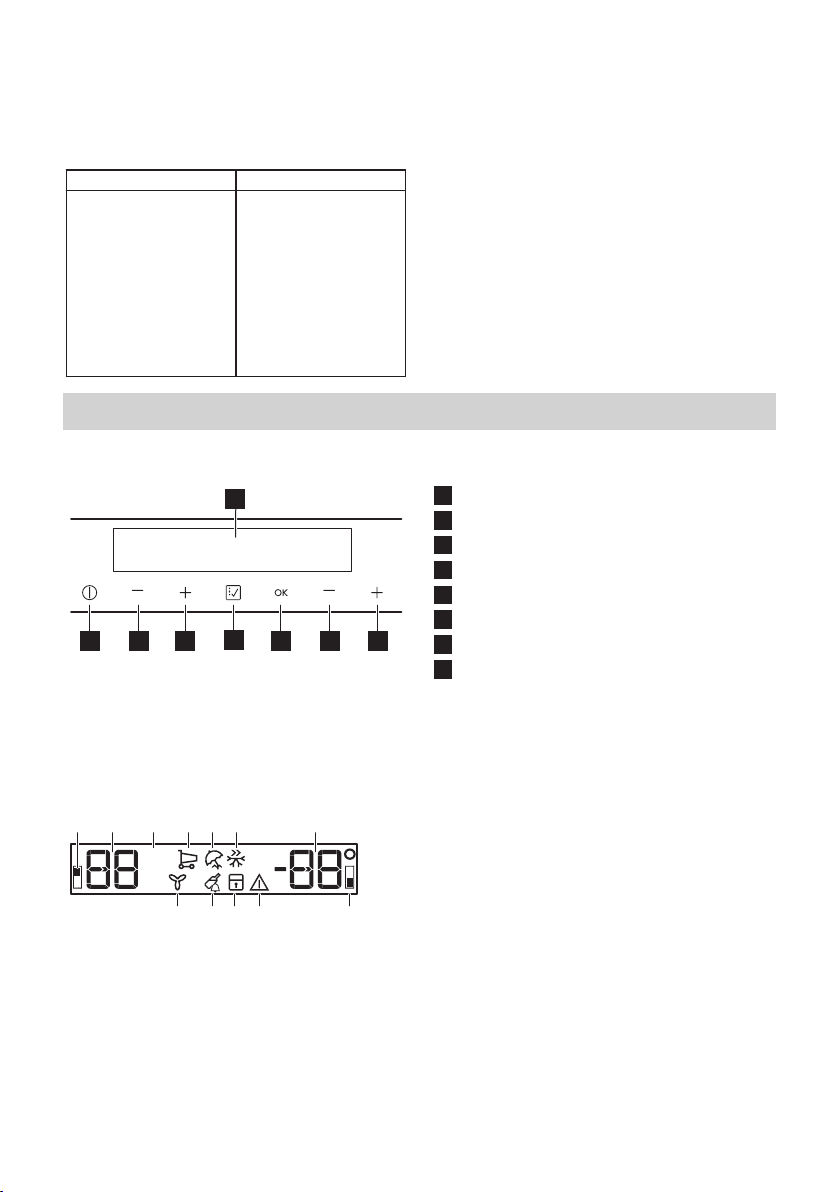
Bottle Chill Function
1. Press
Function button until the Bottle
Chill icon appears.
The Bottle Chill indicator ashes.
The Timer shows the set value (30 minutes)
for a few seconds.
2. Press the
,
temperature buttons to
change the Timer set value from 1 to 90
minutes.
3. Press
OK button to conrm.
The Bottle Chill indicator is shown.
The Timer starts to ash (min).
At the end of the countdown the "0 min"
indicator ashes and an audible alarm
sounds. At that time, remove the products
that were put into the appliance to cool
down, and press the
OK button to switch
o the sound and terminate the function.
To switch o the function at any time during
the countdown, repeat the procedure until
the Bottle Chill indicator disappears.
Fan-cooling Function
1. Press
Function button until the Fan-
cooling indicator appears.
The Fan-cooling indicator ashes.
2. Press
OK button to conrm.
The Fan-cooling indicator is shown.
To switch o this function repeat the
procedure until the Fan-cooling indicator
disappears.
The activation of the Fan-cooling Function
increase the energy consumption.
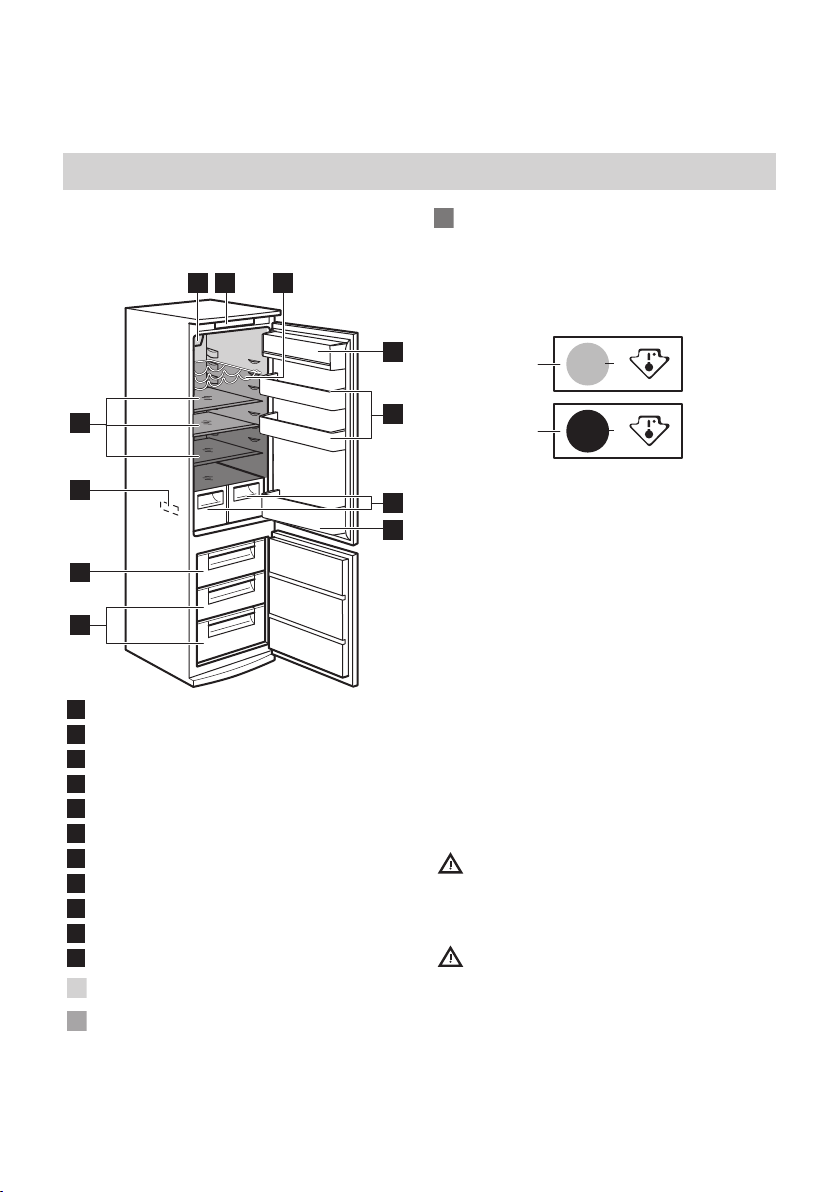
Freezing and storage of frozen food
When activating an appliance for the rst
time or after a period out of use, before
putting the products in the compartment let
the appliance run at least 3 hours with the
Fast Freezing function switched on.
To freeze fresh food activate the Fast
Freezing function at least 24 hours before
placing the food to be frozen in the freezer
compartment.
Store the fresh food evenly distributed in the
rst compartment or drawer from the top.
The maximum amount of food that can be
frozen without adding other fresh food
during 24 hours is specied on the rating
plate (a label located inside the appliance).
If large quantities of food are to be stored,
remove all drawers and place the food on
shelves.
Keep the food no closer than 15 mm from
the door.
Caution! In the event of
accidental defrosting, for example
due to a power failure, if the
power has been o for longer
than the value shown on rating
plate under "rising time", the
defrosted food must be
consumed quickly or cooked
immediately then cooled and
then re-frozen.
ENGLISH 8
To download the full version visit www.ikea.com