7
ENGLISH
To download the full version visit www.ikea.com
Daily Use
PREPARING THE LAUNDRY
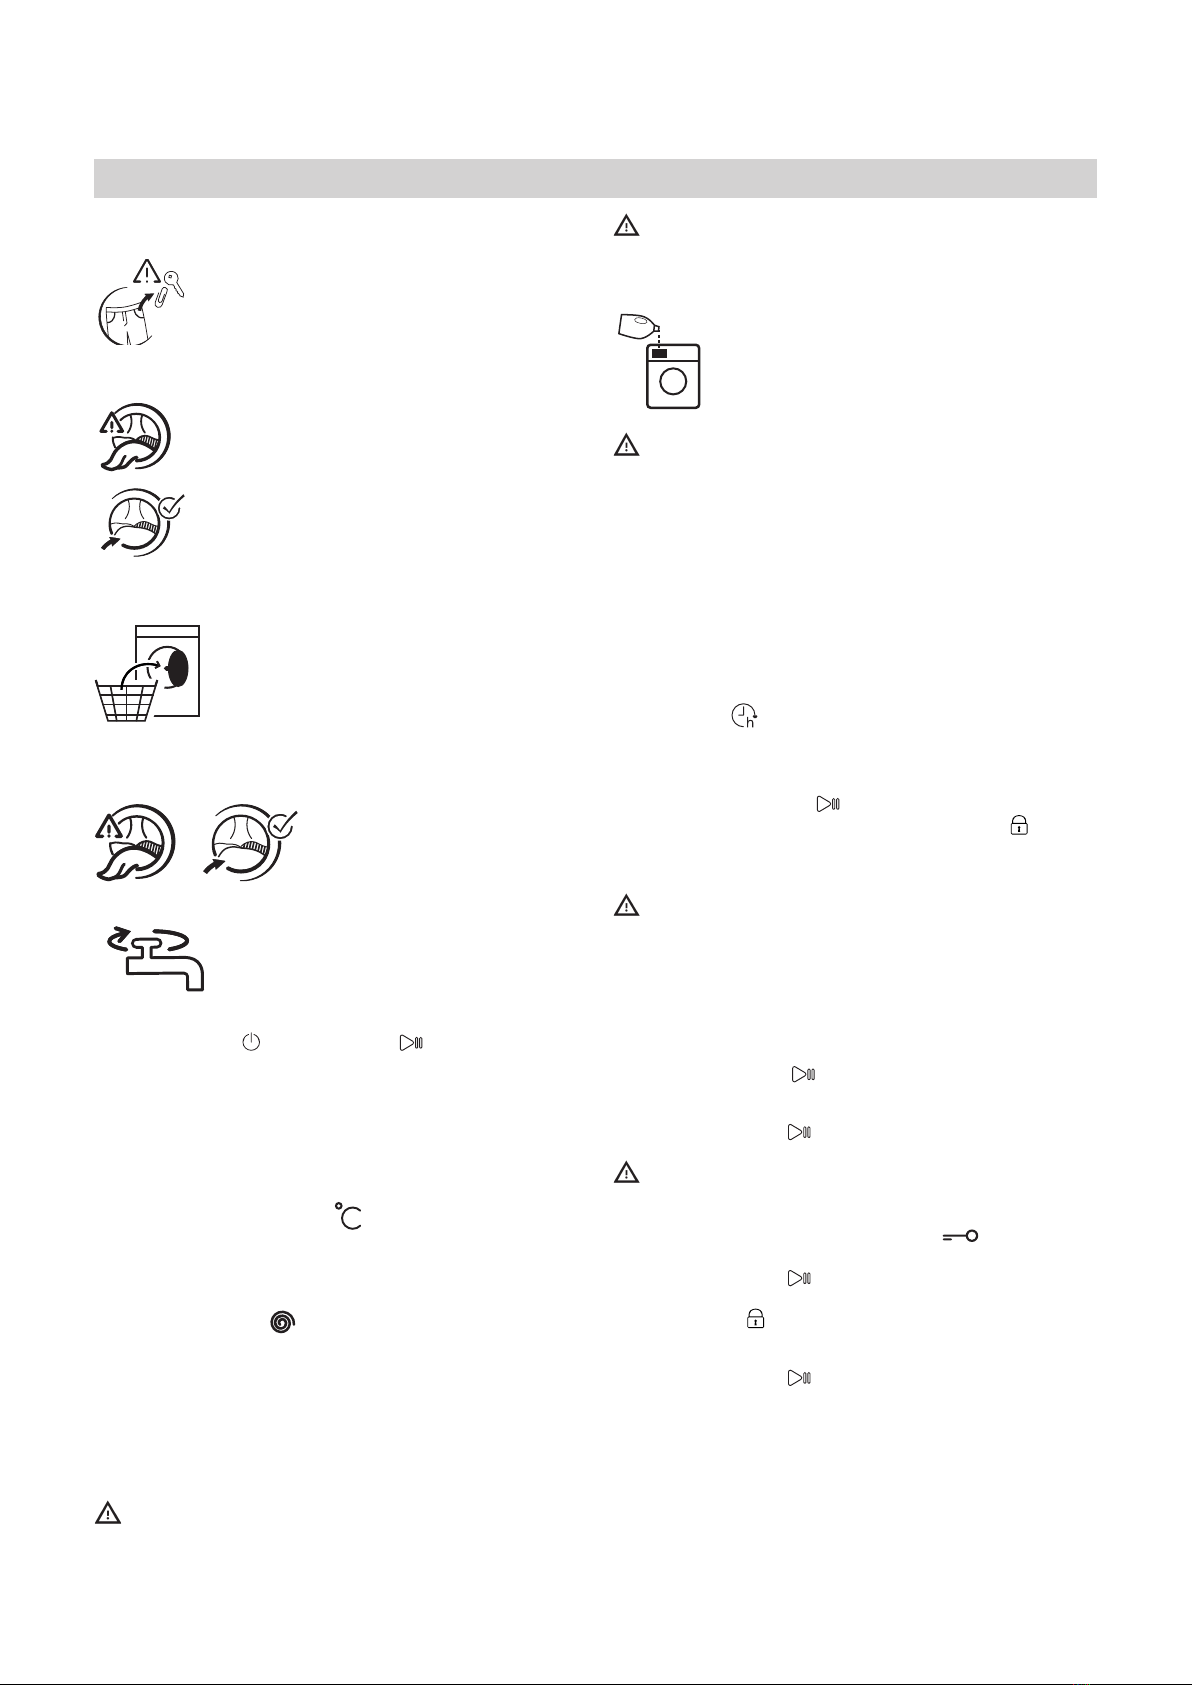
Empty pockets
Close all zippers, buttons, and hooks. Tie all ribbons or belts
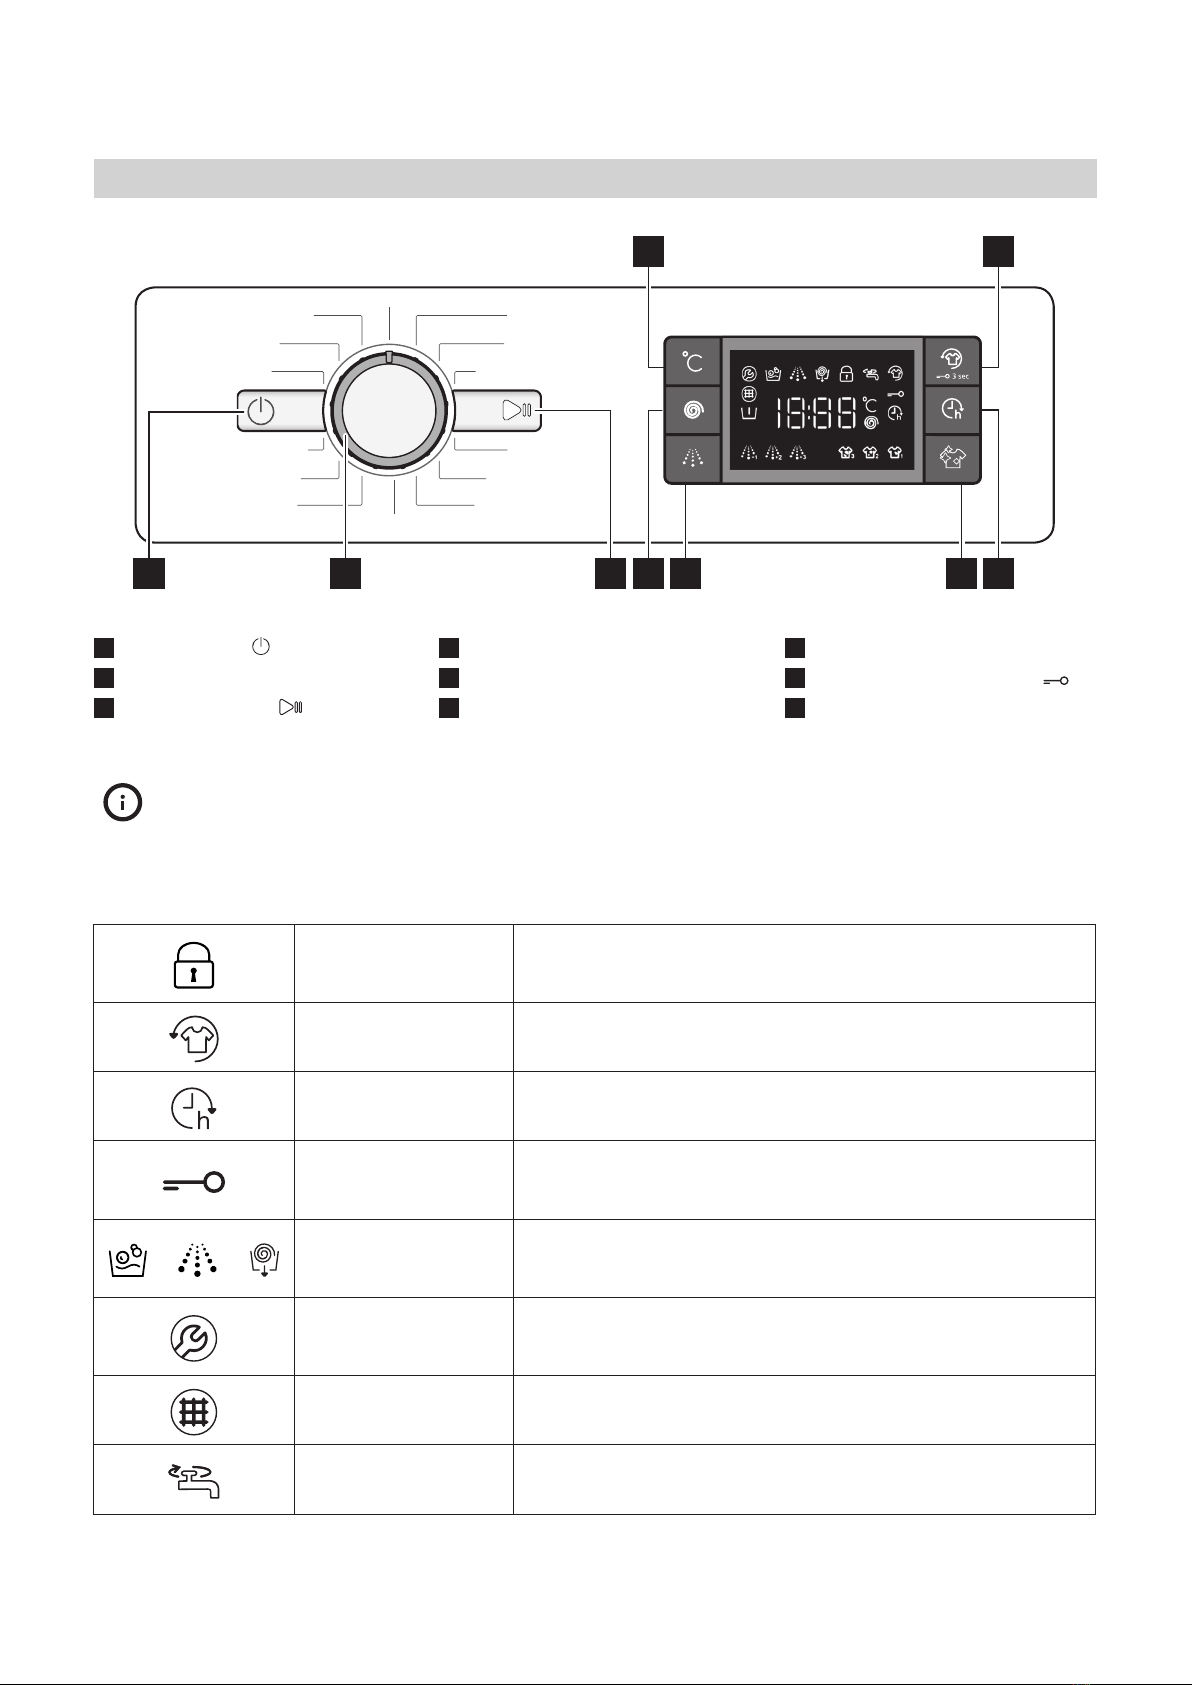
HOW TO USE THE WASHING MACHINE
1. Load laundry
2. Close door
3. Open water tap
Switch on washing machine
Pressthe“ON/OFF” ,the“Start/Pause” lampashesslowly.
4. Set the desired programme
Selecttherequiredprogrammewiththe“Programselector”dial.
The washing machine automatically displays the default
temperature setting and then the duration of the washing cycle.
Adjust the temperature and/or spin speed settings if needed
with the relative buttons.
Change temperature, if needed
Pressthe“Temperature”button to progressively lower
thetemperaturesettinguntilcoldwashhasbeenset(“--“will
beshownonthedisplay).Pressingthebuttonagainsetsthe
highest possible setting.
Change spin speed, if needed
Pressthe“Spin”button to progressively decrease the spin
speeduntilthespincycleisturnedo(“0”willbeshownonthe
display).Pressingthebuttonagainsetsthehighestpossible
setting.
Select functions, if needed
Press the button to select the function; the respective symbol on
display illuminates.
Press the button again to cancel the option; the light
extinguishes.
If the selected function is incompatible with the programme
set,theincompatibilitywillbesignalledbyabuzzer(3beeps)
andthecorrespondingindicatorlightwillash.
If the selected function is incompatible with another
previouslysetfunction,onlythemostrecentselectionwill
remain active.
5. Add detergent
Correctdosingofdetergent/additivesisimportant,
because:
• itoptimizesthecleaningresult
• it avoids irritating residues of surplus detergent in your
laundry
• it saves money by avoiding waste of surplus detergent
• itprotectsthewashingmachinebyavoidingcalcicationof
components
• it respects the environment by avoiding unnecessary
environmental burden.
6. Delaying the start of a programme
• Tosettheselectedprogrammetostartatalatertime(Max
24h),pressthebuttontosetthedesireddelaytime.
• The symbol lights on the display when this fuction is
enabled.Tocancelthedelayedstart,pressthebuttonagain
untile the value ‚‘‘0‘‘ is shown on the display.
7. Start programme
• Pressthe“Start/Pause” . The relative indicator lamp
illuminates,thedoorlocksandthe“Doorlocked”
indicatorlightsupwitha“beep”.
• Toavoidoverow,donotopenthedetergentdispenser
during a running programme anymore.
The remaining programme duration can vary. Factors like
unbalanceinthewashload,orfoamformation,canhavean
eectontheprogrammeduration.
8. Change the settings of a running programme, if needed
You can still change the settings while a programme is
running.Thechangeswillbeapplied,providedtherespective
programmephasehasnotnishedyet.
To change the settings of a running programme:
• Press“Start/Pause” (conrmation“beep”)toputthe
running programme on pause.
• Change your settings.
• Press“Start/Pause” (conrmation“beep”)againto
continue the programme.
Ifyouhavechangedtheprogramme,donotadddetergent
for the new programme.
To prevent that a running programme is changed by accident
(forinstancebychildren),usethe“Keylock” .
Pause a running programme and open the door, if needed
• Press“Start/Pause” to pause a running programme.
• Providedwaterlevelortemperatureisnottoohigh,the
“Doorlocked” indicatorlightturnso.Youcanopen
thedoor,forexampletoaddmorelaundry,ortoremove
laundry which was loaded by mistake.
• Press“Start/Pause” to proceed with the programme.
• Coins,paperclips,etc.coulddamagetheload
and the washing machine components.
• Tissueswillbreakdownduringthewashcycle,
and the fragments will have to be subsequently
removed by hand.
• Insertthesmallergarments(e.g.nylonhosiery,
belts,etc.)andgarmentswithhooks(e.g.
braziers)intoafabricbagorapillowcasewith
azipper.
• Removeanyringsfromcurtains,orelseplace
the curtains inside a fabric bag together with
the rings.
Open the door and load the laundry. Load the
articlesoneatatimelooselyintothedrum,
withoutoverlling.Observetheloadsizesgiven
inthe“PROGRAMMECHART”table.
Overloading the machine will result in
unsatisfactory washing results and creased
laundry.
Make sure that no laundry gets
stuck between door glass and
rubber seal. Close the door so that
you can hear it click shut.
Make sure that the washing machine is
connected to the water mains.
Open the water tap.
Pull out the detergent dispenser and add
detergent(andadditives/softener)intotherelative
compartments as described in section “DETERGENT
DISPENSER”.Observethedosingrecommendations
on the detergent pack.