Iluminar iLi3 User manual

3
2
CONTENTS
• Observe all safety precautions (see page 8), seek the services of a
qualified electrician, installation professional, or call ILUMINAR Lighting
technicians for assistance.
• DO NOT handle or touch the fixture while in use.
• Connect the fixture only to the power sources of the appropriate voltage
using the correct AC plug type. Protect power cables from being pinched,
walked on, or otherwise damaged. Be especially careful where the power
cable enters the power outlet to the unit. Only connect the fixture to an
electrical outlet or extension cord of comparable standard and level
rating. Connect the fixture ONLY to the power sources of the correct
voltage using the plug received.
• The fixture should only be cleaned as directed. Always seek service for
your system by qualified service personnel if any of the following occur:
1. The fixture shows a noticeable change in performance.
2. The power-supply cord or plug is damaged.
3. The fixture has been dropped, or the exterior is damaged.
Please read this manual thoroughly prior to
installing or operating the ILUMINAR iLi3.
Pre-Install Information ........................................
Technical & Physical Specications......................
Hardware & Accessories ....................................
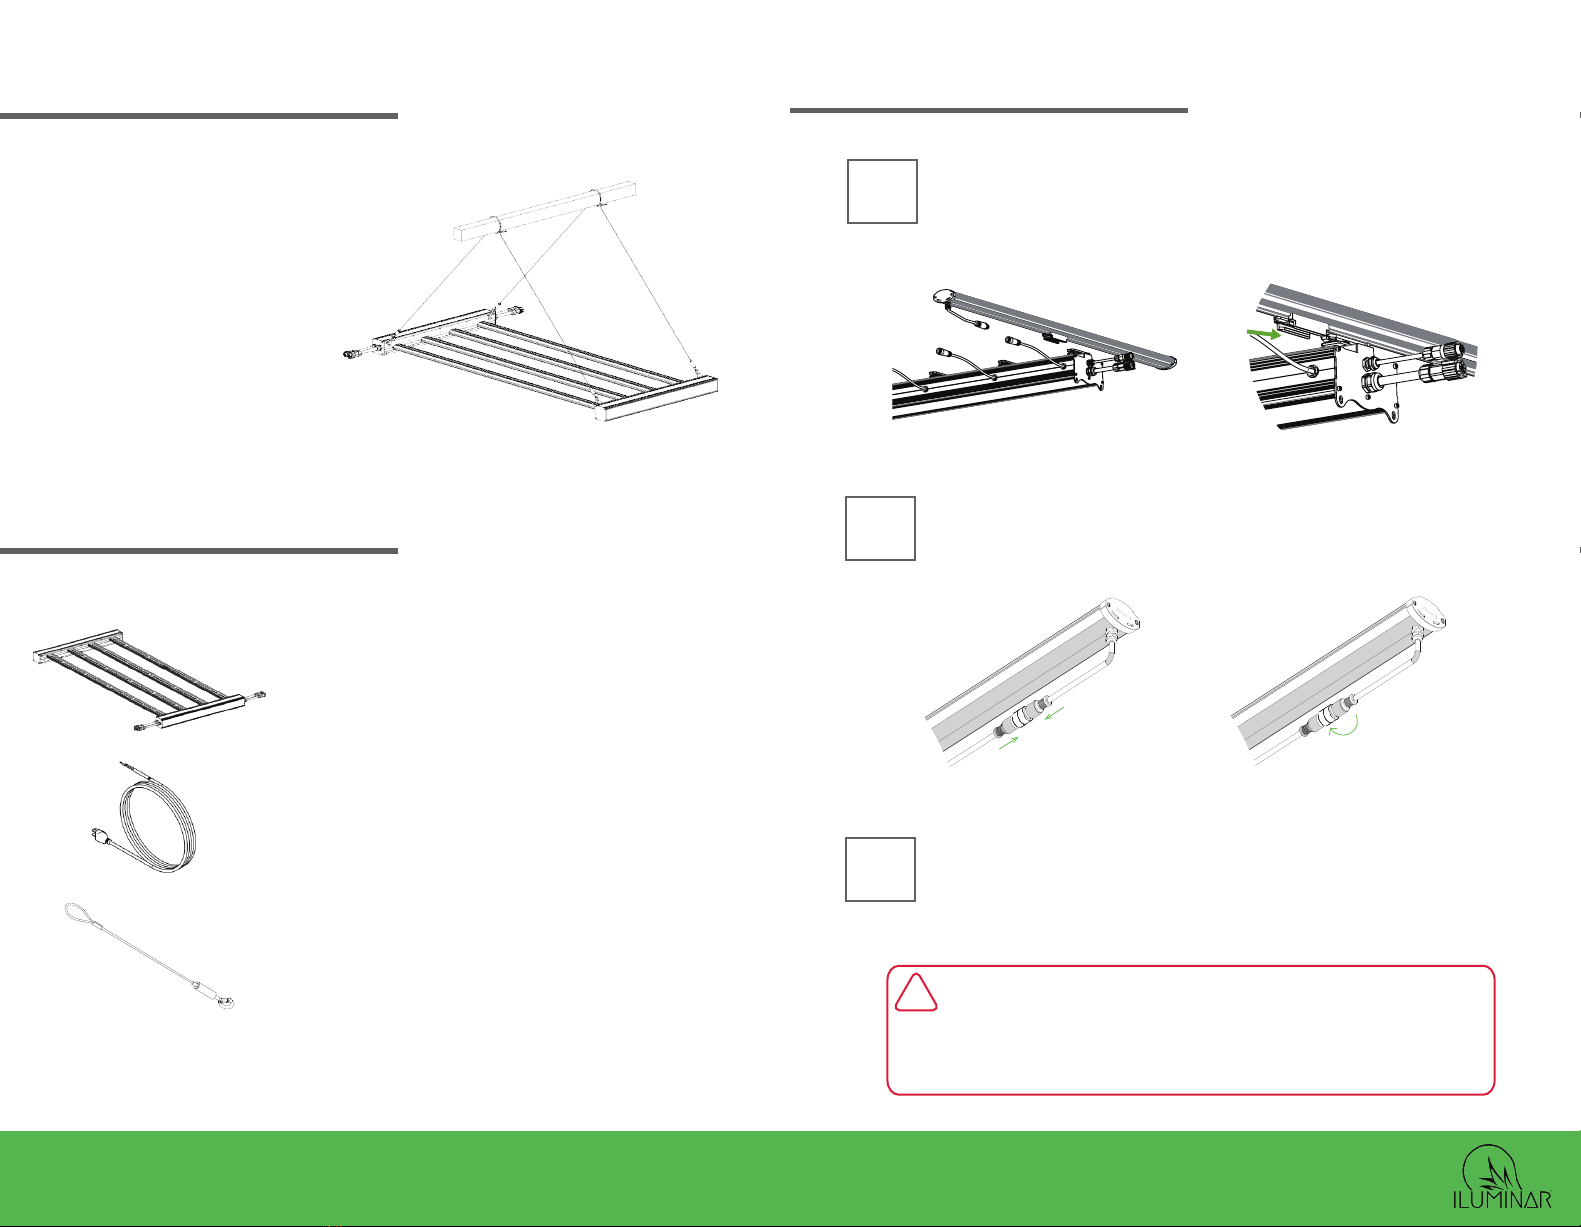
Hanging Instructions ...........................................
Daisy Chain Instructions .....................................
Important Cautions & Warranty ...........................
2
3
4
5-6
7
8
1-877-540-5588
iluminarlighting.com
© Copyright 2020, ILUMINAR Lighting
Subject to change without notice.
ILI3 240W LED SPECTRUM
W
A
VELENGTH NM
MOUNTING & COVERAGE
1m / 3'
1.2m / 4'
15-30cm / 6-12”
1193mm / 46.97"
458mm / 18.04"
50mm / 1.97"
PPF
Efficacy
Input Current
Input Power
Output Power
Output Voltage
Min Power Factor
THD
Crest Factor
BTU
Rated Mains Voltage
Voltage Range (+/-10%)
Mains Frequency
Dimmable
Ambient Temperature
Max. Temperature
Relative Humidity
Plug Type
Color Temperature
Color Rendering Index
Finishing Mounting Height
Emitter Cooling
Light Distribution +/- 5%
Waterproof Rating
LED Lifespan (90% of Life)
624 µmol/s
2.6 µmol/j
6.70A
240 W
221.1
33V
0.9
15%
0.99
816
120-277V AC
100-277V
50 / 60Hz
1-10V Controllable
-20..+45°C
75°C/167°F
98%
Power Cord Sold Seperately
4000k
88
6”-12” to top of Canopy
Passive / Extruded Case
125º
IP65 for Damp/Wet Conditions
55,000+ hours
TECHNICAL SPECIFICATIONS
LED Lighting Solution
MODEL:
VOLTAGE:
WATTS: 240W2.6
100-277V
SKU: IL-i326FSG-120
PHYSICAL SPECIFICATIONS
Length
Width
Height
Weight
1193mm
458mm
50mm
7kg
46.97"
18.04"
1.97"
15.4lb
120V
208V
240V
277V
347V
480V
0.71A
0.51A
2.11A
1.2A
1.09A
0.9A
245W
239W
251W
2.44W
241W
240W
VOLTAGE AND AMPERAGE DRAW

4
HARDWARE AND ACCESSORIES
The iLi3 can be hung from
steel cables or can be
mounted to a rack.
Before you begin installation,
check that you have all the
necessary parts to begin.
1 iLi3 Fixture
1 Power Cable
4 Steel Hanging Cables with attached
cylindrical locks for hanging
IN THE BOX
1-877-540-5588
iluminarlighting.com
5
Lay the central mast on a at table top or surface with the attachment
brackets facing UP. Attach each LED Bar by aligning the plastic clips
and carefully sliding them into place until you hear a soft click.
CONNECTION INSTRUCTIONS
Once the plastic clips are all snapped in place, attach the A/C cables
coming from the mast to each LED bar by aligning the connector pins and
pressing the ends together. Lock by twisting in opposite directions.
Once all the LED bars are fastened into place and A/C cables are attached
to the mast, turn the xture over (this may require more than one person).
Ensure the at surface is clear of anything that could damage the delicate
diodes.
SLIDE
2
1
3
! CAUTION when handling your ILUMINAR iL Fixture.
The LED array should NOT come in contact with sharp
objects.DONOTtouchdiodesorapplydirectforcetothe
diodes as this can/will cause permanent damage.
© Copyright 2020, ILUMINAR Lighting
Subject to change without notice.

7
1
61-877-540-5588
iluminarlighting.com
HANGING INSTALLATION DAISY CHAIN CONNECTIONS
If you plan to utilize several LEDs in your room or facility, one of the many
benets of the ILUMINAR LED is that you can “daisy chain” one xture to
another to save space and use only one outlet to run several lamps, thus
minimizing the amount of cords used in your space.
If you plan to utilize the TOUCH Controller or ILUMINAR HASH
Controller,youcanconnecttheyellowconnectionsfromthecontroller
to the xture and then connect the Daisy Chain Controller Cable from
xture to xture. Please consult with our lighting layout designers to
ensure proper spacing of outlets for your unique setup.
!
A/C 100-277V
50/60 Hz INPUT
(to power outlet)
Yellow Tip
Controller Cable
(to Controller)
Controller Cable
Daisy Chain
(yellow)
A/C Daisy
Chain Cable
(blue)
Controller Cable
Daisy Chain
(yellow)
! NEVERattachtwoACinputplugs.Safely
install only one AC Power Cable.
Attached the secure hooks to the xture.
Loop the hanging wire as shown around the support beam (as shown
in Figure A). Press down at base of hook to slide to adjust the mounting
height of the xture (Figure B).
! NEVERattachtwoACinputplugs.Safely
install only one AC Power Cable.
Onesideonlyused
to Daisy Chain
power to xture 2.
Once xture is hanging with all LED bars installed, connect the power
cable (blue tip) from the outlet to one side of the xture. DO NOT EVER
connect two power cables from the wall to the xture.
AC 100-277V
50/60 Hz INPUT
1
2
3
FIGURE A
FIGURE B
© Copyright 2020, ILUMINAR Lighting
Subject to change without notice.

8
CAUTION
1. Leave at least one inch of space between the xture and the mounting
area for maximum performance and lifespan.
2. ALWAYS wear protective eye wear when looking directly at the diodes to
prevent eye damage.
3. Only handle, clean or move xture when it’s unplugged and completely
cool.
4. Keep the xture free of dust, debris, deposits to ensure the maximum
potential of the xture.
5. NEVERuseclothtocleanthediodes.Thiswillscratchthediodesandcould
potentially break or dislodge them.
6. DO NOT use chemicals to clean the xture. Use ONLY low pressure air or
low pressure water to remove dust and debris.
At ILUMINAR, we stand behind our products and our
technology as well as our customers. All ILUMINAR xtures
are backed by our 5-Year Guarantee. Please visit our
website iluminarlighting.com/warranty for more information.
1-877-540-5588
iluminarlighting.com
GUARANTEE
Please read the following list carefully prior to beginning installation.
This manual suits for next models
1
Table of contents
Other Iluminar Light Fixture manuals