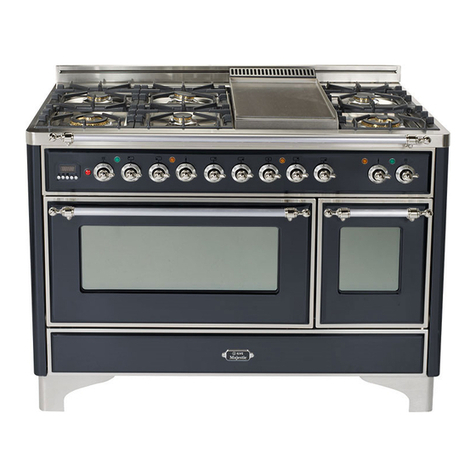
ILVE 645SLZT4/SS User guide

PIZZA OVEN
USER – Use and Maintenance
INSTALLER – Installation and maintenance
cod. EI33960190000EN
31/2022
ZONA PER TARGHETTA
EN


INDEX
4 IMPORTANT SAFETY WARNINGS
9 INSTRUCTIONS FOR USE
9 TFT touch display
13 TFT touch T4 static model
14 Accessories
15 CLEANING AND MAINTENANCE
15 Oven cleaning and care
15 Oven door disassembly
16 Glass disassembly and cleaning
17 Grills cleaning
17 Lamp replacement
18 Behavior in case of failures
19 COOKING CHART
19 Fan oven cooking chart
20 Natural convection oven cooking chart
21 INSTALLATION
21 Instructions for installation
22 Electrical connection
22 Installation rules
23 Wiring diagrams
25 Safety thermostat
26 NOTES

4
IMPORTANT
SAFETY WARNINGS
Appliances’ data
CAUTION
1
2
3
As well as being shown on the cover, the data plate is ap-
plied to the oven door frame and is visible with the door
open.
These warnings refer to different types of appliance. Pay
attention in properly identifying the type you own (see the
data plate).
These warnings are valid for the countries
mentioned in the plate.
Before using the cooker, read the instructions booklet ca-
refully.
This contains very important information concerning sa-
fety during installation, use and maintenance.
The instructions booklet must be kept with care for later
consultation.
The electrical safety of this cooker is guaranteed only if it
is correctly grounded as required by the regulations.
It is fundamental to ensure that these regulations have
been respected; if you are in doubt, contact a skilled te-
chnician to have the electric system accurately checked.
The manufacturer is not responsible for damage
caused by a bad grounding system.
Before powering the appliance, check that the tech-
nical features shown on the data plate match those of
the electrical system perfectly.
Installation/regulation must be carried out by qualied
personnel.

5
USER
IMPORTANT
SAFETY WARNINGS
Check that the electrical system and the sockets have
the capacity to withstand the maximum power of the
appliance which is shown on the plate.
If in doubt, contact a qualied person.
The device must be connected directly to the power sup-
ply with the correct polarity.
The connection must have a device ensuring discon-
nection from the network, with an opening distance of the
contacts that allows complete disconnection in the con-
ditions of overvoltage category III, in accordance with in-
stallation instructions.
If the socket is not suitable for the plug, replace it with a
suitable one and in this case contact a qualied person
who will also check if the cable section of the socket can
withstand the power consumed by the appliance. The
power cable does not have a tted plug. For connection
see “Electrical connection” section. The use of adapters,
multiple sockets or extension leads, is not recommended.
When the appliance is not used for a long time, remove
the electrical connection and disconnect the mains swi-
tch.
Do not block ventilation or heat dissipation slots.
If the appliance’s electrical power cable is damaged, it
must only be replaced by a manufacturer approved ser-
vice centre.
4
5
6
7
8
9

6
The appliance must only be used for the purposes it is in-
tended for (cooking). Any other use (e.g. heating a room)
is improper and dangerous.
The manufacturer declines any responsibility for dama-
ges caused by such improper uses.
The use of any electrical appliance requires that a num-
ber of fundamental rules be respected:
A. Never touch the appliance with wet or damp
hands or feet;
B. Never use the appliance with bare feet;
C. Avoid using extension cords and possibly take all
possible precautions;
D. Do not pull the electric wire to disconnect it from
the socket;
E. Do not expose the appliance to atmospheric
agents (rain, sun, etc.)
F. Keep children under the age of 8 away from the
appliance if they are not continuously supervised.
This appliance can be used by children from 8 years
and by persons with reduced physical, sensory or
mental capacities or with lack of experience and
knowledge if they are under adequate supervision
or if they have been instructed about the use of
the appliance safely and if they realize the related
dangers. Children must not play with the appliance.
Cleaning and maintenance operations must not be
carried out by children without supervision.
The appliance and its accessible parts become very hot
during use. Care should be taken not to touch the heating
elements. Children must be kept at a distance. Children
under 8 years of age must be kept away unless constantly
supervised.
10
11
12
IMPORTANT
SAFETY WARNINGS

7
USER
Before cleaning the appliance or performing mainte-
nance, disconnect the appliance by disconnecting the
power cord or by cutting off the electricity using the spe-
cial switch.
In case of breakdown or malfunction switch off the ap-
pliance and do not attempt any repairs that must only
be performed by an authorized service centre. Always
insist on original spare parts.
Failure to comply with these instructions may compro-
mise the appliance’s safety.
It is strongly recommended not to make accessible the
parts that can be dangerous, especially if there are
children who could use the appliance for play.
Do not use ammable liquids (alcohol, petrol, ...) near
the appliance in operation.
The materials used for the construction of our applian-
ce are compatible with the environment and therefore
recyclable. The packaging residues must not be left wi-
thin the reach of children, but must be disposed of using
the appropriate separate collection channels. For the
scrapping of your equipment the disposal options must
be used at your retailer and/or at your municipal admini-
stration; remember to scrap your appliance before ma-
king it useless.
Do not use steam cleaners to clean the inside of the oven.
Do not use abrasive detergents or sharp metal tools to
clean the glass door of the oven, as they could damage
the surface and cause it to break.
13
14
15
16
17
18
19
IMPORTANT
SAFETY WARNINGS

8
20
21
Warning: Make sure the product is off before replacing
the lamp to avoid the possibility of electric shock.
All accessories in direct contact with food must be tho-
roughly cleaned using suitable products before their
rst use.
Cooking food in direct contact with grills and oven trays
is not allowed
IMPORTANT
SAFETY WARNINGS

9
USER
OFF
INSTRUCTIONS FOR USE
TFT touch display - Icons legend
Pause Home
Start Light
°C - °F Timer
Screen lock Exit - Term
Conrmation Time
Settings Settings Conrmation
Meat probe Off
Knob present in some models
(allows to set and conrm the TFT
functions besides the Touch)

10
INSTRUCTIONS FOR USE
TFT touch display - Settings
Home: display start page.
3 options
Allows you to proceed to the cavity setting screen
Allows you to set the timer
Allows direct access to the settings
Settings
Choice of degree scale (° C or ° F).
Setting the time.
Exit - Term
Screen lock
To unlock, tap on the display for 10 seconds
Set a timer
Increase or decrease time.
Conrm once the desired time has been set.
An acoustic signal will indicate the term.
Conrm and return to the home page.
PM
11:48AM
10m
It allows you to set the volume of the
acoustic signal and optionally a sound
at the touch of the display
Numeric keypad
ATTENTION: if the display does not respond to the commands (touch locked), simply open and close
the oven door

11
USER
11:48AM
320
°C
INSTRUCTIONS FOR USE
TFT touch display - Settings
11:48AM
__:__
__:__
120°c
50 100150 200250 300
0
1- Choose cooking
function
Light (turned on or off)
Home (back to the home screen)
2- Set the cooking temperature
3- Set the cooking time and pro-
grammed start
1b - Conrm cooking fun-
ction
3d - Conrm the cooking
function
3a - Set the
cooking time
3c - Set the start time
3b - Shows the
cooking time
2a - There are two opzini per
set the temperature:
• scrolling the bar
• with +or
-
2b - Conrm the cooking function
1a - Choose dry / wet co-
oking
NOTE: only possible in
certain cooking methods

12
INSTRUCTIONS FOR USE
Cooking process
SETTED CAVITY
Once the cavity has been set (cooking function, temperature and
timer set) conrm to start preheating. At this point the display will switch
to preheating mode
11:48AM
280
°C
10m
12:58
PRE-HEATING PHASE
There are four levels that allow you to monitor the preheating process.
The red part will progressively increase until it lls the display
11:48
2809m 15s
°C
AM
12:58
11: 4 8
280 8m 02s
°F
AM
12:5 8
OFF
MODALITÀ COTTURA
PRERISCALDO ENDED
When the set temperature is reached, the display will turn red to indicate the
end of the preheating phase, and the start of the cooking phase. If a cooking
time was set, the oven will automatically switch off when the time expires.
In case of no cooking time set, it is possible to suspend
and then nish cooking
11: 4 8
400 8m 02s
°F
AM
12:5 8
OFF
MODALITÀ COTTURA

13
USER
INSTRUCTIONS FOR USE
T4 static model with TFT touch - Icons
Pizza function
This function is particularly suitable for cooking pizzas, focaccias and bread. The main source of heat comes from the lower
heating element which works in combination with the other furnace resistances.
Normal static cooking
It is the classic function of the electric oven particularly suitable for cooking the following foods: pork chop, sausages, cod,
braised meat, game, roast veal, meringues and biscuits, baked fruit, etc.
Cooking from below
This is the best cooking to nish cooking food, especially pastry (biscuits, meringues, leavened cakes, fruit desserts, etc.) and
other foods.
Cooking from above
Particularly suitable for browning and to give the nal touch of color to many foods; it is the recommended function for ham-
burgers, pork chops, veal steaks, sole, cuttlesh, etc.
Grill cooking with closed door
The function indicated for quick and deep grilling, for grilling and roasting meat in general, llet, Florentine steak, grilled sh and
even grilled vegetables. Cooking with the electric grill must be carried out with the thermostat at 180 ° C.
Ventilated grill cooking
Particularly fast and deep with considerable energy savings, this function is suitable for many foods such as: pork chop, sau-
sages, pork or mixed skewers, game, Roman-style gnocchi, etc. Cooking with the electric grill must be carried out with the
thermostat at 180 ° C.
Intensive cooking
It is the function of the rapid and intense cooking of various dishes; suitable for: baked sh, braised vegetables, skewers, duck,
chicken, etc.
Multiple ventilated cooking
It is the function that allows the simultaneous cooking of different dishes without the smells mixing together; you can cook baked
lasagna, pizza, croissants and croissants, pies, cakes, etc.
Eco cooking
It is the function that allows you to cook with a considerable saving on electricity consumption. To make the most of this feature
it is useful, before inserting the ECO function, to introduce the dish inside the oven, positioning it in the center of the cavity.
With the Eco function, cooking times adapt to slow cooking such as: braised meats, white meats, baked pasta, delicate pa-
stries.
Thawing
Allows quick thawing of all frozen foods in general that are quickly brought to room temperature.
Quick Start (only available for some models)
This function is used to speed up the preheating of your oven. We suggest you use this function when setting a cooking tem-
perature between 200 and 320° C. Using the QuickStart function for temperatures below 200° C does not offer particular
advantages.
To use the Quick Start function, turn the selector knob (S) until it is positioned on the symbol (9), then set the desired temperature
with the thermostat knob (T). Once the oven has reached the temperature, the orange thermostat light goes off and the oven
is ready to receive the food to be cooked. At this point, set the desired cooking function.
CAUTION: the Quick Start function is not suited to cooking food, it only serves to preheat the oven more quickly.
DO NOT USE THE QUICK START FUNCTION FOR MORE THAN 20 MINUTES.
Dry / wet cooking
The oven is equipped with an automatic device that allows the condensation vapors of the cooking, in some functions, to be
expelled from the oven: this involves dry cooking (dry). If the need for cooking requires that the humidity remain inside the oven,
moist cooking (moisture)
Normal static cooking Intensive cooking
Cooking from below Multiple ventilated cooking
Cooking from above

14
INSTRUCTIONS FOR USE
Accessories
Lower conveyor (A)
Upper conveyor (B)
Pizza rack (C)
Pizza server (D)
Insert conveyor A into the oven in position 2 and conveyor B in position 3, see gure 5.
Activate the PIZZAfunction at 400 °C to pre-heat the oven.
The pizza base needs to be rolled out and placed on the pizza rack (C). Top the pizza as
desired and then use the pizza server (D), to position it inside the oven.
Use the timer to set the required time, and when the acoustic alarm sounds, remove the
pizza from the oven placing it on the pizza rack (C) using the pizza server (D). The recom-
mended pizza cooking time will vary from between two and three minutes according to
the type of dough, the ingredients used, and personal cooking tastes.
WARNING: THERE IS A RISK OF ESCAPING STEAM ON OPENING THE OVEN DOOR. TO AVOID
THE RISK OF BURNS IT IS ADVISABLE TO ALLOW THE STEAM TO ESCAPE GRADUALLY BY SLOWLY
OPENING THE OVEN DOOR, AND TO MAINTAIN A CERTAIN DISTANCE FROM THE APPLIANCE
ITSELF.
Quando si usa il forno per la prima volta, farlo funzionare a vuoto per circa 1 ora (230°C),
lasciando possibilmente le nestre della cucina aperte. Il forno alla prima accensione
emana cattivi odori dovuti a residui di produzione quali grassi, olii o resine. Trascorso il
tempo indicato il forno è pronto per effettuare la prima cottura. Quando il forno sarà
raffreddato pulirlo seguendo le istruzioni del paragrafo “Pulizia e manutenzione”.
Accessories
First use
1
2
3
A
B
Fig.5
C D

15
USER
CLEANING AND MAINTENANCE
Removing the oven
We recommend cleaning the oven after each use. The dirt is cleaned more easily by
avoiding that it burns repeatedly at high temperatures. Wait for the room to be warm.
Remove all the extractable parts and wash them separately with hot water and non-a-
brasive detergent. The cooking chamber is cleaned with a soft cloth soaked in a solution
of warm water and ammonia, then rinse and dry.
• Do not use steam cleaners for cleaning the inside of the oven.
• Do not use abrasive / corrosive detergents or sharp metal tools to clean the glass
door of the oven as they could damage the surface and cause it to break.
• Do not cover the inside of the oven with aluminum sheets to facilitate
cleaning. This operation alters the performance of the appliance .
To facilitate intensive cleaning of the oven, it is practical to disassemble the door by
following these instructions:
Insert the hook C in the hinge sector D;
Bring the door in a half-open position and working with both hands, pull the door towards
you until it has been released from the attack. To reassemble the door, work in reverse
order taking care to correctly insert the two guides (F);
Oven cleaning and care
Oven door disassembly
D
C
F
A
A
B
C
B

16
The oven door is composed of three crystals (two in some models). The crystal parts are
cleaned using non-abrasive absorbent kitchen paper and a common detergent. Do
not use rough abrasive materials or sharp metal scrapers to clean the glass doors of the
oven as they can scratch the surface and cause the glass to shatter. The internal crystals
are removable to make cleaning easier. For this purpose it is necessary to dismantle the
oven door or, alternatively, position it at the intermediate click.
Warning: do not remove the internal windows with the door fully open. The door may
suddenly close and injure you.
Once the door has been dismantled, store it with the outside facing downwards on a at
and soft surface to avoid scratches ature. If you don’t want to dismantle the
door, the windows can be removed by positioning it at the intermediate opening click,
paying attention so that the door does not close suddenly.
Procedure to follow
Sequence for removal of
the door glass
CLEANING AND MAINTENANCE
Glass disassembly and cleaning
A
A
B
C
B
A
A
B
C
B
A
A
B
C
B

17
USER
CLEANING AND MAINTENANCE
Cleaning grills
We recommend cleaning the pan support grids after each cooking. Wait for it to cool
and proceed with cleaning with NON-ACID detergent. Acidic substances such as lemon
juice or other acidic detergents can irreparably damage the enamel of the grids. Care-
fully dry the grills with a cloth immediately after washing. Washing in a dishwasher is not
recommended.
Grills cleaning
Lamp replacement
If the oven light does not work, disconnect the appliance from the mains, remove the
lamp protection glass and replace the lamp.
It should of course be noted that the lamp to be inserted is indicated for
use at high temperatures and has the characteristics for such use.
Procedure to follow

18
System errors
The following errors are detected:
The error code syntax is: “E YY X”, where:
YY = error code
x = cavity number when error occurred or ‘ 0 ‘ for
general errors
Description Error ID
Cavity probe in open circuit
Cavity probe in short circuit
Meat probe in open circuit
Meat probe in short circuit
Overheating
Tangential fan not working
Incorrect mapping card
Communication error
– TFT display errors
00
01
04
05
08
16
19
20
error
123456
AVVISO PROBLEMA
In case of error disconnect and reconnect the applian-
ce. If the error is present again you will need the inter-
vention of an authorized technician.
ERROR MESSAGE
During the guarantee period repairs can only be carried out by the authorized after-sa-
les service.
Before repairing, unplug the appliance from the power supply, that is, unplug the
power cable or use the appropriate switch.
Unauthorized interventions and repairs can cause electrocution or short circuit, therefo-
re do not carry them out. Leave these works to authorized technicians.
In case of small disturbances, it is possible to solve the problem following the in-
structions.
After-sales service intervention during the guarantee period is not free, if the appliance
does not work because of incorrect use.
The elimination of the faults or complaints, caused by incorrect use or installation, will
not be repaired under guarantee. In such cases, the repair costs will be borne by the
user
ATTENTION:
PROBLEM SOLVING
– Guide for the resolution

19
USER
Insert the foods when the oven is hot.
When appliances are equipped with grill, baking can be achieved keeping the door closed. By using the grill
you can cook meat, sh and even vegetables. At rst, we suggest using the upper runner.
Place the selector on grill and select a temperature of 180 ° C.
Important
Grill baking
COOKING CHART
Fan oven cooking chart (by way of example only)
DISH
MEATS
Roast beef
Roast ox
Roast veal
Roast lamb
Rare roast beef
Roast hare
Roast rabbit
Roast turkey
Roast goose
Roast duck
Roast chicken
FISH
CAKES
Fruit cake
Plain square cake
Brioches
Sponge cake
Plain ring cake
Sweet biscuits
Yeast cake
Strudel
Savoy biscuits
Apple fritters
Biscuits pudding
BAKERY
Bread
Pizza
Toast
TEMP. C°
170-180
170-190
160-180
140-160
180-190
170-180
160-170
160-170
160-180
170-180
180
160-180
180-200
180-190
170-190
190-200
160-180
180-200
190-200
160
150-180
180-200
170-180
180-200
250/300
185-195
MIN.
40/50
40/60
65/90
100/130
40/45
80/100
80/100
160/240
120/160
100/160
90/120
15/25
40/50
40/45
40/60
25/35
35/45
20/30
30/40
25/35
50/60
18/25
30/40
45
10/20
25/35
2
2
2
2
2
2
2
2
2
2
2
2
2
2
2
2
2
2
2
2
2
2
2
2
2
2
2
1
3

20
COOKING CHART
Natural convection oven cooking chart (by way of example only)
DISH
MEATS
Roast beef
Roast ox
Roast veal
Roast lamb
Rare roast beef
Roast hare
Roast rabbit
Roast turkey
Roast goose
Roast duck
Roast chicken
FISH
CAKES
Fruit cake
Plain square cake
Brioches
Sponge cake
Plain ring cake
Sweet biscuits
Yeast cake
Strudel
Savoy biscuits
Apple fritters
Biscuits pudding
BAKERY
Bread
Pizza
Toast
Insert the foods when the oven is hot.
When appliances are equipped with grill, baking can be achieved keeping the door closed. By using the grill
you can cook meat, sh and even vegetables. At rst, we suggest using the upper runner. Place the selector
on grill and select a temperature of 180 ° C.
Important
Grill baking
TEMP. C°
225
250
225
225
230
250
250
250
225
250
250
200/225
225
175/200
175/200
220/225
180/200
200/220
250
180
180/200
200/220
200/220
180-200
250/300
185-195
MIN.
60/80
50/60
60/80
40/50
60/50
40/50
40/50
50/60
60/70
45/60
40/45
15/25
35/40
50/60
25/30
20/30
30/40
15/20
25/35
20/30
40/50
15/20
20/30
45
10/20
25/35
2
2
2
2
2
2
2
2
2
2
2
1/2
2
2
2
2
2
2
2
2
2
2
2
2
2
2
2
1
3
Table of contents
Other ILVE Kitchen Appliance manuals
Popular Kitchen Appliance manuals by other brands

Beper
Beper BC.200 use instructions

Market Forge Industries
Market Forge Industries ALTAIR II Series Installation, operation and maintanance

Klarstein
Klarstein 10029505 manual

Carrier
Carrier Taylor C300 NP operating instructions

Brock
Brock MC 6601 SS manual

Transtherm Caves
Transtherm Caves Wine cabinet Technical Manual and Instructions for Use