Premium PPN20 User manual


1
IMPORTANT SAFEGUARDS
When using electrical appliances, basic safety precautions should be followed
including the following:
1. Read all instructions.
2. The cord to this appliance should be plugged into a 120VAC electrical outlet
only.
3. To protect against risk of electric shock, do not immerse the cord plug or
cooking unit in water or anyother liquid.
4. Do not touch hot surfaces. Use handles.
5. This appliance is not intended for use of persons (including children) with
reduced physical, sensory and mental capabilities, or lack of experience and
knowledge, unless they have been given supervision or instruction concerning
the use of the appliance by a person responsible for their safety.
6. Close supervision is necessary when the appliance is used by or near
children.
7. Unplug from the wall outlet when is not in use and before cleaning. Allow to
coolbefore cleaning or storing this appliance.
8. Never yank the cord to disconnect the cooking unit from the electric outlet.
Instead, grasp the plug and pull to disconnect.
9. Do not operate any appliance if the cord is damaged. Do not use this
appliance if the unit malfunctions, if it is dropped or has been damaged in any
manner. In order to avoid the risk ofelectric shock, never try to repair the Panini
Maker yourself. Bring it to a qualified technician for examination, repair or
electrical or mechanical adjustment. An incorrect assembly could present a risk
of electric shocks when the Panini Maker is used.
10. The use of accessories or attachments not recommended by the
manufacturer maycause fire, electrical shocks or injury.
11. Do not use outdoors or forcommercial purposes.

2
12. Do not use this appliance for purposes other than the one for which it was
designed.
13. Do not let the electricalcord hang over the edge of the table or countertop, or
touch hot surface.
14. Do not place on or near a hot gas, electric burner or heated oven.
15. Useona heat-resistant flat level surface only.
16. Use extreme caution whenmoving anyappliance containing hot food, water,
oilor other liquids.
17. To disconnect, turn the controlto “OFF,” then remove plug from outlet.
18. Always unplug after use. The appliance will remain “ON” unless it is
unplugged.
19. CAUTION HOT SURFACES: This appliance generates heat during use.
Proper precautions must be taken to prevent the risk of burns, fire or other
damage to persons or property.
20. When using this appliance, provide adequate ventilation above and on all
sides for air circulation. Do not allow this appliance to touch curtains, wall
coverings, clothing, dishtowels or other flammable materials during use.
21. Used with wall plug receptacle only.
22. Do not use for other than intended use.
23. Always preheat for approximately3 minutes.
SAVE THESE INSTRUCTIONS
FOR HOUSEHOLD USE ONLY

3
ADDITIONAL IMPORTANT SAFEGUARDS
CAUTION: This appliance is hot during operationand retains heat for some time
after turning it OFF. Always use oven mitts when handling hot materials and
allows the metal parts to cool before cleaning. Do not place anything on top of
the device while it is operating or while it is hot.
1. All users of this appliance must read and understand this Instruction Manual
before operating for cleaning this appliance.
2. Do not leave this appliance unattended during use.
NOTES ON THE CORD
The provided short power supply cord (or detachable power-supplycord)should
be used to reduce the risk resulting from becoming entangled in or tripping over
a longer cord. Do not use anextensioncord with this product.
NOTES ON THE PLUG
This appliance has a polarized plug (one blade is wider thanthe other),to reduce
the risk of electric shock, the plug will fit ina polarized outlet only. Ifthe plug does
not fit fully into the outlet, reverse the plug. If it still does not fit, contact a
qualified electrician. Do not modify the plug in any way.
PLASTICIZER WARNING
CAUTION: To prevent plasticizers from migrating to the finishing of the counter
top, table top or other furniture, place (Non-Plastic) coasters or placemats
betweenthe appliance and the finishing of the counter top or table top. Failure to
do so maycause the finishto darken; permanent blemishes may occur.

4
ELECTRIC POWER
If the electrical circuit is overloaded with other appliances, your device may not
work properly. It should be operated on a separate electrical circuit from other
appliance.
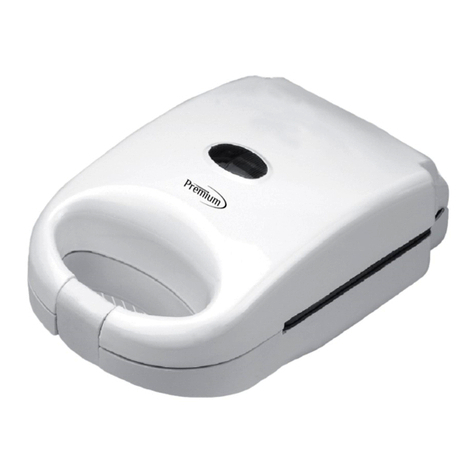
GETTING TO KNOW YOUR PANINI MAKER
Product may varyslightly from illustration
Figure 1
Handle
Nonstick cooking
Red power light
Green readylight
Removable drip tray
Top-up feet
Polarized plug
Hinge button
Top Housing
Grease drain

5
BEFORE USING FOR THE FIRST TIME
1. Carefully unpack the Panini Maker and remove all labels, packaging and
materials.
2. Before using your Panini Maker for the first time, wipe the cooking plates with
a damp cloth to remove all dust, and thendry.
WARNING: Never use metal scouring pads, harsh or abrasive cleaners on any
part of the Panini Maker.
3. Wipe outer surfaces with a slightlydamp,soft cloth or sponge.
4. For best results, pour a teaspoon of vegetable oil onto an absorbent kitchen
towel.Spread onto the non-stick grill plates. Wipe off any excess oil.
CAUTION: Take care to prevent water fromrunning into the appliance.
NEVER IMMERSE THE PANINI MAKER IN WATER OR ANY OTHER
LIQUIDS.
5. Slide the removable drip tray into the bottom front of the unit. Push firmly to
ensure the drip trayis securelyinstalled.
6. Set the appliance on a dry, clean and flat surface. Keep the Panini Maker
closed until use.
OPERATING INSTRUCTIONS
The Panini Maker canbe used in the open position to grill burgers, thinboneless
pieces of meat, fish, fruits, and vegetables easily. Use the Panini Maker in the
closed position to make grilled pressed sandwiches.
IMPORTANT: Always preheat the Panini Maker closed.
1. Optional: Before using the Panini Maker, use a pastrybrush to lightlycoat the
top and bottom grilling plates with vegetable oil.

6
IMPORTANT: Do not use non-stick sprays as they can cause build-up on the
cooking plate.
2. IMPORTANT: Make sure removable drip tray is in the position before use.
3. Use the tilt-up feet to raise the front two legs of the cooking plate. That will
allow the grease to run to the drain at the back of the closed Panini Maker.
4. Turn the Panini Maker over to the underside. The feet will be in the lowered
(flat) position.
5. Press the center tab of eachof the feet (see Figure 1). Tilt eachfoot upwards
to the raised position (see Figure 2). With the front part raised, turn the Panini
Makerover and replace onto the work area.
Figure 1 Figure 2
6. Use the handle to lower the top grillplate.
7. Preheat the Panini Maker. Operate the unit in a closed position during
preheat.
8. Check to make sure that the cord is fully unwrapped and does not come in
contact with any exterior parts of the unit. Plug unit into a 120 VAC electrical
outlet. The red (POWER) light willilluminate and remain lighted during use.
9. While preheating, prepare the Panini (s)or food to be grilled.
10. After approximately 2 minutes, the blue (READY) light will illuminate,
indicating the unitis preheated and is ready for use.

7
NOTE: When the Panini Grill is heated for the first time, it may emit a slight
smoke or odor; this is normal and should disappear after 1 or 3 uses. Thatdoes
not affect the safety of the appliance.
TO USEAS A PRESS GRILL (CLOSED POSITION)
NOTE: Followstep 1 through 9 of the Operating Instructions. Preheat the Panini
Maker following the detailed Instructions described.
NOTE: When cooking more than one panini, prepare so that the thickness of
each sandwich is consistent. This will allow both Panini (s) to cook it quickly,
evenly and produces a rich grillmarks both top and bottom.
1. Place the panini, put the oiled side down and centered on the bottom grill
plate.
2. Using a pot holder or oven mitt putdown the handle and gently lowers the top
grill plate.
3. To ensure a perfectly grilled panini, all sandwiches placed on the Panini Grill
at the same time must be the same thickness. Look to make sure that the top
grill plate lies evenly on the top of the bread. Make sure the sandwiches are
centered on the grill plate. If desired, press the handle down several times while
cooking.
4. During cooking, the blue (READY) indicator light will cycle on and off during
cooking. This indicates that the thermostat is maintaining the proper cooking
temperature.
5. Using an ovenmitt or pot holder, grasp the handle and carefully lift the top grill
plate. Continue grilling until the bread is toasted, and food is cooked to your
liking.
6. To remove your grilled panini sandwiches, always use a plastic or wooden
spatula.

8
7. WARNING: Never use a sharp or metal objectas it maydamage the non-stick
surface of the grill plates.
CAUTION: Do not leave appliance unattended during use.
8. Remove the plug from the wall outlet.
9. Allow the panini to cool to a safe handling temperature before slicing.
PANINI HINTS FOR BEST RESULTS
It is usual to prepare Panini (s) from a hearty loaf of bread. However, Panini
(s) made from the store, sliced breads or rolls can be delicious and simple to
make. Experiments witha varietyof breads, tortillas, flatbreads, even pitas.
For health-conscious cooks, the non-stick coating of grill plates assures a
crisp and delicious toasting without the use ofoil or butter. The raised ridges
and tilted bottom plate, allow grease and other liquids to drip off into the drip
trayand away from your food.
With the Panini Grill's non-stick grill plates, it is not necessary to use butter
oroil the outside of the bread. However, spreading a small amount of butter
or olive oil is recommended to encourage evenbrowning of the bread.
NOTE: Do not use non-stick sprays as they can cause build-up on the grill
plates. Use olive oilinstead.
WARNING: Do not use non-fat spreads. They may burn and damage the
non-stick grill plates.
Always preheat the Panini Grillbefore each use.
Have all the ingredients at hand before preparing the panini.
When using soft or liquid fillings, use thicker slices of breads. Try removing
the inside of the bread to create a cup form in which filing can be added.
Most fresh fruits release juice when heated. If a recipe calls for canned fruit,
drainand dry the fruit with a clean paper towel.
Avoid using processed cheeses, as they tend to melt under high
temperatures.
9
A teaspoon of sugar sprinkled on the buttered side make the grilled panini
more crispier and adds flavor when using sweet fillings.
Whole grain and sweet breads will grill faster than white breads and should
be in the grill for less time.
After you have removed the finished panini, close the top grillplate to retain
heat while assembling of more sandwiches.
To a void food contamination, wear oven mitts and use a soft absorbent
paper towel to wipe the grillplates, and clean aftereach use.
TO USE AS AFULL CONTACT GRILL (OPEN POSITION)
NOTE: Followstep 1 through 9 of the Operating Instructions. Preheat the Panini
Maker, following detailed instructions described.
NOTE: When grilling more than one piece of food, prepare so that the thickness
of food items is consistent. This will allow the food to cook it quickly, evenlyand
produces a rich grill marks.
1. Press the hinge button to create a full ribbed contact grill. Wear protective
oven mitts grasp the handle and open the Panini Maker (see Figure 3).
Figure 3
Hinge Button

10
2. Following the procedures outlined in the ''Operating Instruction,” raise the
front two tilt up feet. This will enable the oil to flow into the grease drain in the
center of the flattened grill plates, and theninto the drip tray.
Figure 4
3. When the grill plates are in an opened, flat position, it may be necessary to
adjust the angle of the upper grill plate. Press the grill plate down on the center
grease drain to adjust the angle (see Figure 4).
CAUTION: Always wear protective ovenmitts whenpressing ona hot surface.
4. Center food onanopen grillplate(s).
CAUTION: To prevent risk of burns, always use oven mitts. Be careful not to
touch any hot surfaces suchas the top housing or grill plates, or any hot liquid in
the drip tray. Extreme care must be taken when operating this appliance as the
surface temperatures get extremely hot.
5. Allow the food on the Panini Maker to grill for 3 to 8 minutes, according to
recipe directions. The blue (READY) light will cycle on and off as the unit
maintains baking temperatures.
6. Most recipes will varyincook time and brownness. Note the perfect grill times
foreach food for future use.
Top-up Feet
Grease drain

11
7. Wearing oven mitts, remove grilled food from the cooking plate(s) using a
non-metallic utensil. A plastic spatula will help to remove delicate food in one
piece. Tongs are helpful when grilling meat or sausages.
8. NOTE: If additional a food is to be grilled, close the Panini Maker to retain
heat. Follow the detailed instructions outlined previously to open the grill and
continue cooking.
9. Whengrilling is finished, remove the plug from the wall outletand allow Panini
Makerto cool before removing the drip tray for cleaning the unit.
USER MAINTENANCE INSTRUCTIONS
The appliance requires little maintenance. It contains no user serviceable parts.
Do not try to fix it yourself. Contact a qualified appliance repair technician if the
product requires servicing.
CARE & CLEANING INSTRUCTIONS
CAUTION: Unplug from the electrical outlet and allow cooling thoroughly before
removing the drip trayor cleaning the unit.
1. The Panini Maker does not disassemble for cleaning.
2. Never immerse appliance in water or other liquids. Never place Panini Maker
indishwasher.
3. Slide the removable drip tray out from the bottom of the unit. Clean it with hot
soapy water.
NOTE: The removable drip trayis top rack dishwasher safe.
IMPORTANT: Always clean the drip tray before use. NEVER OPERATE THE
PANINIMAKER WITHOUT THE DRIP TRAYPROPERLY IN PLACE.
4. The panini cooking plates should be cleaned and conditioned before each
heating.

12
5. Brush non-stick cooking plates with a clean soft pastry brush or cloth, to
condition the plates; lightly coat the cooking surfaces with solid vegetable
shortening or vegetable oil. Carefully follow suggested cleaning procedures
below. After a time, if the Panini (s) show signs of sticking, recondition as
needed.
6. To protect the premium quality non-stick surfaces, use only plastic, nylon or
wooden utensils.
7. To remove any butter baked onto the cooking plate, pour a small amount of
cooking oil onto the hardened butter. Allow to set for 5 minutes, and then wipe
softened butter off with a paper towel or soft cloth. To remove stubborn stains
used a plastic mesh puff or pad. A clean toothbrush works well to remove
baked-on butter from the grids. For best results, use only products with
directions stating they are safe for cleaning non-stick cooking surfaces. Do not
use steel wool or coarse scouring pads.
8. The exterior finish should be cleaned with a non-abrasive cleaner and a soft,
damp cloth. Dry thoroughly.
STORINGINSTRUCTIONS
1. Make sure unit is unplugged and fully cooled.
2. Turn the Panini Maker over. The feet willbe ina raised position.
3. Press the center tab of each the feet. Each foot will tilt back and fit into the
recessed area (see Figures 5 and 6).

13
Figure 5 Figure 6
4. Never wrap the cord tightly around appliance. Do not put any stress on the
cord where it enters the unit, as this could cause the cord to frayand break.
5. Store the Panini Maker in its box or stand unit on for an easy and compact
storage.
WARNING: Never store the Panini Maker while itis hotor stillplugged in.

14
IMPORTANTES PRECAUCIONES
Cuando se utilizan aparatos eléctricos, deben seguirse las precauciones
básicas de seguridad incluyendo las siguientes:
1. Lea todas las instrucciones.
2. El cable de este aparato debe enchufarse en un tomacorriente eléctrico de
120V AC solamente.
3. Para protegerse contra el riesgo de choque eléctrico, no sumerja el cable o
unidad de cocciónen agua o cualquier otro líquido.
4. No toque las superficies calientes. Use las asas.
5. Este aparato no está destinado para el uso de personas (incluidos niños) con
capacidades físicas, sensoriales o mentales reducidas, o falta de experiencia y
conocimiento, a menos que sean supervisados o instruidos acerca del uso del
aparato por una persona responsable por suseguridad.
6. Atenta supervisión es necesaria cuando el aparato sea usado por o cerca de
niños.
7. Desenchúfela del tomacorriente cuando no esté en uso y antes de limpiarlo.
Deje que se enfríe antes de limpiar o guardar este aparato.
8. Nunca tire del cable para desconectar el aparato de cocción de la toma
eléctrica. En lugar de ello, sujete el enchufe y tire para desconectar.
9. No opere ningún aparato si el cable está dañado. No use este aparato si el
aparato funciona mal, si se ha caído o ha sido dañado de cualquier manera. Con
el fin de evitar el riesgo de descargas eléctricas, no intente repararlo usted
mismo. Llévelo a un técnico calificado para su revisión, reparación o ajuste
eléctrico o mecánico. Un montaje incorrecto podría presentar un riesgo de
descargas eléctricas cuando se usa el producto.
10. El uso de accesorios o aditamentos no recomendados por el fabricante
puede causar incendios, descargas eléctricas o lesiones.
11. No use alaire libre o con fines comerciales.
12. No use este aparato para fines distintos de aquél para el que fue diseñado.

15
13. No deje que el cable eléctrico cuelgue del borde de la mesa o mostrador, ni
que toque superficies calientes.
14. No coloque sobre o cerca de una hornilla eléctrica, de gas u horno caliente.
15. Use sobre una superficie plana resistente al calor únicamente.
16. Tenga mucho cuidado al mover cualquier aparato que contenga alimentos
calientes, agua, aceite uotros líquidos.
17. Para desconectar, gire el control a pagado "OFF", luego retire elenchufe del
tomacorriente.
18. Desenchufe siempre después de su uso. El aparato seguirá encendido a
menos que esté desconectado.
19. PRECAUCIÓN SUPERFICIES CALIENTES: Este aparato genera calor
durante su uso. Precauciones adecuadas se deben tomar para evitar el riesgo
de quemaduras, incendio u otros daños a personas o bienes.
20. Cuando se utiliza este aparato, procure una ventilación adecuada por
encima y por todos los lados para circulación de aire. No permita que este
aparato toque cortinas, recubrimientos de paredes, ropa, paños de cocina u
otros materiales inflamables durante el uso.
21. Utilizar con enchufe de pared solamente.
22. No utilice para usos distintos delindicado.
23. Siempre precalentar durante aproximadamente 3 minutos.
GUARDE ESTAS INSTRUCCIONES
SOLO PARA USO DOMESTICO

16
OTRAS PRECAUCIONES IMPORTANTES
PRECAUCIÓN: Este aparato está caliente durante el funcionamiento y retiene
el calor durante algún tiempo después de apagarlo. Use siempre guantes de
cocina cuando maneje materiales calientes y permite que las partes metálicas
se enfríen antes de limpiar. No coloque nada encima del aparato mientras esté
funcionando o mientras esté caliente.
1. Todos los usuarios de este aparato deben leer y comprender este manual de
instrucciones antes de utilizar para la limpieza de este aparato.
2. No deje este aparato desatendido durante su uso.
NOTAS SOBRE EL CABLE
El cable corto de corriente proporcionado (o cable de suministro eléctrico
desmontable) debe utilizarse para reducir el riesgo de enredarse o tropezarse
con un cable más largo. No utilice un cable de extensión coneste producto.
NOTAS SOBRE EL ENCHUFE
Este aparato tiene un enchufe polarizado (una pata es más ancha que la otra),
para reducir el riesgo de descarga eléctrica, el enchufe encajará solamente en
un tomacorriente polarizado. Si el enchufe no entra completamente en el
tomacorriente, invierta el enchufe. Si aún así no encaja, comuníquese con un
electricista calificado. No modifique el enchufe de ninguna manera.
ADVERTENCIASOBRE PLASTIFICANTE
PRECAUCIÓN: Para evitar la expansión de plastificantes al acabado de la
encimera, mesa u otro mueble, coloque posavasos (no plástico) o manteles
individuales entre el aparato y el acabado de la encimera o mesa. No hacerlo
puede causar que el acabado se oscurezca; también pueden producirse
manchas permanentes.
ENERGÍA ELÉCTRICA
Si el circuito eléctrico se sobrecarga con otros aparatos, el dispositivo no
funcionara correctamente. Debe ser operado en un circuito eléctrico separado
de otros aparatos.

17
CONOZCASU FABRICANTE DE PANINI
Este producto puede variar ligeramente de la ilustración
Figura 1
ANTES DE USAR POR PRIMERAVEZ
1. Desempaque cuidadosamente el fabricante de panini y retire todas las
etiquetas, envases y materiales.
2. Antes de usar su fabricante de panini, por primera vez, limpie las placas de
coccióncon unpaño húmedo para eliminar todo elpolvo, y luego seque.
ADVERTENCIA: No use nunca estropajos metálicos, productos de limpieza
fuertes o abrasivos en ninguna parte del fabricante de panini.
Asa
Plato de cocina
antiadherente
Luzroja de encendido
Luzverde de listo
Bandeja removible de grasa
Patas
Enchufe polarizado
Botón de
bisagra
Tope
Drenaje de grasa

18
3. Limpie las superficies externas con un paño suave y ligeramente húmedo o
una esponja.
4. Para obtener mejores resultados, vierta una cucharadita de aceite vegetal en
un papel de cocina absorbente. Extender sobre las planchas antiadherentes.
Limpie cualquier exceso de aceite.
PRECAUCIÓN: Tenga cuidado para evitar que el agua escurra hacia el aparato.
NUNCA SUMERJAEL FABRICANTE DE PANINI EN AGUA U OTROS
LIQUIDOS.
5. Deslice la bandeja de goteo extraíble enla parte inferior de la unidad. Empuje
firmemente para asegurarse de que la bandeja de goteo esté bieninstalada.
6. Coloque el aparato sobre una superficie seca, limpia y plana. Mantenga el
aparato cerrado hasta su uso.
INSTRUCCIONES DE USO
El fabricante de panini se puede utilizar en la posición abierta para asar
hamburguesas, finas carnes sin hueso, pescado, frutas y verduras fácilmente.
Utilice el fabricante de panini en la posición cerrada para hacer sándwiches
presionados a la parrilla.
IMPORTANTE: Siempre precaliente el fabricante de panini cerrado.
1. Opcional: Antes de usar el aparato, utilice una brocha de cocina para cubrir
ligeramente las placas superiores e inferiores de la parrilla conaceite vegetal.
IMPORTANTE: No utilice aerosoles antiadherentes, ya que pueden
causar la acumulación de la placa de cocción.
2. IMPORTANTE: Asegúrese de que la bandeja de goteo extraíble está en la
posiciónantes de usar.
3. Utilice las patas de inclinación-hacia arriba para levantar la parte delantera de
las dos patas de la placa de cocción. Eso permitirá la grasa ejecutar al desagüe
en la parte posterior cerrada del fabricante de panini.
4. Gire el aparato hacia la parte inferior. Las patas estarán hacia abajo en
posiciónplana

19
5. Pulse la pestaña central de cada uno de las patas (ver Figura 1). Incline cada
pata hacia arriba a la posición elevada (véase la Figura 2). Con la parte de al
frente levantada, gire el aparato y vuelva a colocar enel área de trabajo.
Figura 1 Figura 2
6. Use la manija para bajar la plancha superior.
7. Precaliente el fabricante de panini. Utilice la unidad en una posición cerrada
durante el precalentamiento.
8. Asegúrese de que el cable está completamente desenrollado y no entre en
contacto con las partes exteriores de la unidad. Enchufe el aparato a un
tomacorriente de 120 V AC. La luz roja (ENERGIA) se encenderá y
permanecerá encendida durante el uso.
9. Mientras está precalentando preparar elpanini (s)o la comida para ser asada
10. Después de aproximadamente 2 minutos, la luz azul (PREPARACIÓN) se
encenderá, indicando que la unidad esté precalentada yestá lista para usar.
NOTA: Cuando la parrilla del aparato se calienta por primera vez, puede emitir
un ligero humo u olor; esto es normal y debe desaparecer después de 1 o 3
usos. Eso no afecta a la seguridad del aparato.
Table of contents
Languages:
Other Premium Kitchen Appliance manuals

Premium
Premium PBM50 User manual

Premium
Premium PPN40 User manual

Premium
Premium PWC1007XB User manual

Premium
Premium PSM270 User manual

Premium
Premium PHB315 User manual

Premium
Premium PWC147MB User manual

Premium
Premium PSM 101 User manual

Premium
Premium PP1200 User manual

Premium
Premium PSM276 User manual

Premium
Premium PRBD496MS Owner's manual