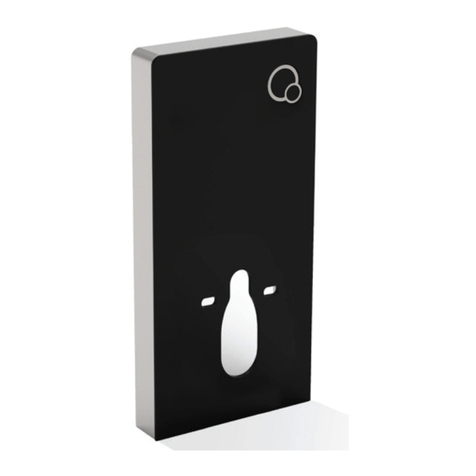
imex CC100F User manual

TM
CC100F
Super slim concealed insulated cistern with chrome front
mounted dual ush plate
a
Z
ijij
ijij
X
Y
2.
))%
Technologic data:
?″VtandaUd Iill ZateUhole
The ZateUVtUeVV Uange oIIill ZateUiV
a EaU
The ZateUtePSeUatXUe Uange iVa5
(// dXal IlXVh ZateUYolXPethe IlXVh
ZateUtiPe iVVaV
The SUodXct can Ee inVtalled in a Zall oI
PP thicNneVV
$ttention:3lVinVtall the SUodXct EeIoUe
tile&onIiUP the inVtall SoVition and
height EeIoUe inVtall the SUodXctPaUN the
height onto the Zall
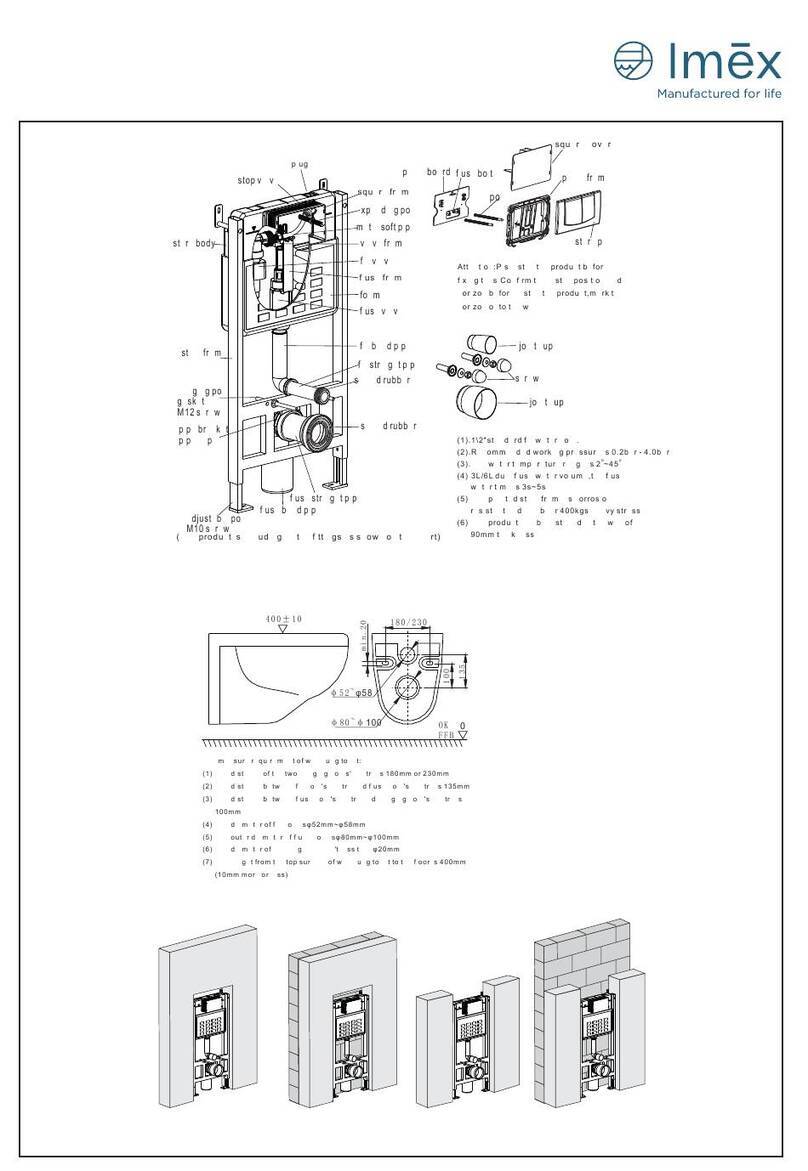
([Sloded coPSonent YieZ
The SUodXct iVinclXding all the IittingVaVVhoZn on the chaUt
ciVteUn Eod\
IlXVh YalYe
Iill VtUaight SiSe
Iill Eend SiSe
IlXVh Eend SiSe
Iill YalYe
Petal VoIt SiSe
e[Sanding Sole
Vealed UXEEeU
Vealed UXEEeU
Moint cXS
Moint cXS
YalYe IUaPe
Instruction Manual of Concealed Cistern
(Suit for standing floor toilet)
VTXaUe IUaPe
Sanel EoaUd
Sanel IUaPe
ciVteUn Sanel
IlXVh Eolt
Sole
VTXaUe coYeU
IlXVh IUaPe
Technical UeTXiUePentVIoU
standing floor toilet
The diaPeter of fill hole is ijPPaijPP
The oXter diaPeter of flXsh hole is ijPPaijPP
The height froPthe toSsXrface of standing floor toilet to the floor is
PP PP Pore or less
0easXre the height froPthe centre of fill SiSe to the floor Xthe
height froPthe centre of flXsh SiSe to the floor Y Eefore install
SreZall dr\half Zall Srehalf Zall
ǃ)i[the cistern Eod\
angle iron
The installation of the cistern Eod\can Ee done Xsing
angle iron onto the Zallfi[the steel fraPe onto the angle iron
Technologic data:
Eig Eotton
sPall Eotton
OK
FFB
a


OK
FFB
OK
FFB
This cistern is sXitaEle for an\of the installations EeloZ
FlXsh straight SiSe

TM
/
OK
FFB
0
Y
OK
FFB
0
Y
PD[
PP
PD[
PP
PP
PP
0LQ
PD[
7.Install fill water pipe
Loosen the screws and
removefrom the panel
board.
Attention: There may be debris in the new pipe,pls repeat open and close the stop valve several times,
flush out the dirt by open & close the water source several times,till appear clean water.At the same time,
pleases wash the dirt from the cistern.
Remove the panel board,pull
it upward and take it out at an
angle.
6.Install flush pipe
The way of connect the flush bend pipe:
HDPE plastic: weld the flush bend pipe by heated steel board,connect the flush
bend pipe and flush pipeline by rubber tie-in.ABS plastic: smear glue onto the
flush bend pipe,connect the flush bend pipe and flush pipeline by rubber tie-in.
pipe installed above the floor pipe installed under the floor
Fix the position of flush bend pipe according to the height of Y
which had measured,turn the flush bend pipe as needed.
connect the flush bend pipe with flush straight pipe ,fix the
flush bend pipe with linker.
8.Preparative before build wall
Insert the two hooks of panel
board into the flush valve.
9.Build the wall 10.Install cistern panel
The surface of expanding pole is
5mm lower than the wall surface.
Fix the panel frame onto the
expanding pole by screw.
Adjust the
outer part of
pole to be
about 28mm.
Fasten the bottom of cistern
panel onto the panel frame,
push the cistern panel upward,
close the cistern panel onto the
panel frame.
11.Adjust straight pipe
Measure the length of L+3mm at the edge of
straight pipe and cut it down.Rub the cut edge
of straight pipe by file to remove rough edge.
Insert the straight pipe into the bend
pipe,make mark on the pipe where
is balance to the wall.
Insert the straight pipe into the hole of standing
floor toilet,make mark on the pipe where is
balance to the surface of standing floor toilet.
Measure the distance
between the two marks.
L1mm
L2mm
mark
L1+3mm
L2+3mm 1.5mm
45°
the cut part
Smear silicon oil onto the sealed rubber
of bend pipe equaly,insert straight pipe
into the bend pipe.
Measure the depth " L" of hanging hole of
standing floor toilet,smear small sealant
onto the side surface of standing floor toilet
where connecting to the wall.
Install the standing floor toilet onto the hanging pole,
set decorated ring,gasket,screw & decorated cup
onto the hanging pole orderly.
Smear silicone glue onto the side of
standing floor toilet where connecting
to the wall.
12.Install standing floor toilet
13.Install effect
Press the four knot and take
out the square cover
Connect the fill water pipe with angle iron and
connect the metal flexible pipe with angle iron
(If the flush valve can not stop water,
maybe is the pole too long;if the flush
valve flush volume too small,maybe is
Cut the part which is
protruding of tile flat
with the wall
The interval of tile and
the square cover no
bigger than 5mm
Cover the system of
concealed cistern by
plasterboard or
composite board.
Stick tile onto the
finished wall. The thickness
range of tile onto the finished
wall is 20mm~70mm.
Insert the panel board into the
cavity at an angle
Twist the panel board
with screw tightly
Cover the square cover
(to prevent the dirty and
prevent the deformation)
CC100F
Super slim concealed insulated cistern with chrome front
mounted dual ush plate
the pole is too short)

TM
1ǃOpen cistern panel system
2ǃReplace fill valve
Push the bottom of cistern panel upwards,
turn the top of cistern panel about 30,take
the panel out of the panel frame.
Remove the screw,take
out of the panel frame.
To remove panel board,turn it
over about 30 from the top,
take it out aslant &upwards.
Close the stop valve, loosen
and remove the flexible
connection pipe.
Maintenance Manual of Concealed Cistern
(Suit for standing floor toilet)
Take out the fill valve aslant.
Remove the screws and
take off the panel board
Pull out the valve from the coupling. Pull up the fill valve at an angel.
3ǃReplace flush valve
Pull the flush valve with left hand
lightly,with the right hand holding the
flush frame top and pull it out.
Move the flush frame to the
right and take it out. Turna the flush upside down
Pull the flush valve
upwards slightly Take out the flush valve
at an angel
Technologic data:
.12standard fill water hole.
.The water stress range of fill water it 0.02~1.0Mpa.
.The water temperature range is 2~45.
.3L6L dual flush water volume,the flush water time is 3s~5s.
.The product can be installed in the wall of 78mm thickness.
CC100F
Super slim concealed insulated cistern with chrome front
mounted dual ush plate
0.2 - 4 bar

Imex Ceramics UK, 15 Millbrook Industrial Estate, Sybron Way, Crowborough, East Sussex. TN6 3DU
www.imexceramic.co.uk Technical Helpline: 01530 835598
1ǃMaintenance of fill valve
Troubleshooting
1.The water level too high or too low
malfunction solve way
2.Can not stop water
3.Fill water speed slow
4.Others questions
Adjust the water level
Wash the rubber and seal and filter
Wash filter, increase the water pressure
Pleases consult with a professional technician
2ǃMaintenance for flush valve
malfunction
Troubleshooting
1.Can not flush water
reason solve way
1.Leaking
The flush pole may be damaged Replace the flush pole
The working water level too low Adjust the working water level
The rubber seal can not seal water
The movement of flush valve is blocked
Replace the rubber seal
Wash the debris of flush valve
ķ$GMXVWWKHVPDOOIOXVKZDWer volume
by adjust the small flush adjuster.
ĸWash the debris out
by flushing and clean water.
sealed rubber
Ĺ7DNHRXWRIWKHVLlica gel of flush
valve,clean or replace it.
small flush adjuster
ĺ7DNHRXWRIWKHVHDOed rubber of
flush valve.clean or replace it.
ķTurn the knob,adjust water level height.
Take off the filter tip and clean Loosen the nut and clean or replace
the valve core and the silica gel of fill valve
ĸWash the dirt
valve core
silica gel
Other imex Bathroom Fixture manuals
Popular Bathroom Fixture manuals by other brands

METHVEN
METHVEN SATINJET ESCAPE MKII installation guide

Porcelanosa
Porcelanosa noken SQUARE 100251837 N806718582 manual

Nadoli
Nadoli DW1-3736 instruction manual

Eurotech
Eurotech Regency installation manual

Milli
Milli Pure Twin Rail installation instructions

Raritan
Raritan STCFS Installation and maintenance instructions

URIDAN
URIDAN ADMIRAL KH-10 installation instructions

Gessi
Gessi VENTI2O 65021 manual

Bristan
Bristan Bliss series Installation instructions and user guide

Bradley
Bradley OmniDeck 4000 Series installation guide

DURAVIT
DURAVIT D-NEO DE4210 0100 Instructions for mounting and use

DURAVIT
DURAVIT A.1 A15230 0000 10 Instructions for mounting and use