iMode IP562UK User manual

PLEASE READ BEFORE OPERATING THIS EQUIPMENT
MODEL NO. IP562UK
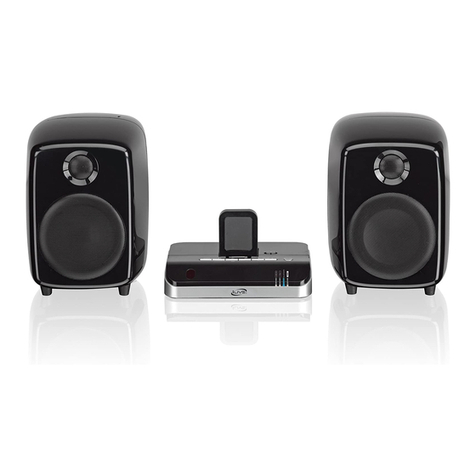
MICRO SYSTEM DOCKING STATIONFOR iPOD
INSTRUCTION MANUAL
iMode
MODE
CLK SET POWER
FM ST

IMPORTANT SAFETY INSTRUCTIONS
1
IMPORTANT SAFETY INSTRUCTIONS
Mains supply
This equipment is designed to operate from a 230 Volt, 50Hz AC mains supply. Other power sources may
damage it. Check that the rating label of the equipment states 230V AC before you plug it in for the first
time.
Mains plug
We have fitted this equipment with a standard mains plug.
If the supply cord is damaged it must be replaced by the manufacturer, its service agent or similarly
qualified person in order to avoid a hazard.
If you cut off the mains plug, for example to fit a different type, please destroy the old plug as it would
be dangerous if inserted into a live power outlet. Carefully follow the wiring instructions supplied with
the new plug.
If a fuse is fitted to the plug, remove the fuse before throwing the plug away.
Never use a fused mains plug without the fuse cover.
Mains plug wiring for the UK
In a moulded plug the wires in the mains lead of this apparatus must be connected as follows.
The wire-coloured brown must be connected to the terminal that is marked with the letter L.
The wire-coloured blue must be connected to the terminal that is marked with the letter N.
Do not connect anything to the earth terminal which is marked E, or .
You must make sure the mains lead is a firmly secured under the cord clamp.
Mains fuse
UK standard (BS1363) plugs must have a 3 amp (BS1362 type) fuse fitted. Replace the plug or have the
power lead assembly replaced if the fuse cover is lost.
Symbols
This equipment is double insulated and
an earth connection is not required.
This mark is applied to show the
equipment conforms to European
safety and electro-magnetic
compatibility standards.
Dangerous voltage constituting a risk
of electric shock is present inside this
equipment.
There are important operating and
maintenance instructions in the
literature accompanying this
equipment.
L
E
N
BROWN
Live
BLUE
Neutral
FUSE
3 Amps
Cord Clamp

2
Battery Installation
To use this unit with battery power, remove the battery compartment on the
rear of the unit by sliding it towards the rear of the unit and lifting the battery
door off. Insert six (6) "C" size batteries (batteries not included) following the
diagram in the compartment.
POWER SOURCE

Locations of Controls
3
BATTERY PRECAUTIONS:
Follow these precautions when using a battery in this device:
1.Use only the size and type of battery specified.
2.Be sure to follow the correct polarity when installing the battery as indicated in the battery
compartment. A reversed battery may cause damage to the device.
3.Do not mix different types of batteries together (e.g. Alkaline and Carbon-zinc) or old batteries
with fresh ones.
4.If the batteries in the device are consumed or the device is not to be used for a long period of
time, remove the batteries to prevent damage or injury from possible battery leakage.
5.Do not try to recharge the battery not intended to be recharged; it can overheat and rupture.
(Follow battery manufacturer’s instructions.)
6.Do not dispose of battery in fire. Battery may explodes or leak.
7.Clean the battery contacts and also those of the device prior to battery installation.
MODE
CLK SET
POWER
FM ST
OPEN OPEN
1
23
4
5
6
7
8
9
10
11
12
13
14

Control Definitions
1. Volume Knob
Turn to adjust volume.
2. Power Switch
Switch to ON/OFF
3. Function Switch
~ Slide to FM-ST-AM to turn on the radio.
~ Slide to iPod to playback the music from the connected iPod.
~ Slide to Line In to playback the music from the connected external audio device via Line In Jack.
4. Tuning Knob
Turn to adjust radio channel
5. Power Indicator
6. FM Stereo Indicator
7. Clock Display
8 & 9. Clock Set Button And Mode Button
~ Press the CLOCK SET button twice; the month will appear in the display (i.e. “1”).
~ Repeatedly Press the MODE button to set the month.
~ Press the CLOCK SET button again; the date will appear in the display.
~ Repeatedly press the MODE button to set the date.
~ Press the CLOCK SET button until the hour and am/pm indicator appears in the display (i.e. “2: P” for 2 p.m.).
~ Repeatedly press the MODE button to set the hour. Make sure to select the correct AM/PM setting.
~ Press the CLOCK SET button again; the current minute will appear in the display.
~ Repeatedly press the MODE button to set the current minute.
~ When you are done setting the time and date, press the CLOCK SET button to finish.
~ Press the MODE button to start the clock; the “:” will blink.
10. FM Antenna
11. Line In Jack
12. Headphones Jacks
13. Battery Compartment
14. AC Cord Jack
4

Power Source: AC~230V, 50Hz / DC 9V, 6 x 1.5V ‘C’ size batteries
Radio Frequency: AM 522 -1620 KHz, FM 87.3 -108 MHz
Accessories:
1 x Instruction Manual
1 x AC Cord
Specifications are subject to change without notice.
5
NOTES ON CLEANING:
~ Use a soft, dry cloth for cleaning.
~ For stubborn dirt, soak the cloth in a weak detergent solution,
wring well and wipe. Use a dry cloth to wipe it dry. Do not use any
type of solvent, such as thinner and benzene, as they
may damage the surface of the unit.
~ If you use a chemical-saturated cloth to clean the unit, follow that
product's instructions.
General Specification:

LIMITED PRODUCT WARRANTY
Audio Product / Telecom Product / TV / DVD Product
This quality product is warranted to be free from manufacturer’s defects in material and workman-ship,
provided that the unit is used under the normal operating conditions intended by the manufacturer.
Should any problems arise with this product, it is highly recommended to visit our website at
www.curtisint.com. To better serve our valued customers, additional copies of operating manuals and trouble shooting
tips have been posted on our website.
If your query remains unresolved, please feel free to call our UK Customer helpline at 0 800 032 5264. If you are in
Ireland, please call 1 800 315 697.
TERMS OF WARRANTY
Curtis International LTD warrants this product to be free from defects in materials and workmanship for 1 year on parts
and 90 days on labor.
Nothing within this warranty shall imply that Curtis International LTD will be responsible or liable for any damage to
any items placed in this product, whether due to any defect of the product, or its use, proper or improper.
This warranty is in addition to, and in no way impacts upon, your statutory rights.
TO OBTAIN REPLACEMENT / CREDIT / or REPAIRS UNDER THIS WARRANTY
1. The original purchaser must present a copy of the original bill of sale and this service warranty card.
2. Any alterations, abuse, misuse, battery corrosion or accidental damage voids the warranty.
3. The warranty does not cover cabinets and non essential accessories.
4. No warranty or insurance contained or set out shall apply when damage or repair is caused by power
failure; damage in transit by the consumer , or when moving the unit; improper power supply; use for commercial
or industrial purposes; service calls resulting in customer education, etc.
5. The defective product should be shipped prepaid to the address as advised by our Customer service.
6. Curtis International LTD reserves the right to repair or replace the parts, which have become defective.
Please record the appropriate information indicated below on this Warranty Card and retain with your proof
of purchase.
Model No……………… Serial No……………………..
Date Purchased……………………………… Supplier / Retailer ………………………..
Table of contents
Other iMode Docking Station manuals
