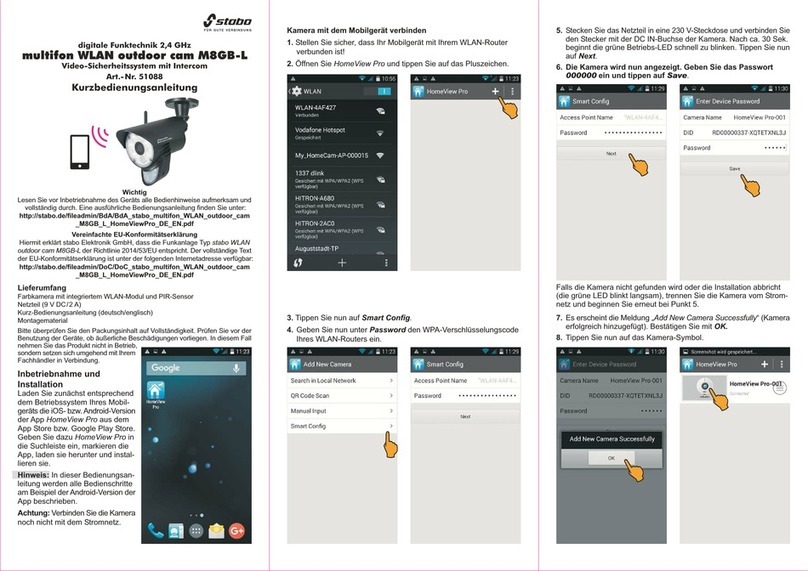
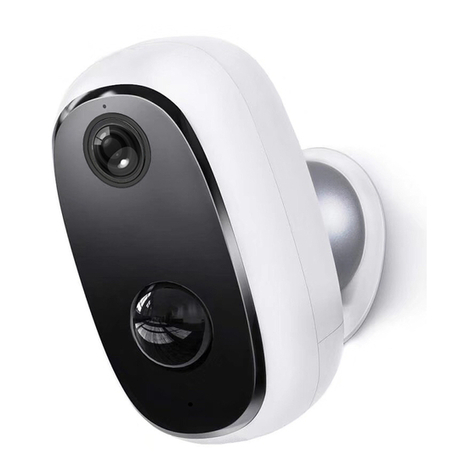
imogenStudio +Cam Outdoor HD User manual

+Cam%Outdoor%HD%%
(All%Weather)
!
!
!
!
!
!

+Cam!Outdoor!HD!Quick!Start!Guide!
2!
!
CAUTION!
RISK!OF!ELECTRIC!SHOCK!
DO!NOT!OPEN!
!
!
CAUTION!TO!REDUCE!THE!RISK!OF!
ELECTRIC!SHOCK,!
DO!NOT!REMOVE!COVER!(OR!BACK).!
NO!USER!SERVICEABLE!PARTS!
INSIDE,!REFER!SERVICING!TO!
QUALIFIED!SERVICE!PERSONNEL.!
!
!
This!symbol!is!intended!to!alert!the!user!
to!the!presence!of!uninsulated!
“dangerous!voltage”!within!the!product’s!
enclosure!that!may!be!of!sufficient!
magnitude!to!constitute!a!risk!of!electric!
shock!to!persons.!
!
The!exclamation!point!within!an!
equilateral!triangle!is!intended!to!alert!
the!user!to!the!presence!of!important!
operating!and!maintenance!(servicing)!
instructions!in!the!literature!
accompanying!the!product.!
!
Warning%
!
Apparatus!shall!not!be!exposed!to!dripping!or!splashing!and!
no!object!filled!with!liquids,!such!as!vases,!shall!be!placed!
on!the!apparatus.!
!
To!avoid!electrical!shock,!do!not!open!the!cabinet.!Refer!
servicing!to!qualified!personnel!only.!

+Cam!Outdoor!HD!Quick!Start!Guide!
3!
Regulatory%Notices%for%USA!
This!equipment!has!been!tested!and!found!to!comply!with!
the!limits!for!a!digital!device,!pursuant!to!Part!15!of!the!FCC!
Rules.!These!limits!are!designed!to!provide!reasonable!
protection!against!harmful!interference!in!a!residential!
installation.!This!equipment!generates,!uses,!and!can!
radiate!radio!frequency!energy!and,!if!not!installed!and!used!
in!accordance!with!the!instructions,!may!cause!harmful!
interference!to!radio!communications.!However,!there!is!no!
guarantee!that!interference!will!not!occur!in!a!particular!
installation.!If!this!equipment!does!cause!harmful!
interference!to!radio!or!television!reception,!which!can!be!
determined!by!turning!the!equipment!off!and!on,!the!user!is!
encouraged!to!try!to!correct!the!interference!by!one!or!more!
of!the!following!measures:!!
-!Reorient!or!relocate!the!receiving!antenna.!!
-!Increase!the!separation!between!the!equipment!and!
receiver.!
-!Connect!the!equipment!into!an!outlet!on!a!circuit!
different!from!that!to!which!the!receiver!is!connected.!!
-!Consult!the!dealer!or!an!experienced!radio/TV!
technician!for!help.!!
!
You!are!cautioned!that!a n y ! c h a n g e s ! o r!modifications!not!
expressly!approved!in!this!manual!could!void!your!authority!
to!operate!this!equipment.!!
The!shielded!interface!cable!recommended!in!this!manual!
must!be!used!with!this!equipment!in!order!to!comply!with!the!
limits!for!a!digital!device!pursuant!to!Subpart!B!of!Part!15!of!
FCC!Rules.!
!
!
!

+Cam!Outdoor!HD!Quick!Start!Guide!
4!
Camera Diagram
Please follow the directions to install the camera outdoors:
Mount the camera in a position outside to ensure the most
comprehensive view for video monitoring.
1.!Wall
Bracket
Screws
2.!Power
extension
cord
3.!Screws
4.!Base Pivot
5.!Antenna
6.!Mounting
Plate

+Cam!Outdoor!HD!Quick!Start!Guide!
5!
Outdoor Wall-Mount
1.!Unscrew the mounting plate from the base of the camera. Do
not remove from the power cord completely, as the power cord
needs to feed through the mounting plate. Place the mounting
plate at desired location (figure 6) and mark the location of
each screw placement.
2.!Drill pilot holes for the wall bracket screws (figure 7) into the
wall.
3.!Attach screws (figure 5) to the wall mounting plate (figure 6).
4.!Make sure that the power supply unit extension cord (figure 4)
is placed into the drilled hole of the wall (figure 9) and run the
cord into the wall towards the main power adapter.
5.!Drill in the screws through the wall bracket plate and into the
wall bracket screws.
6.!Make sure that the +Cam Outdoor HD is now secured to the
wall and connect the camera power supply unit cable to the
main power adapter.

+Cam!Outdoor!HD!Quick!Start!Guide!
6!
1. iSecurity+ App
To get star t e d , d o w n l o a d the iSecurity +
app from Apple’s App store or the Google
Play Store.
2. Connect to Power
Connect the +Cam Outdoor HD to the
AC power adapter, then plug your power
cord into the electrical outlet. The Led
light in front of the camera should be
green (this indicates power and set-up
mode is on).

+Cam!Outdoor!HD!Quick!Start!Guide!
7!
3a. Wi-Fi Setup Mode
Press the Wi-Fi Setup/reset button on
the back of the camera.
The “Wi-Fi Setup” LEDs in the front of
the camera will flash green and orange
alternatively. The +Cam Outdoor HD is
now ready to connect to your Wi-Fi (This
may take up to 2 minutes from when the
camera is first powered on.)

+Cam!Outdoor!HD!Quick!Start!Guide!
8!
3b. Connect device to +Cam
Outdoor HD
iOS
Android
!
!
Go to your device’s settings -->
Under the Wi-Fi setting, connect to the
+Cam-HD-AWXXXX (last 4 digits of Cam
ID) network and make sure you are
connected to the Cameras Wi-Fi network.

+Cam!Outdoor!HD!Quick!Start!Guide!
9!
4a. Launch iSecurity+ App!
Once your device establishes its
connection to the +Cam Outdoor HD,
(usually takes around 30 seconds,)
launch the iSecurity+ App. If you don’t
see the pop up prompt, please close the
app and re-launch it.
iSecurity+ app will automatically detect
your camera. When prompted, click ‘Yes’
to setup your camera.

+Cam!Outdoor!HD!Quick!Start!Guide!
10!
4b. Setup Wizard
Follow the instructions in the Camera
Setup Wizard to complete installation.
!
!
!
!
!

+Cam!Outdoor!HD!Quick!Start!Guide!
11!
4c. Setup Complete!
!
Once you see the page below, the setup
process has been completed. Restart
iSecurity+ and please log in again.
!
!
!
!
You can use your iOS/ Android devices to
access the camera anywhere in the world.
Make sure your phone has access to the
internet via 3G, 4G or Wi-Fi for internet
connection.

+Cam!Outdoor!HD!Quick!Start!Guide!
12!
5. Using iSecurity+ Main
Features Window
Please enter your user name and
password, (created during the setup
process) to access your +Cam Outdoor
HD.
!
!
!
!
!
!
!
!
!
!!
! !
! !
Friends’
Cameras
Recorded
Events
App
Settings
Camera
Status
Configure
Camera

+Cam!Outdoor!HD!Quick!Start!Guide!
13!
6. iSecurity+ Features –
Camera Viewer!
Swipe directional controls to Pan & Tilt.
**To pan & t ilt , you must first zoom in**
!
!
!
!
!
!
!
!
!
!
!
!
!
!
!
!
!
! !
Audio Muting
Off/On
Ta k e a
Snapshot
Audio-only
Mode
Record a
video clip

+Cam!Outdoor!HD!Quick!Start!Guide!
14!
6a. Zoom Function
Zooming In - Touc h the s cr e en w ith t wo
fingers together and slide outward at an angle
and the image will zoom in.
Zooming Out - Touc h the s cr e en w ith t wo
fingers apart and slide inwards at an angle
and it will zoom out.

+Cam!Outdoor!HD!Quick!Start!Guide!
15!
6b. Audio Talkback
!
!
!
!
!
!
!!!!
!!!!!!!!!!!
!!!
1. To us e Aud io Ta lk b ac k ,
first press the Audio button
to initiate sound to listen in.
2. Then press the Audio Talkback button and
speak into your device, then let go for the
audio to transfer to the camera’s speaker.

+Cam!Outdoor!HD!Quick!Start!Guide!
16!
Safety Information
Do not point the camera directly at the
sun, or else it will damage the image
sensor.!
Keep the camera away from heat to
avoid electric shock.
Do not attempt to open, dismantle,
repair, or service the camera. Doing so
may cause electric shock and other
hazards.
Any evidence of misuse, abuse, or
tampering will void the Limited Warranty.
To maintain c o m p l i a n c e w i th FCC’s RF
exposure guidelines, this equipment
should be installed and operated with
minimum distance of 20 cm between the
radiator and your body. Use only the
supplied antenna.
Troubleshooting

+Cam!Outdoor!HD!Quick!Start!Guide!
17!
LED Status Indicators
During Wi-Fi Setup Mode
Green: Setup mode on
Flashing Green &Orange: Setup mode
initializing
Light Off: Setup mode off
During Normal Operation
Green:
Connected to iSecurity+
Orange:
Connected to local Network
Flashing
Orange:
Not connected to any network

+Cam!Outdoor!HD!Quick!Start!Guide!
18!
Reset button
If the camera has shut down, please hold
down the power button on the back of
the camera for 20 seconds to reset the
camera.!
For More Information

+Cam!Outdoor!HD!Quick!Start!Guide!
19!
To get the late s t c a m e ra drive r u p d a t e s
or to learn more about Imogen Studio
products, please visit:
www.imogenstudio.com
To get the late s t s o f t ware updates or to
learn more about Seedonk, please visit:
www.isecurityplus.com
!

Revised!December!3,!2014!
©ImogenStudio,!2014!
!
!
Table of contents
