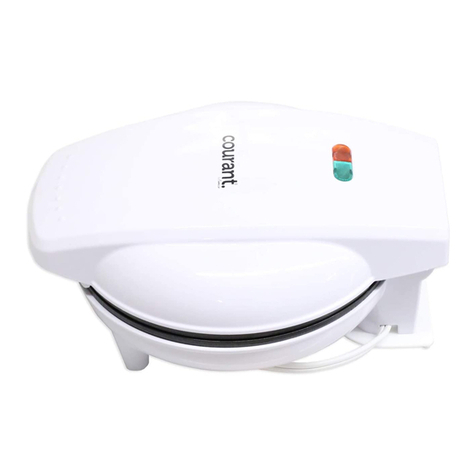
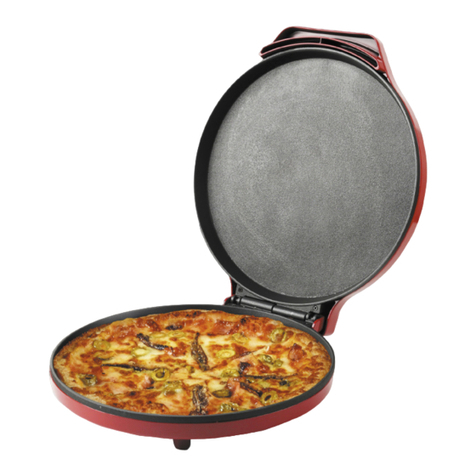
Impecca COURANT CSD-2176 User manual

Sandwich Maker — User’s Guide
Sandwichera — Manual De Usuario
Fabricant de sandwich — Manuel de l’utilisateur
Model: CSD-2176
www.courantusa.com
v 1.0

ENGLISH ESPAÑOL FRANÇAIS
–ii–
TABLE OF CONTENTS
Important Safeguards ...................................................................................................................... 3
Product Diagram ............................................................................................................................... 5
Using your contact grill .................................................................................................................... 6
Cleaning, Maintenance & Storage.................................................................................................. 7
USDA Cooking Guidelines................................................................................................................ 7
Customer support............................................................................................................................. 8
One Year Limited Warranty (US) ..................................................................................................... 9
Notes..................................................................................................................................................26
Notes..................................................................................................................................................27
SAVE THESE INSTRUCTIONS
FOR HOUSEHOLD USE ONLY

ENGLISHESPAÑOLFRANÇAIS
–3–
IMPORTANT SAFEGUARDS
CAUTION: This appliance is hot during operation and retains heat for some time aer
unplugging. Always use oven mitts when handling hot materials and allow metal parts to
cool before cleaning. Do not place anything on top of the appliance while it is operating or
while it is hot.
When using electrical appliances, basic safety precautions should always be followed,
including the following:
1. READ ALL INSTRUCTIONS.
2. Do not touch hot surfaces. Use handles or knobs.
3. Do not leave this appliance unattended during use.
4. Do not place unit directly under a cabinet when using; this may result in excessive
heat build-up.
5. Do not use charcoal or similar combustible fuels with this appliance.
6. To protect against risk of electric shock, do not immerse or partially immerse the
cord, plugs, or the entire unit in water or any other liquid.
7. This appliance is not intended for use by persons (including children) with reduced
physical, sensory or mental capabilities, or lack of experience and knowledge,
unless they have been given supervision or instruction concerning use of the appli-
ance by a person responsible for their safety.
8. Close supervision is necessary when any appliance is used by or near children.
9. Unplug from wall outlet when not in use and before cleaning. Allow to cool before
cleaning or storing this appliance.
10. Never yank the cord to disconnect the appliance from the outlet. Instead, grasp the
plug and pull to disconnect.
11. Do not operate any appliance with a damaged cord or plug or aer the appliance
malfunctions, or has been damaged in any manner. Return appliance to the nearest
authorized service facility for examination, repair or adjustment.
12. The use of accessories attachments not recommended by the appliance manufac-
turer may cause re, electrical shock or injuries.
13. Do not use outdoors. This is for household only.
14. Do not use for commercial purposes.
15. Do not let the electrical cord hang over the edge of the table or counter, or touch
hot surfaces.
16. Do not place on or near a hot gas or electric burner or in a heated oven.
17. Use on a heat-resistant, at level surface only.
18. Extreme caution must be used when moving an appliance containing hot food, hot
water, hot oil or other hot liquids.
19. The cord to this appliance should be plugged into a 120V AC electrical outlet only.
20. A short power-supply cord is to be provided to reduce the risk resulting from be-
coming entangled in or tripping over a longer cord.
21. To disconnect, remove plug from outlet.
22. Always unplug aer use. The appliance will remain ON unless unplugged.
23.CAUTION HOT SURFACES: This appliance generates heat during use. Proper pre-
cautions must be taken to prevent the risk of burns, re or other damage to persons
or property.

ENGLISH ESPAÑOL FRANÇAIS
–4–
24. When using this appliance, provide adequate ventilation above and on all sides for
air circulation. Do not allow this appliance to touch curtains, wall coverings, cloth-
ing, dish towels or other ammable materials during use.
25. Use with wall receptacle only.
26. Do not use appliance for other than intended use.
NOTES ON THE PLUG
This appliance has a polarized plug (one blade is wider than the other). To reduce the
risk of electric shock, this plug will t in a polarized outlet only one way. If the plug does
not t fully into the outlet, reverse the plug. If it still does not t, contact a qualied
electrician. Do not modify the plug in any way.
NOTES ON THE CORD
This appliance has a polarized attachment plug (or detachable power-supply cord)
should be used to reduce the risk resulting from becoming entangled in or tripping over
a longer cord. Do not use an extension cord with this product.
PLASTICIZER WARNING CAUTION
To prevent Plasticizers from migrating from the nish of the counter top or table top or
other furniture, place NON-PLASTIC coasters or place mats between the appliance and
the nish of the counter top or table top. Failure to do so may cause the nish to darken;
permanent blemishes may occur or stains can appear.
ELECTRIC POWER
If the electrical circuit is overloaded with other appliances, your appliance may not
operate properly. It should be operated on a separate electrical circuit from other appli-
ances.
WARNING
Use NON-PLASTIC coasters or place mats between the contact grill and any heat sensi-
tive counter surfaces. Failure to do so may cause permanent damage or stains.
CAUTION
• This appliance is hot during operation and retains heat for some time aer unplug-
ging. Always use oven mitts when handling hot materials and allow metal parts to
cool before cleaning.
• Do not place anything on top of the appliance while it is operating or while it is hot.

ENGLISHESPAÑOLFRANÇAIS
–5–
PRODUCT DIAGRAM
1. Locking Lid Latch
2. Cool-Touch Carrying Handle
3. Diagonal Cutting Edge
4. Non-Stick Cooking Plates
5. Electric Cord with Polarized Plug
6. Diagonal Cutting Edge
7. Non-Stick Cooking Plates
8. Skid-Resistant Feet (not shown)
9. Red POWER Light

ENGLISH ESPAÑOL FRANÇAIS
–6–
USING YOUR SANDWICH MAKER
BEFORE FIRST USE
CAUTION: To avoid burns, care should be taken when handling the Sandwich Maker
during or just aer use. The sides of the cooking plates are exposed and may be hot.
• Carefully unpack the Sandwich Maker.
• Wipe all surfaces with a slightly damp, so cloth. Never immerse in water.
• To burn o residues on the cooking plates, it will be necessary to operate the unit for
a few minutes before initial use. Do not add bread or oil during this time.
• Set the appliance on a dry, clean and at countertop surface. Plug unit into a 120V AC
electrical outlet.
• Open the Sandwich Maker. You will notice smoke and a slight odor while residue
burns o. This is normal and should disappear aer 1 or 2 uses. This does not aect
the safety of the appliance.
• Allow the Sandwich Maker to operate until smoke and odor dissipate; then unplug
Sandwich Maker and allow it to cool.
CONDITIONING COOKING PLATES
For best results, condition the cooking plates by lightly coating the top and bottom
plates with solid vegetable shortening. DO NOT USE SPRAY-ON OIL PRODUCTS. Recon-
dition the plates at any time if food shows signs of sticking.
USING THE SANDWICH MAKER
Making sandwiches in the Sandwich Maker is quick, fun, and easy. The Sandwich Maker
toasts both sides of the sandwich at once to form two sealed halves. Sandwich trian-
gles are perfect for packing or eating on the run. Bring out those leovers and trans-
form them into wholesome and delicious, tasty toasted sandwiches that your kids and
family will love!
1. Plug Sandwich Maker into a 120V AC power outlet.
2. Close the lid.
3. The red POWER light will illuminate. Preheat the Sandwich Maker for approximately
2 to 3 minutes. When the green READY light turns on, the unit is ready.
4. While the Sandwich Maker is preheating, we suggest that you prepare your sand-
wiches and llings.
NOTE: Initially, some smoking may occur. This is normal for newly manufactured appli-
ances and will not occur aer the rst few uses.
5. Wearing a protective oven mitt, raise the lid and place 1 or 2 slices of bread, but-
tered side down, onto either 1 or both of the sandwich cooking surfaces.

ENGLISHESPAÑOLFRANÇAIS
–7–
6. Spoon approximately 1 to 2 tablespoons of the lling onto 1 or both slices of bread,
leaving a 1/4” border of clean bread. Top with a second slice of bread, buttered side
up.
7. Carefully close the lid. Do not force shut, fold the lid lock over the handle if possible.
NOTE: If the sandwich is thick, it may be necessary to hold a spatula (or other non-met-
al utensil) in front of the sandwich to prevent the top slice from sliding forward as the lid
is closed.
CAUTION: Steam will be ejected from between the plates while cooking. Care must be
taken to ensure that ngers do not come into contact with steam.
NOTE: During cooking, the green READY light will cycle on and o while the thermostat
maintains the proper cooking temperature.
8. Follow recipe directions and allow at least 2 to 3 minutes for food to cook to taste.
Check cooking progress at 2 minutes and cook longer if needed.
9. Wearing protective oven mitts, open the Sandwich Maker and remove the grilled
sandwiches using a plastic or wooden spatula.
CAUTION: Never use a metal utensil as this may damage the non-stick coating.
NOTE: Close the upper cooking plate to preserve heat until sandwiches are ready for
the next cooking.
10. Wearing oven mitts, use a so, absorbent paper towel to wipe the Sandwich Maker
cooking plates clean aer each use to avoid food contamination.
11. Unplug the Sandwich Maker when nished.
NOTE: The appliance will remain ON until it is unplugged.
FOR LOW-FAT, LOW CHOLESTEROL SANDWICHES
• All recipes will work with thin-sliced diet breads.
• Don’t add butter, mayonnaise or dressings to sandwiches.
• Use low-fat, low-cholesterol spreads instead of butter.
• Use low-fat cheese.
• Fill sandwiches with cooked, seasoned veggies.
FOR HIGH-FIBER SANDWICHES
• Instead of white breads, use whole-wheat or oat bran breads.
• Use specially baked high-ber breads.
• Fill sandwiches with cooked, seasoned, high-ber veggies, such as artichoke hearts
or black beans.
• Use spreads made from high-ber veggies, such as artichoke tapinade or hummus.
HINTS FOR BEST RESULTS
• Always preheat the Sandwich Maker before each use.
• Have all ingredients at hand before preparing sandwiches.

ENGLISH ESPAÑOL FRANÇAIS
–8–
• A wide variety of breads may be used, such as whole wheat, fruit breads, and white
bread. Be sure to select breads approximately 4” square. Most pre-sliced loaves of
bread found in the supermarket are perfect.
• For crisp, tasty bread, butter or oil the outside of the bread. Use avored butters or
oils to add interest to your sandwiches. For example, try garlic oil or any herbed but-
ter.
• With plain llings such as meats, spread the inside of the bread with mayonnaise,
tomato sauce, or mustard.
• If you prefer not to use butter or margarine, clean the cooking plates occasionally
with a little vegetable oil to prevent sticking and make cleaning easier. Rub o excess
oil with a so, absorbent paper towel.
• When using so or liquid llings, use thicker-sliced breads. Bread can be slightly
toasted before lling is added.
• Avoid using fresh fruits. Canned fruits can be used; drain fruit thoroughly and pat dry
with a clean paper towel.
• Avoid using processed cheeses, as they tend to “run” under high temperatures.
• Add avor and crispiness when using sweet llings by sprinkling 1 teaspoon of white,
ginger, vanilla or brown sugar on the buttered sides of the bread.
• Whole grain and sweet breads will toast quicker than white breads.
• Aer you have removed nished sandwiches, close the lid to retain heat while assem-
bling more sandwiches.
• Wipe the cooking plates clean aer each use to avoid food contamination.
USER MAINTENANCE INSTRUCTIONS
This appliance requires little maintenance. It contains no user serviceable parts. Do not
try to repair it yourself. Contact a qualied appliance repair technician if the product
requires servicing.
CARE AND CLEANING INSTRUCTIONS
WARNING: Never immerse the appliance into water for cleaning as electric shock may
occur.
CAUTION: Unplug from electrical outlet and allow to cool thoroughly before cleaning.
• The Sandwich Maker body does not disassemble for cleaning.
• Never immerse appliance in water or other liquids. Never place Sandwich Maker
body in dishwasher.
• To protect the premium quality non-stick surfaces, use only plastic, nylon or wooden
utensils to add or remove food.
• For best results, cooking plates should be cleaned aer each use and conditioned
before each heating.

ENGLISHESPAÑOLFRANÇAIS
–9–
• To remove any food or batter baked onto the cooking plates, clean with a plastic
mesh pu or pad. Do not use steel wool or coarse scouring pads.
• The cool-touch body of the Sandwich Maker should be cleaned with a non-abrasive
cleaner and a so, damp cloth. Dry thoroughly.
STORAGE
• Make sure unit is unplugged and fully cooled.
• Use the cord wrap on the bottom back of the Sandwich Maker.
(See Figure 2.)
• Never wrap cord tightly around appliance. Do not put any stress
on cord where it enters unit, as this could cause cord to fray and
break.
• The Sandwich Maker can be placed in a vertical position (handles
pointed up) for neat and compact counter top or general storage.
(See Figure 2.)
• Unit may be stored in its box.
USDA COOKING GUIDELINES
The United States Department of Agriculture recommends that meat and poultry be
cooked to the following internal temperatures to be certain harmful bacteria has been
killed. Cook all food to these minimum internal temperatures as measured with a food
thermometer before removing food from the heat source.
• Ground turkey and chicken: cooked to an internal temperature of 165°F / 74°C
• Ground beef, veal and lamb: cooked to an internal temperature of 160°F / 71°C
• Whole chicken and turkey: cooked to an internal temperature of 180°F/82°C, for
breast to 170°F / 77°C
• Goose and duck: cooked to an internal temperature of 180°F / 82°C
• Fresh beef, veal and lamb: cooked to an internal temperature of 145°F / 63°C
USER MAINTENANCE INSTRUCTIONS
This appliance requires little maintenance. It contains no user serviceable parts. Do not
try to repair it yourself. Contact a qualied appliance repair technician if the product
requires servicing.
CARE & CLEANING INSTRUCTIONS
CAUTION: Unplug from electrical outlet and allow to cool thoroughly before cleaning.
• The Sandwich Maker body does not disassemble for cleaning.
• Never immerse appliance in water or other liquids. Never place Sandwich Maker
body in dishwasher.

ENGLISH ESPAÑOL FRANÇAIS
–10–
• To protect the premium quality non-stick surfaces, use only plastic, nylon or wooden
utensils to add or remove food.
• For best results, cooking plates should be cleaned aer each use and conditioned
before each heating.
• To remove any food or batter baked onto the cooking plates, clean with a plastic
mesh pu or pad. Do not use steel wool or coarse scouring pads.
• The cool-touch body of the Sandwich Maker should be cleaned with a non-abrasive
cleaner and a so, damp cloth. Dry thoroughly.
STORING INSTRUCTIONS
• Make sure unit is unplugged and fully cooled.
• Use the cord wrap on the bottom back of the Sandwich Maker. (See Figure 2.)
• Never wrap cord tightly around appliance. Do not put any stress on cord where it
enters unit, as this could cause cord to fray and break.
• The Sandwich Maker can be placed in a vertical position (handles pointed up) for
neat and compact counter top or general storage. (See Figure 2.)
• Unit may be stored in its box.
RECIPES
BACON & EGG BREAKFAST
(makes 2 sandwiches)
• 4 small eggs
• 2 teaspoons butter (room temperature)
• 2 slices cheddar cheese salt, pepper to taste
• 4 slices pre-cooked bacon
• 2 teaspoons chopped chives
• 2 slices bread, buttered
1. Preheat Sandwich Maker.
2. Butter cooking plates.
3. Add one egg per triangle-shaped mold, taking care not to break the yolks.
4. Add chives, salt and pepper to taste.
5. Close the lid, lock, and allow eggs to cook for 1 minute. Open lid. Place bacon and
cheese onto each of the sandwiches.
6. Top with 2 slices of bread, butter side up.
7. Close the lid and lock.
8. Toast for 2 minutes or until bread is golden brown.
9. Li toast with eggs up and out of the Sandwich Maker.
Serve egg-side-up.

ENGLISHESPAÑOLFRANÇAIS
–11–
CREAMY HONEY MUSTARD TOASTED AVOCADO SANDWICH
(makes 2 sandwiches or 4 pockets)
• 1/4 cup shredded carrot
• 1/4 cup cleaned and sliced mushrooms
• 1/4 cup sliced radishes
• 1 ripe Hass avocado, thinly sliced washed and dried fresh spinach leaves
• 1 tablespoon fresh chopped green onions
• 1/4 cup cream cheese, soened
• 1 teaspoon Dijon mustard
• 1 teaspoon honey
• 4 teaspoons mayonnaise
• 8 slices whole wheat bread
1. Combine cream cheese, honey and mustard in a medium bowl. Mix well.
2. Add remaining ingredients except spinach and avocado. Mix lightly.
3. Spread mayonnaise onto one side of each piece of bread. Set aside.
4. Place 2 slices of bread, mayonnaise side down, onto preheated Sandwich Maker.
5. Spoon 2 tablespoons of veggie mixture onto the center of each piece of bread.
6. Add 2 thin slices of avocado. Layer spinach on top. Top with 2 slices of bread, may-
onnaise side up.
7. Close the lid and lock. Toast for 2-3 minutes or until bread is golden brown.
EZ LUNCH SANDWICH SNACKS
(makes 2 sandwiches or 4 pockets)
• 2-4 slices lunch meat (see list below)
• Condiments (see list below)
• 1 small onion, grated (optional)
• 2 oz. your choice (not processed) cheese, grated or sliced
• 4 slices your choice bread, buttered
1. Place 2 slices of bread, buttered side down, onto preheated Sandwich Maker.
2. Add condiments to both pieces of bread.
3. Sprinkle or place slice of cheese over tops of both pieces of bread. Cover with 1-2
slices of lunch meat.
4. Top with 2 slices of bread, buttered side up.
5. Close the lid and lock. Toast for 2-3 minutes. Allow to cool slightly, cut into pockets
and serve warm or cold.
Lunch Meat: Salami, bologna, corned beef, pastrami, turkey, smoked turkey, etc.
Condiments: Mustard, pickles, chutney, horseradish, chopped jalapeno peppers,
chopped onions, grilled onions, ketchup, cooked bacon bits.

ENGLISH ESPAÑOL FRANÇAIS
–12–
OMG! NUTELLA® MARSHMALLOW FLUFF® BANANA SAMMIES
(makes 2 sandwiches or 4 pockets)
• 1–2 tablespoons Marshmallow Flu®
• 1/2 banana, sliced
• 1–2 tablespoons Nutella® Hazelnut Spread
• 4 slices egg bread, buttered
1. Place 2 slices of bread, buttered side down, onto preheated Sandwich Maker.
2. Spread Marshmallow Flu® onto each unbuttered side of bread.
3. Add banana slices.
4. Spread Nutella® on the rst side of the bread. Top with 2 slices of bread.
5. Butter the top sides of the bread.
6. Close the lid and lock. Toast for 2-3 minutes. Serve hot or cold.

ENGLISHESPAÑOLFRANÇAIS
–13–
CUSTOMER SUPPORT
Visit our website to contact us, find answers to Frequently Asked Questions, and for
other resources which may include an updated version of this user’s guide.
WWW.COURANTUSA.COM
If you wish to contact us by phone, please be sure to have your model number and seri-
al number ready and call us between 9:00am and 6:00pm ET, at +1 888-943-2111.
Keep tabs on Courant’s newest innovations & enter contests via our social network
feeds:
www.facebook.com/Impecca/
www.instagram.com/impecca/
@impeccausa
© 2017 Courant™ by Impecca, a division of LT Inc., Wilkes Barre, PA.

ENGLISH ESPAÑOL FRANÇAIS
–14–
Courant™ warrants this product against defects in materi-
al and workmanship to the original purchaser as specied
below. Please be sure that the product is registered online
within fourteen (14) days of purchase.
PARTS – if the product is determined to have a
manufacturing defect, within a period of one
(1) year from the date of the original purchase,
Courant™ will repair or replace the product
parts at no charge (for parts) to consumers in
the U.S.A. and Canada.
LABOR – if the product is determined to have
a manufacturing defect, within a period of
ninety (90) Days from the date of the original
purchase, Courant™ will repair or replace the
product at no charge to consumers in the U.S.A.
and Canada. Aer ninety (90) days, it will be the
responsibility of the consumer.
Shipping costs to and from our warranty service center
are the sole responsibility of the consumer.
To obtain warranty service by an authorized Courant™
service center, please email us at: service@courantusa.
com to obtain a Repair and Maintenance Authorization
(RMA) number and to locate the Warranty Service Center
nearest you. Once authorized, you must mail the product
to the authorized Courant™ service center in its original
product packaging materials or equivalent, to prevent
damage while in transit.
Further, should Courant™ determine that the product is
outside of the Warranty terms, Courant™ will return the
product to sender at sender’s expense without being re-
paired or replaced, unless authorized by the consumer
to service the out-of-warranty product at consumer’s ex-
pense. All handling or restocking charges for returns and/
or replacements shall be non-refundable.
Courant™ specically excludes from this warranty any
non-electric/mechanical attachments, accessories, and
disposable parts including, but not limited to, outside
case, connecting cables, batteries, and AC adapters.
Courant™ reserves the right to repair or replace defective
products with the same, equivalent, or newer models.
We reserve the right to either repair or replace product at
our discretion. Replacement may be either new or refur-
bished and while every endeavor will be made to ensure
it is the same model, if same model is not available, it will
be replaced with a model of equal or higher specication.
Normal “Wear and Tear” is not covered by this, or any oth-
er, warranty. Further, Courant™ hereby reserves the right
to determine “Wear and Tear” on any and all products.
Tampering or opening the product casing or shell will void
this warranty in its entirety.
In addition, this warranty does not apply if the product
has been damaged by accident, abuse, misuse, or mis-
application; has been altered or modied without the
written permission of Courant™; has been serviced by a
non-authorized repair center of Courant™; has not been
properly maintained or operated according to the opera-
tion manual; has been used for commercial, non-house-
hold purposes; has been cosmetically damaged; was not
imported by Courant™; was not manufactured according
to specication of the United States market; was dam-
aged due to improper installation or neglect by the con-
sumer; was damaged due to improper packaging in ship-
ment to the Warranty Service Center; was damaged due
to natural disasters; or if the serial number for the product
has been removed or defaced.
ALL IMPLIED WARRANTIES, INCLUDING IMPLIED WAR-
RANTIES OF MERCHANTABILITY AND FITNESS FOR A
PARTICULAR PURPOSE ARE LIMITED IN DURATION TO
ONE (1) YEAR PARTS AND NINETY (90) DAYS LABOR FROM
THE DATE OF THE ORIGINAL RETAIL PURCHASE OF THIS
PRODUCT.
THESE WARRANTIES AND REMEDIES ARE THE SOLE AND
EXCLUSIVE WARRANTIES AND REMEDIES IN CONNEC-
TION WITH THE SALE AND USE OF THE PRODUCT. NO
OTHER WARRANTIES, ORAL OR WRITTEN, EXPRESSED OR
IMPLIED, ARE GIVEN.
COURANT™ IS NOT RESPONSIBLE OR LIABLE FOR ANY
DAMAGE, WHETHER SPECIAL, INCIDENTAL, CONSEQUEN-
TIAL, DIRECT OR OTHERWISE, OR WHETHER KNOWN OR
SHOULD HAVE BEEN KNOWN TO COURANT™, INCLUDING
LOST PROFITS, GOODWILL, AND PROPERTY AND PER-
SONAL INJURY RESULTING FROM ANY BREACH OF WAR-
RANTY, THE INABILITY TO USE THE PRODUCT OR UNDER
ANY LEGAL THEORY IN CONTRACT OR TORT. COURANT™
LIABILITY IS LIMITED TO THE ACTUAL PURCHASE PRICE
PAID TO THE RETAIL SELLER OF THE DEFECTIVE PROD-
UCT.
No Courant™ dealer, agent, or employee is authorized
to make any modication, extension, change or amend-
ment to this warranty without the written consent and
authorization from Courant™.
Some states do not allow the exclusion or limitation of
implied warranties or liability for incidental or conse-
quential damages, or do not allow a limitation on how
long an implied warranty lasts, so the above limitations or
exclusions may not apply to you. This warranty gives you
specic legal rights, and you may have other rights, which
vary from state to state.
Note: Our Warranty Service Center ships only within Conti-
nental U.S.A., excluding Alaska and Hawaii.
ONE YEAR LIMITED WARRANTY (US)

ENGLISHESPAÑOLFRANÇAIS
–15–
TABLA DE CONTENIDO
Recomendaciones Importantes De Seguridad............................................................... 11
Diagrama Del Producto........................................................................................................ 13
Usando Su Parrilla De Contacto......................................................................................... 14
Limpieza, Mantenimiento Y Almacenamiento ................................................................ 15
Directrices De Cocción Del USDA ....................................................................................... 15
Atención Al Cliente................................................................................................................ 16
Garantía Limitada De Un Año ............................................................................................. 17

ENGLISH ESPAÑOL FRANÇAIS
–16–
RECOMENDACIONES IMPORTANTES DE SEGURIDAD
Cuando se utilizan aparatos eléctricos , las precauciones básicas de seguridad
deben seguirse , incluyendo las siguientes
1. LEA TODAS LAS INSTRUCCIONES. Todos los usuarios deberán leer y entender las
instrucciones de este manual antes de utilizar o limpiar este electrodoméstico.
2. El cable de este electrodoméstico sólo debe ser conectado directamente en un
tomacorrientes eléctrico de pared de 120 V AC.
3. Utilice solamente con tomacorrientes eléctrico de pared.
4. Utilice únicamente sobre una supercie resistente al calor, plana y nivelada.
PRECAUCIÓN SUPERFICIES CALIENTES: Este electrodoméstico genera calor durante el uso. Sigas
estas recomendaciones de seguridad para evitar quemaduras, fuego u otros daños a las personas
o en la propiedad.
5. No toque las supercies calientes. Utilice las manijas para cerrar, abrir y mover el
electrodoméstico.
6. Para protegerse de descargas eléctricas no sumerja el cable, clavija o electrodoméstico en
agua u otro líquido.
7. Este electrodoméstico no debe ser utilizado por niños.
8. Se debe observar extrema precaución al utilizar cualquier electrodoméstico cerca de los
niños.
9. Desconecte el electrodoméstico cuando no esté en uso y antes de limpiarlo. Permite que
enfríe antes de colocar o quitar partes, antes e limpiarlo o almacenarlo.
10. Nunca jale el cable para desconectarlo. Tome la clavija y desconecte del tomacorrientes.
11. No opere ningún electrodoméstico con un cable o clavija dañados o después que
el electrodoméstico ha fallado, o se ha estropeado de alguna forma. Para evitar las
descargas eléctricas, nunca repare su parrilla Grill Champ usted mismo. Llévela con un
técnico calicado para la reparación, o ajuste eléctrico o mecánico. Un armado incorrecto
incrementa el riesgo de una descarga eléctrica.
12. El fabricante no recomienda el uso de accesorios o utensilios ya que pueden causar fuego,
descargas eléctricas o lesiones.
13. No se utilice en exteriores o con propósitos comerciales. Este electrodoméstico es solamente
para uso doméstico.
14. No deje que el cable eléctrico cuelgue de la orilla de la encimera o mesa o toque supercies
calientes. El cable puede enredarse o causar que el electrodoméstico caiga, o puede
derretirse si toca supercies calientes.
15. No coloque sobre o cerca de quemadores de gas o eléctricos o cerca de un horno caliente, ya
que puede causar que la parte exterior se derrita.
16. Observe extrema precaución cuando mueva cualquier electrodoméstico que contenga
comida, agua, aceito u otros líquidos calientes.
17. No deje este electrodoméstico desatendido durante el uso.
18. El electrodoméstico permanecerá encendido (ON) a menos que sea desconectado. Después
de usarlo desconéctelo siempre.
19. Cuando esté en uso, permita que haya una adecuada ventilación. No opere este
electrodoméstico si está cerca de cortinas, papel tapiz, telas, toallas u otros materiales

ENGLISHESPAÑOLFRANÇAIS
–17–
inamables.
20. No coloque este electrodoméstico directamente debajo de un gabinete, ya que esto puede
resultar en la formación de calor excesivo.
21. Puede llegar a salir vapor entre las placa de cocción. Evite que sus manos entren en contacto
con el vapor para evitar quemaduras.
22. No se utilice este electrodoméstico para otro uso que no es el previsto.
23. Este electrodoméstico solo puede ser operado en la posición cerrada.
CONSERVE ESTAS INSTRUCCIONES
NOTA: Debe utilizarse el cable de suministro de energía corto que viene con la uni-
dad para reducir el riesgo de enredarse o tropezarse con un cable más largo. Si está
disponible un cable de extensión puede utilizarse si se hace con cuidado. Si se llega a
utilizar un cable de extensión, el calibre eléctrico de la extensión debe ser tan grande o
más que el calibre eléctrico indicado en el electrodoméstico. El cable de extensión debe
colocarse de forma que no cuelgue de la encimera o mesa donde puede ser jalado por
algún niño o donde alguien pueda tropezarse sin querer.
NOTA: Este electrodoméstico cuenta con una clavija polarizada (una pata es mas
ancha que la otra). Para reducir el riesgo de descarga eléctrica esta clavija puede co-
nectarse con un tomacorrientes de una sola forma. Si la clavija no puede conectarse al
tomacorrientes, dele vuelta a la clavija si aún así no puede hacer la conexión, entre en
contacto con un electricista calicado. De ninguna forma trate de modicar la clavija.
ÚNICAMENTE PARA USO DOMÉSTICO

ENGLISH ESPAÑOL FRANÇAIS
–18–
DIAGRAMA DEL PRODUCTO
ADVERTENCIA
• Utilice posavasos o manteles individuales QUE NO SEAN DE PLÁSTICO entre la
parrilla y cualquier supercie sensible al calor. De no hacerlo pueden formarse
manchas o daños permanentes.
SUMINISTRO ELÉCTRICO
• Si el circuito eléctrico está sobrecargado con otros electrodomésticos, probable-
mente su electrodoméstico no pueda funcionar correctamente. Debe estar conec-
tado a un circuito eléctrico separado de los otros electrodomésticos.
PRECAUCIÓN
• Este electrodoméstico está caliente durante la operación y retiene el calor tiempo
después de desconectarlo. Siempre utilice guantes cuando maneja materiales
calientes y permita que las partes metálicas se enfríen antes de limpiarlas.
• No coloque nada encima de la parte superior del electrodoméstico, ya sea que esté
en funcionamiento o no.
1. Locking Lid Latch
2. Cool-Touch Carrying Handle
3. Diagonal Cutting Edge
4. Non-Stick Cooking Plates
5. Electric Cord with Polarized Plug
6. Diagonal Cutting Edge
7. Non-Stick Cooking Plates
8. Skid-Resistant Feet (not shown)
9. Red POWER Light

ENGLISHESPAÑOLFRANÇAIS
–19–
USANDO SU PARRILLA DE CONTACTO
ANTES DE USARLA
• Desempaque su parrilla y colóquela en una encimera plana. Limpie la supercie
exterior y las placas antiadherentes con un paño húmedo.
• Para ayudar a proteger la supercie antiadherente cubra las placas de la parrilla
con una capa de aceite vegetal antes de precalentar.
• El electrodoméstico puede emitir algún olor durante el precalentado inicial. Esto es
normal y desaparecerá después de uno o dos usos.
USANDO SU PARRILLA
1. Conecte el cable de suministro eléctrico en el tomacorrientes para precalentar con la
tapa cerrada. La luz roja “Power ON” iluminará y permanecerá encendida mientras el
electrodoméstico esté conectado al suministro eléctrico.
2. La luz verde se iluminará cuando la unidad se encuentre lista para que usted comien-
ce a cocinar. Esto puede llevarse cerca de 4 minutos.
3. Utilice la manija superior para abrir con cuidado la tapa, usando guantes o un trapo
para reducir el riesgo de alguna lesión. Coloque los alimentos en la placa de cocción
inferior.
4. Cierre cuidadosamente con la manija la tapa.
5. El tiempo de cocción ideal variará de acuerdo al grosor y tipo de alimento y del gusto
personal.
6. Una vez que ha terminado el proceso de cocción abra la tapa, de nuevo con cuidado
y con guantes o un trapo. Retire los alimentos con una espátula de plástico o made-
ra. NO use utensilios de metal. Pueden dañar la cubierta antiadherente.
7. Cierre la tapa para mantener la temperatura en alto si va a cocinar otro alimento.
8. Al terminar desconecte la parrilla y permita que se enfríe antes de limpiar.

ENGLISH ESPAÑOL FRANÇAIS
–20–
LIMPIEZA, MANTENIMIENTO Y ALMACENAMIENTO
LIMPIEZA Y MANTENIMIENTO
• Retire la charola de escurrimientos y lávela bajo el chorro de agua utilizando un
detergente suave y esponja no abrasiva.
• Siempre desconecte el electrodoméstico y permita que se enfríe antes de limpiarlo.
• Limpie la tapa, las placas de cocción y la cubierta con toallas de papel absorbente o
un paño suave.
• PRECAUCIÓN: Nunca sumerja este electrodoméstico en agua para limpiarlo ya que
puede causar una descarga eléctrica.
ALMACENAMIENTO
• Asegúrese que la unidad esté desconectada y completamente fría.
• Coloque en su lugar la charola de escurrimientos.
• Baje la tapa.
• Almacene el cordón en la parte inferior de la parrilla de contacto al enrollara y en
el eje central. No estire el cable, especialmente donde el cable entra a la unidad, ya
que esto puede causar que el cable se pele o se rompa.
DIRECTRICES DE COCCIÓN DEL USDA
El Departamento de Agricultura de Estados Unidos (USDA) recomienda que la carne
y aves se cocinen con las siguientes temperaturas internas para asegurarse que las
bacterias dañinas han muerto. Cocine todos los alimentos a estas temperaturas mínimas
internas midiendo la temperatura con un termómetro de comida antes de retirar los
alimentos de la fuente de calor.
• Pollo y pavo molido: cocinado a una temperatura interna de 165°F/71°C
• Carne de res, ternera y cordero molido: cocinado a una temperatura interna de
160°F/71°C
• Pollo y pavo molido entero: cocinado a una temperatura interna de 180°F/82°C y la
pechuga a 1670°F/77°C
• Ganso y pato: cocinado a una temperatura interna de 180°F/82°C
• Carne de res, ternera y cordero fresco: cocinado a una temperatura interna de
145°F/63°C
Table of contents
Languages:
Other Impecca Kitchen Appliance manuals