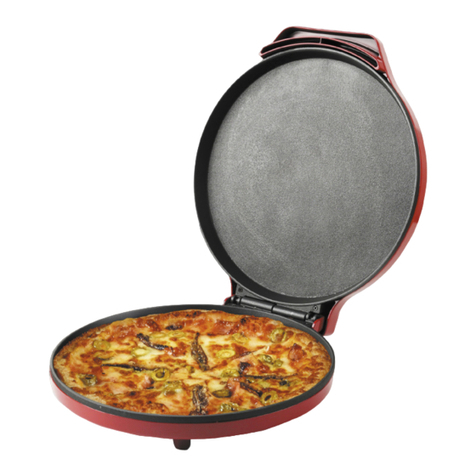
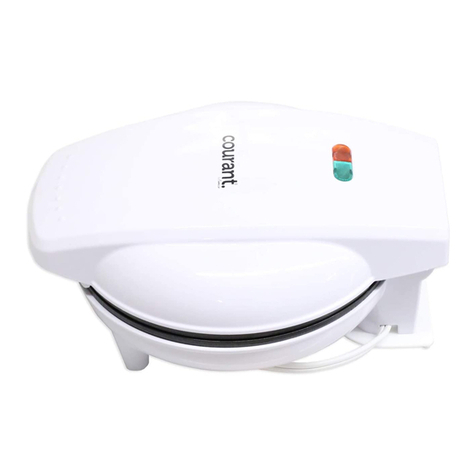
Impecca Courant CPM-1200R User manual

User Manual
Manual de usuario
Mode d’emploi
Model: CPM-1200
www.courantusa.com
v 1.5
Pizza Maker

ENGLISH ESPAÑOL FRANÇAIS
TABLE OF CONTENTS
IMPORTANT SAFEGUARDS............................................................................................................ 3
WHAT'S IN THE BOX....................................................................................................................... 4
BEFORE USING YOUR PIZZA MAKER FOR THE FIRST TIME .................................................... 5
PARTS OF YOUR PIZZA MAKER..................................................................................................... 6
USING YOUR PIZZA MAKER ...................................................................................................... 6
RECIPES............................................................................................................................................ 7
CARE AND CLEANING...................................................................................................................10
TROUBLESHOOTING GUIDE.......................................................................................................11
CUSTOMER SUPPORT..................................................................................................................11
ONE YEAR LIMITED WARRANTY (US)......................................................................................... 12
2

3
ENGLISH
FRANÇAIS ESPAÑOL
IMPORTANT SAFEGUARDS
When using electrical appliances, always follow basic safety precautions to reduce the
risk of fire, electric shock and personal injury.
1. READ ALL INSTRUCTIONS CAREFULLY.
2. Parts become hot during use. Do not touch hot surfaces; use handles or knobs.
3. To protect against fire, electric shock, and injury to persons or pets, do not
immerse cord, plug, or unit in water or any other liquid.
4. Close supervision is necessary when any appliance is used by or near children.
5. Do not operate any appliance with a damaged cord or plug, or aer the appliance
malfunctions or is dropped or damaged in any manner. In the event of damage,
return the Pizza Maker to the nearest authorized service facility for examination,
repair or adjustment.
6. The use of accessory attachments not recommended or sold by Courant may
cause fire, electric shock or injury, and is therefore prohibited.
7. Do not use outdoors or for commercial use.
8. Do not allow the cord to hang over the edge of table or counter, or touch hot
surfaces including the stove.
9. Do not place on or near a hot gas or electric burner, or in a heated oven.
10. To power o the Pizza Maker, remove the plug from wall outlet.
11. Extreme caution must be used when moving an appliance containing hot oil or
other liquids.
12. Do not use this appliance for other than its intended use.
13.Do not leave appliance unattended while in use.
14. Unplug this appliance from outlet when not in use, and before cleaning. Allow to
cool before cleaning.
15. Do not twist, kink or wrap the power cord around the Pizza Maker, as this may
cause the insulation to weaken and split, particularly in the location where it
enters the unit.
16. Always place the Pizza Maker on a heat-resistant surface.
17. To avoid scratching, use utensils specifically designed for nonstick surfaces.
Never remove the pizza or any other food items with a cutting device or metal
kitchen utensil.
18. When using the Pizza Maker, allow four to six inches of space above, behind and
on either side for air circulation.
19. Always unplug and let unit cool before cleaning and storing.
SAVE THESE INSTRUCTIONS
HOUSEHOLD USE ONLY

4
ENGLISH ESPAÑOL FRANÇAIS
Power Cord
1. A short power-supply cord is provided to reduce the hazard resulting from
entanglement or tripping over a long cord.
2. Extension cords may be used if care is exercised. If it is necessary to use an
extension cord, it should be positioned so that it does not drape over the
counter or tabletop, where it can be pulled on by children or tripped over
unintentionally.
3. The electrical rating of the extension cord must be the same or greater than the
wattage of the appliance (the wattage is shown on the rating label located on
the underside or back of the appliance).
4. Avoid pulling or straining the power cord at the outlet or appliance connections.
Polarized Plug
1. Your appliance is equipped with a polarized plug (one blade is wider than the
other).
2. To reduce the risk of electrical shock, this plug is intended to fit into a polarized
outlet only one way
3. If the plug does not fit fully into the outlet, reverse the plug.
If the plug does not fit, please consult a qualified electrician. Do not attempt to defeat
this safety feature by modifying the plug in any way.
WARNING: Improper use of the power cord may result in electric shock. Consult a
qualified electrician if necessary.
WHAT'S IN THE BOX
Please verify that your box contains the following items. Note that
some models may not include all items.
➌
➋
❶

5
ENGLISH
FRANÇAIS ESPAÑOL
Included are:
1. Pizza Maker
2. User Manual
3. Tech Support Card
BEFORE USING YOUR PIZZA MAKER FOR THE FIRST TIME
Before using your Pizza Maker for the first time, please read all the instructions
contained here.
Carefully unpack the Pizza Maker and remove all packaging materials from inside and
around the unit. To remove any dust that may have accumulated during packaging,
wipe the cooking surface and the exterior of the unit with a cloth or sponge
moistened in warm water. Dry thoroughly.
Before cooking, let your Pizza Maker run for 10 minutes with the lid closed. This will
help burn off any lubricant from the oven’s heating elements. This will not affect the
performance of your Pizza Maker, nor do you need to repeat this process at any time
in the future.
Never use a knife or pizza cutter on the cooking surface, as this could damage it.
WARNING: Do not immerse the unit, cord or plug in water or any other liquid. Do
not pour or run water onto any part of the appliance. Do not use harsh or abrasive
cleansers on any part of the appliance.
To maintain the quality of the nonstick coating on your Pizza Maker we recommend
the following: Using a paper towel, coat the nonstick surface with a small amount of
vegetable oil or a nonstick cooking spray and wipe off excess oil.
Before use, unwind the power cord completely and keep the cord away from the hot
parts of the appliance.
NOTE: During the first use, even after preheating, the unit may emit a small amount
of smoke and a slight smell; this is normal, the unit is burning off the residues from the
manufacturing process. The odor is harmless and should not reoccur after the initial
heating.

6
ENGLISH ESPAÑOL FRANÇAIS
PARTS OF YOUR PIZZA MAKER
RATING: 120V, 60Hz, 1440W, AC ONLY
USING YOUR PIZZA MAKER
1. Place the unit on a clean, dry, heat resistant flat surface, such as a table or counter-top.
2. To maintain the quality of the nonstick finish on your Pizza Maker, we recommend
using a paper towel or silicone basting brush to coat the nonstick surfaces with a small
amount of vegetable oil or a nonstick cooking spray, and then wipe the excess oil off.
3. Plug the power cord into a convenient 120V, 60 Hz, AC-only outlet. The red Power-On
indicator light will illuminate. Lower the lid to the closed position.
4. NOTE: The Pizza Maker must be allowed to preheat before using. During preheating
you can prepare your ingredients and pizza dough.
5. The red Power-On indicator Light comes on when the unit is plugged in. This light will
stay on until the unit is unplugged.
6. The green Ready-to-Bake Indicator Light comes on when the unit has reached the
required temperature for baking. For best results, wait until the green Ready-to-Bake
Indicator Light comes on before placing your pizza on the Bottom Nonstick Baking Plate.
7. The green Ready-to-Bake light cycles off and on during the baking cycle as the unit
maintains baking temperature.
8. NOTE: If you are preparing a fresh pizza ensure your dough is rolled out no larger

7
ENGLISH
FRANÇAIS ESPAÑOL
than 12" (30.5cm) in diameter. Your Pizza Maker accommodates a 12" (30.5cm) pizza.
9. WARNING: The housing of this unit gets hot during use. Always use the handle on the
lid to open and close the unit. To prevent burns, never touch baking plates while hot.
Always use oven mitts to protect your hands when opening and closing the unit as steam
may emit from the sides and can cause burns.
10. Wearing oven mitts use the handle to lift the lid into the upright position. Carefully place
your homemade or frozen pizza onto the Bottom Nonstick Baking Plate.
11. Close lid and allow to bake.
12. Most pizzas will be ready in approximately 10-25 minutes or until the cheese bubbles and
turns golden brown. Recipes may vary in baking times depending on the thickness of the
crust, type of crust, toppings used on your pizza and personal preference. Fresh pizzas
will brown quicker than frozen pizzas. Thin crust will take less time than thick crust. Take
note of perfect baking times for each type of pizza you create for future reference.
13. Wearing oven mitts, carefully open the unit using the handle. To test if the crust is
baked all the way through insert a toothpick into the center of the pizza. If the toothpick
comes out dry the crust is baked all the way through. You can also use a rubber tipped
spatula to lift up an edge of the pizza to check if the bottom crust has browned to your
preference.
14. NOTE: If necessary continue baking for 1 or 2 minutes until desired doneness.
15. When baking is complete, unplug the power cord from outlet.
16. CAUTION: Wearing oven mitts, remove the pizza from the unit using utensil safe for
nonstick surfaces. Do not use metal utensils or cutting devices as they may damage the
nonstick surface of the cooking plates.
17. Once pizza is removed from the Bottom Baking Plate and placed on a cutting board cut
into slices and serve.
BAKING ADDITIONAL PIZZAS
1. If baking additional pizzas, keep the Pizza Maker lid closed to retain heat. Always wait
until the green (Ready-to-Bake) Indicator Light illuminates before adding another pizza.
2. Additional pizzas may bake quicker than your first baked pizza, since extra heat has been
retained inside your Pizza Maker. It may be necessary to adjust to a shorter baking time.
RECIPES
What’s a Pizza Maker without recipes? We have included several here to start you
off. Of course, there are literally hundreds of other recipes you can try. Feel free to
experiment.
Our first recipe is perhaps the one you’ll use most often: basic pizza dough.
BASIC PIZZA DOUGH Makes2thin12-incrusts
INGREDIENTS
• 1 pinch of sugar
• 1 cup lukewarm water (115°F)
• 1 package active dry yeast
• 2 to 3 cups all-purpose flour teaspoon salt

8
ENGLISH ESPAÑOL FRANÇAIS
• 2 tablespoons olive oil
PREPARATION
1. Dissolve sugar in water. Sprinkle yeast over water mixture and stir to dissolve.
2. Wait 5 minutes until yeast becomes active and bubbly.
3. Add 2 cups flour to a large mixing bowl; make a well in the center of the flour.
Add salt, yeast mixture and olive oil.
4. Mix together by hand until the dough is soft.
5. Place the dough onto a lightly floured surface. Knead until smooth and elastic,
about 5 to 10 minutes, adding flour gradually as needed.
6. Transfer the dough to a large, lightly oiled bowl, and coat the dough ball with
some oil. Cover with plastic wrap, and allow it to rest for approximately 1 hour in
a warm place, until the dough doubles in size.
7. After an hour, punch the dough down with your fist.
8. Turn dough out onto lightly floured surface, split in half and shape into 2 balls.
9. Cover with a towel and rest 15 to 20 minutes.
10. Roll or stretch dough to a 12-inch diameter.
11. Add pizza sauce, shredded cheese and toppings.
12. Bake in the preheated Pizza Maker until crust is crisp and lightly browned.
STORING OPTIONS:
• Store the oiled and wrapped unused dough ball for up to 24 hours in the
refrigerator.
• One hour before preparing pizza, take the dough out of the refrigerator and
allow to rest until it reaches room temperature.
• Freeze the oiled and wrapped unused dough ball in a zippered freezer bag up to
3 months.
PIZZA TOPPINGS:
Spicy sausage, chicken strips, bacon, pepperoni, salami, ham, Italian beef, onions,
pesto, black olives, spinach, artichoke hearts, fresh tomatoes, sun-dried tomatoes,
mushrooms, sweet peppers, jalapeño peppers, anchovies, pineapple, etc.
BBQ CHICKEN PIZZA
INGREDIENTS
• 1 (12-in) unbaked pizza crust
• 3/4 cup shredded rotisserie chicken
• 6 tablespoons barbecue sauce, divided
• 3/4 cup shredded smoked mozzarella cheese
• 1/2 cup thinly sliced red onion
• 3/4 cup shredded whole-milk mozzarella cheese
PREPARATION

9
ENGLISH
FRANÇAIS ESPAÑOL
1. In a small bowl, toss the chicken with half the barbecue sauce; set aside.
2. Brush pizza dough with remaining barbecue sauce, and sprinkle with smoked
mozzarella cheese.
3. Add sliced red onions and shredded chicken, and top with mozzarella cheese.
4. Bake in the preheated Pizza Maker until crust is crispy and lightly browned.
SUN-DRIED TOMATO AND GOAT CHEESE PIZZA
INGREDIENTS
• 1 (12-in) unbaked pizza crust
• 2 teaspoons olive oil
• 3 tablespoons tomato sauce
• 1 tablespoon tomato paste
• 1 teaspoon minced garlic
• 1 cup shredded whole-milk mozzarella cheese cup crumbled goat cheese
• 1 cup sliced and drained sun-dried tomatoes
• 4 tablespoons fresh chopped basil
• 2 chopped small shallots
• 6 tablespoons grated Parmesan cheese
PREPARATION
1. Brush pizza dough with olive oil.
2. Combine tomato sauce, tomato paste and garlic in a small bowl, and then
spread over pizza dough.
3. Mix cheeses and sprinkle over sauce.
4. Add sun-dried tomatoes, basil and shallots.
5. Bake in the preheated Pizza Maker until crust is crisp and lightly browned
ROASTED GARLIC WHITE PIZZA
INGREDIENTS
• 1 (12-in) unbaked pizza crust
• 1/2 teaspoons olive oil
• 1/2 head garlic, roasted and mashed
• 6 tablespoons grated Parmesan cheese
• 1cup shredded Fontina cheese*
• 1/2 cup spinach, frozen, thawed, drained well
• 6 tablespoons whole-milk ricotta cheese
*You can also substitute Havarti or muenster cheese

10
ENGLISH ESPAÑOL FRANÇAIS
PREPARATION
1. Brush pizza dough with olive oil.
2. Spread roasted garlic over the dough.
3. Mix Fontina and Parmesan cheeses and sprinkle over dough.
4. Drop clumps of spinach over the cheese.
5. Add small dollops of ricotta cheese.
6. Bake in preheated Pizza Maker until the crust is crisp and lightly browned.
SAUSAGE AND BELL PEPPER PIZZA
INGREDIENTS
• 1 (12-in) unbaked pizza crust
• 1/2 teaspoons olive oil
• 1 teaspoon minced garlic
• 4 tablespoons grated parmesan or romano cheese
• 1 cup shredded whole-milk mozzarella cheese
• 1/2 cup shredded provolone cheese
• 1 cup Italian sausage, cooked and crumbled
• 1/2 cup red bell pepper julienned
• 1 cup peeled and diced Roma tomatoes
• 2 tablespoons chopped fresh oregano leaves (optional)
PREPARATION
1. Brush pizza dough with olive oil and sprinkle with minced garlic.
2. Mix cheeses and sprinkle over dough.
3. Arrange remaining ingredients on cheese mix.
4. Bake in the preheated Pizza Maker until crust is crisp and lightly browned.
CARE AND CLEANING
Always ensure that the Pizza Maker is unplugged and cool before moving, cleaning or
storing.
Wipe the nonstick baking plates with a clean, damp cloth. If pizza dough still remains
on the baking plates, pour a small amount of cooking oil on the hardened pizza
dough. Allow the oil to set for 5 minutes, then wipe clean with a paper towel or so
cloth. To remove stubborn stains, use a so nylon brush or other cleaning utensil safe
for nonstick surfaces.
WARNING: Do not immerse the unit, cord or plug in water or any other liquid. Do
not pour or run water onto any part of the unit. Do not place in dishwasher. Do
not use harsh or abrasive cleansers on any part of the Pizza Maker.
The exterior of the unit may be wiped clean with a wet cloth. Let dry thoroughly.

11
ENGLISH
FRANÇAIS ESPAÑOL
Wrap cord around the convenient cord wrapper on the base. Ensure that the unit is
clean and dry before storing.
TROUBLESHOOTING GUIDE
PROBLEM The heat indicator light goes on, then off.
CAUSE This is an automatic thermostat light.
SOLUTION The light will stay on until the oven has reached the desired
temperature setting.
PROBLEM The pizza is burnt.
CAUSE Temperature of oven is too high.
SOLUTION Reduce the time of cooking.
PROBLEM Bottom of pizza burns.
CAUSE Temperature of oven is too high.
SOLUTION Make sure the oven has been pre-heated. When the oven light
goes out, allow a couple of minutes, then put your pizza in.
When cooking additional pizzas one after the other, it is best to
leave the lid open for a few minutes in-between cooking pizza.
CUSTOMER SUPPORT
Visit our website to contact us, find answers to Frequently Asked Questions, and for
other resources which may include an updated version of this user’s manual.
www.courantusa.com
If you wish to contact us by phone, please be sure to have your model number and serial
number ready and call us between 9:00am and 6:00pm ET, at +1 866-954-4440.
© 2018 Courant™ by Impecca, a division of LT Inc., Wilkes Barre, PA.

12
ENGLISH ESPAÑOL FRANÇAIS
Courant™ warrants this product against defects in
material and workmanship to the original purchaser
as specified below. Please be sure that the product is
registered online within fourteen (14) days of purchase.
PARTS – if the product is determined to have a
manufacturing defect, within a period of one
(1) year from the date of the original purchase,
Courant™ will repair or replace the product parts
at no charge (for parts) to consumers in the
U.S.A. and Canada.
LABOR – if the product is determined to have a
manufacturing defect, within a period of ninety
(90) Days from the date of the original purchase,
Courant™ will repair or replace the product at no
charge to consumers in the U.S.A. and Canada.
Aer ninety (90) days, it will be the responsibility
of the consumer.
Shipping costs to and from our warranty service center
are the sole responsibility of the consumer.
To obtain warranty service by an authorized Courant™
service center, please email us at: service@ courantusa.
com to obtain a Repair and Maintenance Authorization
(RMA) number and to locate the Warranty Service
Center nearest you. Once authorized, you must mail the
product to the authorized Courant™ service center in its
original product packaging materials or equivalent, to
prevent damage while in transit.
Further, should Courant™ determine that the product is
outside of the Warranty terms, Courant™ will return the
product to sender at sender’s expense without being
repaired or replaced, unless authorized by the consumer
to service the out-of-warranty product at consumer’s
expense. All handling or restocking charges for returns
and/or replacements shall be non-refundable.
Courant™ specifically excludes from this warranty any
non-electric/mechanical attachments, accessories, and
disposable parts including, but not limited to, outside
case, connecting cables, batteries, and AC adapters.
Courant™ reserves the right to repair or replace defective
products with the same, equivalent, or newer models.
We reserve the right to either repair or replace product
at our discretion. Replacement may be either new or
refurbished and while every endeavor will be made
to ensure it is the same model, if same model is not
available, it will be replaced with a model of equal or
higher specification.
Normal “Wear and Tear” is not covered by this, or any
other, warranty. Further, Courant™ hereby reserves
the right to determine “Wear and Tear” on any and all
products. Tampering or opening the product casing or
shell will void this warranty in its entirety.
In addition, this warranty does not apply if the product
has been damaged by accident, abuse, misuse, or
misapplication; has been altered or modified without
the written permission of Courant™; has been serviced
by a non-authorized repair center of Courant™; has not
been properly maintained or operated according to the
operation manual; has been used for commercial, non-
household purposes; has been cosmetically damaged;
was not imported by Courant™; was not manufactured
according to specification of the United States market;
was damaged due to improper installation or neglect
by the consumer; was damaged due to improper
packaging in shipment to the Warranty Service Center;
was damaged due to natural disasters; or if the serial
number for the product has been removed or defaced.
ALL IMPLIED WARRANTIES, INCLUDING IMPLIED
WARRANTIES OF MERCHANTABILITY AND FITNESS FOR
A PARTICULAR PURPOSE ARE LIMITED IN DURATION
TO ONE (1) YEAR PARTS AND NINETY (90) DAYS LABOR
FROM THE DATE OF THE ORIGINAL RETAIL PURCHASE
OF THIS PRODUCT.
THESE WARRANTIES AND REMEDIES ARE THE SOLE
AND EXCLUSIVE WARRANTIES AND REMEDIES IN
CONNECTION WITH THE SALE AND USE OF THE
PRODUCT. NO OTHER WARRANTIES, ORAL OR WRITTEN,
EXPRESSED OR IMPLIED, ARE GIVEN.
COURANT™ IS NOT RESPONSIBLE OR LIABLE FOR
ANY DAMAGE, WHETHER SPECIAL, INCIDENTAL,
CONSEQUENTIAL, DIRECT OR OTHERWISE, OR
WHETHER KNOWN OR SHOULD HAVE BEEN KNOWN
TO COURANT™, INCLUDING LOST PROFITS, GOODWILL,
AND PROPERTY AND PERSONAL INJURY RESULTING
FROM ANY BREACH OF WARRANTY, THE INABILITY TO
USE THE PRODUCT OR UNDER ANY LEGAL THEORY IN
CONTRACT OR TORT. COURANT™ LIABILITY IS LIMITED
TO THE ACTUAL PURCHASE PRICE PAID TO THE RETAIL
SELLER OF THE DEFECTIVE PRODUCT.
No Courant™ dealer, agent, or employee is authorized
to make any modification, extension, change or
amendment to this warranty without the written
consent and authorization from Courant™.
Some states do not allow the exclusion or limitation
of implied warranties or liability for incidental or
consequential damages, or do not allow a limitation
on how long an implied warranty lasts, so the above
limitations or exclusions may not apply to you. This
warranty gives you specific legal rights, and you may
have other rights, which vary from state to state.
Note: Our Warranty Service Center ships only within
Continental U.S.A., excluding Alaska and Hawaii.
ONE YEAR LIMITED WARRANTY (US)

13
ENGLISH
FRANÇAIS ESPAÑOL
TABLA DE CONTENIDO
INSTRUCCIONES IMPORTANTES DE SEGURIDAD ........................................................... 14
QUÉ HAY EN LA CAJA............................................................................................................ 15
ANTES DE USAR SU FÁBRICA DE PIZZAS POR PRIMERA VEZ........................................ 16
PARTES DE SU FÁBRICA DE PIZZAS ................................................................................... 17
USANDO SU FÁBRICA DE PIZZAS .................................................................................... 17
RECETAS.................................................................................................................................. 18
LIMPIEZA Y CUIDADOS.......................................................................................................... 22
GUÍA DE SOLUCIÓN DE PROBLEMAS................................................................................. 22
SOPORTE AL CLIENTE .......................................................................................................... 23
GARANTÍA LIMITADA POR UN AÑO..................................................................................... 24

14
ENGLISH ESPAÑOL FRANÇAIS
INSTRUCCIONES IMPORTANTES DE SEGURIDAD
Para reducir los riesgos de incendio, descarga eléctrica o daños personales, al utilizar
aparatos eléctricos, siempre deben seguirse las precauciones básicas de seguridad.
1. LEA CUIDADOSAMENTE TODAS LAS INSTRUCCIONES.
2. Las partes se calientan durante el uso. No toque las superficies calientes; en lugar
de eso utilice las asas o perillas.
3. Para protegerse contra incendio, descarga eléctrica o daños personales, no sumerja
en agua u otros líquidos, el cable de suministro de energía o la unidad.
4. Se requiere de supervisión cercana cuando este electrodoméstico es utilizado por o
cerca de niños.
5. No opere este electrodoméstico si el cable o enchufe están dañados, o después de
que el electrodoméstico ha fallado o se ha caído o se ha dañado en alguna forma.
En caso de daño, regrese su Fábrica de Pizzas a la estación de servicio autorizado
más cercana para que puedan revisarla, repararla o ajustarla.
6. El uso de accesorios no recomendados o vendidos por el Courant pueden causar
incendios, descargas eléctricas o daños, y por lo tanto están prohibidos.
7. No se use en exteriores o para uso comercial.
8. No permita que el cable cuelgue sobre la orilla de la mesa o encimera, o entre en
contacto con superficies calientes incluyendo la estufa.
9. No coloque encima o cerca de un quemador eléctrico o de gas, u horno caliente.
10. Para apagar su Fábrica de Pizzas desconéctela del tomacorrientes.
11. Se debe tener extrema precaución cuando se mueva un electrodoméstico que
contiene aceite caliente u otros líquidos.
12. No utilice este electrodoméstico para otros usos diferentes al previsto.
13. Mientras el electrodoméstico esté en uso no lo deje sin supervisión.
14. Desconecte este electrodoméstico del tomacorrientes cuando no esté en uso y
antes de limpiarlo. Permita que se enfríe antes de limpiarlo.
15. No tuerza, doble o enrede el cable de suministro de energía alrededor de la Fábrica
de Pizza, ya que esto puede causar que el aislante se debilite y se rompa, particular-
mente en donde este cable se conecta a la unidad.
16. Siempre coloque la Fabrica de Pizzas en una superficie resistente al calor
17. Para evitar rayones, utilice los utensilios diseñados para superficies antiadherentes.
Nunca retire la pizza ni ningún otro alimento con un utensilio de cocina para corte
o de metal
18. Cuando utilice la Fabrica de Pizzas permita un espacio de cuatro a seis pulgadas
por encima, atrás y a los lados del electrodoméstico para dejar que el aire circule.
19. Siempre desconecte la unidad y deje que se enfríe antes de limpiarla y guardarla.
GUARDE ESTAS INSTRUCCIONES
ÚNICAMENTE PARA USO DOMÉSTICO

15
ENGLISH
FRANÇAIS ESPAÑOL
Cable de Suministro de Energía
1. Se proporciona un cable de suministro de energía corto para reducir el peligro de
enredarse o tropezarse con un cable largo.
2. Se pueden utilizar cables de extensión si se tiene cuidado. Si es necesario utilizar
una extensión, debe colocarse donde no cuelgue de la mesa o encimera, donde no
pueda ser jalado por niños o donde alguien pueda tropezar por accidente.
3. El calibre de la extensión debe ser el mismo o mayor que la potencia requerida por
la unidad (esta potencia se muestra en la etiqueta de especificaciones en la parte
de abajo o posterior del electrodoméstico).
4. Evite jalar o deformar el cable de suministro de energía, ya sea en el tomacorrientes
o en la conexión al electrodoméstico.
Enchufe Polarizado
1. Su electrodoméstico está equipado con un enchufe polarizado (una pata es más
ancha que la otra).
2. Para reducir el riesgo de descarga eléctrica, este enchufe está hecho para entrar en
un tomacorrientes polarizado de una sola forma.
3. Si el enchufe no entra en el tomacorrientes, voltéelo y vuelva a intentar.
Si definitivamente el enchufe no entra en el tomacorrientes, consulte con un electricis-
ta calificado. NO intente violar esta característica de seguridad al modificar de alguna
forma el enchufe.
ADVERTENCIA: El uso inadecuado del cable de suministro de energía puede causar una
descarga eléctrica. De ser necesario consulte con un electricista calificado.
QUÉ HAY EN LA CAJA
Verifique que su caja contenga los siguientes artículos. Tome en
cuenta que algunos modelos pueden no incluir todos los artículos.
➌
➋
❶

16
ENGLISH ESPAÑOL FRANÇAIS
Se incluye:
1. Fábrica de Pizzas
2. Manual de Usuario
3. Tarjeta de Soporte Técnico
ANTES DE USAR SU FÁBRICA DE PIZZAS POR PRIMERA VEZ
Antes de usar su Fábrica de Pizzas por primera vez, lea todas las instrucciones
contenidas aquí.
Desempaque cuidadosamente la Fábrica de Pizzas y retire todo el material de
empaque de adentro y alrededor de la unidad. Para retirar el polvo que se haya
acumulado durante el empaque, limpie la superficie de cocción y el exterior de la
unidad con un paño o esponja humedecidos con agua tibia. Seque completamente.
Antes de cocinar, deje su Fábrica de Pizzas funcionar por 10 minutos con la tapa
cerrada. Esto ayudará a quemar cualquier lubricante de los elementos calentadores
del electrodoméstico. Esto no afectará el funcionamiento de su Fábrica de Pizzas, ya
que no necesita repetir este procedimiento en ningún momento posterior.
Nunca utilice cuchillos o cortadores de pizza en la superficie de cocción, ya que
pueden dañarla.
ADVERTENCIA: No sumerja la unidad, su cable o enchufe en agua o algún otro líquido.
No vierta o deje el agua correr sobre ninguna parte de este electrodoméstico. No use
limpiadores duros o abrasivos en ninguna parte de este electrodoméstico.
Para mantener la calidad de la capa antiadherente de su Fábrica de Pizzas, le
recomendamos lo siguiente: Utilizando una toalla de papel, cubra la superficie
antiadherente con una pequeña cantidad de aceite vegetal o un aerosol
antiadherente comestible y retire el exceso de aceite.
Antes de usar, desdoble completamente el cable de suministro de energía y
manténgalo lejos de las partes calientes del electrodoméstico.
Nota: Durante el primer uso, e incluso después de precalentar, la unidad puede emitir
una ligera cantidad de humo; esto es normal, la unidad está quemando los residuos
del proceso de manufactura. El olor es inofensivo y no debe volver a ocurrir después
del precalentado inicial.

17
ENGLISH
FRANÇAIS ESPAÑOL
PARTES DE SU FÁBRICA DE PIZZAS
ESPECIFICACIONES DE CONSUMO: 120V, 60Hz, 1440W, SÓLO AC
USANDO SU FÁBRICA DE PIZZAS
1. Coloque la unidad en una superficie plana, limpia, seca y resistente al calor, como una
mesa o encimera.
2. Para mantener la calidad del terminado antiadherente de su Fábrica de Pizzas, le
recomendamos que utilice una toalla de papel o un cepillo de silicona para cubrir las
superficies antiadherentes con una ligera capa de aceite vegetal o aerosol antiadherente
comestible y después retire el exceso de aceite.
3. Cierre su Fabrica de Pizzas y enchúfela a un tomacorrientes AC adecuado de 120V, 60Hz.
La luz roja indicadora de encendido se iluminará. Baje la tapa a la posición de cerrado.
4. NOTA: Se debe dejar que la Fábrica de Pizzas se precaliente antes de usarla. Durante el
precalentado puede preparar los ingredientes y la masa para pizza.
5. La luz roja indicadora de encendido estará iluminada cuando la unidad se conecte y
permanecerá encendida hasta que la unidad sea desconectada.
6. La luz verde indicadora de Listo para Hornear se iluminará cuando la unidad ha
alcanzado la temperatura requerida para hornear. Para mejores resultados, espere

18
ENGLISH ESPAÑOL FRANÇAIS
hasta que la luz verde indicadora de Listo para Hornear se ilumine para colocar su pizza
en la placa de horneado antiadherente inferior.
7. La luz verde indicadora de Listo para Hornear se iluminará y se apagará en forma cíclica
durante el ciclo de horneado mientras la unidad mantiene su temperatura de horneado.
8. NOTA: Si está preparando pizza cruda, asegúrese de que al aplanar la base de la pizza
esta no mida más de 12” (30.5 cm) de diámetro. En su Fábrica de Pizzas caben pizzas de
hasta 12” (30.5 cm) de diámetro.
9. ADVERTENCIA: La carcasa de esta unidad se calienta durante el uso. Siempre use el asa
en la tapa para abrir y cerrar la unidad. Para evitar quemaduras, nunca toque las placas
de horneado mientras estén calientes. Siempre utilice guantes térmicos para proteger
sus manos al abrir y cerrar la unidad ya que puede salir humo de ella por los lados y
causar quemaduras.
10. Usando sus guantes térmicos abra con el asa la tapa de la Fábrica de Pizzas dejándola
en forma vertical. Con cuidado coloque su pizza recién preparada o congelada en la
placa de horneado antiadherente inferior.
11. Cierre la tapa y permita el horneado.
12. La mayoría de las pizzas están listas en 10-25 minutos o hasta que el queso empieza a
derretirse y se dora. El tiempo de horneado de las recetas puede variar dependiendo
del grosor de la base de la pizza, tipo de masa, ingredientes usados y preferencias
personales. Las pizzas recién preparadas se doran más rápido que las congeladas. La
base delgada de pizza se cocina más rápido que la gruesa. Para referencia a futuro,
anote los tiempos de horneado perfectos para cualquier clase de pizza que prepare.
13. Usando sus guantes térmicos abra con el asa la tapa de la Fábrica de Pizzas. Para probar
si la base de la pizza está ya completamente cocida inserte un palillo al centro de la
pizza. Si el palillo sale seco, la base de la pizza ya está cocida. También puede usar una
espátula con punta de goma para levantar la orilla de la pizza y revisar si la base de la
pizza ya se doró por debajo a su gusto.
14. NOTA: Si es necesario continúe horneando por 1 o 2 minutos hasta que esté lista.
15. Cuando el horneado esté completo, desconecte el cable del tomacorrientes.
16. PRECAUCIÓN: Usando los guantes térmicos, retire la pizza de la unidad utilizando
utensilios seguros para superficies antiadherentes. No utilice utensilios de metal o para
cortar ya que pueden dañar la superficie antiadherente de las placas de horneado.
17. Una vez que la pizza se retire de la placa de horneado inferior y sea colocada en una
tabla de corte, corte en rebanadas y sirva.
HORNEANDO PIZZAS ADICIONALES
1. Si horneará pizzas adicionales, mantenga la Fábrica de Pizzas cerrada para que
mantenga el calor. Antes de meter otra pizza, siempre espere hasta que la luz indicadora
verde (listo para hornear) se ilumine.
2. Las pizzas adicionales pueden hornearse más rápidamente que la primera, ya que la
Fábrica de Pizzas ha retenido calor adicional. Si es necesario ajuste a un tiempo de
cocción menor.
RECETAS
¿Qué sería de una Fábrica de Pizzas sin recetas? Para comenzar, hemos incluido en

19
ENGLISH
FRANÇAIS ESPAÑOL
este manual algunas recetas. Por supuesto que hay, literalmente, miles de recetas
más que usted puede intentar. Siéntase en libertad de experimentar.
Nuestra primera receta es quizá la que usará más seguido: masa básica para pizza.
MASA BÁSICA PARA PIZZA Rinde 2 bases de 12 pulgadas
INGREDIENTES
• 1 pizca de azúcar
• 1 taza de agua tibia (115°F)
• 1 paquete de levadura seca activa
• 2-3 tazas de harina para todo uso
• 1 cucharadita de sal
• 2 cucharadas de aceite de oliva
PREPARACIÓN
1. Disuelva el azúcar en agua. Rocíe la levadura sobre la mezcla de agua y revuelva
hasta disolver
2. Espere 5 minutos hasta que la levadura se active y burbujee
3. Agregue 2 tazas de harina a un recipiente grande; haga un pozo en el centro de la
harina. Agregue la sal, la mezcla de levadura y el aceite de oliva
4. Mezcle a mano hasta que la masa esté suave
5. Coloque la masa en una superficie ligeramente enharinada. Amase por cerca de
5 a 10 minutos, hasta que esté suave y elástica, agregando harina conforme se
requiera.
6. Transfiera la masa a un recipiente grande y engrasado y cubra la pelota de masa
con un poco de aceite. Cubra con una película plástica, y permita que descanse
aproximadamente una hora en un lugar cálido, hasta que la masa duplique su
tamaño.
7. Después de una hora, dele un golpe a la masa con su puño.
8. Coloque la masa en una superficie ligeramente enharinada, divida en dos partes y
hágalas bola.
9. Cúbralas con una toalla y déjelas reposar de 15 a 20 minutos
10. Con un rodillo aplaste la masa hasta formar una base circular de 12 pulgadas de
diámetro
11. Agregue la salsa para pizza, queso rallado y demás ingredientes
12. Hornee en la Fábrica de Pizzas hasta que la base esté crujiente y ligeramente dora-
da
OPCIONES DE ALMACENAMIENTO
• Guarde la masa engrasada y envuelta en plástico que no ha utilizado hasta por 24
horas en el refrigerador
• Una hora antes de preparar la pizza, saque la masa del refrigerador y permita que
repose hasta que esté a temperatura ambiente

20
ENGLISH ESPAÑOL FRANÇAIS
• Congele la masa engrasada y envuelta en plástico en una bolsa de plástico con
zipper hasta por tres meses
INGREDIENTES PARA PIZZA
Salchicha condimentada, tiras de pollo, tocino, pepperoni, salami, jamón, carne ita-
liana, cebolla, pesto, aceitunas negras, espinaca, corazones de alcachofa, jitomate
fresco, jitomates deshidratados, champiñones, pimiento dulce, chiles jalapeños, an-
choas, piña, etc.
INGREDIENTES
• 1 base de 12 pulgadas de pizza sin hornear
• ¾ taza de pollo rostizado deshebrado
• 6 cucharadas de salsa BBQ, dividida en 2
• ¾ taza de queso mozzarella ahumado rallado
• ½ taza de cebolla morada rebanada muy delgada
• ¾ taza de queso mozzarella de leche entera rallado
PREPARACIÓN
1. En un molde pequeño, revuelva el pollo con la mitad de la salsa BBQ; deje aparte.
2. Con una brocha barnice la base de la pizza con la salsa BBQ restante y espolvoree
el queso mozzarella ahumado.
3. Agregue la cebolla y el pollo rallado y cubra con queso mozzarella de leche entera.
4. Hornee en la Fábrica de Pizzas precalentada hasta que la base esté crujiente y
ligeramente dorada
PIZZA DE JITOMATES DESHIDRATADOS Y QUESO DE CABRA
INGREDIENTES
• 1 base de 12 pulgadas de pizza sin hornear
• 2 cucharaditas de aceite de oliva
• 3 cucharadas de salsa de tomate
• 1 cucharada de pasta de tomate
• 1 cucharadita de ajo picado
• 1 taza de queso mozzarella de leche entera rallado
• ½ taza de queso de cabra desmoronado
• 1 taza de jitomates deshidratados rebanados
• 4 cucharadas de albahaca fresca picada
• 2 chalotes pequeños picados
• 6 cucharadas de queso parmesano rallado
PREPARACIÓN
1. Barnice la base de la pizza con aceite
This manual suits for next models
2
Table of contents
Languages:
Other Impecca Kitchen Appliance manuals