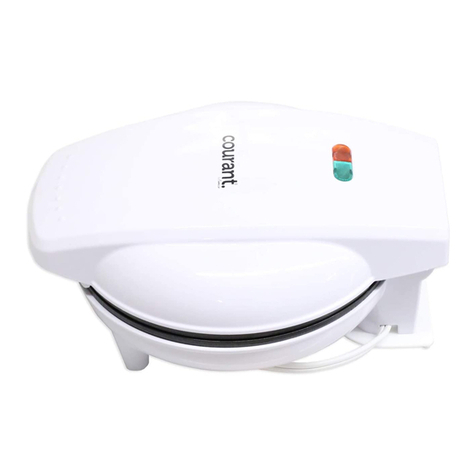
Impecca COURANT SMOOSH User manual

SMOOSH Panini Press and Griddler— User’s Guide
Prensa y Plancha para Paninis SMOOSH— Manual De Usuario
SMOOSH Gril Presse-Paninis— Manuel de l’utilisateur
www.courantusa.com
v.1.7
CPP-4140 4-slice/4 rebanadas/4 tranches
Models:
CPP-2100 2-slice/2 rebanadas/2 tranches

ENGLISH ESPAÑOL FRANÇAIS
ii
TABLE OF CONTENTS
Important Safeguards .................................................................................................................. iii
Introduction..................................................................................................................................... 4
What’s In the Box ............................................................................................................................ 4
Operating Instructions................................................................................................................... 5
Additional Operating Instructions and TIps.............................................................................. 8
Care, Cleaning, And Maintenance............................................................................................... 9
Customer Support........................................................................................................................10
One Year Limited Warranty (US) ................................................................................................11
ESPAÑOL ....................................................................................................................12
FRANÇAIS................................................................................................................................22
SPECIAL CORD SET INSTRUCTIONS
A short power-supply cord (or detachable power-supply cord) should be used to reduce the risk
resulting from becoming entangled in or tripping over a longer cord.
Longer detachable power-supply cords or extension cords are available and may be used. If a
longer detachable power-supply cord or extension cord is used, the marked electrical rating of
the cord set or extension cord should be at least as great as the electrical rating of the appliance.
The cord must be arranged in such a way that it will not drape over the countertop or tabletop
where it can be pulled on by children or tripped over.
NOTICE
This appliance has a polarized plug (one blade is wider than the other). To reduce the risk of
electric shock, this plug is intended to fit into a polarized outlet only one way. If the plug does
not fit fully into the outlet, reverse the plug. If it still does not fit, contact a qualified electrician.
Do not attempt to modify the plug in any way.

iii
ENGLISH
FRANÇAIS ESPAÑOL
IMPORTANT SAFEGUARDS
Here are some basic safety precautions that you should carefully follow as you use
your new Courant Panini Press and Griddler. Read all instructions carefully! Courant is
not responsible for damage or injuries caused by improper use of the appliance.
GENERAL SAFETY
1. READ ALL INSTRUCTIONS
2. Remove any packaging material before using this appliance.
3. Do not touch hot surfaces. Use handles or knobs. Use oven mitts when cooking as the
grilling plates can become very hot.
4. Do not place on or near a hot gas or electric burner, or in a heated oven.
5. Extreme caution must be used when moving an appliance containing hot oil or other hot
liquids.
6. Always attach plug to appliance first, then plug cord into the wall outlet. To disconnect, turn
the switch to the OFF position and then remove plug from wall outlet.
7. To protect against electric shock do not immerse cord, plugs or appliance in water or any
other liquid/
8. Close supervision is necessary when your appliance is being used by or near children.
9. Keep the appliance and its cord out of reach of children aged less than 8 years.
10. Always use the Panini Press and Griddler on a dry level surface.
11. If the supplied power cord is damaged, it must be replaced by the manufacturer, its service
agent or similarly qualified persons in order to avoid a hazard.
12. The appliance must be grounded.
13. The use of accessory attachments not recommended by the appliance manufacturer may
cause injuries.
14. Remove plug from wall outlet before cleaning and when not in use. Allow appliance to cool
down completely before taking o, attaching components or before cleaning.
15. Do not operate any appliance with a damaged cord or plug or aer the appliance malfunc-
tions, or is dropped or damaged in any manner. Return appliance to the nearest authorized
service facility for examination, repair or electrical or mechanical adjustment.
16. Any use of this product which is not recommended by manufacturer may cause injury to
persons or damage to appliance.
17. Place appliance on flat surface or table. Do not hang its power cord over the edge of table
or counter. Ensure that the power cord does not touch hot surface of appliance.
18. Do not use appliance for other than intended use.
19. Do not use outdoors.
SAVE THESE INSTRUCTIONS FOR
FUTURE REFERENCE
HOUSEHOLD USE ONLY

4
ENGLISH ESPAÑOL FRANÇAIS
INTRODUCTION
Thank you for purchasing this quality Courant SMOOSH Panini Press and Griddler. The Cou-
rant SMOOSH Panini Press and Griddler was designed with a unique handle and hinge that
positions the grilling plates to adjust to the thickness of the sandwich to allow for even toast-
ing and heating. Please follow these operating instructions carefully. Keep these instructions
in a safe place and consult them as needed.
WHAT’S IN THE BOX
Please verify your box for the following items. Note that some models may not include
all items.
SMOOSH Panini Press and Griddler— User’s Guide
Prensa y Plancha para Paninis SMOOSH— Manual De Usuario
SMOOSH Gril Presse-Paninis— Manuel de l’utilisateur
www.courantusa.com
v.1.7
CPP-4140 4-slice/4 rebanadas/4 tranches
Models:
CPP-2100 2-slice/2 rebanadas/2 tranches
❶ ❷ 1. Panini Press
2. User's Guide
12
3
4
5
6
7
8
9
10
1. Handle
2. Top Housing
3. Grill Lock Button
4. Grease Drain
5. Polarized plug
6. Removable Drip Tray
7. Green Preheat Indicator Light
8. Red Power Indicator Light
9. Adjustable Feet
10. Non-Stick Grill Plates (Upper
and Lower)
Note: Unit shown is for illustrative purposes only. Your model may appear dierent.

5
ENGLISH
FRANÇAIS ESPAÑOL
OPERATING INSTRUCTIONS
BEFORE THE FIRST USE
We recommend a ''trial run'' at a high temperature to eliminate any protective sub-
stance or oil that may have been used for packing and shipping.
1. Carefully unpack the Panini Press and remove all labels and packaging materials
2. Check that the grilling plates are clean and free of dust. You may wipe the Panini
Press and Griddler body with a clean, damp cloth. Never use metal scouring pads,
harsh or abrasive materials on the grilling plate of the Panini Press as this may
damage the non-stick surfaces. Do not immerse the Panini Press body, cord or
plug in water or other liquid.
3. Place the Panini Press and Griddler on a clean, level and stable surface.
4. Plug your unit into a standard 120v wall outlet and let the Panini Press run for 10 to
15 minutes. You may notice some smoking coming from your Panini Press during
this initial phase. This is normal during the trial run and may occur the first two or
three times that the product is used.
USING YOUR PANINI PRESS
Your new Panini Press can be used in two dierent grilling configurations:
the Contact Position (see Figure 1) or the Flat Position (see Figure 2).
When cooking foods containing a lot of fats or oils, we recommend raising the adjust-
able feet of the Panini Press and Griddler to ensure that the grease runs towards the
rear of the grill into the drip tray. To raise the adjustable feet., swing out the feet to the
raised position as shown below.
Figure 1 Figure 2
Note: Unit shown is for illustrative purposes only. Your model may appear dierent.

6
ENGLISH ESPAÑOL FRANÇAIS
GRILLING IN THE CONTACT (OR CLOSED) POSITION
Cooking in the CONTACT position (see Figure 1) allows both the LOWER and UPPER
plate to contact the food. Food cooks much faster this way than traditional open grill-
ing cooking. Grease drains away to the rear of the grill into a removable DRIP DRAWER.
The position is most commonly used to grill sandwiches, steaks, burgers, chicken,
and fish. This position is best used with thick, crusty breads, such as French, Italian,
and focaccia. The top grill plate will compress and grill a panini to perfection in about
3 minutes (depending on the bread, filling, and personal taste).
1. Ensure that your drip tray is in the sliding position and fully inserted under the grill
in the center of the lower housing (see Figures 5 and 6).
2. Before using the Panini Press and Griddler, use a pastry brush to lightly coat the top
and bottom grilling plates with vegetable oil.
3. Close the top housing and plug into a 120-volt 60HZ AC grounded outlet only.
4. The red light will turn on indicating that the appliance is preheating. Aer ap-
proximately 3 minutes, the green light will turn on indicating that the appliance is
preheated and ready for use.
5. Place items to be cooked on the LOWER grilling plate. Use the handle to lower the
top housing and cook the food according to desired temperature. Do not apply
excessive force to close the top housing cover; the grilling plate should simply rest
on the food during cooking.
6. To ensure a perfectly grilled panini, all sandwiches placed on the Panini Grill at
the same time must be the same thickness. Look to make sure that the top grilling
plate lies evenly on the top of the bread. Make sure the sandwiches are centered
on the grilling plate. If desired, press the handle down several times while cooking.
NOTE: The GREEN (READY) indicator light will cycle on and o during cooking.
T
his indicates that the thermostat is maintaining the proper cooking temperature.
7. Using an oven mitt or pot holder, grasp the handle and carefully li the top grilling
plate. Continue grilling until the bread is toasted, and food is cooked to your liking.
8. To remove your grilled panini sandwiches, always use a plastic or wooden spatula.
Figure 5 Figure 6

7
ENGLISH
FRANÇAIS ESPAÑOL
GRILLING IN THE FLAT (OR OPEN) POSITION
Cooking in the FLAT position allows for more space to grill. This configuration can be
used to grill vegetables, meats, fruits, and thinly sliced fish.
IMPORTANT: Always preheat the Panini Press and Griddler in the CLOSED position.
NOTE: When cooking on both Lower and Upper grilling plates in FLAT mode ensure
that your food is spread evenly amongst both plates. Always place the food with
longest cooking time on the Lower plate. When cooking on one plate, only use Lower
plate. In the FLAT position the Upper plate will run 75˚F cooler than the Lower plate.
WARNING: Open the grill using the handle only. Be careful not to touch any hot sur-
face such as the housing or grill plates. We recommend the use of oven mitts or pot-
holders to prevent the risk of injury. Extreme care must be used when operating this
appliance as surface temperatures get extremely hot.
1. Ensure that your drip tray is in the sliding position and fully inserted under the grill
in the center of the lower housing (see Figures 5 and 6).
2. Following the procedures outlined in the ''Operating Instructions,” raise the front
two adjustable feet. This will enable the oil to flow into the grease drain in the
center of the flattened grill plates, and then into the drip tray.
3. Before using the Panini Press and Griddler, use a pastry brush to lightly coat the
top and bottom grilling plates with vegetable oil.
4. Close the top housing and plug into a 120-volt 60Hz AC grounded outlet only.
5. The red light will turn on indicating that the appliance is preheating. Aer approxi-
mately 3 minutes, the green light will turn on indicating that the appliance is pre-
heated and ready for use.
6. Press the Grill Lock Button to create a full ribbed contact grill. Wear protective
oven mitts grasp the handle and open the Panini Press and Griddler.
Grill Lock ButtonFigure 3
7. When the grill plates are in an opened, flat position, it may be necessary to
adjust the angle of the upper grill plate. Press the grill plate down on the center
grease drain to adjust the angle
8. Center food on an open grill plate(s). CAUTION: To prevent risk of burns, always
use oven mitts. Be careful not to touch any hot surfaces such as the top housing

8
ENGLISH ESPAÑOL FRANÇAIS
or grill plates, or any hot liquid in the drip tray. Extreme care must be taken when
operating this appliance as the surface temperatures get extremely hot.
9. Allow the food on the Panini Press and Griddler to grill for 3 to 8 minutes, accord-
ing to recipe directions. Most recipes will vary in cook time and brownness. Note
the perfect grill times for each food for future use.
Note: If additional a food is to be grilled, close the Panini Press and Griddler to retain
heat.
10. When grilling is finished, remove the plug from the wall outlet and allow Panini-
Maker to cool before removing the drip tray for cleaning the unit.
ADDITIONAL OPERATING INSTRUCTIONS AND TIPS
Paninis are commonly prepared from a hearty loaf of bread. However, Panini(s) made
from the store, sliced breads or rolls can be delicious and simple to make. Experiment
with a variety of breads, tortillas, flatbreads, --even pitas. For health-conscious cooks,
the non-stick coating of the grilling plates assures a crisp and delicious toasting with-
out the use of oil or butter. The raised ridges and tilted bottom plate allow grease and
other liquids to drip off into the drip tray and away from your food.
With the Panini Grill's non-stick grill plates, it is not necessary to use butter or oil the
outside of the bread. However, spreading a small amount of butter or olive oil is rec-
ommended to encourage even browning of the bread.
NOTE: Do not use non-stick sprays as they can cause build-up on the grilling plates.
Use olive oil instead.
WARNING: Do not use non-fat spreads. They may burn and damage the non-stick
grilling plates.
Always preheat the Panini Grill before each use. Have all the ingredients at hand before
preparing the panini.
When using soft or liquid fillings, use thicker slices of breads. Try removing the inside
of the bread to create a cup form in which filing can be added.
Most fresh fruits release juice when heated. If a recipe calls for canned fruit, drain and
dry the fruit with a clean paper towel.
Avoid using processed cheeses, as they tend to melt under high temperatures.
A teaspoon of sugar sprinkled on the buttered side make the grilled panini more crispi-
er and adds flavor when using sweet fillings.
After you have removed the finished panini, close the top grill plate to retain heat while
assembling more sandwiches.
To avoid food contamination, wear oven mitts and use a soft absorbent paper towel
to wipe the grill plates, and clean after each use.

9
ENGLISH
FRANÇAIS ESPAÑOL
CARE, CLEANING, AND MAINTENANCE
Other than the cleaning mentioned in this manual, no other servicing or maintenance
of this appliance is required. Repairs, if necessary, must be performed by an autho-
rized service center. For best results, always clean your Panini Press and Griddler after
each use to prevent a buildup of baked-on foods and/or residue.
IMPORTANT:Before cleaning, remove the plug from the power outlet and allow the
unit to cool before removing the drip tray or cleaning the unit.
IMPORTANT: Never immerse the Panini Press and Griddler in water or other liquids.
Never place Panini Press and Griddler in the dishwasher.
Note: This appliance does not disasemble for cleaning. Do not attempt to remove the
grill plates from the unit.
1. Slide the removable drip tray out from the bottom of the unit. Clean the drip tray
in warm soapy water or in the top rack of your dishwasher. Always clean the drip
tray before each use and never operate the Panini Press and Griddler without the
drip tray properly in place.
2. Wipe the inside and the edges of the grilling plates with a clean, damp cloth. Do
not use abrasive cleaners. steel wool or coarse scouring pads.
3. To protect the premium quality non-stick surfaces, use only plastic, nylon or
wooden utensils.
4. To remove any butter baked onto the cooking plate, pour a small amount of
cooking oil onto the hardened butter. Allow to set for 5 minutes, and then wipe
softened butter off with a paper towel or soft cloth.
5. To remove stubborn stains, use a plastic mesh puff or pad. A clean toothbrush
works well to remove baked-on butter from the grilling plates.
6. Wipe the exterior with a clean, damp cloth.
7. Dry all parts thoroughly before using again or storing.
Note: The grilling plates should be cleaned and conditioned before each heating.
Brush non-stick grilling plates with a clean soft pastry brush or cloth to condition the
plates; lightly coat the cooking surfaces with solid vegetable shortening or vegetable
oil.
STORAGE
Make sure unit is unplugged and fully cooled. Never wrap the cord tightly around ap-
pliance. Do not put any stress on the cord where it enters the unit, as this could cause
the cord to fray and break. Store the Panini Press and Griddler in its box or stand unit
upright for an easy and compact storage.

10
ENGLISH ESPAÑOL FRANÇAIS
CUSTOMER SUPPORT
Visit our website to contact us, find answers to Frequently Asked Questions, and for
other resources which may include an updated version of this user's guide.
WWW.COURANTUSA.COM
If you wish to contact us by phone, please be sure to have your model number and
serial number ready and call us between 9:00am and 6:00pm ET, at +1 888-943-2111.
Keep tabs on Courant’s newest innovations & enter contests via our social network
feeds:
www.facebook.com/impecca/
www.instagram.com/impecca/
@impeccausa
© 2016 Courant by Impecca, a division of LT Inc., Wilkes Barre, PA.

11
ENGLISH
FRANÇAIS ESPAÑOL
Courant™ warrants this product against defects in materi-
al and workmanship to the original purchaser as specified
below. Please be sure that the product is registered online
within fourteen (14) days of purchase.
PARTS – if the product is determined to have a
manufacturing defect, within a period of one
(1) year from the date of the original purchase,
Courant™ will repair or replace the product
parts at no charge (for parts) to consumers in
the U.S.A. and Canada.
LABOR – if the product is determined to have
a manufacturing defect, within a period of
ninety (90) Days from the date of the original
purchase, Courant™ will repair or replace the
product at no charge to consumers in the U.S.A.
and Canada. Aer ninety (90) days, it will be the
responsibility of the consumer.
Shipping costs to and from our warranty service center are
the sole responsibility of the consumer.
To obtain warranty service by an authorized Courant™
service center, please email us at: service@courantusa.
com to obtain a Repair and Maintenance Authorization
(RMA) number and to locate the Warranty Service Center
nearest you. Once authorized, you must mail the product
to the authorized Courant™ service center in its original
product packaging materials or equivalent, to prevent
damage while in transit.
Further, should Courant™ determine that the product is
outside of the Warranty terms, Courant™ will return the
product to sender at sender’s expense without being re-
paired or replaced, unless authorized by the consumer
to service the out-of-warranty product at consumer’s ex-
pense. All handling or restocking charges for returns and/
or replacements shall be non-refundable.
Courant™ specifically excludes from this warranty any
non-electric/mechanical attachments, accessories, and
disposable parts including, but not limited to, outside
case, connecting cables, batteries, and AC adapters.
Courant™ reserves the right to repair or replace defective
products with the same, equivalent, or newer models.
We reserve the right to either repair or replace product at
our discretion. Replacement may be either new or refur-
bished and while every endeavor will be made to ensure
it is the same model, if same model is not available, it will
be replaced with a model of equal or higher specification.
Normal “Wear and Tear” is not covered by this, or any oth-
er, warranty. Further, Courant™ hereby reserves the right
to determine “Wear and Tear” on any and all products.
Tampering or opening the product casing or shell will void
this warranty in its entirety.
In addition, this warranty does not apply if the product
has been damaged by accident, abuse, misuse, or mis-
application; has been altered or modified without the
written permission of Courant™; has been serviced by a
non-authorized repair center of Courant™; has not been
properly maintained or operated according to the opera-
tion manual; has been used for commercial, non-house-
hold purposes; has been cosmetically damaged; was not
imported by Courant™; was not manufactured according
to specification of the United States market; was damaged
due to improper installation or neglect by the consumer;
was damaged due to improper packaging in shipment to
the Warranty Service Center; was damaged due to natural
disasters; or if the serial number for the product has been
removed or defaced.
ALL IMPLIED WARRANTIES, INCLUDING IMPLIED WAR-
RANTIES OF MERCHANTABILITY AND FITNESS FOR A
PARTICULAR PURPOSE ARE LIMITED IN DURATION TO
ONE (1) YEAR PARTS AND NINETY (90) DAYS LABOR FROM
THE DATE OF THE ORIGINAL RETAIL PURCHASE OF THIS
PRODUCT.
THESE WARRANTIES AND REMEDIES ARE THE SOLE AND
EXCLUSIVE WARRANTIES AND REMEDIES IN CONNECTION
WITH THE SALE AND USE OF THE PRODUCT. NO OTHER
WARRANTIES, ORAL OR WRITTEN, EXPRESSED OR IM-
PLIED, ARE GIVEN.
COURANT™ IS NOT RESPONSIBLE OR LIABLE FOR ANY
DAMAGE, WHETHER SPECIAL, INCIDENTAL, CONSEQUEN-
TIAL, DIRECT OR OTHERWISE, OR WHETHER KNOWN OR
SHOULD HAVE BEEN KNOWN TO COURANT™, INCLUDING
LOST PROFITS, GOODWILL, AND PROPERTY AND PER-
SONAL INJURY RESULTING FROM ANY BREACH OF WAR-
RANTY, THE INABILITY TO USE THE PRODUCT OR UNDER
ANY LEGAL THEORY IN CONTRACT OR TORT. COURANT™
LIABILITY IS LIMITED TO THE ACTUAL PURCHASE PRICE
PAID TO THE RETAIL SELLER OF THE DEFECTIVE PROD-
UCT.
No Courant™ dealer, agent, or employee is authorized to
make any modification, extension, change or amendment
to this warranty without the written consent and authori-
zation from Courant™.
Some states do not allow the exclusion or limitation of im-
plied warranties or liability for incidental or consequential
damages, or do not allow a limitation on how long an im-
plied warranty lasts, so the above limitations or exclusions
may not apply to you. This warranty gives you specific le-
gal rights, and you may have other rights, which vary from
state to state.
Note: Our Warranty Service Center ships only within Conti-
nental U.S.A., excluding Alaska and Hawaii.
ONE YEAR LIMITED WARRANTY (US)

12
ENGLISH ESPAÑOL FRANÇAIS
TABLA DE CONTENIDO
Consideraciones Importantes De Seguridad.......................................................................... 13
Introducción..................................................................................................................................14
Qué Hay En La Caja......................................................................................................................14
Instrucciones De Operación....................................................................................................... 15
Instrucciones Adicionales De Operación Y Consejos............................................................18
Cuidados, Limpieza Y Mantenimiento......................................................................................19
Soporte Al Cliente.........................................................................................................................20
Garantía Limitada De Un Año ....................................................................................................21
INSTRUCCIONES ESPECIALES PARA EL CABLE
Se debe utilizar un cable corto de suministro de energía (o un cable de suministro de energía
desmontable) para reducir el riesgo de enredarse con un cable más largo o tropezarse con él.
Hay disponibles cables de suministro de energía desmontables más largos o extensiones y
pueden ser utilizados. Si se utiliza un cable de suministro de energía desmontable más largo o
extensión, el calibre eléctrico señalado en este cable de suministro de energía desmontable o
extensión debe se igual o mayor al indicado en la unidad.
El cable debe acomodarse de tal forma que no cuelgue sobre la encimera o mesa donde puede
ser jalado por algún niño o que alguien tropiece con él.
AVISO
Este electrodoméstico cuenta con un enchufe polarizado (una pata es más ancha que la otra).
Para reducir el riesgo de una descarga eléctrica, este enchufe está destinado para conectarse
en un tomacorrientes polarizado de una sola forma. Si el enchufe no cabe por completo en el
tomacorrientes, dele la vuelta al enchufe. Si aún así no puede conectarlo, entre en contacto con
un electricista calificado. No intente modificar el enchufe en ninguna forma.

13
ENGLISH
FRANÇAIS ESPAÑOL
CONSIDERACIONES IMPORTANTES DE SEGURIDAD
Las siguientes son consideraciones básicas de seguridad que debe de seguir
cuidadosamente cuando utilice su nueva Prensa y Plancha para Panini Courant. ¡Lea
todas las instrucciones cuidadosamente! Courant no es responsable por daños o
lesiones causadas por un uso inadecuado de este electrodoméstico.
GENERAL SAFETY
1. LEA TODAS LAS INSTRUCCIONES.
2. Antes de utilizar este electrodoméstico retire cualquier material de empaque
3. No toque las superficies calientes. Utilice asas o perillas. Utilice guantes para cocina
ya que las placas de la parrilla se calientan muchísimo..
4. No coloque cerca de una estufa eléctrica o de gas o de un horno caliente.
5. Se debe de tener muchísimo cuidado cuando se maneja un electrodoméstico que
contiene aceite caliente u otro líquido caliente.
6. Primero conecte el cable de alimentación al electrodoméstico y luego conéctelo a
un tomacorrientes. Para desconectar, primero coloque el interruptor en la posición
OFF y después desconecte del tomacorrientes.
7. Para protegerse de descargas eléctricas no sumerja el electrodoméstico o su cable
de alimentación en agua u otros líquidos.
8. Se requiere de supervisión cercana cuando este electrodoméstico está siendo utili-
zado por un niño o cerca de niños.
9. Mantenga este electrodoméstico y su cable lejos del alcance de niños menores de 8 años.
10. Siempre utilice la Prensa y Plancha para Panini sobre una superficie seca y nivelada.
11. Si el cable de suministro se daña, para evitar daños debe reemplazarse por el fabri-
cante, su agente de servicios o una persona calificada similar.
12. El electrodoméstico debe estar aterrizado.
13. No se recomienda el uso de accesorios no recomendados por el fabricante del elec-
trodoméstico ya que pueden causar daños.
14. Retire el enchufe del tomacorrientes antes de limpiar y cuando no se use. Permita
que el electrodoméstico se enfríe completamente antes de poner o quitar los com-
ponentes o antes de limpiar.
15. No opere este electrodoméstico con un cable o enchufe dañado o después que el
electrodoméstico ha fallado, se ha caído o está dañado en cualquier forma. Regrese
el electrodoméstico al centro de servicio más cercano para que sea examinado,
reparado o ajustado eléctrica o mecánicamente.
16. Un uso no recomendado de este producto por el fabricante puede causar daños a
las personas o al mismo electrodoméstico.
17. Coloque el electrodoméstico en una superficie o mesa plana. No deje que el cable
cuelgue sobre la orilla de la mesa o encimera. Asegúrese que el cable de alimenta-
ción no toque ninguna superficie caliente del electrodoméstico.
18. No utilice este electrodoméstico para otro uso diferente al previsto.
19. No se use en exteriores.
GUARDE ESTAS INSTRUCCIONES
PARA SU REFERENCIA A FUTURO
ÚNICAMENTE PARA USO DOMÉSTI
CO

14
ENGLISH ESPAÑOL FRANÇAIS
INTRODUCCIÓN
GraciasporcomprarestaPrensayPlanchaparaPaniniSMOOSHdecalidadCourant.LaPren-
sa yPlanchapara PaniniSMOOSHde Courantfue diseñadaconunasa ybisagras únicasque
posicionan lasplacas dela prensa para queseajustenalgrosor delsándwich locualpermite
un tostado y calentado uniforme. Siga cuidadosamente estas instrucciones de operación.
Conserve estas instrucciones en un lugar seguro y consúltelas tanto como lo requiera.
QUÉ HAY EN LA CAJA
Verifique que dentro de la caja se encuentren los siguientes artículos. Tome en cuenta
que algunos modelos pueden no contar con todos los artículos.
SMOOSH Panini Press and Griddler— User’s Guide
Prensa y Plancha para Paninis SMOOSH— Manual De Usuario
SMOOSH Gril Presse-Paninis— Manuel de l’utilisateur
www.courantusa.com
v.1.7
CPP-4140 4-slice/4 rebanadas/4 tranches
Models:
CPP-2100 2-slice/2 rebanadas/2 tranches
❶ ❷ 1. Prensa para Panini
2. Guia de Usuario
12
3
4
5
6
7
8
9
10
1. Asa
2. Carcasa superior
3. Botón de bloqueo de la parrilla
4. Drenado para la grasa
5. Enchufe polarizado
6. Charola desmontable para
escurrimientos
7. Luz verde indicadora de preca-
lentamiento
8. Luz roja indicadora de encen-
dido
9. Patas ajustables
10. Placas de la parrilla antiadhe-
rentes (superior e inferior)
Nota: La unidad se muestra es sólo para fines ilustrativos. Su modelo puede tener un aspec-
to diferente.

15
ENGLISH
FRANÇAIS ESPAÑOL
INSTRUCCIONES DE OPERACIÓN
ANTES DEL PRIMER USO
Le recomendamos que realice una “puesta en marcha de prueba” a temperatura alta
para eliminar cualquier sustancia protectora o aceite que pueda haberse utilizado
para el empaque y envío.
1. Desempaque con cuidado su Prensa Panini y retire todas las etiquetas y materiales
de empaque.
2. Revise que las planchas de la parrilla están limpias y sin polvo. Puede limpiar el
cuerpo de la Prensa y Plancha Panini con un paño limpio y húmedo. Nunca utilice
fibras o esponjas metálicas o materiales abrasivos en las placas de la Prensa Panini ya
que esto puede dañar las superficies antiadherentes. No sumerja la Prensa Panini, ni
su cable o clavija en agua o en otro líquido.
3. Coloque la Prensa y Plancha Panini en una superficie limpia, nivelada y estable.
4. Enchufe su unidad en un tomacorrientes estándar de pared de 120v y deje que la
Prensa Panini funcione por 10 a 15 minutos. Tal vez note un poco de humo saliendo
de la Prensa Panini durante la fase inicial. Esto es normal durante la “puesta en mar-
cha de prueba” y puede ocurrir las primeras dos o tres veces que utilice el electro-
doméstico.
UTILIZANDO SU PRENSA PANINI
Su nueva Prensa Panini puede utilizarse en dos diferentes configuraciones de parrilla: la
posición de contacto (ver la Figura 1) y la posición plana (ver Figura 2).
Cuando cocine alimentos que contengan mucha grasa o aceites, le recomendamos
levantar las patas ajustables de la Prensa y Plancha Panini para asegurar que la grasa
se vaya hacia el canal de escurrimientos en la parte trasera de la parrilla hacia la
charola para escurrimientos. Para levantar las patas ajustables, deslice hacia afuera la
pata a la posición levantada como se muestra a continuación.
Figure 1
Figure 2

16
ENGLISH ESPAÑOL FRANÇAIS
COCINANDO EN LA POSICIÓN DE CONTACTO (POSICIÓN CERRADA)
Cocinar en la posición de CONTACTO (ver Figura 1) permite que tanto la placa SUPERI-
OR y la INFERIOR entren en contacto con los alimentos. Los alimentos se cocinan más
rápido de esta forma que en la parrilla de cocción tradicional abierta. La grasa drena
hacia el canal de escurrimientos en la parte trasera hacia un COMPARTIMENTO PARA
ESCURRIMIENTOS. Esta posición se utiliza comúnmente para asar sándwiches, filete,
hamburguesas, pollo y pescado. Esta posición se utiliza mejor con panes gruesos y
con costra, como el pan francés, italiano y focaccia. La placa superior oprimirá y asará
un panini a la perfección en unos 3 minutos (depende del pan, relleno y gusto person-
al).
1. Asegúrese que la charola de escurrimientos esté en la posición deslizable y
totalmente inserta debajo de la parrilla al centro de la parte inferior de la carcasa
(Figuras 5 y 6).
2. Antes de usar la Prensa y Plancha para Panini, utilice una brocha de pastelería y
cubra ligeramente las placas superior e inferior con un poco de aceite vegetal.
3. Cierre la tapa superior y conecte exclusivamente a un tomacorrientes de 120 Volts
60 HZ AC.
4. La luz roja se encenderá indicando que el electrodoméstico se está precalentando.
Aproximadamente después de 3 minutos, la luz verde se encenderá indicando que
el electrodoméstico ha sido precalentado y está listo para usarse.
5. Coloque los alimentos a cocinar en la placa INFERIOR de la parrilla. Utilice el asa
para bajar la tapa y cocinar los alimentos de acuerdo a la temperatura deseada.
No aplique una fuerza excesiva para cerrar la tapa; las placas de la parrilla simple-
mente deben descansar sobre los alimentos al realizar la cocción.
6. Para asegurar un panini perfectamente asado a la parrilla, todos los sándwiches
que se coloquen en la plancha para panini al mismo tiempo deben tener el mismo
grosor. Asegúrese que la placa superior toca de manera uniforme la parte de arriba
de todos los panes. Asegúrese que los sándwiches estén centrados en la placa de
la parrilla. Si se desea presione ligeramente el asa varias veces durante el tiempo
de cocción.
NOTA: La luz indicadora VERDE (LISTO) se prenderá y apagará durante la
cocción. Esto indica que el termostato está manteniendo la temperatura
adecuada de cocción.
7. Utilizando un guante de cocina o agarradera para ollas, agarre el asa y levante
cuidadosamente la tapa superior. Continúe asando hasta que el pan quede tosta-
do, la comida esté cocinada a su gusto.
8. Para retirar sus sándwiches paninis de la plancha siempre utilice una espátula de
plástico o madera.
Figure 5 Figure 6

17
ENGLISH
FRANÇAIS ESPAÑOL
COCINANDO EN LA POSICIÓN PLANA (POSICIÓN ABIERTA)
Cocinar en la posición PLANA le permite contar con más espacio para asar. Esta
posición puede utilizarse para asar verduras, carnes, frutas y pescado en rebanadas
delgadas.
IMPORTANTE: Asiempre precaliente la Prensa y Plancha Panini en la posición CERRADA
NOTA: Cuando cocine en las placas de la parrilla superior e inferior en la posición
PLANA asegúrese que sus alimentos estén colocados de forma uniforme en ambos
platos. Siempre coloque los alimentos con el tiempo de cocción más largo en la placa
inferior. Cuando cocine una sola placa, utilice la placa inferior. En la posición PLANA la
placa superior opera 75°F más fría que la placa inferior.
ADVERTENCIA: Abra la parrilla utilizando únicamente el asa. Cuide de no tocar nin-
guna superficie caliente como la carcasa o las placas de la parrilla. Recomendamos el
uso de guantes para cocina o agarraderas para ollas para evitar el riesgo de daños. Se
debe tener mucho cuidado cuando utilice este electrodoméstico ya que la tempera-
tura de la superficie se calienta muchísimo.
1. Asegúrese que la charola de escurrimientos esté en la posición deslizable y total-
mente inserta debajo de la parrilla en al centro de la parte inferior de la carcasa
(Figuras 5 y 6).
2. Siga los procedimientos señalados en las “Instrucciones de operación”, levantan-
do las dos patas ajustables. Este permitirá que la grasa se vaya hacia la parte
central de las placas de las parrillas (en la posición PLANA), y hacia la charola para
escurrimientos
3. Antes de usar la Prensa y Plancha para Panini, utilice una brocha de pastelería y
cubra ligeramente las placas superior e inferior con un poco de aceite vegetal.
4. Cierre la tapa superior y conecte exclusivamente a un tomacorrientes de 120 Volts
60 HZ AC.
5. La luz roja se encenderá indicando que el electrodoméstico se está precalentan-
do. Aproximadamente 3 minutos después, la luz verde se encenderá indicando
que el electrodoméstico ha sido precalentado y está listo para usarse.
6. Presione el botón de bloqueo de la parrilla para crear una parrilla uniforme. Uti-
lice guantes protectores para agarrar el asa y abrir la Prensa y Plancha para Panini.
Botón de bloqueo de la parrillaFigura 3
7. Cuando las placas de la parrilla estén en una posición abierta y plana, puede ser
necesario ajustar el ángulo de la parrilla superior. Presione hacia abajo en el ca-
nal de drenado central para ajustar el ángulo.

18
ENGLISH ESPAÑOL FRANÇAIS
8. Centre los alimentos sobre las placas abiertas de la parrilla. PRECAUCIÓN: para
evitar el riesgo de quemaduras siempre utilice guantes de cocina. Cuide de no
tocar ninguna superficie caliente como la parte superior de la carcasa o las plac-
as de la parrilla, o cualquier líquido caliente en la charola para escurrimientos.
9. Permita que los alimentos en la Prensa y Plancha para Panini se cocinen de 3 a 8
minutos, de acuerdo a las instrucciones de las recetas. La mayoría de las recetas
varían en el tiempo de cocción y nivel de dorado. Tome en cuenta los tiempos
perfectos de cocción para cada alimento para usarlos a futuro.
Nota: Si se va a utilizar la parrilla nuevamente, cierre la Prensa y Plancha para Panini
para conservar el calor.
10. Cuando termine la cocción desconecte el enchufe del tomacorriente y permita
que la Prensa y Plancha para Panini se enfríe antes de retirar la charola de escur-
rimientos para limpiar la unidad.
INSTRUCCIONES ADICIONALES DE OPERACIÓN Y CONSEJOS
Normalmente los paninis se preparan de una lonja de pan gruesa. Sin embargo los
paninis preparados en las tiendas, panes rebanados o rollos pueden ser deliciosos y
simples de hacer. Experimente con una variedad de panes, tortillas, panes planos… e
incluso pan pita. Para cocción consiente de la salud, la capa antiadherente de las plac-
as de la parrilla aseguran un tostado crujiente y delicioso sin el uso de mantequilla o
aceite. Los bordes levantados y la placa inferior inclinada permiten que la grasa y otros
líquidos escurran en la charola para escurrimientos y lejos de sus alimentos.
Con placas de la plancha antiadherentes del Panini Grill , no es necesario el uso de
mantequilla o aceite de la parte exterior del pan. Sin embargo , se recomienda la di-
fusión de una pequeña cantidad de mantequilla o aceite de oliva para fomentar un
color dorado del pan .
NOTA: No utilice aerosoles antiadherentes ya que pueden acumularse en las placas de
la parrilla. En lugar de eso, utilice aceite de oliva.
ADVERTENCIA: No utilice sustancias untables no grasas. Pueden quemar y dañar la
superficie antiadherente de las placas de la parrilla.
Cuando utilice rellenos suaves o líquidos utilice rebanadas de pan gruesas. Trate de
remover la parte interna del pan (migajón) para formar un recipiente en donde se
puede agregar el relleno.
La mayoría de las frutas frescas liberan líquidos cuando se calientan. Si una receta
pide fruta enlatada, drene y seque la fruta con una toalla de papel limpia.
Una cucharada de azúcar espolvoreada en el lado con mantequilla hace que el panini
a la parrilla sea más crujiente y agrega sabor cuando se utilizan rellenos dulces.
Una vez que ha retirado el panini terminado, cierre la placa superior de la parrilla para
retener el calor, mientras prepara más sándwiches.
Para evitar la contaminación de los alimentos , use guantes de cocina y usar una
toalla de papel absorbente suave para limpiar las placas de la parrilla , y limpia
después de cada uso.

19
ENGLISH
FRANÇAIS ESPAÑOL
CUIDADOS, LIMPIEZA Y MANTENIMIENTO
Además de la limpieza mencionada anteriormente en este manual, este electro-
doméstico no requiere de servicio o mantenimiento. Las reparaciones, en caso de ser
necesarias, deben ser realizadas por un centro de servicio autorizado. Para mejores
resultados, siempre limpie su Prensa y Plancha para Paninis después de cada uso
para evitar acumulaciones de alimentos ya preparados y/o residuos.
IMPORTANTE:Antes de limpiar, desconecte el enchufe del tomacorrientes y permita
que la Prensa y Plancha para Panini se enfríe antes de retirar la charola de escur-
rimientos o limpiar la unidad.
IMPORTANTE: Nunca sumerja la Prensa y Plancha para Panini en agua u otros líqui-
dos. Nunca coloque la Prensa y Plancha para Panini dentro de la lavadora de platos.
Nota: Este electrodoméstico no se desarma para limpiarse. No intente retirar las
placas de la parrilla de la unidad.
1. Deslice la charola de escurrimientos desmontable de la parte inferior de la unidad.
Limpie la charola con agua tibia jabonosa o en la parte superior de la lavadora de
platos. Antes de cada uso limpie la charola de escurrimientos y nunca utilice la
Prensa y Plancha para Panini sin esta charola.
2. Limpie la parte interna y las orillas de las placas de la parrilla con un paño limpio y
húmedo. No utilice limpiadores abrasivos, o esponjas metálicas o abrasivas.
3. Para proteger la excelente calidad de las superficies antiadherentes, solamente
utilice utensilios de madera, nylon o plástico.
4. Para retirar cualquier acumulación de mantequilla horneada de las placas, vierta
una pequeña cantidad de aceite sobre la mantequilla endurecida. Deje que
repose por 5 minutos y después limpie la mantequilla suavizada con una toalla de
papel o paño húmedo.
5. Para remover manchas difíciles utilice una esponja de malla o paño. Un cepillo de
dientes limpio funciona bien para retirar mantequilla pegada en las palcas de la
parrilla.
6. Limpie el exterior con un paño limpio y húmedo.
7. Seque totalmente todas las partes antes de volver a usar el electrodoméstico o
almacenarlo.
Nota: Las placas de la parrilla deben ser limpiadas y acondicionadas antes de calen-
tarlas. Acondicione las placas antiadherentes de la parrilla untándoles una capa ligera
de aceite vegetal o manteca vegetal con un cepillo de pastelería suave o un paño.
ALMACENAMIENTO
Asegúrese que la unidad está desconectada y totalmente fría. Nunca enrolle el cable
de forma apretada alrededor del electrodoméstico. No jale el cable de la parte en
donde se conecta a la unidad ya que esto causará que se troce y se rompa. Almacene
la Prensa y Plancha para Panini en su caja o en forma vertical para un almacenamiento
fácil y compacto.

20
ENGLISH ESPAÑOL FRANÇAIS
SOPORTE AL CLIENTE
Visite nuestro sitio web para entrar en contacto con nosotros, encontrar respuestas a
las Preguntas Más Frecuentes y otros recursos entre los cuales podría encontrar una
actualización a este manual.
WWW.COURANTUSA.COM
Si desea entrar en contacto con nosotros por teléfono, asegúrese de tener a la mano
el número de modelo y el número de serie de su equipo y llámenos entre 9:00am y
6:00pm Tiempo del Este al +1 888-943-2111.
Manténgase al tanto de las más recientes innovaciones de Courant y participe de nues-
tros concursos por medio de los medios sociales:
www.facebook.com/courant/
www.instagram.com/courant/
@impeccausa
© 2016 Courant por Impecca, una división de LT Inc., Wilkes Barre, PA.
This manual suits for next models
2
Table of contents
Languages:
Other Impecca Kitchen Appliance manuals