IMPETUS iv500 User manual
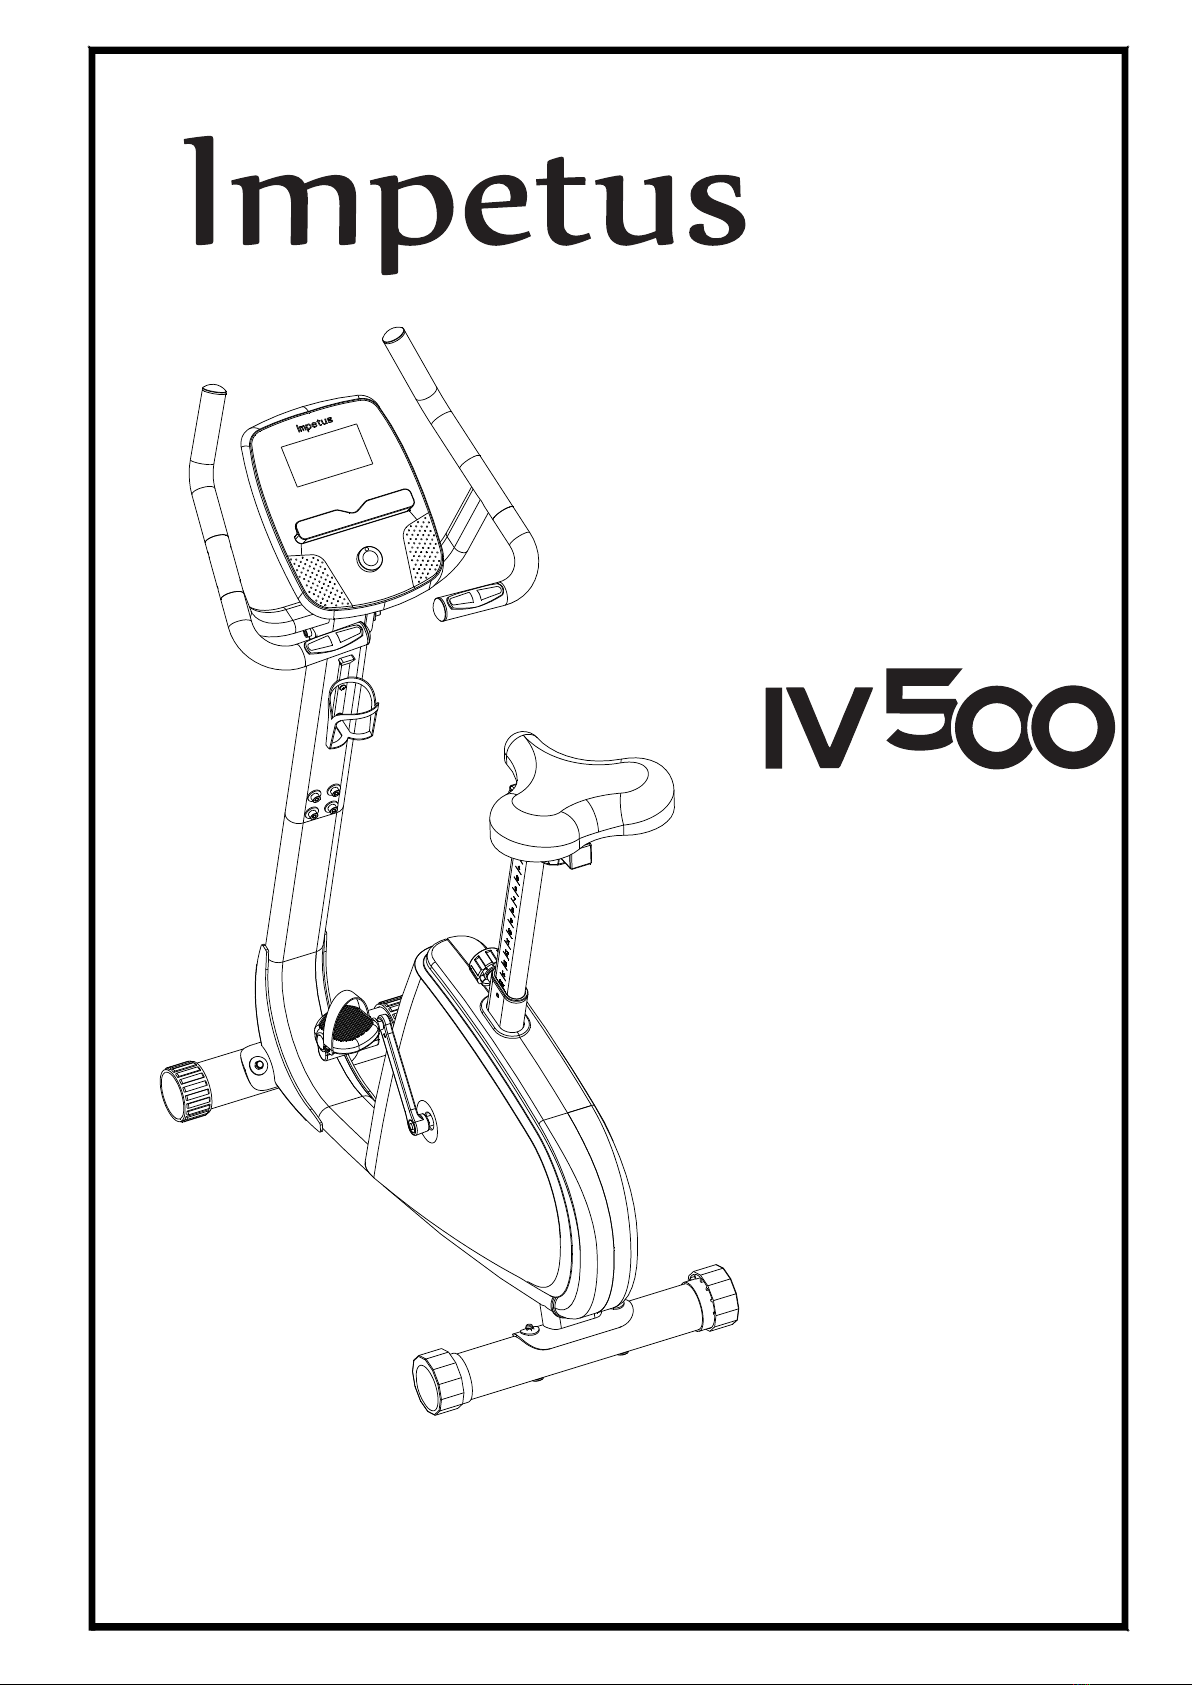
USER MANUAL

INTRODUCTION / IMPORTANT INFORMATION
PACKING LIST
HARDWARE PACK PACKING LIST
ASSEMBLY INSTRUCTIONS
SEAT ADJUSTMENT
HOW TO MOVE THE TRAINER
HOW TO ADJUST THE BALANCE OF THE TRAINER
EXPLODED VIEW
PART LIST
WARM-UP / COOL DOWN
CLEANING & MAINTENANCE
3
5
5
6
9
10
10
11
12
13
14
2

3
A. Introduction
This user manual contains assembly, operation, maintenance and safety
information.
Please read and retain this manual for future reference.
B. Safety guidelines
a. Read the user manual and all accompanying literature. Follow it carefully
before using your machine.
b. This machine is intended for indoor home or commercial location use only.
c. Inspect your exercise machine prior to exercising to ensure that all parts are
tightened.
d. Make sure the trainer is stable on the floor. Avoid uneven surfaces.
e. Keep children under age of 14 and pets away from the exercise trainer at all
times.
f. Exercise equipment has moving parts. Keep others, especially children, at a
safe distance while exercise.
g. Make sure all devices are fully adjusted before use to avoid injury.
h. Remove all jewelry, including rings, chains and pins before exercising.
i. Always wear suitable clothing and footwear during exercise. Do not wear
loose fitting clothing that could become caught in the moving parts of your
exercise machine.
j. Warm up 5 to 10 minutes before each workout and cool down 5 to 10 minutes
afterward. This allows your heart rate to gradually increase and decrease and
will help prevent muscle strain.
k. Never hold your breath while exercising. You should breathe at a normal rate
in conjunction with the level of exercise being performed.
l. Rest adequately between workouts. Muscles tone and develop during these
rest periods.
INTRODUCTION / IMPORTANT INFORMATION

4
IMPORTANT:
THE MAXIMUM RECOMMENDED WEIGHT CAPACITY FOR YOUR
EQUIPMENT IS KGS.
WARNING:
Before commencing with any exercise program, please consult your
family physician. If at any time during exercise you feel faint, dizzy or
experience pain, stop and consult your family physician.
The safety level of the equipment can be maintained only if it is examined
regularly for damaged and wear.
The appliances are not for children under age of 14.
IMPORTANT:
Read all instructions carefully. Assemble the unit in accordance with the
steps in the manual. Lay out all parts on the floor and check if you have all
the parts included completely before beginning assembly. In case of a
discrepancy, please contact the customer service department
150

M10*90mm Screw- 4pcs
M10 Locknut- 4pcs
M10 Arc Washer- 4pcs
Wrenches & screw driver
Main frame
Handlebar post
Water bottle holder
Console Handlebar
Front stabilizer Rear stabilizer Seat Seat holder Pedal ( L )
Pedal ( R)
5
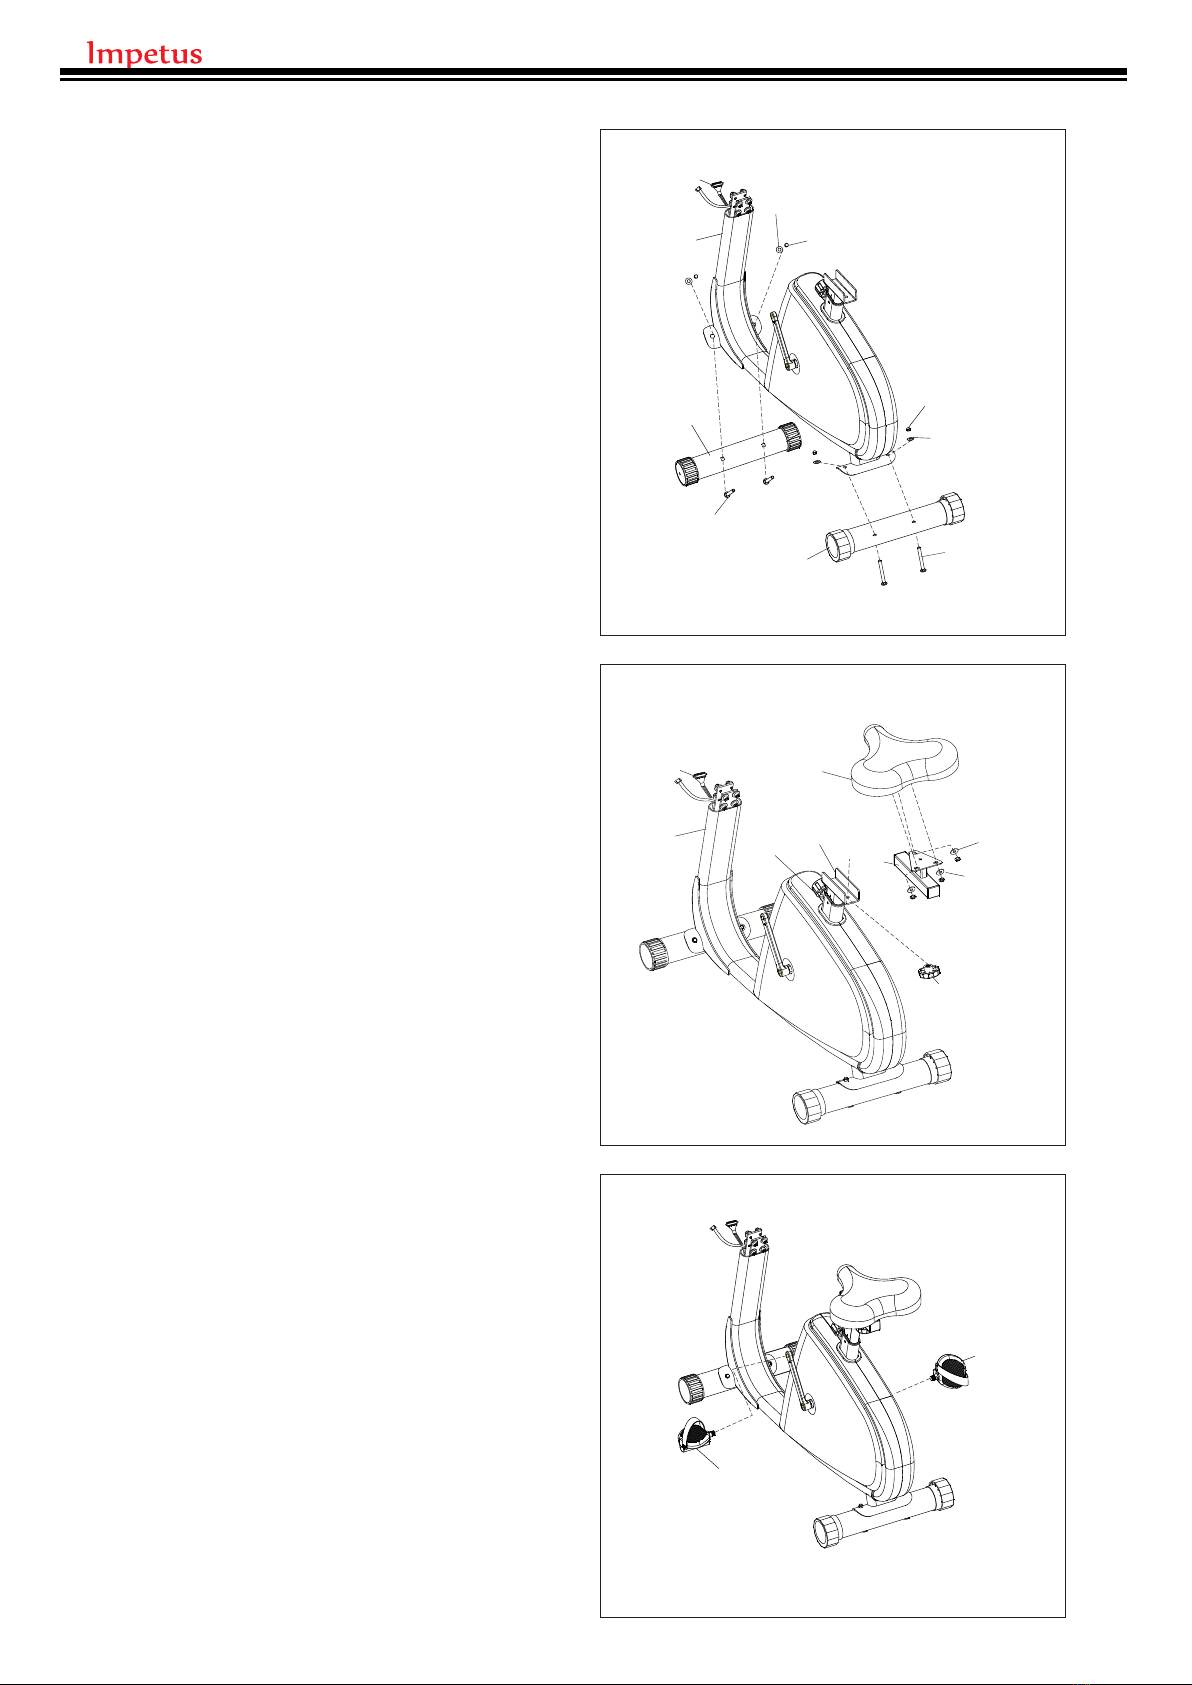
STEP 1
Join FRONT STABILIZER (04) and REAR
STABILIZER (02) to the MAIN FRAME (01)
using 4 BOLTS (15), 4 WASHERS (65) and 4
NUTS (16).
ASSEMBLY INSTRUCTIONS
STEP 2
1. Attach the SEAT (08) to the SEAT
CARRIAGE (07) using 3 WASHERS
(25) & 3 NUTS (23).
2. Install it on top of the SEAT POST (06)
using KNOB (26).
STEP 3
1. Tighten the RIGHT PEDAL (14R)
clockwise into the RIGHT CRANK.
2. Tighten the LEFT PEDAL (1 4L)
counter-clockwise into the RIGHT
CRANK.
14L
14R
15
04
01
65
16
02
16
15
65
29
01
08
06
21 07 25
23
26
29
6
STEP 4
1. Connect the UPPER WIRE (30) to the
LOWER WIRE (29).
2. Slide the HANDLEBAR POST (09) onto
the MAIN FRAME (01) using 8 BOLTS
(28) and 8 WASHERS (75).
STEP 5
1. Insert the PULSE WIRE (31) upward
through the HANDLEBAR POST (09).
2. Attach the HANDLEBAR (10) to the
HAN D L EBAR PO S T ( 0 9) usin g 2
WASHERS (72) and 2 SCREWS (28).
3. Repeat the above steps for the other
side.
09
30
28
29
75
01
30
10
31
28
72
09
STEP 6
1. Remove the top 2 SCREWS (32) on the
CONSOLE (13), and loosen the bottom 2
without removing them.
2. Insert 5 batteries into the CONSOLE(13)
as the graph shown.
32
13
13
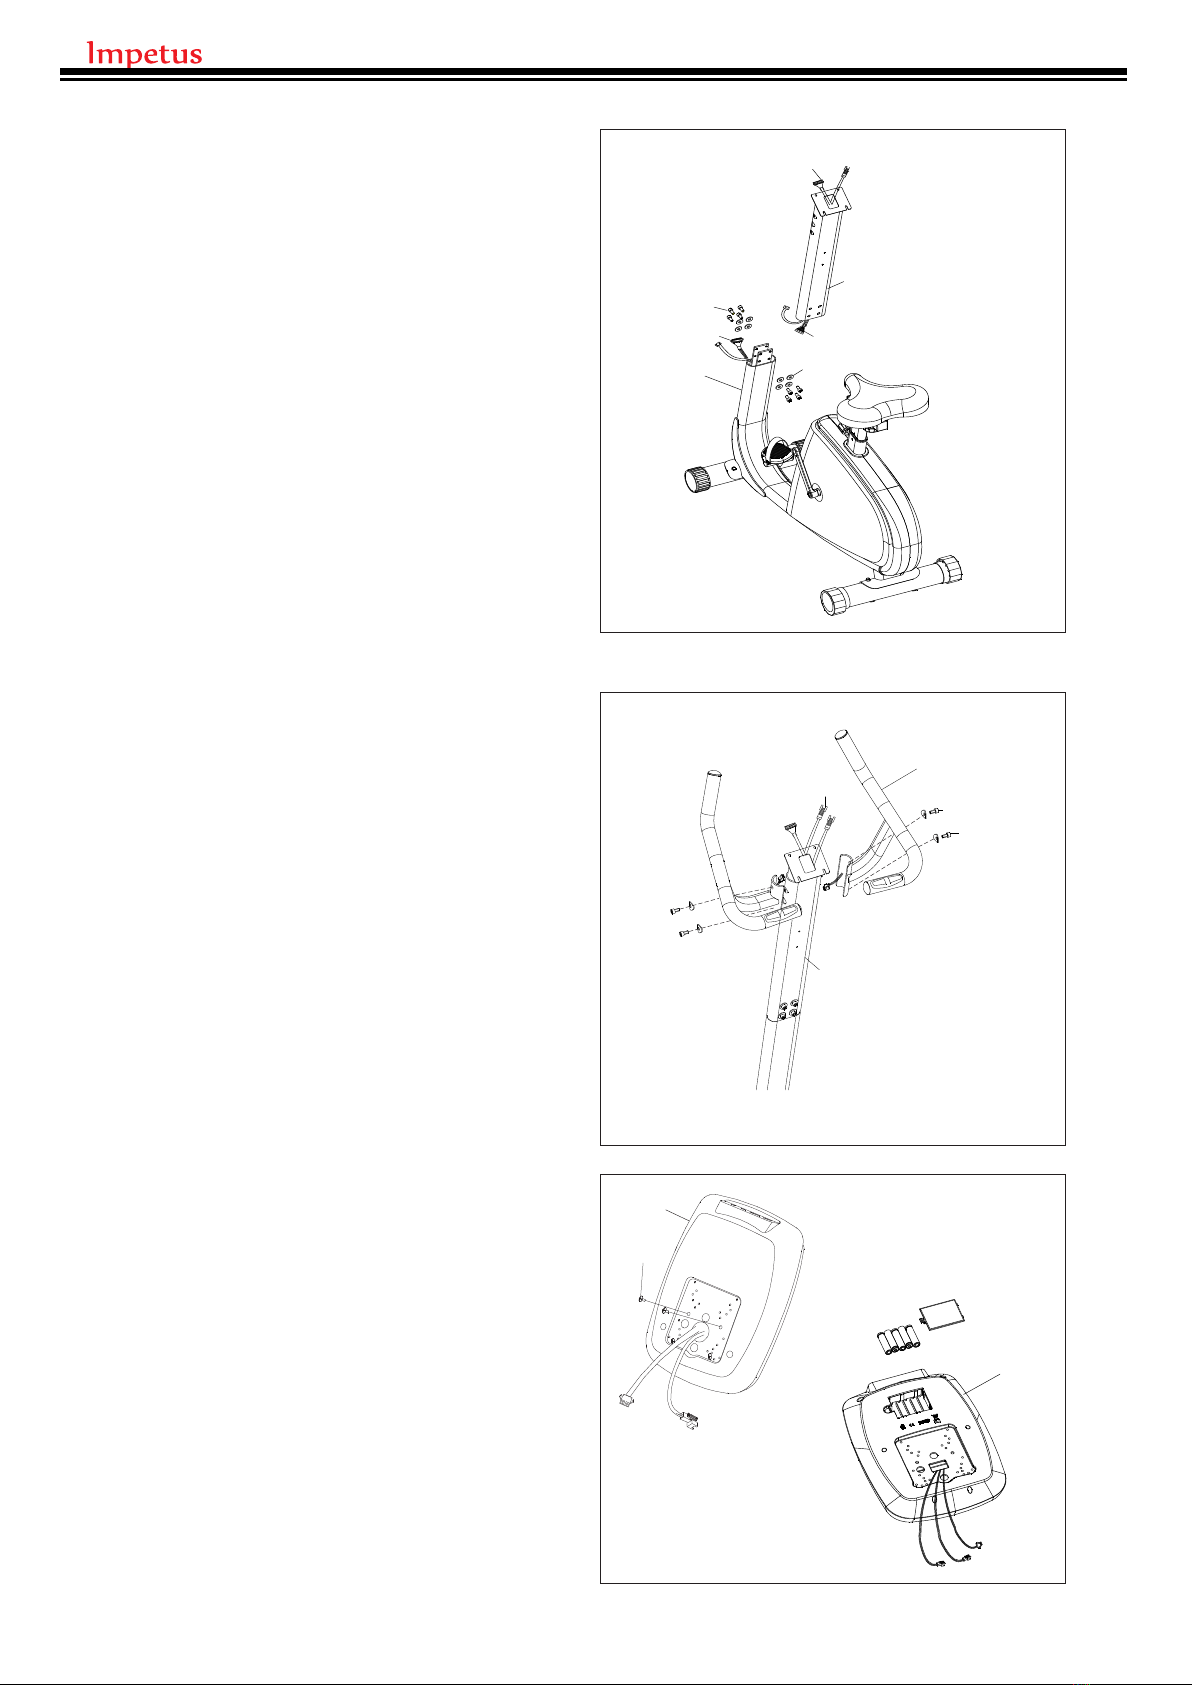
7
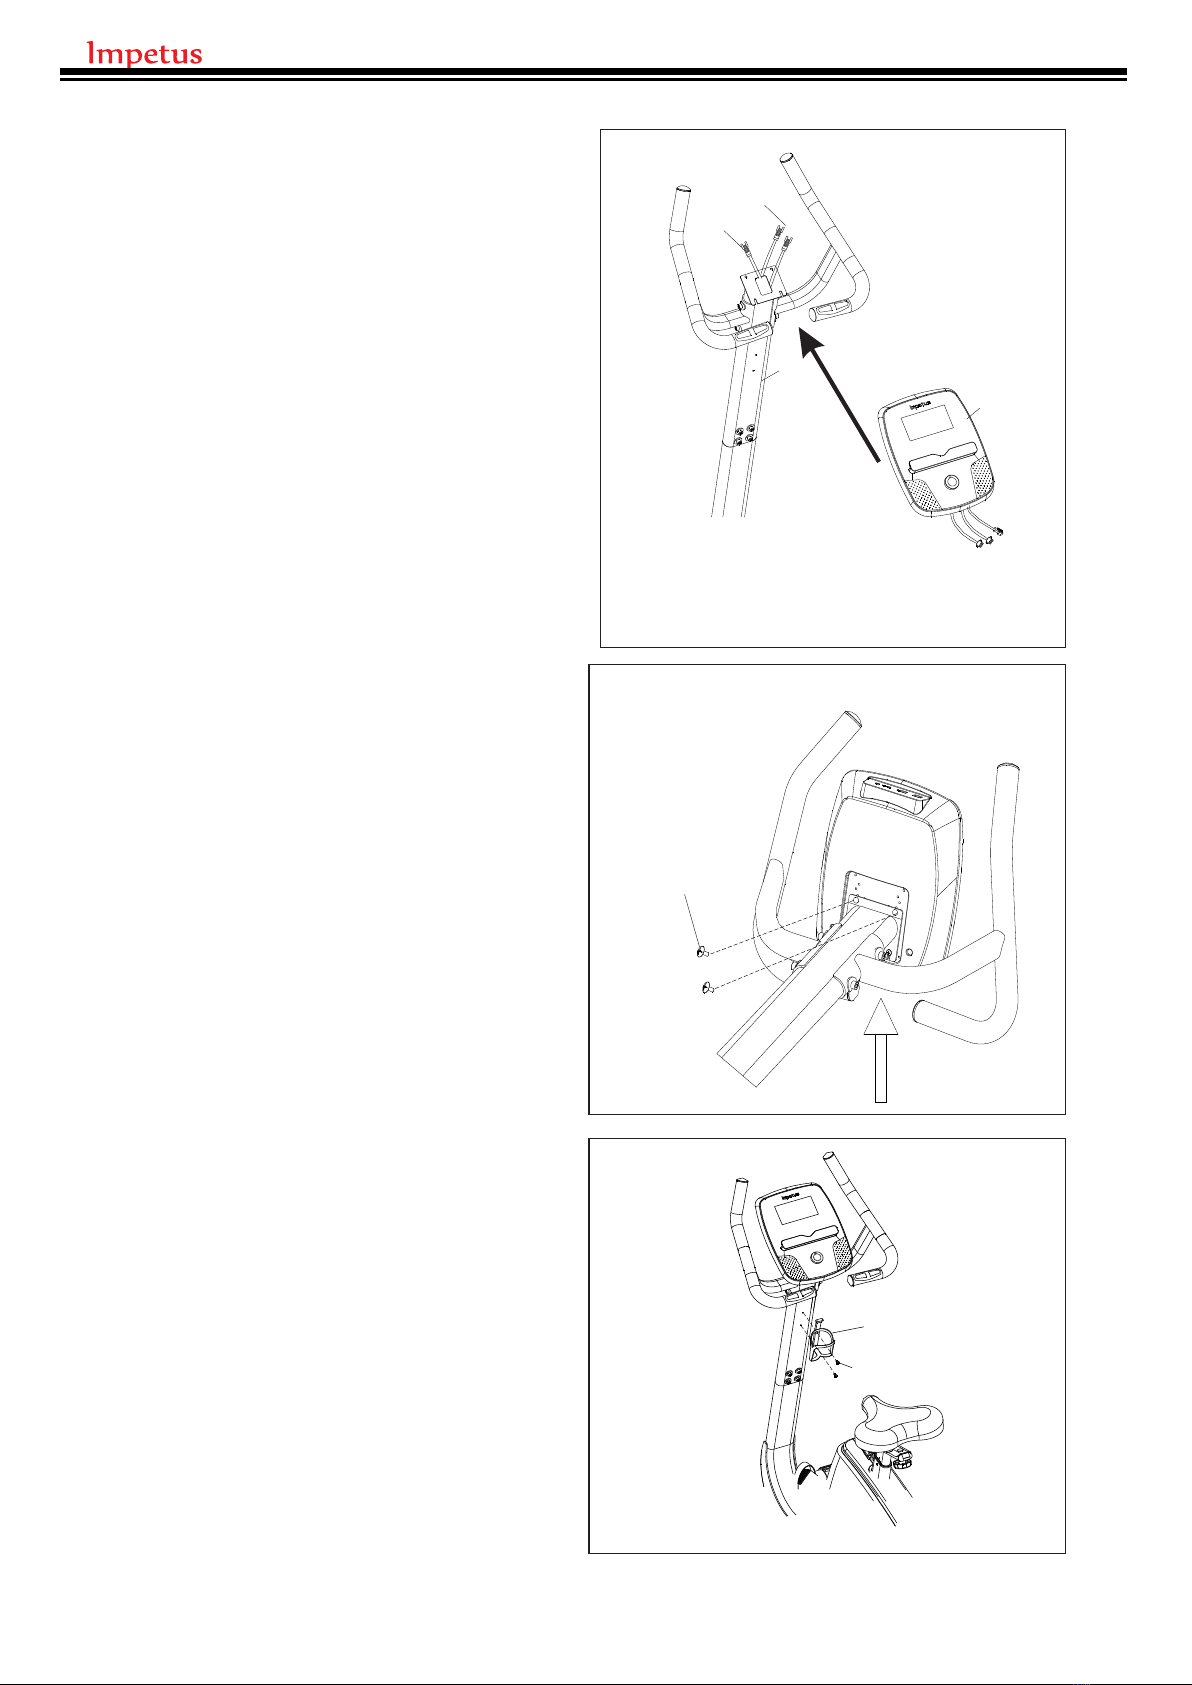
STEP 7
1. Connect the WIRES (30 & 31) to the
CONSOLE (13).
2. Slide in the CONSOLE (13) to the
HANDLEBAR POST (09) as the arrow
indicated.
STEP 8
1. Attach the CONSOLE (13) to the
HANDLEBAR POST (09) using 2
SCREWS (32) removed earlier.
2. Adjust the alignment of the CONSOLE
(13) before tightening the bottom 2
SCREWS (32).
32
STEP 9
Attach the WATER BOTTLE HOLDER
(76) to the HANDLEBAR POST (09)
using 2 SCREWS (77).
31
30
09
13
76
77
8

9

HOW TO MOVE THE TRAINER
HANDLE
FRONT STABILIZER
1. Stand in front of the trainer, pull the trainer up while one of your feet stepping on the
front stabilizer.
2. Move the trainer to your designated position while lifting the trainer.
3. Carefully let down the trainer.
TRANSPORT WHEEL
HOW TO ADJUST THE BALANCE OF THE TRAINER
Make sure the trainer is placed on the flat floor, and rotate the leveling foot clockwise or
counter-clockwise, so the leveling foot touches the floor.
ADDITIONAL INFORMATION
1. The trainer requires an 9V, 1.3A adaptor.
2. When the trainer is idle for 4 minutes, it enters power save mode, and the workout result
is stored until the next workout.
3. To reset the console, re-plug in the adaptor.
10

WARM UP / COOL DOWN
Suggested Stretches
The following stretches provide a good warm-up and cool-down. Move slowly
as you stretch.
Ham String Stretch
Sit with one leg extended. Bring the sole of the
opposite foot toward you, resting it against the
extended leg's inner thigh. Stretch toward your toe as
far as possible, hold for 15 counts, then relax. Repeat
three times for both legs. .
Stretches: Hamstring, Lower Back and Groin
Inner Thigh Stretch
Sit with the soles of your feet together and knees
pointing outward. Pull your feet as close into the groin
area as possible. Hold for 15 counts, then relax. Repeat
three times.
Stretches: Quadriceps and Hip Muscles
Toe Touches
Stand with your knees bend slightly, slowly bend forward
from the hips. Allow your back and shoulders to relax as
you stretch down toward your toes. Go as far as you can
and hold for 15 counts, then relax. Repeat three times.
Stretch: Hamstring, Back of Knees, Back
Quadriceps Stretch
Stand on one foot with one hand hold onto the wall to
balance, raise the other foot behind you, and pull up your
foot as close to your buttocks as possible. Hold for 15
counts, then relax. Repeat three times.
Stretch: Quadriceps muscles, Hip muscle
Calf/Achilles Stretch
Stretch: Lower legs, Achilles tendons, and Ankles
With one leg in front of the other and arms out, lean
against the wall. Keep your back leg straight and back
foot flat on the ground; then bend the front leg and lean
forward by moving your hips toward the wall. Hold, then
repeat on the other side. To cause even further
stretching the Achilles tendons, slightly bend back leg as
well.
13

14

15
Table of contents
Other IMPETUS Exercise Bike manuals


