imtera IVEW360 Setup guide

RECORDER
SafetyandInstallationManual

RecorderInstallationManualv3.34 Page2
©Copyright20052006.Allrightsreserved.Allothertrademarksandcopyrightsreferredtohereinare
thepropertyoftheirrespectiveholders.Nopartofthisdocumentationmaybereproducedinanyform
orbyanymeansorusedtomakeanyderivativework,withoutwrittenpermissionfromthecopyright
holder,detailsofwhomcanbeobtainedfromIVIEWDigitalVideoSolutions.Thisdocumentissubject
tochangewithoutwrittenpriornotice.WhilstIVIEWDigitalVideoSolutionsmakeseveryeffortto
ensuretheaccuracyandreliabilityoftheinformationcontainedinthisdocument,itsemployeesand
agentswillnotberesponsibleforanyloss,howeverarising,fromtheuseof,orrelianceon,this
information.
LegalNotice:Partsofthisproductareprotectedbypatents.

RecorderInstallationManualv3.34 Page3
ElectromagneticCompatibility(EMC)
Warning
ThisisaClassAproduct.Inadomesticenvironmentthisproductmaycauseradiointerference,in
whichcasetheusermayberequiredtotakeadequatemeasures.
Manufacturer’sDeclarationOfConformance
ADeclarationofConformityinaccordancewiththefollowingEUstandardshasbeenmadeandiskept
onfileattheaddressshownonthelastpage.
Themanufacturerdeclaresthattheproductsuppliedwiththisdocumentiscompliantwith
theprovisionsoftheEMCDirective89/336,theLowVoltageDirectiveLVD73/23,theCE
MarkingDirective93/68EECandallassociatedamendments.
Specificationssubjecttochangewithoutnotice.

RecorderInstallationManualv3.34 Page4
BEFOREYOUBEGIN
Readtheseinstructionscarefullybeforeinstallingoroperatingthisproduct.
Note:Thisequipmentshouldbeinstalledbyaqualifiedservicepersonandshouldconformtolocaland
nationalregulations.
Thismanualprovidesinstallationandoperationinformation.Tousethisdocumentyoumusthavethe
followingminimumqualifications:
· abasicknowledgeofCCTVsystemsandcomponents
· abasicknowledgeofelectricalwiringandlowvoltageelectricalconnections.
INTENDEDUSE
Usethisproductonlyforthepurposeforwhichitwasdesigned,asdescribedinthismanualandinthe
IVIEW360usermanual.
ENVIRONMENTALCONDITIONS
Storage:–10°to+60°C,14to140°F.Therecordershouldbeallowedtoacclimatizetoitsoperational
temperaturerangebeforepowerissupplied.Additionally,iftherecorderismovedfromacolderareato
awarmerarea,precautionsshouldbetakentoensurethatcondensationisprevented.
Operational:5°to35°C,41to95°F.Ifaconstantsourceofairflowissuppliedtotheproduct(e.g.fan
blowingcoolairovertheunit)thentheoperationaltemperaturerangeisincreasedto5°Cto40°C,41°F
to104°F.

RecorderInstallationManualv3.34 Page5
CONTENTS
1 PREFACE ............................................................................................................. 6
1.1 ABOUTTHISMANUAL ................................................................................. 6
1.2 CONVENTIONSUSEDINTHISMANUAL ......................................................... 6
1.3 TRADEMARKS ........................................................................................... 6
2 INSTALLATION ...................................................................................................... 7
2.1 REQUIREMENTS........................................................................................ 7
2.2 BEFOREINSTALLINGTHERECORDER.......................................................... 7
2.3 RECORDERINSTALLATIONCHECKLIST ........................................................ 8
2.4 INSTALLINGTHERECORDER....................................................................... 9
2.4.1 Wiringandinstallingtherecorder................................................... 9
2.5 DISCONNECTINGTHERECORDER............................................................. 11
2.6 CONFIGURINGTHERECORDER................................................................. 11
2.7 VERSIONS .............................................................................................. 11
3 RECORDERSPECIFICATION ................................................................................. 12

RecorderInstallationManualv3.34 Page6
1 PREFACE
1.1 ABOUTTHISMANUAL
Thismanualincludessafetyandinstallationinstructionsforinstallers,andshouldbeusedinconjunction
withtheseparateusermanualsuppliedwiththecamera.
Thisdocumentisintendedtoprovideaccurateinformation.However,theinformationitcontainsis
subjecttochangewithoutnotice.IVIEWDigitalVideoSolutions,inkeepingpacewithtechnological
advances,isacompanyofproductinnovation.Thismakesitdifficulttoensurethatalltheinformation
providedhereisentirelyaccurateanduptodate.IVIEWDigitalVideoSolutionsacceptsno
responsibilityforanyinaccuraciesoromissions,andspecificallydisclaimsanyliabilities,loss,orrisk,
personalorotherwise,whichisincurredasaconsequence,directlyorindirectly,oftheuseand/or
applicationofanyofthecontentsofthisdocument.
1.2 CONVENTIONSUSEDINTHISMANUAL
WARNINGstatementsidentifypotentialhazardsandproblemsthatcanoccuriftheequipmentis
handledimproperly.
*
WARNING:
Improperuseofthisequipmentcancauseseverebodilyinjuryorequipmentdamage.
*thissymbolindicateselectricalwarningsandcautions
CAUTIONstatementsidentifyissuesthatcancauseproblemswiththenormaloperationofthe
equipment.
**
CAUTION:
Ensurerecorderhassufficientclearancewheninstalled.
**thissymbolindicatesnonelectricalwarningsandcautions.
TIPstatementsofferusefuladviceaboutoperatingtheequipment.
***
TIP:
Thissettingcanbeindividuallycontrolledoneachofyourtwovideooutputs.
***thissymbolindicatesimportantinformation.
Notes:containimportantinformationaboutaproductorprocedure.
1.3 TRADEMARKS
Alltrademarksandregisteredtrademarksthatappearinthisdocument,including(butnotlimitedto)
IMTERA™arethepropertyoftheirrespectiveowners,detailsofwhichcanbesuppliedbyIVIEWDigital
VideoSolutions.

RecorderInstallationManualv3.34 Page7
2 INSTALLATION
Thischaptergivesyouastepbystepguidetoinstallingtherecorder.
2.1 REQUIREMENTS
Operationrequirements
Therecorderisdesignedtoworkintandemwitha“recorderready”camera.
Cablerequirements
Therecorderrequiresapowercableandadedicatedinterconnectioncable(whichissuppliedwiththe
unit).
· The24VAC/DCcablepowerstherecorder
· The3m/9ft10”interconnectioncableisforconnectingtherecordertothecamera
Note:TherecorderwillalsorequireanEthernetcableifyouintendtoconnectittoyourlocalnetworkto
usesuchfeaturesasanNTPtimeserver.
WARNING
Donotreplacetheinterconnectioncable,oruseanyothercableinitsplace:doing
socoulddamagetherecorderand/orthecameraandwillinvalidatethewarranty.
Powerrequirements
Foroptimalperformancetherecordershouldbepoweredfromanisolated24VAC/DCsource(usinga
cablelessthan10m/33ftlong),capableofproviding2ampsat24V.
WARNING
Donotconnecttherecorderdirectlytothemains:thiswilldamagetherecorderand
couldresultinsevereinjury.
2.2 BEFOREINSTALLINGTHERECORDER
· Checkthecomponentssuppliedwithyourrecorderagainstthelistbelow.Besurenothingis
missing.
· Makesureyouhaveallthetoolsneededfortheinstallation(notsupplied,butlistedbelow).

RecorderInstallationManualv3.34 Page8
2.3 RECORDERINSTALLATIONCHECKLIST
Insidetheboxyouwillfind:
Quantity Item
1 Recorder
1 Plasticsupportbracket
3 M5x6mm/0.24”PanHeadCrossheadscrews(for
supportbracket)
3 M5shakeproofwashers
1 Plasticconnectorcover
2 M3x6mm/0.24”PanHeadCrossheadscrews(forthe
connectorcover)
1 3m/9ft10”interconnectioncable
2 Ferrites
1 Installationmanual
Youwillalsoneed:
1Powersupplyunit
1Crossheadscrewdriver
1Cabletie
1Groundcableandsetoffixings

RecorderInstallationManualv3.34 Page9
2.4 INSTALLINGTHERECORDER
CAUTION:RecorderOrientation
Therecordermustbeinstalledverticallyuprightonasurfaceadequatetobearitsfull
weight.
Failuretocomplywiththeseinstructionswillinvalidatethewarranty.
CAUTION:VentilationClearance
Ensurerecorderhassufficientclearancewheninstalled.RefertoFig.2.1)
200mm/ 7.90”
347mm/13.70”
2.4.1 WIRINGANDINSTALLINGTHERECORDER
WARNING:
Youmustcompletesteps1)to5)ofthisinstallationbeforesupplyingpowertothe
unit.Therecorderrequiresa24VACorDCpowersupply– thisisnotthesameas
thecamera,whichrequiresa12VDCsupply.Applyingthewrongvoltagetothe
recordermaydamageitandwillalsoinvalidatethewarranty.
RefertoFig.2.2forstep1)
1) Attachtheplasticsupportbrackettothebodyofthe
recorderusingthethreescrewssupplied.Useonlythese
screwsandbesuretofitallthreescrews.
CAUTION:
Takecarewhenhandlingthe
recorder:thedeviceisheavy.
Fig.2.1)Ventilation
clearances.
Keep200mm/8”clear
abovetherecorderfor
ventilationpurposes.
Fig.2.2)Connectingtheplasticsupportbracket
tothebaseoftherecorder

RecorderInstallationManualv3.34 Page10
2) Usescrewsorothersuitablefasteningstofixtherecorderinitsfinalpositionthroughthefourholes
intheplasticsupportbracket. Topreventgroundloopsandresultingpictureinterference,we
recommendthatyougroundtherecordertoasuitablebuildingearthpoint.
CAUTION:
Ensuretherecorderisstableinitsfinalposition,andthattheunititselfstands
verticallyupright.Mountingthedeviceinanyotherwaywillinvalidatethe
warranty.
3) Youmustfitasafetywireorcabletie(notsupplied)orfixthedevicephysicallyinsomeway.You
candothisbyloopingthewirethroughanattachmentpointintheceilingandthroughthehole
providedonthebodyoftherecorder,totherightoftheconnectorpanel.
CAUTION:
Therecordermustbesecurelyfixed:failuretodosowillinvalidatethewarranty.
4) Connecttherecordertothecamerausingthecablesupplied.Besuretoconnectthecabletothe
portmarkedHiresvideo(seeFig.2.3)).Cliponeoftheferritesaroundthecableasshownbelow,
leavingenoughroombetweentheferriteandtheendofthecabletoallowtheendofthecabletofit
insidetheconnectorcover(fittedbelow).3050cm(12”20”)fromtheendofthecableshouldbe
sufficient. Theloopedpartshouldhaveadiameterofatleast4cm/2”.
CAUTION:
Donotuseanyother
cablethantheone
supplied;doingsowill
damagetherecorderand
willalsoinvalidatethe
warranty.
5) Ifyouwish,connecttherecordertoyournetworkusinganEthernetcableconnectedtotheEthernet
port(Fig.2.3)).CliptheremainingferritearoundtheEthernetcableasshowninthestepabove.
6) Connectthepowercabletotherecorder–rememberthatitrequires24VAC/DC,2Amps.
Fig.2.3)
Connectionpanel

RecorderInstallationManualv3.34 Page11
7) Turnonthepowersupplytotherecorder,
andchecktheLEDdisplay.ThePowerLED
shouldlightupimmediately.
8) Afteranintervalofapproximatelyone
minute,whentherecorderhassuccessfully
startedupandcompleteditsselftest,the
secondLED(markedwithaheartsymbol)
willbegintoflash.Thisshowsthatthe
recorderisworkingproperly.IfthisLEDdoes
notlightup,orremainspermanentlyonor
off,thereisaproblemwiththerecorder.
9) Once thePowerLEDislit,andthe
‘heartbeat’LEDispulsing, fittheconnector
coverusingthetwoscrewssupplied(see
Fig.2.4)).Installationiscomplete.
2.5 DISCONNECTINGTHERECORDER
Youmustshutdowntherecorderifyouneedtodisconnectitormoveittoanewlocation.Doingthis
willensurethatthedriveisnotdamagedduringthemove,andnodataislost.Takecarenottoshut
downtherecorderbyaccident–nothingwillberecordedwhilethediskisshutdown.
Toshutdown therecorder:
1) EnterthemenusystemusingtheMENUkey.
2) Inthemainmenu,usepqtogotoRecorder andthenpressutogotothenextscreen.
3) Inthe Recordermenu,usepqtogotoAdvanced andthenpressutogotothenextscreen.
4) Inthe Recorder Advancedmenu,usepqtogotoDisk Operations andthenpressutogotothe
nextscreen.
5) Usepqtogoto Shut Down Recorder andthenpressutogotothenextscreen.
6) AmessageappearssayingRecording will be disabled until the recorder is reset. Are you
sure?
7) Thedefaultresponseis No:useqtochoose Yes,thenpressENTERtoconfirm.Themessage
Recorder disabledappearsonscreen,followedby Recorder Disconnected.Atthetoprightyou
willthenseethemessage Shutting off the recorderfollowedbyYou can now turn off your
recorder. Atthispointyoucannowremovepowerfromtherecorderanddisconnectitfromthe
camera.
2.6 CONFIGURINGTHERECORDER
Toconfiguretherecorderforcontinuous,event,orscheduledrecordingpleaserefertothecamera
manual(section6.4).
2.7 VERSIONS
Tocheckversionnumbersfortherecorder,pleaserefertothecameramanual(section6.5.4).
Fig.2.4)Fittingtheconnectorcover

RecorderInstallationManualv3.34 Page12
3 RECORDERSPECIFICATION
Features
RetrospectivePanandTilt Yes–seeafull360°afterthefact
RetrospectiveOptical
EquivalentZoomYes–approx.4xzoomafterthefact
RetrospectiveVMD Yes–carryoutmotiondetectionandtrackingafterthefact
RetrospectiveSceneAnalysis Yes–leftluggage,objectremovalandscenechange
Playback Yes–playforwards,backwards,upto32x
SingleFrameStepping Yes–forwardsandbackwards
GraphicalTimelineDisplay Yes
TimeandDateSearching Yes
EventSearching Yes
EventLocking Yes–protectuserdefinablesectionsand/oreventsfromerasure
MotionDetection/Tracking Yes(accessedviacamera)
SceneAnalysis Yes–leftluggage,objectremovalandscenechange
PasswordProtection Yes
Recording
Resolution 3Megapixel
Storagecapacity
400GBcontinuousratedHardDiscDrive
Eventbased:uptoseveralmonths
Continuous:uptoseveralweeks
Dependentonlightingconditions,framerateandquality(user
selectable)
Example:~5daysfromcontinuousrecording(24/7),4fps,highest
quality,with300Luxlightingconditions
ContinuousRecording Yes
EventBasedRecording Yes
ScheduledRecording Yes
SimultaneousRecordingand
Playback(Duplex)Yes

RecorderInstallationManualv3.34 Page13
AutoRecordonPowerUp Yes
RecordingSpeeds 1,2or4framespersecond
RecordingFailureDetection Yes–onscreenand/orviaalarmoutput
RecordingTamperDetection Yes–384bithashproprietaryauthenticationsignature
RecordPre /PostAlarm Yes–upto30seconds
Video
VideoCompression Proprietary,userselectable
VideoFormat PALorNTSC(viacamera)
Mono/Colour ColourandB&WNightMode(viacamera)
I/O
PowerSourceRating 24VAC/DC+/10%,2Amps
PowerConsumption 30W
ControlProtocol RS485:PelcoD,VistaPD;RS232:BoschAutodome;allauto
sensing;viacamera
AlarmInputs 4N/OorN/C(viacamera)
AlarmOutput 1N/OorN/C(viacamera)
SoftwareUpgrade UpgradeenabledviaLAN(10/100BaseT)
Time/DateGenerator Yes–includingNTPtime support;synchronisedwithcamera
Mechanical
Weight 3.5kg,7lb12oz
Size LxHxW:261x147x156mm;10.28”x5.79”x6.14”
OperatingTemperatureRange5to35°C,41to95°F
5to40°C,41to122°Fwithforcedairflow(e.g.externalfan)
StorageTemperatureRange 10to60°C,14to140°F
Mounting Upright;within3metres/10ftofthecamera
CameraInput 1360°cameraperrecorder
Certifications CE,EMC/FCCClassA

RecorderInstallationManualv3.34 Page14
Dimensions
132mm/5.20”
80mm/3.15”
40mm
/1.575”
40mm
/1.575”
261mm/10.30”
192.1mm/7.563”
120mm/4.75”
78mm/3.07” 78mm/3.07”
40mm
/1.575”
105mm/4.13”
118mm/4.65”
40mm
/1.575”
Diameter
5.8mm/0.23”
3xtapped
M5thread
4xtapped
M5thread
4xtapped
M5thread
Safetylanyard
locatinghole
4xtapped
M5thread
eachside
156mm/6.20”
147mm/5.80”

RecorderInstallationManualv3.34 Page15
DistributedbyIVIEWDigitalVideoSolutionsInc.
FormoreinformationontheIVIEWCompleteVideoSurveillanceSystem,visit:
www.iviewsolutions.com
Table of contents
Popular DVR manuals by other brands
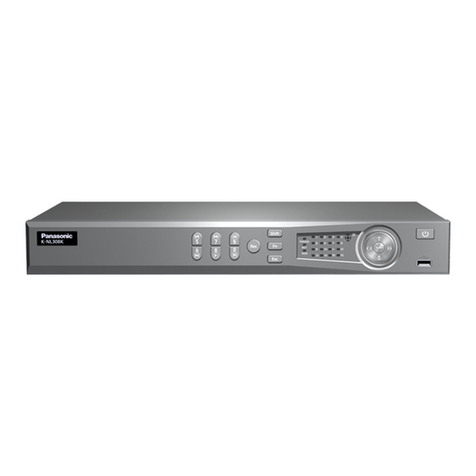
Panasonic
Panasonic k-nl308k Basic setup / operation guide
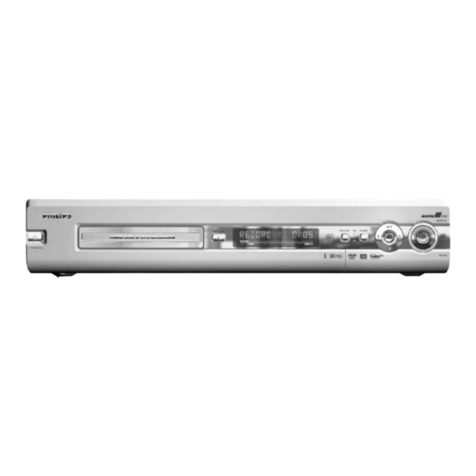
Philips
Philips HDRW720 Service manual
Swann
Swann DVR16-8500AI SW243-X6G Specifications
ALIBI
ALIBI ALI-QVR4104H Quick setup guide

Idis
Idis TR-1504 installation manual
EverFocus
EverFocus PowerPlex EDR1600 Administrator's guide and operating instructions

