Contents
Introduction ............................................................................................................................................3
CITE HD - Wearable High Definition Streaming Video........................................................................3
Cite Overview..........................................................................................................................................4
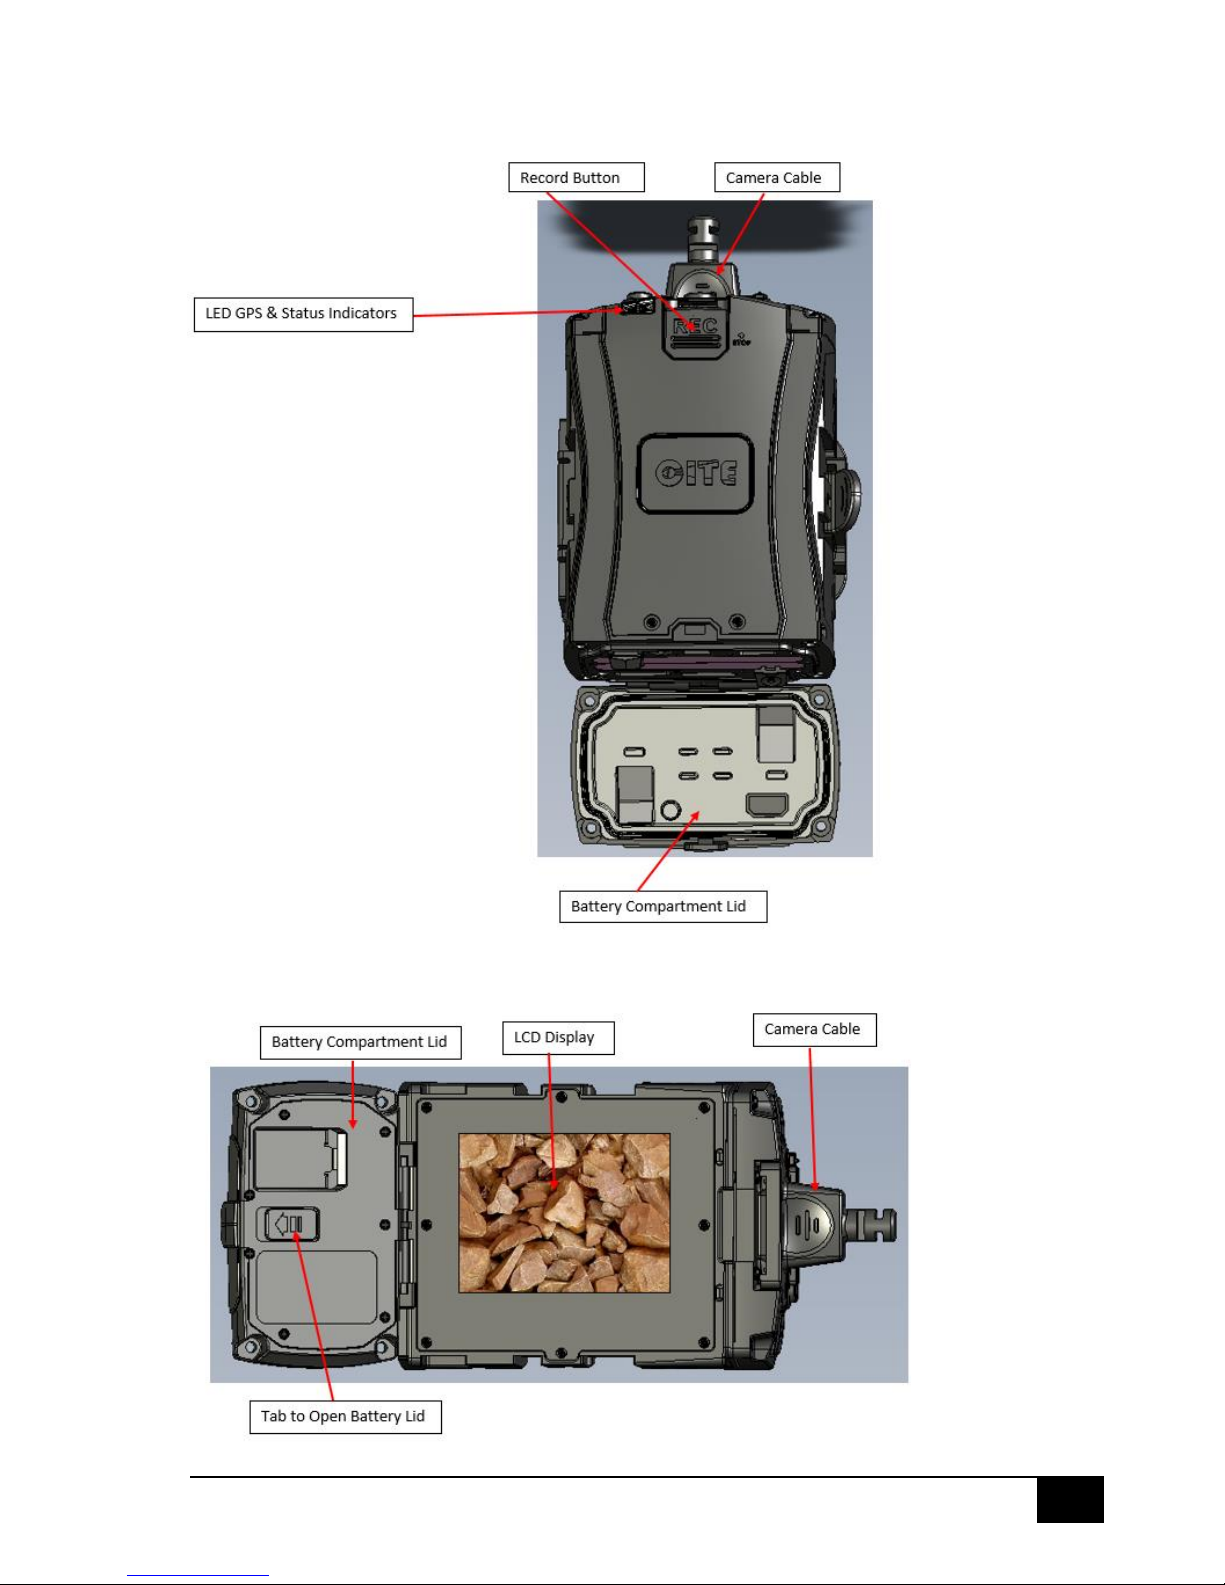
Top of Cite Unit...................................................................................................................................4
Bottom of Cite Unit.............................................................................................................................4
Front of Cite Unit ................................................................................................................................5
Rear of Cite Unit..................................................................................................................................5
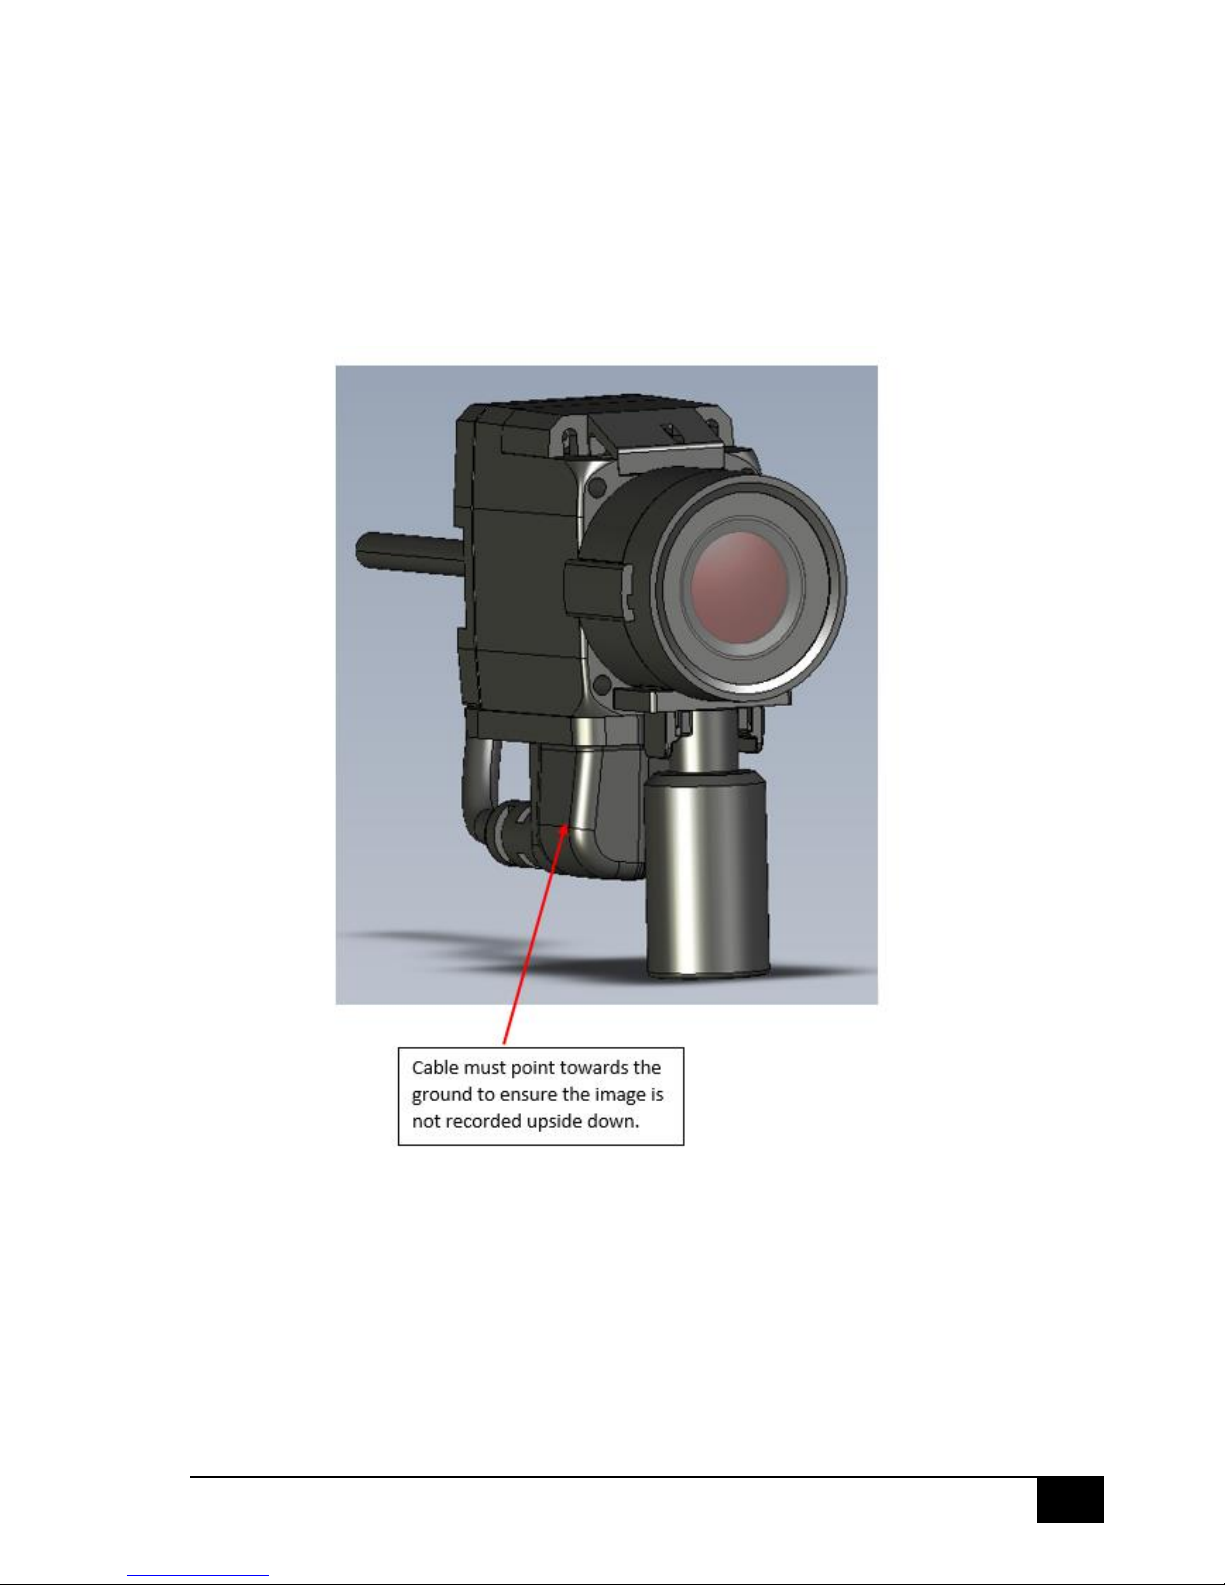
Lens Module........................................................................................................................................6
Getting Started........................................................................................................................................7
Kit Contents.........................................................................................................................................7
Batteries..............................................................................................................................................7
Hot Swap System ............................................................................................................................7
Cables..................................................................................................................................................9
Power................................................................................................................................................10
LED Lights......................................................................................................................................10
Sleep Mode ...................................................................................................................................11
Lens Module..........................................................................................................................................11
LCD Display............................................................................................................................................13
Cite Functions .......................................................................................................................................14
Set Up................................................................................................................................................15
Security .............................................................................................................................................16
Recording Video................................................................................................................................17
Manual Activation.........................................................................................................................17
Remote Activation ........................................................................................................................18
G-Sensor Activation ......................................................................................................................18
External Trigger.............................................................................................................................18
Viewing Recorded Video...................................................................................................................19
Using the Remote Control.................................................................................................................20
Pairing the Remote with the Cite Unit..........................................................................................20
Activate/Deactivate Recording .....................................................................................................20
Checking Battery Health ...............................................................................................................21
Lock Out Button ................................................................................................................................22
Mode Functions ....................................................................................................................................22
Tactical Mode....................................................................................................................................22