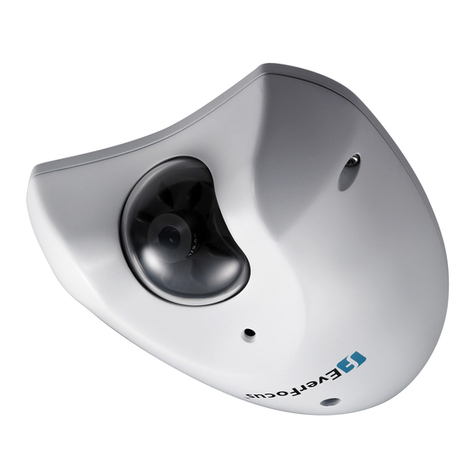
Inanny NC112 User manual

User's Guide
IP Wi-Fi Camera
NC112
GB
FR
SE
TR
IL
RU
IP Wi-Fi Camera
User’s Guide .................... 1
Caméra IP Wi-Fi
Manuel d’utilisation 11
IP Wi-Fi Kamera
Användarhandbok....... ..
IP Wi-Fi Kamera
Kullanım Kılavuzu.............
תיטוחלא IP תמלצמ
שמתשמל ךירדמ
..................... 1
IP-камера WI-FI
Руководство по
эксплуатации................. 1
www.inannyhome.com

ENGLISH
Read these instructions for use carefully and
keep them for later use, be sure to make them
accessible to other users and observe the
information they contain.
Table of Contents
1. Getting to know your device
...............
2
2. Signs and symbols....................................
3
3. Intended usage
.......................................
3
4. Notes .........................................................
3
5. How it works / useful information ..........
4
6. Units description .......................................
5
7. First steps....................................................
5
7.1 Setting up the camera using on
Android device
................................
5
7.2 Setting up the camera using on
iPhone / iPad device
.....................
6
7.3 Camera settings ..............................
6
7.3.1 Allocating a camera name /
thumbnail image
............................
6
7.3.2 Setting the notification sensitivity..6
7.4 General settings ................................
6
8. Camera operation
................................
7
8.1 Switching on the camera
...............
7
8.2 Adding another camera
................
7
8.3 Removing a camera
.......................
7
8.4 Account settings / signing out
........
7
8.5 Infrared night vision function............
8
8.6 Function during live transmission
in the app
........................................
8
8.6.1Two-way communication
...........
8
8.6.2 Photo capture / video
recording
.......................................
8
8.6.3 Lullabies..........................................
8
8.6.4 Temperature display...................
8
8.7 Using the camera for other end
devices
............................................
9
8.8 Access to the user account via
the web portal (PC)
......................
9
9. Maintenance and cleaning
............
9
10. What if there are problems?
...............
9
11. Disposal.................................................. 10
12. Technical data
.....................................10
1
English

Included in delivery
• 1x camera / 1x mains part plug for camera / 1x these instructions for use
1. Getting to know your device
Functions of the device
This Wi-Fi Camera enables you to see your baby via the smartphones or tablets at all
times when you pursue activities in rooms or in the garden. As it is possible to connect
up to 4 cameras, the Wi-Fi camera is also suitable for caring elderly or for home security.
It is therefore possible to keep an eye on everything whenever and wherever you are.
You simply need an active WLAN network, a smartphone or tablet and the free
iNanny app powered by Hubble.
The camera is equipped with:
• Infrared night vision function
• Temperature sensor
• Microphone / loudspeaker
• Wall-mounting fixture
Using the app provides you with the following functions:
• Video monitoring via WLAN with the iNanny app powered by Hubble
• Timeline function (events are displayed chronologically in the app)
• Range control with acoustic signal
• Push notifications for movements / noises
• Two-way communication
•
5 lullabies
System requirement:
App:
- Android from version 4.0 / iOS from version 6.0
Web portal:
- Windows System, 7 or 8 (Java Version from 7)
- MacOS version 10.7 or higher
- Internet Explorer version 8.0 or higher
- Firefox version 11.0 or higher
- Chrome version 18.0 or higher
- Safari version 5.1 or higher
Camera:
- 802.11 b/g/n (2.4 - 2.4835 GHz) WLAN
- protected by at least WEP
2

2. Signs and symbols
The following symbols appear in these instructions for use:
WARNING
Warning instruction indicating a risk of injury or damage to health
IMPORTANT
Safety note indicating possible damage to the device/accessory
Note
Note on important information
3. Intended usage
WARNING
•Only use the Wi-Fi Camera when you cannot mind your baby directly. It is not
a substitute for your own personal, responsible supervision!
•You can also use the Wi-Fi Camera as a room monitor.
•Improper use can be dangerous.
•The Wi-Fi Camera is only intended for domestic/private use, not for
commercial use.
• Respect the personal rights of others. All persons in the monitored room or
who may be in the monitored room should be informed that there is a
camera filming the room.
4. Notes
WARNING
Safety notes
• Always position the camera and power cord out of the reach of children. The
power cord may cause strangulation or injury to children.
• Keep small parts out of reach of children.
• Keep packaging material away from children (risk of suffocation).
• Never place the camera in the cot or within reach of your child.
•Place the camera 2 m away from your baby, in order to minimise the
possibility of electrosmog pollution and noise pollution.
• Make sure that cables are not accessible to your child.
• Before use, make sure that the camera functions properly.
• Never submerge the camera in water. Never rinse it in running water.
• Never use the camera in proximity to moisture.
• Do not cover the camera with a towel or cover.
• Only use the mains part plug included in delivery.
• Do not use the cable to pull the mains part plug out of the socket.
3
English

• This device may be used by children over the age of eight and by people with
reduced physical, sensory or mental skills or a lack of experience or knowledge,
provided that they are supervised or have been instructed on how to use the
device safely and are fully aware of the consequent risks of use.
• Children must not play with the device.
• Cleaning must not be performed by children unless supervised.
• Do not pull, twist or bend the mains cable.
• Pull out the mains part plug in the case of operational faults before the
cleaning process and when the device is not in use.
• The camera and the mains part plug must not come into contact with hot
surfaces or sharp-edged objects.
•Do not use any additional parts that are not recommended by the
manufacturer or offered as accessories.
Note
• Repairs must only be carried out by Customer Services or authorised suppliers.
Under no circumstances should you open or repair the camera yourself, as
faultless functionality can no longer be guaranteed thereafter. Failure to
comply will result in voiding of the warranty.
•If you should have any questions about using the camera, please contact
either your retailer or Customer Services.
5. How it works / useful information
Local
NC112 WLAN-Router Smartphone, Tablet, PC
Internet
Hubble-Server
Note
If there is an active internet connection, the camera sends all recordings via the Hubble
server. This is of vital importance when setting up the camera. Not all functions are available if
there is no active internet connection (limited functionality).
• You can increase the range of the camera by placing it as high as possible near a door or
a window.
• Other radio waves may possibly interfere with the transmission of the baby monitor.
Therefore, do not position the baby monitor near devices such as microwaves, etc.
4

• The following other factors can interfere with the baby monitor's transmission or shorten its
range: furniture, walls, houses, trees, environmental factors (such as fog, rain).
Note
On the Hubble homepage (http://www.hubbleconnected.com), you can activate the
recording function at an additional charge. When the recording function is activated, events
triggered by movements are automatically recorded and saved onto the Hubble server so
that they can be viewed later.
6. Unit description
HD camera (720p for a high resolution image quality)
2
1
3
5
4
PAIR
6 7
8
1 Microphone
5 Temperature sensor
2 Brightness sensor (night vision function) 6 ON/OFF Switch
3 Camera lens
7 Pair button
4 Function light* 8 Connection for USB mains part plug
*Function light status
Function light lights up blue
=
Camera warm-up phase ~ 1 minute
Function light flashes red
=
Camera is not connected
Function light flashes red and blue
=
Camera is ready to connect
Function light flashes blue
=
Camera is connected
7. First steps
7.1 Setting up the camera using an Android device
1.
Open the Google Play Store on your Android device.
2. Search for the “iNanny Monitor
” app and download it.
3.
Start the app and create a user account.
5
English

4.
Follow the further instructions in the app. As soon as the camera registration has been
successfully completed, the transmission image of the installed camera appears.
5.
Position the camera (2m away from the baby, out of the reach of children).
7.2 Setting up the camera on your iPhone/iPad
1. Open the App Store on your iPhone/iPad.
2.
Search for the “iNanny Monitor” app and download it.
3.
Start the app and create a user account.
4.
Follow the further instructions in the app. As soon as the camera registration has been
successfully completed, the transmission image of the installed camera appears.
5.
Position the camera (2m away from the baby, out of the reach of children).
7.3 Camera settings
In the camera settings you can, for example, allocate a name and a user image to the
cam
era. You can also set the camera sensitivity to movement, sound and temperature, in
order to be able to better specify when you should be informed.
7.3.1 Allocating a camera name / thumbnail image
A personal name and menu image simplify the assignment of the cameras.
1.
When you see the current transmission image, tap the iNanny logo on the top
left. You are taken to the camera menu.
2. On the camera menu, tap the settings symbol
() of the camera.
3. Tap on “Camera details”.
4. Here you can now tap “Camera name” to name the camera. If you would like to
allocate a personal menu image, click on “Change image”.
7.3.2 Setting the notification sensitivity
1. Tap the settings symbol next to the camera in the camera menu.
2. Tap the field with the blue warning triangle at the top. Now you can set the
movement/sound sensitivity and the limits for the temperature alarm. Limit values for the
temperature alarm: 10 - 18°C or 26 - 40°C (50 - 64.4°F or 78.8 - 104°F).
Note
Depending on the sensitivity setting, a notification appears in the app timeline that the
cam
era has registered a movement, a sound or a temperature alarm.
If you allow push messages for the
“iNanny Monitor” app on your smartphone/tablet, you
will receive notifications even when you are not in the app (e.g. on the lock screen).
7.4 General settings
In the general settings you can set the clock mode
(12h / 24h) and temperature
mode
(°C/°F). In addition, you can also activate the “Do not disturb” function.
1.
When you see the current transmission image, tap the “iNanny Monitor”
logo on the top
left. You are taken to the camera menu.
2.
Now tap on “Settings” at the top.
3.
To set the clock mode/temperature mode, tap the “General settings”.
6

4.
To activate the “Do not disturb” function, first tap “Do not disturb” and then “ON” to the
right. Now set the required length of time (3 hours max.) by moving the point.
Note
When the “Do not disturb” function is activated, you will not receive push messages during
the period selected.
8. Camera operation
8.1 Switching on the camera
IMPORTANT
Only use the mains part plug included in delivery.
1. Connect the small end of the mains part plug to the camera.
2. Connect the other end of the mains part plug to the socket.
3. Slide the ON/OFF switch on the side to “ON”. The function light starts to glow blue. (Push
the ON/OFF switch downwards to switch off the camera.)
4. Open the “iNanny Monitor” app on your smartphone/tablet or the web portal on your PC.
5. Log into your account.
6. When you have correctly set up your camera (see Chapter 7), the transmission image
appears on the display.
8.2 Adding another camera
It is possible to connect up to 4 cameras with one user account:
1. When you see the current transmission image, tap the “iNanny Monitor”
logo on the top
left. You are taken to the camera menu.
2. Now tap “Add camera” on the bottom left.
3. Follow the instructions in the app. As soon as you have successfully logged in, the
transmission image of the attached camera appears automatically.
8.3 Removing a camera
To remove a camera from your user account again, proceed as follows:
1. Tap the settings symbol
()
in the camera menu of the camera you wish to remove.
2. Tap on “Camera details”.
3. Tap “Remove camera” and confirm.
8.4 Account settings / signing out
In the account settings you can, amongst other things, change your password, view
your app version or log out.
1. When you see the current transmission image, tap the
“iNanny Monitor” logo on the top
left. You are taken to the camera menu.
2.
Now tap “Account” on the top right.
3.
In order to change your password, tap “Change password” and follow the instructions. If
you would like to log out of your account, tap “Log out” and confirm.
7
English

8.5 Infrared night vision function
To ensure that clear transmission images can be seen on the screen even when it is dark,
the camera automatically activates the infrared night vision function (black and white
image display).
8.6 Functions during live transmission in the app
Note
When you tap the transmission image, the following
menu interface appears. After approx. 10
seconds,
the menu interface disappears again.
These functions are only available in the app.
1
Two-way communication 3 Lullabies
2 Photo capture /
video recording (Android only)
4 Temperature display
8.6.1
Two-way communication
1. Tap the microphone symbol ( ) on the far left.
2.
The first time you do this, the message “Allow iNanny Monitor access to the microphone
?
”
appears. Tap “Yes”.
3. To activate the two-way communication, tap the push-to-talk button. The words you
have spoken can now be heard on the camera. To deactivate the two-way
communication tap the push-to-talk button again.
8.6.2
Photo capture / Video recording
1.
Tap the camera symbol
().
2.
To take a photo of the current transmission image, tap the camera button. The image is
saved in the image folder of your smartphone/tablet.
Note
If you have an Android end device, you can also record videos locally. To do this, tap
the
video symbol( ).
8.6.3 Lullabies
You can activate one of five lullabies that will then be played over the camera:
1.
Tap the note symbol (
).
2.Tap to choose your required lullaby. The lullaby now plays on the camera. To
dea
ctivate the lullaby, tap it again.
8.6.4 Temperature display
Tap the thermometer symbol (
).
The current ambient temperature of the camera
appears. When you tap again on the thermometer symbol (
),
you can change the
temperature display between °C and °F.
8

8.7 Using the camera for other end devices
To use the camera with other end devices, you must log in with the same username +
pass
word as your user account.
8.8 Access to the user account via the web portal (PC)
It is possible to access your user account via the web portal.
You will have received a link to the web portal automatically via e-mail after setting up the
camera.
Note
The transmission image and the timeline can only be displayed via the web portal. Other
functions/settings options (such as the two-way communication) are not available.
9. Maintenance and cleaning
The service life of the camera depends on careful use:
IMPORTANT
•
Protect the camera from knocks, damp, dust, chemicals, drastic changes in
temperature, electromagnetic fields and nearby sources of heat (ovens, heaters).
•
Never use the camera in a damp environment.
•
Clean the camera with a dry cloth. Do not use any abrasive cleaning products.
10. What if there are problems?
IMPORTANT Forgotten password
If you have forgotten your password, tap “Forgot password” inthe app and enter your
e-mail
address. Anew password willbesent to your e-mail address.
Problem
Solution
No connection can be established
to
the camera.
Switch your WLAN router off and back on again. Go
through the registration again.
No connection can be made to
the
camera.
Check that the camera is within range of the WLAN
rout
er. If the function light flashes, place the camera
closer
to the WLAN router for better reception.
There is no alarm warning sound on
the
smartphone/tablet.
Check whether youralarm
settings have been
activated.
Videos cannot be recorded on the
end
device.
Videos can only be saved on Android™ devices.
I cannot log into my user account after
registration.
Check that the user name and password are correct.
I receive the error message “Your
e-mail ID is not registered”
Make sure that you have registered with us. First tap
“Create user account”
9
English

Problem
Solution
What should I do if I have forgotten my
password
?
In the app tap “Forgot password” and enter your e-mail
address. A new password
will be sent to your e-mail
address.
I have not received an e-mail, even
though I have used the “Forgot
pass
word” function.
1. The e-mail may be in the spam folder of your e-mail
account. Check the spam folder for the e-mail.
2. The e-mail may not have arrived yet. Check your
e-mail account again after a few minutes.
If I try to add a new camera to my user
account, no available cameras
appear.
Press the “PAIR” button on the camera for 5 seconds
and try again.
During the set-up process, no camera
appears in the last step. The set-up
process is interrupted.
Switch the camera of and back on again. Press the
“PAIR” button until there is a beep. Wait for a minute until
the indicator lamp flashes. The camera is now ready for
the set-up process. Start the set-up process for the
camera again.
If I try to view the transmission image,
I received the message that I should
update my Firmware.
Conduct a Firmware update. We update the app from
time to time to constantly improve the camera function.
11. Disposal
For environmental reasons, do not dispose of the device in the household
waste at the end
of its useful life.
Dispose of the unit at a suitable local collection or recycling point. Dispose of
the
device in accordance with EC Directive - WEEE (Waste Electrical and
Electronic
Equipment). If you have any questions, please contact the local
authorities re
sponsible for waste disposal.
12. Technical Data
•Frequency 2.4 - 2.483 GHz
•
Digital receiver
•
Infrared technology
•
Camera dimensions: 9.0 x 6.5 x 5.8 cm
•
Camera weight: 95g
•
Application
temperature:
0 - 50°C
•Power adaptor: By Ten Pao International Ltd.
S005ANB0500100 (For UK)
S005ANV0500100 (For EU)
Input: 100 - 240 VAC, 50/60 Hz, 300mA
Output: 5VDC, 1000mA
Use only the power supply listed in the user instructions.
We hereby guarantee that this product complies with the European R&TTE Directive 1999/5/
EC. Please contact the specified service address to obtain further information, such as the
CE Declaration of Conformity.
10

FRANÇAIS
Veuillez lire attentivement ces instructions
d'utilisation et les conserver à des fins ultérieures.
Veillez à les mettre à disposition des autres
utilisateurs et à respecter ces informations.
Table des matières
1. Découverte de l'appareil....................... 2
2. Signes et symboles .................................. 3
3. Utilisation prévue ..................................... 3
4. Remarques ............................................... 3
5. Fonctionnement/informations utiles.....4
6. Description de l'appareil ........................ 5
7. Premiers pas ............................................. 5
7.1 Configuration de la caméra sur un
appareil Android................................5
7.2 Configuration de la caméra sur un
appareil iPhone/iPad....................... 6
7.3 Paramètres de la caméra............... 6
7.3.1 Allocation d'un nom ou d'une
image miniature à la caméra ......6
7.3.2 Paramétrage de la sensibilité de
notification ......................................6
7.4 Paramètres généraux .......................6
8. Fonctionnement de la caméra............ 7
8.1 Allumer la caméra.............................7
8.2 Ajouter une autre caméra ...............7
8.3 Supprimer une caméra.....................7
8.4 Paramètres du compte/déconnexion
............................................................. 7
8.5 Fonction de vision nocturne infrarouge
..............................................................8
8.6 Fonctions disponibles pendant une
transmission en direct depuis
l'application......................................8
8.6.1 Communications bidirectionnelles
............................................................8
8.6.2 Prise de photos/enregistrement
vidéo...............................................8
8.6.3 Berceuses...................................... 8
8.6.4 Affichage de la température.... 8
8.7 Utilisation de la caméra depuis
d'autres terminaux.......................... 9
8.8 Accès au compte d'utilisateur via
le portail Web (PC)......................... 9
9. Entretien et nettoyage......................... 9
10. Que faire en cas de problème ?........9
11. Élimination ............................................. 10
12. Informations techniques ......................10
Français
11

Éléments fournis :
• 1caméra, 1 câble d'alimentation pour la caméra et 1 exemplaire de ce
manuel d'utilisation
1. Découverte de l'appareil
Fonctions de l'appareil
Cette caméra Wi-Fi vous permet de surveiller votre bébé à partir d'un smartphone ou
d'une tablette à tout moment afin de poursuivre vos activités depuis une autre pièce
ou dans le jardin. En y raccordant jusqu'à 4 caméras, la caméra Wi-Fi permet
également d'assurer la surveillance de personnes âgées ou d'un domicile. Vous
pouvez ainsi surveiller vos locaux depuis n'importe où. Il suffit de disposer d'un réseau
Wi-Fi actif, d'un smartphone ou d'une tablette ainsi que de l'application Hubble
iNanny.
Cette caméra offre les fonctions suivantes :
• Fonction de vision nocturne infrarouge
• Capteur de température
• Microphone/haut-parleur
• Montage mural
L'application vous permet d'accéder aux fonctions suivantes :
• Vidéosurveillance via réseau sans fil grâce à l'application Hubble iNanny
• Barre de temps (les évènements s'affichent chronologiquement dans l'application)
• Contrôle de portée par signal sonore
• Notifications push en cas de mouvements ou de bruit
•Communications bidirectionnelles
• 5 berceuses
Configuration minimale :
Application :
- Android à partir de la version 4.0/iOS à partir de la version 6.0
Portail Web :
- Windows 7 ou 8 (Java à partir de la version 7)
- MacOS à partir de la version 10.7
- Internet Explorer à partir de la version 8.0
- Firefox à partir de la version 11.0
- Chrome à partir de la version 18.0
- Safari à partir de la version 5.1
Caméra :
- Réseau Wi-Fi 802.11 b/g/n (2,4-2,4835 GHz)
- protégé au minimum via WEP
12

2. Panneaux et symboles
Les instructions d'utilisation utilisent les symboles suivants :
AVERTISSEMENT
Instruction d'avertissement indiquant un risque de blessures ou de
IMPORTANT
Remarque de sécurité indiquant des risques potentiels pour
Remarque
Remarque concernant les informations importantes
3. Utilisation prévue
AVERTISSEMENT
• Utilisez la caméra Wi-Fi uniquement si vous ne pouvez pas surveiller directement le bébé.
L'appareil ne remplace en aucun cas votre propre surveillance !
• Vous pouvez également utiliser la caméra Wi-Fi pour surveiller une salle.
• L'utilisation incorrecte de l'appareil peut présenter des risques.
•La caméra Wi-Fi est destinée à une utilisation personnelle, privée et non commerciale.
• Respectez la vie privée des autres personnes. Toute personne présente dans la salle
placée sous surveillance ou susceptible de s'y trouver doit être prévenue qu'une caméra
filme les lieux.
4. Remarques
AVERTISSEMENT
Remarques de sécurité
• Placez toujours la caméra et son câble d'alimentation hors de portée des enfants. Le câble
d'alimentation présente des risques d'étranglement et de blessures pour les enfants.
• Conservez les petits composants hors de portée des enfants.
• Conservez l'emballage de l'appareil hors de portée des enfants (risque de suffocation).
• Ne placez jamais la caméra dans le lit à barreaux ou à portée de l'enfant.
• Placez la caméra à 2 m du bébé afin de réduire les risques de pollution électromagnétique
ou sonore.
• Assurez-vous que les câbles sont hors de portée de l'enfant.
• Avant de l'utiliser, assurez-vous que la caméra fonctionne correctement.
• N'immergez jamais la caméra dans l'eau. Ne la rincez jamais à l'eau.
• N'utilisez jamais la caméra à proximité de zones humides.
• Ne couvrez jamais la caméra avec une serviette ou une couverture.
• Utilisez uniquement la fiche secteur fournie avec l'appareil.
• Ne débranchez pas la prise secteur en tirant sur le câble.
13
Français

• Cet appareil peut être utilisé sous surveillance par les enfants à partir de huit ans et par les
personnes dont les capacités physiques, sensorielles ou mentales sont réduites ou qui ne
possèdent pas l'expérience ou les compétences nécessaires ou s'ils ont appris à utiliser
l'appareil correctement et qu'ils sont entièrement conscients des risques encourus lors de
son fonctionnement.
• Les enfants ne doivent pas jouer avec l'appareil.
• Le nettoyage de l'appareil ne doit pas être effectué pas des enfants sans surveillance.
• Ne pas tirer, tordre, ni plier la fiche secteur de l'appareil.
• Débranchez la prise secteur de l'appareil en cas de panne, avant de le nettoyer ou lorsqu'il
est inutilisé.
• La caméra et la fiche secteur ne doivent pas entrer en contact avec des surfaces chaudes
ou des objets tranchants.
• N'utilisez pas de dispositifs externes à l'exception des produits recommandés ou proposés
comme accessoires par le fabricant.
Remarque
• L'appareil doit être uniquement réparé par le service clientèle ou les fournisseurs agréés.
Ne procédez sous aucun prétexte au démontage ou à la réparation de la caméra pour
garantir son fonctionnement optimal. Le non-respect de ces instructions entraîne
l'annulation de la garantie.
• Pour toute question concernant l'utilisation de la caméra, veuillez contacter votre
revendeur ou le service clientèle.
5. Fonctionnement/informations utiles
Local
NC112 Routeur Wi-Fi Smartphone, tablette, ordinateur
Internet
Serveur Hubble
Remarque
Si elle dispose d'une connexion Internet active, la caméra transmet tous les enregistrements
via le serveur Hubble. Ce point est essentiel lors de la configuration de la caméra. Certaines
fonctions sont indisponibles en l'absence d'une connexion Internet active (fonctionnalités
limitées).
• Vous pouvez améliorer la portée de la caméra en la plaçant le plus haut possible à
proximité d'une porte ou d'une fenêtre.
• Les ondes radio externes peuvent interférer avec les transmissions du système de
surveillance pour bébé. Par conséquent, ne placez pas le système de surveillance pour
bébé à proximité d'appareils tels que les fours à micro-ondes, etc.
14

• Les facteurs suivants peuvent interférer avec les transmissions du système de surveillance
pour bébé ou réduire leur portée : meubles, murs, maisons, arbres et facteurs
environnementaux (brouillard, pluie, etc.).
Remarque
La page d'accueil Hubble (http://www.hubbleconnected.com) vous permet d'activer la
fonction d'enregistrement moyennant des frais supplémentaires. Lorsque la fonction
d'enregistrement est activée, les évènements déclenchés par les mouvements sont
automatiquement enregistrés sur le serveur Hubble pour pouvoir y accéder par la suite.
6. Description de l'appareil
Caméra HD (format 720p assurant une qualité d'image haute résolution)
2
1
35
4
ASSOCIER
6 7
8
1 Microphone 5 Capteur de température
2 Capteur de luminosité (fonction de vision 6 Interrupteur marche/arrêt
3 Objectif de la caméra 7 Bouton d'association
4 Voyant de fonction* 8 Connexion du câble USB
*État du voyant de fonction
Voyant de fonction bleu fixe :phase de démarrage de la caméra (environ 1 minute)
Voyant de fonction rouge clignotant :caméra déconnectée
Voyant de fonction clignotant en rouge et bleu :caméra en attente de connexion
Voyant de fonction bleu clignotant :caméra connectée
7. Premiers pas
7.1 Configuration de la caméra sur un appareil Android
1. Accédez à Google Play Store sur l'appareil Android.
2. Recherchez et téléchargez l'application « iNanny Monitor ».
3. Lancez l'application et créez un compte d'utilisateur.
15
Français

4. Suivez les instructions de l'application. Après avoir enregistré votre caméra, l'image
transmise s'affiche.
5. Placez la caméra (à 2 m du bébé, hors de portée des enfants).
7.2 Configuration de la caméra sur un iPhone/iPad
1. Accédez à l'App Store sur l'iPhone/iPad.
2. Recherchez et téléchargez l'application « iNanny Monitor ».
3. Lancez l'application et créez un compte d'utilisateur.
4. Suivez les instructions de l'application. Après avoir enregistré votre caméra, l'image
transmise s'affiche.
5. Placez la caméra (à 2 m du bébé, hors de portée des enfants).
7.3 Paramètres de la caméra
Les paramètres de la caméra vous permettent notamment d'assigner un nom et une image
personnalisée à la caméra. Vous pouvez également régler la sensibilité de la caméra aux
mouvements, aux bruits et à la température afin de répondre au mieux à vos besoins de
prévention.
7.3.1 Allocation d'un nom ou d'une image miniature à la caméra
Le fait d'assigner un nom et une image de menu aux caméras vous permet de les gérer plus
facilement.
1. Lorsque l'image transmise s'affiche, tapez sur le logo iNanny en haut à gauche.
Le menu Caméra s'affiche.
2. Dans le menu Caméra, tapez sur le symbole paramètres ( ) de la caméra.
3. Tapez sur « Détails de la caméra ».
4. Tapez ensuite sur « Nom de la caméra » pour lui donner un nom. Si vous souhaitez lui
assigner une image de menu personnalisée, cliquez sur « Modifier l'image ».
7.3.2 Paramétrage de la sensibilité de notification
1. Tapez sur le symbole paramètres situé en face de la caméra dans le menu Caméra.
2. Tapez sur le champ situé en dessous d'un triangle d'avertissement bleu. Vous pouvez
maintenant définir la sensibilité des mouvements ou du son ainsi que les limites de l'alarme
de température. Valeurs limites de l'alarme de température : 10-18°C ou 26-40°C.
Remarque
En fonction du paramètre de sensibilité, une notification s'affiche dans la barre de temps de
l'application pour indiquer le déclenchement d'une alarme de mouvement, de bruit ou de
température.
Si vous autorisez l'application « iNanny Monitor » à transmettre des messages push à votre
smartphone ou tablette, les notifications s'afficheront même si l'application n'est pas active
(par exemple sur l'écran d'accueil).
7.4 Paramètres généraux
Les paramètres généraux vous permettent de régler le mode de l'horloge (12/24 h) et l'unité
de température (°C/°F). Vous pouvez également activer la fonction « Ne pas déranger ».
1. Lorsque l'image transmise s'affiche, tapez sur le logo « iNanny Monitor » en haut à gauche.
Le menu Caméra s'affiche.
2. Tapez ensuite sur « Paramètres » en haut. 16

3. Pour définir le mode de l'horloge ou de la température, tapez sur « Paramètres généraux ».
4. Pour activer la fonction « Ne pas déranger », tapez d'abord sur « Ne pas déranger » puis sur
« Activé » à droite. Sélectionnez ensuite la durée désirée (max. 3 heures) en déplaçant le point.
Remarque
Lorsque la fonction « Ne pas déranger » est activée, vous cesserez de recevoir les messages
push pendant la période sélectionnée.
8. Fonctionnement de la caméra
8.1 Allumer la caméra
IMPORTANT
Utilisez uniquement la fiche secteur fournie avec l'appareil.
1. Raccordez la petite extrémité de la fiche secteur à la caméra.
2. Raccordez l'autre extrémité de la fiche secteur à la prise de courant.
3. Placez le bouton marche/arrêt en position marche. Le voyant de fonction s'allume en
bleu. Placez le bouton marche/arrêt en position arrêt pour arrêter l'appareil.
4. Lancez l'application « iNanny Monitor » sur votre smartphone ou tablette, ou accédez au
portail Web sur votre ordinateur.
5. Connectez-vous à votre compte.
6. Une fois la caméra correctement configurée (voir Chapitre 7), l'image transmise s'affiche à
l'écran.
8.2 Ajouter une autre caméra
Il est possible d'ajouter jusqu'à 4 caméras par compte d’utilisateur :
1. Lorsque l'image transmise s'affiche, tapez sur le logo « iNanny Monitor » en haut à gauche.
Le menu Caméra s'affiche.
2. Tapez ensuite sur « Ajouter caméra » en bas à gauche.
3. Suivez les instructions de l'application. Une fois connecté, l'image transmise par la caméra
connectée s'affiche automatiquement.
8.3 Supprimer une caméra
Pour supprimer une caméra de votre compte d'utilisateur, procédez comme suit :
1. Dans le menu Caméra que vous souhaitez supprimer, tapez sur le symbole paramètres ( ).
2. Tapez sur « Détails de la caméra ».
3. Tapez sur « Supprimer caméra » puis confirmez.
8.4 Paramètres du compte/déconnexion
Les paramètres du compte permettent notamment de changer le mot de passe, d'afficher
la version de l'application et de se déconnecter.
1. Lorsque l'image transmise s'affiche, tapez sur le logo « iNanny Monitor » en haut à gauche.
Le menu Caméra s'affiche.
2. Tapez maintenant sur « Compte » en haut à droite.
3. Pour changer de mot de passe, tapez sur « Changer le mot de passe » puis suivez les
instructions. Si vous désirez vous déconnecter du compte, tapez sur « Déconnexion » puis
confirmez.
17
Français

8.5 Fonction de vision nocturne infrarouge
Pour garantir la quantité des images transmises à l'écran même dans un environnement
sombre, la caméra active automatiquement la fonction de vision nocturne infrarouge (en
noir et blanc).
8.6 Fonctions disponibles durant une transmission en direct dans l'application
Remarque
Lorsque vous tapez sur l'image transmise,
l'interface de menus suivante s'affiche. L'interface
de menus suivante disparaît au bout d'environ
10 secondes.
Ces fonctions sont uniquement disponibles dans l'application.
1 Communications bidirectionnelles 3 Berceuses
2 Prise de photo/enregistrement vidéo
(Android uniquement) 4 Affichage de la température
8.6.1 Communications bidirectionnelles
1. Tapez sur le symbole microphone ( ) à l'extrême gauche.
2. Si vous procédez à l'opération pour la première fois, le message « Autoriser iNanny Monitor
à accéder au microphone ? » s'affiche. Tapez sur « Oui ».
3. Pour activer les communications bidirectionnelles, tapez sur le bouton d'émission. Vos
paroles sont diffusées par la caméra. Pour désactiver les communications bidirectionnelles,
tapez à nouveau sur le bouton d'émission.
8.6.2 Prise de photos /enregistrement vidéo
1. Tapez sur le symbole appareil photo ( ).
2. Pour prendre une photo de l'image transmise actuellement, tapez sur le bouton appareil
photo. L'image est enregistrée dans le dossier d'images de votre smartphone ou tablette.
Remarque
Les appareils Android permettent également d'enregistrer des vidéos localement. Pour ce faire,
tapez sur le symbole vidéo ( ).
8.6.3 Berceuses
Vous pouvez activer l'une des cinq berceuses pouvant être diffusées par la caméra.
1. Tapez sur le symbole note ( ).
2. Tapez sur la berceuse désirée. La caméra diffuse maintenant la berceuse. Pour désactiver
la berceuse, tapez à nouveau dessus.
8.6.4 Affichage de la température
Tapez sur le symbole thermomètre ( ).La température ambiante actuelle de la caméra
s'affiche. Si vous tapez à nouveau sur le symbole thermomètre ( ), vous pouvez basculer
entre l'affichage en °C et en °F. 18

8.7 Utilisation de la caméra depuis d'autres terminaux
Pour utiliser la caméra à partir d'autres terminaux, vous devez vous connecter avec le nom
d'utilisateur et le mot de passe de votre compte d'utilisateur.
8.8 Accès au compte d'utilisateur via le portail Web (PC)
Vous pouvez accéder à votre compte d'utilisateur via le portail Web.
Une fois la caméra configurée, vous recevrez automatiquement un lien vers le portail Web.
Remarque
L'image transmise et la barre de temps sont uniquement affichées sur le portail Web.
Certaines autres fonctions et options de paramètres (telles que les communications
bidirectionnelles) ne sont pas disponibles.
9. Entretien et nettoyage
La durée de vie de la caméra dépend du soin apporté lors de son utilisation.
IMPORTANT
• Protégez la caméra contre les coups, l'humidité, la poussière, les produits chimiques, les
changements drastiques de température, les champs électromagnétiques et les sources
de chaleur (fours, radiateurs, etc.).
• N'utilisez jamais la caméra dans un environnement humide.
• Nettoyez la caméra uniquement avec un chiffon sec. N'utilisez pas de produits chimiques
abrasifs.
10. Que faire en cas de problème ?
IMPORTANT Mot de passe oublié
Dans l'application, tapez sur « Mot de passe oublié » puis saisissez votre adresse électronique
si vous avez oublié votre mot de passe. Un nouveau mot de passe vous sera transmis par
courrier électronique.
Problème Solution
Impossible de se connecter à la
caméra.
Éteignez puis rallumez votre routeur Wi-Fi. Effectuez de
nouveau l'inscription.
Impossible de se connecter à la
caméra.
Assurez-vous que la caméra se trouve à laportée du
routeur Wi-Fi. Si le voyant de fonction clignote, rapprochez
la caméra du routeur Wi-Fi pour améliorer la réception.
Le smartphone ou la tablette n'émet
aucun son d'avertissement.
Assurez-vous d'avoir activé les paramètres d'alarme.
Impossible d'enregistrer les vidéos sur le
terminal.
Seuls les appareils Android peuvent enregistrer les vidéos.
Impossible de se connecter au compte
d'utilisateur suite à l'inscription.
Assurez-vous que le nom d'utilisateur et le mot de passe
sont corrects.
Le message d'erreur « Votre adresse
électronique n'est pas inscrite » s'affiche.
Veuillez vérifier si vous êtes bien inscrit. Tapez d'abord sur
« Créer le compte d'utilisateur ».
19
Français
Table of contents
Languages:


