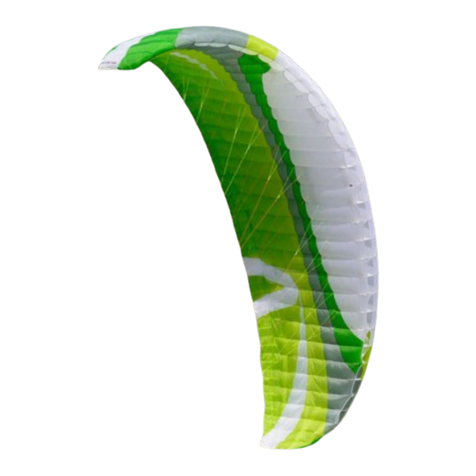
Independence paragliding Trigon User manual

Owner´s manual Fassung 1.0 vom 20.07.2018
Rescue system
Trigon
Fly market GmbH & Co. KG
Am Schönebach 3
D-87637 Eisenberg
Tel.: +49-8364-9833-0
Fax: +49-8364-9833-33
Mail: [email protected]

Inhaltsverzeichnis
1. Technical Data
2. Intended use
3. Operating limits
4. Necessary documentation
5. Mode of operation
6. usage of steering lines
7. Control and inspection of the parachute
8. Behaviour if damages are noticed
9. Storage
10. Maintanance
11. Cleaning
12. Repairs
13. Nature- and environment-friendly behaviour
14. Environmentally compatible waste disposal
15. Spare parts / changeable parts
16. Structure of the parachute
17. Packing the parachute
18. Mounting in a container
19. Mounting / integration to a harness
20. Specialities for winch towing
21. Preflight check
Warning
Itisnotallowedtousethisrescueparachuteforskydiving!
AccordingEN12491:Notsuitableforuseatspeedsinexcessof32m/s(115km/h)
The paragliding rescue systems of the Trigon series are certified according EN 12491 (European standard) and LTF
91/09(Germantypeapproval).
The manufacturer can not be made liable for any possible damages to persons or material damages, which may result
fromthisrescueparachutesinanyway.
1.TECHNICALDATA
Typeofrescueparachute: paraglidingrescuesystem Trigon100,Trigon125
Manufacturer: FlymarketGmbH&Co.KG
AmSchönebach3
D-87637Eisenberg
Tel.+49-8364-9833-0
rescuesystem:
Weightoftherescuesystem(kg):
Surface(m²):
Numberofpanels:
Totallengthpacked:
(Bridletopackingloops)(m)
Minandmax.loadnotsteered(kg)
Minandmaxloadifsteered(kg)
SeePoint6.
Sinkrateatmax.load
VolumeinMilliliter
(withoutbridle)
Trigon 100
1,29
32
8,90
55 -100
55 -85
<5,5 m/s
3800
16
Trigon 125
1,45
37
9,40
70 - 125
70 - 100
<5,5 m/s
4300
16
2 3

2.Intendeduse
Manuallyreleased,steerablerescuesystemforsingleseatedparaglidersinanemergencysituationwhileflying.
3.Operatinglimits
Maximumspeedforusage:115km/h(32m/s)
Interval for repacking: 12 month, then the rescue system has to be repacked and this repacking has to be recorded in the
“Repackandinspectionlogbook”.
Duetotheeffectofwater,sand,saltorotherenvironmentalinfluencesmayreducetherepackinterval.
Interval of inspection: 24 month, then a complete inspection of the rescue system is necessary. The inspection has to be
recordedinthe“Repackandinspectionlogbook”.
Operational lifespan of parachute: 10 years. The lifespan can be extended for 2 more years if the rescue parachute is
inspectedyearlyduringthislasttwoyearsatthemanufacturer.Sothetotalmax.possiblelifespanis12years.
4.Necessarydocumentation
a)Owner´smanual
b)Repackandinspectionlogbook(withrecordedrepackandinspectionjobs)
5.Modeofoperation
During an emergency situation while flying the pilot pulls at the release handle with a firm tug. Thereby the outer container
opensandthedeploymentbagisreleased.Afterthattherescueparachutepackage(whichisstillpackedinit´sdeployment
bag)have tobethrownwithadynamicmove intothefree airspace.That meanstherelease handlehavetobethrown away
togetherwiththedeploymentbag!!!
The deployment bag and the bridle are designed in a way which releases the lines and canopy of the parachute not before
theparachutepackageisthrownaway.
Thispreventsanunintentionalortooearlyopeningoftherescueparachute.Thisisminimizingthedangeroftanglingupwith
the paraglider / hang glider / pilot or the reason which maybe causal for the emergency case (e.g. collision with another
paraglider).
Moreover the maximum throwing speed of the deployment bag should be reached when the deployment bag leaves the
pilothand.
Ingeneral:Thefastertherescuesystempackageisthrownaway,thequickerthesystemwillopen.
After the throw the deployment bag opens and releases lines and canopy. The powerful throw and/or the airstream
stretchesthelinesandcanopynowtherescueparachutesopens.
Whentherescueparachuteisopenedcompletely,youfirsthavetocheckthealtitudeaboveground.
If you have still enough height you should try to make the paraglider unable to fly according to the doctrine to avoid an V-
positionoftheparagliderandtherescuesystem.
Ifyoudonothaveenoughheightanymore,justfocusonthegroundandprepareyourselfforalandingfall.
6.Usageofsteeringlines
TheTrigonisequippedwithasystemthatpre-brakesthecanopyafteropeningbyshortenedsteeringlineswhichpreventsa
forwardspeed.
Theuseofthesteeringlinesrequiresafewconditionsthatmustallbemet:
After the rescue system has successfully opened in the pre-braked condition and is stable above the pilot, a sufficient
altitudemustbepresent.Inaddition,theparaglidermustbeinastable,incapableflyingposition(bestis,iftheparaglidergot
disconnectedbyaquickoutrelease).
If these conditions are all met, the pre-braked steering lines can be unlocked by pulling both control handles symmetrically
down.Therescuesystempicksupforwardspeedbydecreasingtheuseofthebrake.
Thecontrol handlesare attachedtothe rightandleftofthe bridle,rightabove thesuspension point.The steeringisworking
byincreasingthedragofthecanopy,sameasonaparaglider,butwithaslowanddampedreaction.
Attention:
Whenthepre-brakingisreleased,themax.takeoffweightisreduced(see1.Technicaldata).
Iftheparagliderisnotinareliable,incapableflyingpositionorseparatedthepre-brakedsteeringlinesmustbenot
releasedandused.IfreleasedinthisconditiontherewouldbeaveryhighpossibilityofaV-positionofparagliderto
rescue system (down plane), in combination with very high and dangerous sink rate and a without possibility of
steering.
The behaviour of the Trigon with non-activated steering lines is comparable with a conventional, not steerable
rescuesystem.
Withashouldersuspensionontheharness,dependingonthepositionofthesuspensionpoints,itcanbedifficulttoturnthe
headand seethe controlhandles.Veryoften, theserescuesystem suspensionare mountedonthe harnessfar intheback
areaand theposition ofthecontrolhandlescan thereforeonly befelt. Werecommendto testthe positionofthehandlesin
advancebyasuitablesimulation(hangintheharnessontheshouldersuspension).
The use of a front container is possible, but the bridle of the rescue system must be extended for the use on the main
carabiners.Otherwisethecontrolhandlesaremountedtoolowandasteeringisnotguaranteed.Theextensionisavailable
asanaccessory.
7.
A parachute must be controlled by a registered packer before it is repacked. After being opened during an emergency
rescue,theparachutemustbeinspectedbythemanufactureroraworkshopwhichisauthorizedbythemanufacturer.
A repackedparachuteshouldundergoareleasetestaftermountedintheoutercontainerorharness.Thisensuresthatthe
openingforcetoreleaseisbetween2kpand7kp.
Bythe firstassemblingof therescuesystem withanouter containerorharness withanintegrated rescuesystemcontainer
thefunctionalitymustbecheckedbyanexpertandmustbeconfirmedintheinspectionlogbook.
The inspection required after 24 months includes a complete visual examination of all components (cloth, seams, lines,
bridlesetc)fordamageandwear.Foraninspectionsuitabletoolsmustbeavailable(lighttable,repacktoolsetc).
Allworkmustbedocumentedappropriately.
8.Behaviourifdamagesarenoticed
If you notice any damage at the rescue parachute, which may affect the airworthy condition of the recue parachute, you
havetosendtherescueparachuteforinspection/repairtothemanufacturer.
Also, ifyouarenotsureabouttheairworthyconditioninanyway,youhavetosendtheparachutetothemanufacturer.
Attention:Chemicals,detergents, insects,mouldstainsor thelike canhavethesame negativeeffectstothestrength ofthe
partsasmechanicalinfluences.
9.Storage
Oil,grease,acidandpaintshouldnotbestoredneartheparachute.Thestoragespaceshouldbedry.Parachuteswhichwill
notbeusedforalongperiodshouldbeopenedandthecanopylooselyrolledandstoredinapermeablebag.
Avoidunnecessaryhightemperatureabove60°C(e.ginaparkingcar)!
10.Maintenance
Thelifespan andconditiondependslargely uponhowcarefully youhandleand maintainyourparachute.Out ofthisreason
werecommendtocontroltheparachuteregular,atthelatestifitisrepacked,ifthereareanywearsordamages.
Duringnormaluseyouhavetotakecareofthefollowingpoints:
If the parachute got wet, you have to open it and dry it at a well ventilated place as soon as possible (but avoid direct
sunlight!)Thefastdryingisimportanttoavoidmouldstains.Aftertheparachuteiscompletedryitcanberepacked.
Iftheparachuteisstrainedmorethannormal(forexample:acardroveovertheharnessinwhichtheparachuteisplaced,or
itmaybeisdamagedbyasharpobject,oranyotherpossibledamage),youhavetosendtheparachutetothemanufacturer
tocheckit.
Avoidcontactwithsaltwater,acidsorotheraggressivesubstances!
Alsoavoidunnecessaryexposuretosunlight,causetheUVraysmaydamagethemolecularstructureofthematerial.
11.Cleaning
Adirtycanopyandcontainercanbecarefullycleanedwithclearwaterandasoftsponge.
Attention: Never use detergents, chemicals, brushes or hard sponges to clean the parachute! Also a cleaning in the
washingmaschineisnotallowed.
Iftherescueparachute getsincontact withsaltwater,youhaveto washitwith freshwater.Atoooftencleaning accelerates
theageingofthesystem.
ControlandInspectionoftheparachute
45

16.
Theparachutestructureissquareandhas12/16/20/24panels(see“technicaldatas”)
Thecanopyismadeoftearrestistant,highstrenghtnylonfabric.Themainseamsareflatfellseamsandarereinforcedby
a band. The lines are sewn to the canopy and reinforced with V-tapes at the canopy. The crown is pulled down by the
centerlines.Alllinesandcenterlinesareconnectedtothebridle.
Thebridlehasastrengthofmorethan2400daN.
Structureoftheparachute
Thedeploymentbagismadeofnylonfabricandgetsclosedat5points.
On the deployment bag are two loops. At one of these loops the release handle of the outercontainer or the harness is
attached.
The outer container (option) is made of robust, water repellent Nylon fabric. It consists of 2 lateral flaps, the upper and
lowerflap,thereleasehandlewith2pins,whichclosesthecontainer.
back side outer container
with attachment pointsouter container opened
velcro for harness
attachment
release handle
loop in points
release handle
upper side: lower side:
Risers / bridles
Control handles
Trailing edge
Canopy
Suspension lines
riser front riser rear
mounting points
marking
right/left
marking
front
control handles
pre-brake
steering lines
riser
upper part
suspension lines
inner
flap
Nose
12.Repairs
Repairjobshavetobedoneonlybythemanufactureroraworkshopwhichiscertifiedbythemanufacturer.
13.Natureandenvironmentfriendlybehaviour
Pleasedoournature-nearsportinawaywhichdonotstressnatureandenvironment!
Please do not walk beside the marked ways, don´t leave your litter, don´t make unnecessary loud noises and respect the
sensitivebalanceinthemountains.Especiallyatthetake-offwehavetotakecareforthenature!
14.Environmentallycompatiblewastedisposal
The materials of which a rescue parchute is made require a special waste disposal. So please send disused parachutes
backtous.Wewillcareaboutaprofessionalwastedisposal.
15.Spareparts/changeableparts
Beside the rubber rings the Ultra Cross series do not need any other spare parts. Only certified rubber rings with the size
25x3x1mmareallowed!Thisspecialrubberringsyoucangetfromusverywellpriced.
Thisparachutesystem hasbeentestedand foundcompliantusingthe originalmanufacturer'sinnercontainer.Useofany
otherdeploymentbagmayproducedifferentresults,includingfailures!
Thedeploymentbagis partoftherescueparachute.It´snotallowed touseanotherrescueparachutedeploymentbag of
othermanufacturers, excepta deployment bagdescribed in 19.4.is used.Achangetoanyother deploymentbagwill void
theairworthynessoftherescueparachute!
Overview:
construction of riser:
6
7

16.
Theparachutestructureissquareandhas12/16/20/24panels(see“technicaldatas”)
Thecanopyismadeoftearrestistant,highstrenghtnylonfabric.Themainseamsareflatfellseamsandarereinforcedby
a band. The lines are sewn to the canopy and reinforced with V-tapes at the canopy. The crown is pulled down by the
centerlines.Alllinesandcenterlinesareconnectedtothebridle.
Thebridlehasastrengthofmorethan2400daN.
Structureoftheparachute
Thedeploymentbagismadeofnylonfabricandgetsclosedat5points.
On the deployment bag are two loops. At one of these loops the release handle of the outercontainer or the harness is
attached.
The outer container (option) is made of robust, water repellent Nylon fabric. It consists of 2 lateral flaps, the upper and
lowerflap,thereleasehandlewith2pins,whichclosesthecontainer.
back side outer container
with attachment pointsouter container opened
velcro for harness
attachment
release handle
loop in points
release handle
upper side: lower side:
Risers / bridles
Control handles
Trailing edge
Canopy
Suspension lines
riser front riser rear
mounting points
marking
right/left
marking
front
control handles
pre-brake
steering lines
riser
upper part
suspension lines
inner
flap
Nose
12.Repairs
Repairjobshavetobedoneonlybythemanufactureroraworkshopwhichiscertifiedbythemanufacturer.
13.Natureandenvironmentfriendlybehaviour
Pleasedoournature-nearsportinawaywhichdonotstressnatureandenvironment!
Please do not walk beside the marked ways, don´t leave your litter, don´t make unnecessary loud noises and respect the
sensitivebalanceinthemountains.Especiallyatthetake-offwehavetotakecareforthenature!
14.Environmentallycompatiblewastedisposal
The materials of which a rescue parchute is made require a special waste disposal. So please send disused parachutes
backtous.Wewillcareaboutaprofessionalwastedisposal.
15.Spareparts/changeableparts
Beside the rubber rings the Ultra Cross series do not need any other spare parts. Only certified rubber rings with the size
25x3x1mmareallowed!Thisspecialrubberringsyoucangetfromusverywellpriced.
Thisparachutesystem hasbeen testedand foundcompliant usingthe originalmanufacturer's innercontainer.Useofany
otherdeploymentbagmayproducedifferentresults,includingfailures!
Thedeploymentbagis partoftherescueparachute.It´snotallowedtouse anotherrescue parachutedeploymentbag of
othermanufacturers, excepta deployment bagdescribed in 19.4.is used.Achangetoanyother deploymentbagwill void
theairworthynessoftherescueparachute!
Overview:
construction of riser:
6
7

7.Arrangepanel8. 8.Arrangepanel7.Thispanelisshorter!
9.Arrangepanel6.Thispanelisshorter! 10.Arrangepanel5.
11.Arrangepanel4. 12.Arrangepanel3.
3. Separate the suspension lines from the risers and check
thattheyarenotcrossed.
Steering lines and lines to the nose (yellow arrows), center
lines(redarrows),lateralsuspensionlines(greenarrows).
17. Packing the parachute
4. Separate the lines up to the canopy. The red nose points
upwards.
1. Set the pre-brake of the control handles. Teh steering
lineshaveaneyeat40cm.Throughthisthehardpartofthe
control handle is insertet (red arrow). Insert in the fixation
rubber band above control handle and jut out steering line
(yellowarrow).
5. Tighten the suspension lines and lay all panels on the
rightside,tothatpanel10isasshowninthepicture. 6.Placepanel10centeredtothefloorandarrangepanel9to
the side. Arrange upper part of panel 9 so far that it forms a
trapeze.
2. Slid on the numbered packing loops on a packing cord
and hook in the packing cord. The Trigon 100 has 16
packingcords,Trigon125has20.
ThefollowingpicturesshowaTriogon125.
89

19.Arrangepanel6..Thispanelisshorter! 20.Arrangepanel5.
21.Arrangepanel4. 22.Arrangepanel3.
23.Arrangepanel2. 24. Arrange panel 1 (this panel is shorter!) and place a
packingweightonthehem.
17.Arrangepanel8.
13.Arrangepanel2. 14. Arrange panel 1 (this panel is shorter!) and place a
packingweightonthehem.
15.Foldtherightsideontheleftside. 16.Place panel 10 centeredtothe floor and arrange panel
9 to the side. Arrange upper part of panel 9 so far that it
formsatrapeze.
18.Arrangepanel7.Thispanelisshorter!
10 11

18. Mounting in a container
1. Connect the release handle at the loop in the middle of
the deployment bag. Place the bridle at the side of the
containerwhichyouprefer.
2.Close the two lateral flaps of the outercontainer with two
packing-cords and closed it with the pins of the handle
provisionally.
3.Close theupper andlower flapwiththe pins.Remove the
packingcordsthen! 4. Close the upper flap finally. Notice the packing in the
“repackandinspectionlogbook”.
31.Place„8-shaped“hanksonthedeploymentbag. 32.Closethelast,outerflapwiththesuspensionlines.
25.FoldrightsideS-shaped.(Step1). 26.FoldleftsideS-shaped(Step2).
27.Removepackingcordandplacedeploymentbagunder
thecanopy. 28. Fold the rest ofthecanopyin S-folds in the deployment
bag.
29. Close inner flaps of deployment bag with suspension
lines. 30. Bundle the lines in “8-shaped” hanks. Do not bundle
thelast30cmoflines.
Attention: Use new rubber rings for hanks and
deploymentbageverytimetheparachuteispacked.
Schematic
illustration
S-fold
13
12
12

19.4.Harnesseswithcombineddeploymentbag/releasehandle
WARNING—Useofthisrescuesystemwithanyalternativedeploymentbag:thespeedofopeningandopeningshocktest
hasbeencompletedusingthedeploymentbagsupplied.
Useofanyotherdeploymentbagmayproducedifferentresults(includingfailure).
Severalharnessesareequippedwithacompletereleasehandle/deploymentbagsystem,whichisadaptedoptimallytothe
correspondingharness.
Whenusing sucha system ensurethat thedeploymentbag iscompatibleand testedtothe rescuesystem used.Therefore
consultthedeploymentbag/harnessmanufacturer if this deployment bag is suitable for theTrigon.The use of other (than
theoriginal)deploymentbagsareinfullresponsibilityofthemanufacturer.Thereareatleast3thingstoconsiderinaddition:
1. The permitted volume range of the handle/deployment bag system must cover the volume of the rescue system. The
volumeoftherescuesystemistobefoundunder1.Technicaldatas.
2.Inadditionmakesurethatthedeploymentbagreleasestherescuesystemwithoutanyproblem.Adeploymentbagwith4
ormoreflaps(socalledcloverleafdeploymentbag)isnormallycompatible.
3.Itisimportanttoensurethatthemanufacturerofthedeploymentbagreleasestheuseofasteerablerescuesystem.
Mounting:
Iftheaboveconditionsaremet,therescuesystemistobepackedbyfollowingNo.17(Packingtheparachute)step1to26.
The remaining steps of stowing the rescue system in the harness specific deployment bag is shown in the manual of the
harness.
Attention:
If the parachute is mounted to a harness or a front/outer container you have to check the compatibility. This check is only
allowed to be done by therefore authorizied persons. The compatibility check have to be noticed in the “Repack and
inspectionlogbook”.
Beside some other points you have to take care particularly that the connection length of the release handle to the
deployment bag is minimized. Therefore different loops are at the deployment bag where the release handle can be
attached.You shouldalways trytouse theshortest possibleconnection to ensurethat therescue parachute canbe thrown
as good as possible. But you also have to take care that the release of the container is not blocked in any way. (take care
thatthereleasepindoesnotblock!!!). Readthemanualoftheharnessinanyway.
20.Specialitiesforparaglider´swinchtowing
Forwinchtowingyouhavetoconsidertheinstructionsoftheharness-,paraglider-andtowingreleasemanufacturer!
Ifyouuseafrontcontaineryouhavetoensurethattherescueparachutecanbereleasedineverysituation.
21.Pre-flightcheck
Inadditiontoanormalpreflightcheck(seemanualoftheglider/harnessormaybetowingdevice),youhavetocheckbefore
everytakeoffthattherescuecontainerisclosedcorrectlyandthereleasehandleisplacedcorrectly.
Iftherescueparachuteconnectionbridleisremovedaftereveryflight(forexample:whenyouuseafrontcontainer)youalso
havetocheckthecorrectattachmentofthebridle!
5. To avoid an unintentional opening, the German type
approval (LTF) prescribe a minimum release-force of 20 N.
Ifthesystemdoesnothavethisminimumrelease-force,itis
necessary to build in a predetermined breaking point
(special thread). This have to define a minimum release
forceof20N.
The special thread which is used as predetermined
breaking point must be put through the hole of the pin and
aroundtheloopasshownonthepicture.
Bothendsofthisspecialthread arefixed witha knotand an
additionalseal.
To secure the pin it is only allowed to use certified material
because if the strength of this material is too high the save
operationoftherescuesystemisnotguaranteed.
This thread is supplied by Fly market GmbH & Co. KG! Do
notuseotherthreadswhichmaylookthesame!
19. Mounting / integration to a harness
Theadaption oftheTrigononthe harnessis possible atthe attachmentpointsfor rescuesystems in theshoulder areaorin
themainsuspension.
It must be ensured with every assembly that the risers of the Trigon are mounted in the right direction and side. For this
purpose,therisersaremarkedwith„R“forrightand„L“forleft,aswellas„front“forfront.
The conection of rescue systems must always be carried out with suitable connecting links that have at in sum least a
strenghtof2400daNforbothsides.
When mounting in the main suspension of the harness (for example with a separate front container), the risers have to be
extendedinordertoenablesteeringwiththecontrolhandles(alsoseethemanualforthefrontcontainer!!!)
When attaching to the shoulder straps, check that the harness has separate attachment points directly on the shoulder
straps.Whethertheseareavailableandsuitablecanbeseeninthemanualoftheharness.Theusewithanexistingbridleof
theharnessisnotpossible!!!!
The riseres of the Trigon is normally long enough to be routed to the harness´s rescue system container. If this is not the
case,thenitisnotpossibletousetheTrigononthisharness.
Ingeneral,whenasseblingrescuesystemson/intheharness,alwaysconsultthemanualoftheharnessorcontainer!!
19.1.harnesseswithoutintegratedrescuesystemcontainer:
If the harness does not have an integrated rescue system container use one of the outercontainer which is shown at point
15.
The outercontainer shown at point 16 has got several loops, eyelets and velcro-tapes on it´s back side to attach it at the
harness.The possibilitiesof theattachmenttotheharness dependsontheharness.For acorrectmountingonthe harness
pleaserefertotheharnessmanual.
19.2.Usageofafrontcontainer/outercontainerofanothermanufacturer:
The use of a front container or other external container as described herein depends on whether it is suitable, has the
correctsizeandhasbeentypecertified.
Ifawrongsizedcontaineroranusuitableornottypcertifiedcontainerisused,theairworthinesswillexpire.
Formountingtherescuesystemincontainersofothermanufacturerpleaserefertothemanualofthiscontainer.
WhenusingtheTrigoninthemainsuspensionoftheparaglider,anextensionoftherisersisnecessary!
19.3.harnesseswithintegratedrescuecontainer:
Almostallmodernharnesseshaveanintergratedrescuecontainerinwhicharescuesystemcanbeplaced.Forthecorrect
mountingoftherescuesystem insuchacontainerpleaserefertotheharnessmanual.
14 15

This manual suits for next models
2
Table of contents
Other Independence paragliding Aircraft manuals