manuals.online logo
Brands
  1. Home
  2. •
  3. Brands
  4. •
  5. Indesit
  6. •
  7. Cooker
  8. •
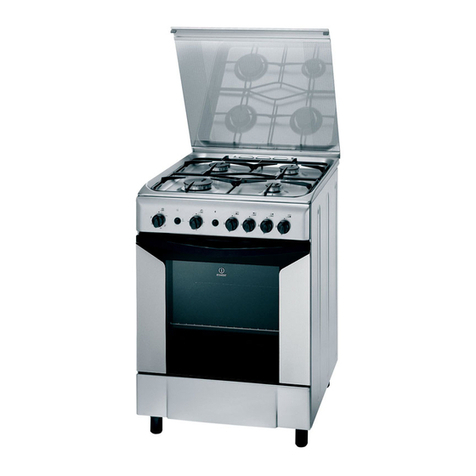
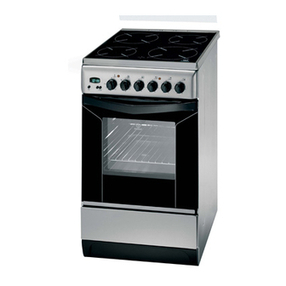
  9. Indesit KD6G35 User manual

Indesit KD6G35 User manual

This manual suits for next models

1

Other Indesit Cooker manuals

Indesit ID67G0MCB/UK User manual

Indesit

Indesit ID67G0MCB/UK User manual

Indesit ID67G0MCW/UK User manual

Indesit

Indesit ID67G0MCW/UK User manual

Indesit IT50G User manual

Indesit

Indesit IT50G User manual

Indesit K3C11/R User manual

Indesit

Indesit K3C11/R User manual

Indesit KD6E35 User manual

Indesit

Indesit KD6E35 User manual

Indesit KG6407 AV/G User manual

Indesit

Indesit KG6407 AV/G User manual

Indesit ID5V92KMW/UK User manual

Indesit

Indesit ID5V92KMW/UK User manual

Indesit KT6G2M User manual

Indesit

Indesit KT6G2M User manual

Indesit KN3E11/EX User manual

Indesit

Indesit KN3E11/EX User manual

Indesit KD6C35 User manual

Indesit

Indesit KD6C35 User manual

Indesit KNJ6G27/RU User manual

Indesit

Indesit KNJ6G27/RU User manual

Indesit I6VMH2A/NL User manual

Indesit

Indesit I6VMH2A/NL User manual

Indesit HGK 20.B Quick start guide

Indesit

Indesit HGK 20.B Quick start guide

Indesit CI6V E97 A1 HA User manual

Indesit

Indesit CI6V E97 A1 HA User manual

Indesit ID60G2 User manual

Indesit

Indesit ID60G2 User manual

Indesit K3E 517 User manual

Indesit

Indesit K3E 517 User manual

Indesit I6GS1 AG/NL User manual

Indesit

Indesit I6GS1 AG/NL User manual

Indesit I5GMH6AG User manual

Indesit

Indesit I5GMH6AG User manual

Indesit ID6IVS2/UK User manual

Indesit

Indesit ID6IVS2/UK User manual

Indesit K3G11/G User manual

Indesit

Indesit K3G11/G User manual

Indesit K3G2S/O User manual

Indesit

Indesit K3G2S/O User manual

Indesit KT6C3 User manual

Indesit

Indesit KT6C3 User manual

Indesit K 642 V/G User manual

Indesit

Indesit K 642 V/G User manual

Indesit K6G40S User manual

Indesit

Indesit K6G40S User manual

Popular Cooker manuals by other brands

Logik LFTG50A12 installation manual

Logik

Logik LFTG50A12 installation manual

Smeg SUK61CMA5 user manual

Smeg

Smeg SUK61CMA5 user manual

Rayburn 200G/L Gas Fired Cooker Installation and servicing instructions

Rayburn

Rayburn 200G/L Gas Fired Cooker Installation and servicing instructions

VacPak-It SV158 manual

VacPak-It

VacPak-It SV158 manual

Electrolux N7E Installation and operating manual

Electrolux

Electrolux N7E Installation and operating manual

Electrolux EKE6100 Instruction book

Electrolux

Electrolux EKE6100 Instruction book

ARO SHC5065 instruction manual

ARO

ARO SHC5065 instruction manual

Baumatic BCE905SS user manual

Baumatic

Baumatic BCE905SS user manual

Bosch HCE744350R instruction manual

Bosch

Bosch HCE744350R instruction manual

Modena FC 7645 SGM User manual book

Modena

Modena FC 7645 SGM User manual book

Stanley Donard 60 Installation and operating instructions

Stanley

Stanley Donard 60 Installation and operating instructions

Bartscher 201TC manual

Bartscher

Bartscher 201TC manual

Parkinson Cowan 50 GR/BU installation instructions

Parkinson Cowan

Parkinson Cowan 50 GR/BU installation instructions

Creda S150E Installation and user instructions

Creda

Creda S150E Installation and user instructions

Creda HB48309 instructions

Creda

Creda HB48309 instructions

Bosch HCE743220F instruction manual

Bosch

Bosch HCE743220F instruction manual

Tricity Bendix SE545P manual

Tricity Bendix

Tricity Bendix SE545P manual

NEFF E1461A2/01 Instructions for use

NEFF

NEFF E1461A2/01 Instructions for use

manuals.online logo
manuals.online logoBrands
  • About & Mission
  • Contact us
  • Privacy Policy
  • Terms and Conditions

Copyright 2025 Manuals.Online. All Rights Reserved.

KD6G35
KDP60E
Contents
Introduction, 2
For Your Safety, 3
Cloc and Minute Minder Operation, 4-5
Hotplate, 6
Grill, 7
Ovens, 8
Oven Coo ing Charts, 9-10
Care and Cleaning, 11
Something Wrong with your coo er?, 12
Installation Instructions, 13-16
If it still Won't Wor , 17
Guarantee Information, 18
Service Information, 19
Operating Instructions
Free Standing Dual Fuel Coo er
GB
English, 1
GB
2
GB
To help you make the best use of your cooker,
PLEASE READ THIS BOOKLET AREFULLY.
Your new cooker is guaranteed and will give lasting
service.
The guarantee is only applicable if the cooker has
been installed in accordance with the Installation
Instructions.
The cooker is designed specifically for domestic use
and responsibility will not be accepted for use in any
other installation.
When first using the cooker ensure that the room is
well ventilated (e.g. open a window or use an
extractor fan) and that persons who may be
sensitive to the odour avoid any fumes. It is
suggested that any pets be removed from the room
until the smell has ceased. This odour is due to any
temporary finish and also any moisture absorbed by
the insulation.
Introduction
Our policy is one of continual improvement in design
and development, therefore strict accuracy of
illustrations and descriptions cannot be guaranteed.
This appliance conforms to the following EE
Directive:
Gas Appliances
90/396/EE
Low Voltage Equipment
73/23/EE
93/68/EE
Electromagnetic ompatibility
89/336/EE
92/31/EE
93/68/EE
3
GB
Please read the precautions below before using
your coo er.
ALWAYS . . .
ALWAYS make sure you understand the controls
before using the cooker.
ALWAYS check that all controls on the cooker are
turned off after use.
ALWAYS stand back when opening an oven door to
allow heat to disperse.
ALWAYS use dry, good quality oven gloves when
removing items from the ovens.
ALWAYS take care when removing items from the
top oven/grill when the main oven is on, as
the contents may be hot.
ALWAYS keep the oven and grill doors closed when
the cooker is not in use.
ALWAYS place pans centrally over the hotplate
burners and position them so that the
handles cannot accidentally be caught or
knocked or become heated by other
burners.
ALWAYS keep the cooker clean, as a build up of
grease or fat from cooking can cause a fire.
ALWAYS allow the cooker to cool before cleaning.
ALWAYS follow the basic principles of food handling
and hygiene to prevent the possibility of
bacterial growth.
ALWAYS keep ventilation slots clear of obstructions.
ALWAYS turn off the electricity supply before
cleaning or replacing an oven lamp.
ALWAYS refer servicing to ORGI registered
appliance service engineers.
For your Safety
NEVER . . .
NEVER leave children unsupervised where the
cooker is installed as all surfaces will get
hot during and after use.
NEVER allow anyone to sit or stand on any part of
the cooker.
NEVER store items that children may attempt to
reach above the cooker.
NEVER heat up unopened food containers as
pressure can build up causing the container
to burst.
NEVER store chemicals, food stuffs, pressurised
containers in or on the cooker, or in cabinets
immediately above or next to the cooker.
NEVER fill a deep fat frying pan more than 1/3 full
of oil, and never use a lid. DO NOT LEAVE
UNATTENDED WHILE OOKING.
NEVER place flammable or plastic items on or near
the hotplate.
NEVER use proprietary spillage collectors on the
hotplate.
NEVER use the cooker as a room heater.
NEVER dry clothes or place other times over or
near to the hotplate or oven/gril doors.
NEVER wear garments with long flowing sleeves
whilst cooking.
NOTE:NOTE:
NOTE:NOTE:
NOTE: The use of a gas cooking appliance results
in the production of heat and moisture in the room in
which it is installed. Always ensure that the kitchen
is well ventilated; keep natural ventilation holes open
or install a mechanical ventilation device
(mechanical extractor hood).
In particular when using the grill or more than one
hotplate burner, open a window if a mechanical
ventilation device is not operating.
! The appliance should not be operated by people
(including children) with reduced physical, sensory
or mental capacities, by inexperienced individuals or
by anyone who is not familiar with the product.
These individuals should, at the very least, be
supervised by someone who assumes responsibility
for their safety or receive preliminary instructions
relating to the operation of the appliance.
4
GB
Cloc and Minute Minder
CLOCK OPERATION
To Set Time of Day
Step 1 heck that the electricity supply to the
cooker is turned on.
Step 2 When switched on the display will show
0.00 flashing intermittently.
Step 3 Press the " " button and
then press either the "+" or "-" buttons to
set the correct time of day.
Note: If the electricity supply has been off, the "+"
button must be pressed once before the "-" button, if
it is required to reduce the time of day.
THE TIME OF DAY IS NOW SET.
00.00
12.00
5
GB
Cloc and Minute Minder
MINUTE MINDER OPERATION
To Set the Minute Minder
Step 1 Press the "+" button until the required time
is set. A "Bell" symbol will light up. During
setting the time adjusts in 10 second
intervals up to a maximum of 99mins
50secs.
It can also be adjusted by pressing the "-" button.
At the end of the set time, a bleeping sound will be
heard and the "Bell" will disappear.
The bleeper can be cancelled by pressing the "+"
button.
The minute minder can be cancelled before the
bleeper sounds by pressing the "+" and "-" buttons
together until 0.00 appears in the display window.
BLEEPER SOUND
To adjust the pitch of the bleeper, press the "-"
button while the bleeper is sounding.
For example:-
(a) Press the "+" button and set 10 seconds.
(b) When the bleeper sounds, press and release the "-
" button, until preferred pitch is set.
(c) Press and release the "+" button to cancel the
bleeper.
NOTE: If the sound of the bleeper appears to be
different, it is most likely that the pitch of the
bleeper has been inadvertently adjusted.
00.20
13.23
6
GB
Hotplate
The hotplate lid is fitted with a safety device which
cuts off the gas supply to the hotplate burners
unless the lid is fully open. Do not use the safety
device as a means of controlling the hotplate
burners.
The hotplate has one high speed burner, two normal
simmering burners and one small simmering burner
which will accommodate pans between 120mm (5")
and 260mm (10") diameter. Locate the pan support
trivet above one of the simmering burners if a very
small pan is being used.
All pans should be positioned centrally over the
burners.
TO USE THE HOTPLATE
1. Remove any items or spillage from the top of the
lid and then raise it to its fully open position.
2. Press the ignition button and then push in and turn
the control knob of the chosen burner anti-clockwise
to the large flame symbol. ontinue to press the
ignition button until the sparks light the gas.
3. Turn the control knob anti-clockwise to reduce the
heat input. Only turn the control knob between the
large flame symbol and the small flame symbol
when adjusting the setting.
4. To turn off, turn the control knob fully clockwise to
the symbol O.
DO NOT use the hotplate unless all pan supports
are in position.
DO NOT use mis-shapen pans which may be
unstable.
DO NOT use round base woks directly on the pan
supports.
DO NOT use the glass lid as a working surface.
Each burner is fitted with a spark ignitor for lighting
the gas. To ensure rapid lighting of the burners
every time they are used, the ignitors must be kept
clean and dry. Remove any food spillage or
cleaning materials from the ignitor using a small
nylon brush such as a tooth brush. Access to the
ignitor can be achieved by lifting off the loose burner
parts carefully when the burners are cool.
When the hotplate burner bodies and caps are
removed for cleaning, be careful not to drop any
food particles or cleaning materials into the burner
bases, to avoid the possibility of blocking the gas
jets.
If aluminium based pans are used, a silvery deposit
may appear on the top edge of the pan support
fingers. See ' are and leaning' section for cleaning
information.
SAFETY REQUIREMENTS FOR DEEP FAT FRYING
1. Never fill chip pans more than one third full with oil
or fat.
2. Never leave oil or fat unattended during the heating
or cooling period.
3. Never heat fat or fry with a lid on the pan.
4. Always dry food thoroughly before frying, and lower
it slowly into the hot oil or fat. Frozen foods in
particular will cause frothing and spitting if added
too quickly.
5. Always keep the outside of the pan clean and free
from streaks of oil or fat.
HOW TO DEAL WITH A FAT FIRE
1. Do not move the pan.
2. Turn off the hotplate burners.
3. Smother the flames with a fire blanket or damp cloth
to extinguish the fire. Do not use water or a fire
extinguisher as the force of it may spread the
burning fat or oil over the edge of the pan.
4. Leave the pan for at least 60 minutes before moving
it.
7
GB
Grill
CAUTION - ACCESSIBLE PARTS MAY BECOME
HOT WHEN THE GRILL IS USED.
YOUNG CHILDREN SHOULD BE KEPT AWAY.
GRILLING SHOULD NEVER BE UNDERTAKEN
WITH THE GRILL DOOR CLOSED
The grill control is designed to provide variable heat
control of either the full width of the grill or just the
left half. Turning the control knob clockwise will
switch on the full width and turning anti-clockwise
will switch on just the left half.
A gentle flow of air will be blown from underneath the
control panel when the grill is in use.
GRILL PAN AND HANDLE
The grill pan handle is detachable from the pan to
facilitate cleaning. The handle can be either
detachable from or fixed to the pan.
Remove the screw and washer
from the grill pan bracket, tilt
the handle over the recess
adjacent to the bracket (A).
Slide the handle toward the
centre of the pan (B) and let
the handle locate over the
bracket ( ).
For a detachable handle:
Remove the screw and washer
from the grill pan and keep
safe.
For a fixed handle: Replace
the screw and washer and
ensure they are fully tightened.
Warning: Ensure when using
grill pan handle in the
detachable manner it is
centralised and secure.
A
B
TO USE THE GRILL
1. Open the grill/top oven door and place the shelf in
the required position.
2. Turn the grill control knob clockwise to 4 (max) for full
width grilling or anticlockwise for the half grill.
3. Slide the grill pan toward the back of the grill
compartment until it stops.
4. Leave the control at 4 (max) for toast and for sealing
and fast cooking of foods. For thicker foods requiring
longer cooking, turn the control to a lower setting after
sealing on both sides at 4 (max).
NOTE: The grill will not operate unless the top oven
control is in the OFF position.
Grilling can be started from cold but for best results
preheat for approximately 5 minutes.
DO NOT cover the grill pan or grid with aluminium
foil as this can hold fat, intensify the heat
and create a fire hazard.
C
8
GB
Both ovens have a thermostat light that will
illuminate until the oven has reached the set
temperature. It will then switch off and on during
cooking as the thermostat maintains the
temperature.
Each shelf has a safety stop to prevent it from being
pulled out too far when attending to food. Shelves
are removed by pulling them out to the stop and
then lifting at the front to withdraw. The oven cooking
charts are a guide only, giving approximate cooking
temperatures and times. To suit personal taste and
requirements it may be necessary to increase or
decrease temperatures by 10° .
After the ovens have been operating for a short
period, a gentle flow of air will be blown from
underneath the control panel which may continue for
a while after the controls have been turned off.
TOP OVEN - CONVENTIONAL COOKING
The top oven can be used to cook small quantities
of food or used in conjunction with the main oven to
provide additional cooking space.
TO USE THE TOP OVEN
1. Place oven shelf in chosen position (refer to cooking
chart).
2. Turn the top oven control knob clockwise to the
required setting. The top oven thermostat light will
go off when the oven has reached the set tempera-
ture.
Food should be placed in the centre of the shelf with
a gap of at least 25mm (1 inch) between it and the
grill element to avoid burning and ensuring an even
cooking.
Do not place food or dishes on the floor of the oven.
Ovens
MAIN OVEN - FAN COOKING
Fan cooking is ideal for large poultry or joints of
meat, reducing cooking times and often eliminating
the need for preheating the oven. It is also ideal for
batch cooking where food is cooked on more than
one level, because the forced circulation of hot air
gives an even temperature from the top to the
bottom of the oven.
When cooking recipes that are not designed for a
fan oven, it is recommended that the temperature is
reduced by about 25° and the time reduced by
about 10 minutes for each hour. If a large quantity of
food is being cooked, it will be necessary to
increase the cooking time to compensate for the
extra oven load.
TO USE THE MAIN OVEN
1. Place oven shelves in chosen position (refer to
cooking chart).
2. Turn the main oven control knob clockwise to the
required setting. Pre-heating is not normally
necessary, but some foods such as bread, scones
and Yorkshire pudding do benefit from being placed
in a hot oven.
Food should be placed in the centre of each shelf to
allow for even air circulation around the food.
9
GB
Oven Coo ing Charts
The most accurate method of testing the readiness of joints of meat or whole poultry is to insert a meat
thermometer into the thickest part of a joint, or the thickest part of poultry thighs, during the cooking period.The
meat thermometer will indicate when the required internal temp has been reached.
Beef - Rare: 60° Lamb: 80° Poultry: 90°
Medium: 70° Por : 90°
Well Done: 75° Veal: 75°
Top Oven Cooking
Meat Pre-heat Temperature °C Time (approx.) Position in Oven
Beef/ Lamb
(slow roasting) Yes 170/180 35 mins per 450g (1lb) + 35 mins over.
Runner 1 from
bottom of oven.
Beef/ Lamb
(foil covered) Yes 190/200 35-40 mins per 450g (1lb)
Pork
(slow roasting) Yes 170/180 40 mins per 450g (1lb) + 40 mins over
Pork
(foil covered) Yes 190/200 40 mins per 450g (1lb)
Veal
(slow roasting) Yes 170/180 40-45 mins per 450g (1lb) + 40 mins over
Veal
(foil covered) Yes 190/200 40-45 mins per 450g (1lb)
Poultry/Game
(slow roasting) Yes 170/180 25-30 mins per 450g (1lb) + 25 mins over
Poultry/Game
(foil covered) Yes 190/200 25-30 mins per 450g (1lb)
asserole
ooking Yes 150 2-2½ hrs
If using aluminium foil, never:
1.Allow foil to touch sides of oven. 2. over oven interior with foil. 3. over shelves with foil.
10
GB
Oven Coo ing Charts
Note: If soft margarine is used for cake making, temperatures recommended by the manufacturers should be
followed.Temperatures recommended in this chart refer to cakes made with block margarines or butter only.
Top Oven Cooking
Baking Pre-heat Temperature °C Time in mins. Position in Oven
Scones Yes 210/220 10-15 Runner 2 from bottom of oven
Small akes Yes 180/190 20-25 Runner 2 from bottom of oven
Victoria Sandwich Yes 170/180 20-30 Runner 2 from bottom of oven
Sponge Sandwich Yes 180/190 20-25 Runner 2 from bottom of oven
Swiss Roll Yes 200/210 10-15 Runner 2 from bottom of oven
Semi-rich Fruit cakes Yes 150/160 60-75 7 inch Runner 2 from bottom of oven
Rich Fruit akes Yes 140/150 Depending on size Runner 1 or 2 from bottom of oven
Shortcrust Pastry Yes 190/200 Depending on size Runner 2 from bottom of oven
Puff Pastry Yes 200/210 Depending on size Runner 2 from bottom of oven
Yorkshire Pudding Yes 190/200 30-40 Runner 2 from bottom of oven
Individual Yorkshire Pudding Yes 200/210 20-30 Runner 2 from bottom of oven
Milk Pudding Yes 140/150 90-120 Runner 2 from bottom of oven
Baked ustard Yes 150/160 40-50 Runner 2 from bottom of oven
Bread Yes 200/210 30-45 Runner 1 from bottom of oven
Meringues Yes 100 150-180 Runner 2 from bottom of oven
Fan Oven Cooking
Baking Pre-heat Temperature °C Time in mins. Position in Oven
Scones Yes 210/220 8-10 Runner 2 from bottom of oven
Small akes 170/180 15-20 Runner 2 from bottom of oven
Victoria Sandwich 160/170 20-25 Runner 2 from bottom of oven
Sponge Sandwich Yes 170/190 15-20 Runner 2 from bottom of oven
Swiss Roll Yes 180/190 10-15 Runner 2 from bottom of oven
Semi-rich Fruit cakes 140/150 60-75 Runner 2 from bottom of oven
Rich Fruit akes 130/140 Depending on size Runner 1 or 2 from bottom of oven
Shortcrust Pastry 190/200 45-50 Runner 2 from bottom of oven
Puff Pastry 190/200 Depending on use Runner 2 from bottom of oven
Yorkshire Pudding Yes 180/190 40-45 Runner 2 from bottom of oven
Individual Yorkshire Pudding Yes 190/200 20-25 Runner 2 from bottom of oven
Milk Pudding 130/140 105-135 Runner 2 from bottom of oven
Baked ustard 140/150 40-50 Runner 2 from bottom of oven
Bread Yes 200/210 40-50 Runner 1 from bottom of oven
Meringues 80-90 180-240 Runner 2 from bottom of oven