Industrial Lock & Hardware allone User manual
TO INSTALL THE LOC K
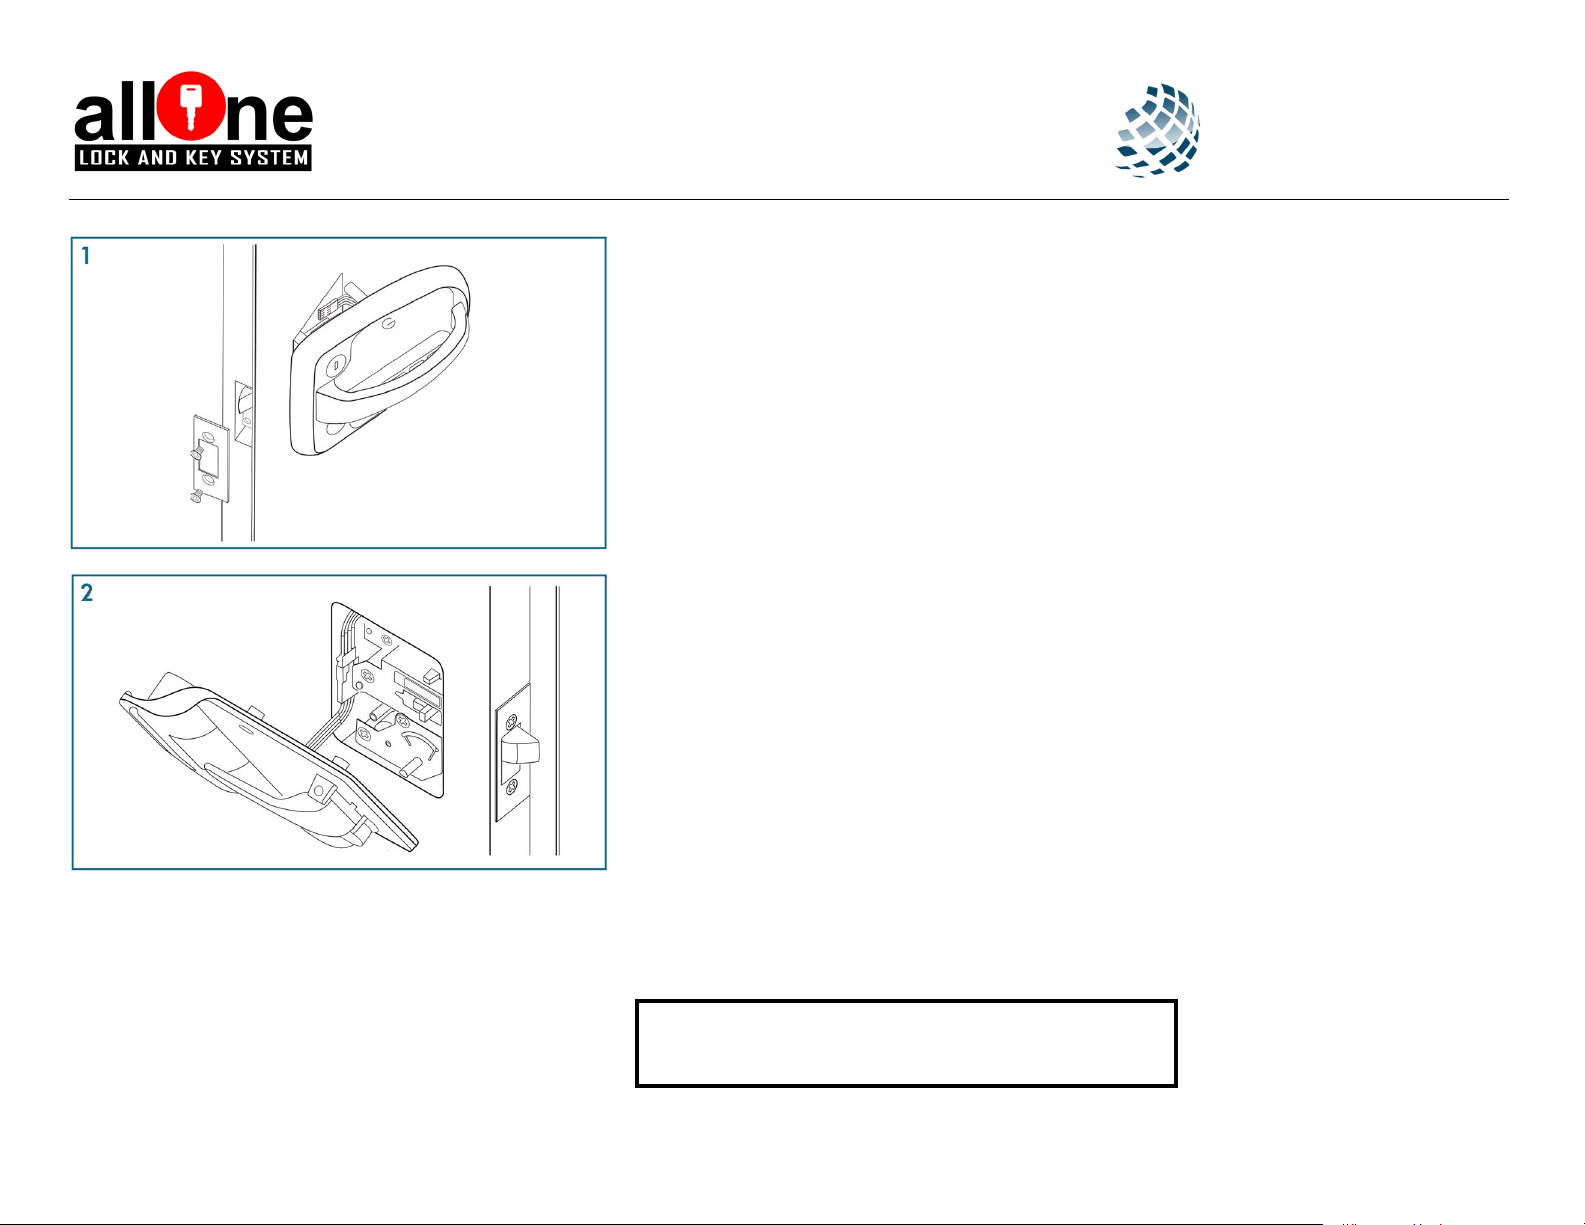
1. Remove the existing lock.
2. Position the exterior lock assembly (with keypad) on the outside of the door, en-
suring the plunger assembly is positioned at the edge of the door as shown (1).
3. Using the 2 #8-32 x 3/8” flat head screws provided, install the door edge cover on
the edge of the door. Ensure the door edge cover is flush to the edge of the door.
4. C onnect the cable attached to the interior lock housing to the cable attached to
the exterior lock housing. Position the cable inside the door as shown (2) to avoid
pinching and binding.
5. Position the interior lock assembly on the door, ensuring:
•The deadbolt post is inserted in the red deadbolt lever so that the lever
operates the deadbolt.
•The interior handle post is positioned on the door edge side of the latch
tab so that the handle operates the latch.
•The 3 screw posts on the interior housing align with the 3 screw bosses
on the exterior housing. Do not overtighten the screws.
6. S ecure the lock housings with the 4 #8-32 x 7/8” oval head screws provided.
7. Ensure the handle operates the latch and the red deadbolt lever operates the
deadbolt.
8. C heck that the strike plate is properly aligned with the lock. The plunger should
extend fully into the strike plate when the door is locked.
Electronic Door Lock
Quick S tart G uide
Industrial Lock & Hardware Inc.
40222 La Quinta Ln B101
Palmdale Ca 93551
(661) 224-1010 ph
www.ch751.com
BEEPS SUMMARY
1 beep: Keypress
2 beeps: User code entered
2 beeps (after 3 seconds): Programming mode entered
2 ascending beeps: Unlocking successful
2 descending beeps: Locking successful
3 varied beeps: New code entered
4 quick beeps: Incorrect code entered
4 quick, descending beeps: Low battery
BATTERY COMES INCLUDED
Uses one C123 or 123A or 123 Lithium Baery

TO LOC K THE DOOR
1. Press any key to wake the keypad, you will not hear a beep but it will light up.
2. Press and hold the 1-2 key and the 3-4 key at the same time for 3 seconds. Two
descending beeps indicates that the door is locked.
TO UNLOC K THE DOOR
1. Press any key to wake the keypad, you will not hear a beep but it will light up.
2. Enter the current user code (printed on the bottom left corner of this page or on
your invoice). Two ascending beeps indicates that the door is now unlocked. Pull the
handle towards you to open the door.
TO C HANGE THE C ODE
1. Press and hold the 9-0 key for 3 seconds until the lock beeps twice.
2. Enter the current user code. Two beeps indicate a correct code.
3. Enter the new 4 digit code. Three varied beeps indicate a new code was entered.
4. Enter the new code again to confirm. Three varied beeps indicate success.
5. Write down your new code in the box provided below labeled NEW C ODE.
TO C HANGE THE BATTERY (INC LUDED) (uses one C 123 lithium battery)
1. Use a #2 Phillips screwdriver to loosen the captive battery compartment screw* on
the interior of the lock. Do not completely remove the screw.
2. Lift off the battery compartment cover.
3. Remove the old battery from the battery holder.
4. Insert a new battery in the correct orientation.
5. Insert the battery door tabs in the slots on the battery compartment and swing the
door closed. Tighten the screw to secure the battery door.
NEED HELP?
(661) 224-1010 PH (661) 240-9391 TXT sales@ilh1.com www.ch751.com Monday—
Friday 8:00 am—4:30 pm Pacific Time
Electronic Door Lock
Quick S tart G uide
Battery C ompartment
(C 123 Lithium Battery)
US ER C ODE:
NEW C ODE:
Industrial Lock & Hardware Inc.
40222 La Quinta Ln B101
Palmdale Ca 93551
(661) 224-1010 ph
www.ch751.com


