InfiniSource ETC 100 Installation instructions

The Hardware Guide

Compiled Date: May 14, 2013
Time Force II Hardware Guide
© 2013 Infinisource All rights reserved.
P.O. Box 860, Sandy UT 84091-0860
Telephone (801) 262-1611
Printed in the United States of America
TimeForce II is a registered trademark of Infinisource. Win-
dows is a trademark of the Microsoft Corporation.
InstallShield Express is a registered trademark of InstallShield
Software Corporation.

SOFTWARE LICENSE AGREEMENT
READ CAREFULLY BEFORE USING THE SOFTWARE
This is a legal agreement between you, as licensee, and Infinisource. BY USING THIS SOFT-
WARE, YOU ACCEPT THE TERMS OF THIS AGREEMENT.
Infinisource grants you a nonexclusive license to use this copy of this Infinisource software program
(the “Software”) on a single computer at a time. You may not install or use this software, or allow it
to be installed or used, on more than one computer or workstation at the same time. However, if you
have purchased a network or multiple user license, you may simultaneously load and use as many
copies of this Software as are authorized by such license. You may also store or install a copy of the
Software on a storage device, such as a network server, used only to install or run the Software on
your other computers over an internal network; however, you must acquire a separate license for
each computer on which the Software is concurrently installed or run from the storage device. You
may make a backup copy of the Software for each license. For information about quantity purchases,
please call Infinisource at 1-800-733-8839.
You may not duplicate any part of the Software or the accompanying manual or other documentation
(collectively, the “Product”) in any form without the written permission of Infinisource, except as
expressly permitted by this Agreement. You may not distribute, rent, sublicense, time share, lease, or
otherwise make available to others, the Product or any copies thereof. You may not modify, trans-
late, adapt, dissemble, decompile, reverse engineer or create derivative works of the Product.
Infinisource reserves all rights not expressly granted in this Agreement.
Limited Warranty and Limitation of Liability. Infinisource warrants that the Product substan-
tially conforms to the specifications contained in Infinisource’s packaging and promotional materi-
als for a period of 90 days from the date of purchase. This warranty assumes the Product has had
normal use and service and that it has been properly installed in accordance with the instructions
supplied with the Product. This warranty is non-transferable.
In order to obtain warranty service, you must call the Infinisource Warranty Department at 1-800-
662-5044. Any Product in warranty returned to Infinisource will, at Infinisource’s option, be
repaired or replaced and the Product returned to you (freight prepaid). Infinisource’s sole obligation
and liability for breach of the foregoing warranty shall be to replace or correct the Product so that it
substantially conforms to the Specifications or to replace the defective media, as the case may be.
This warranty gives you specific legal rights and you may also have other rights which vary from
state to state. Extended Service Warranty agreements can be purchased by calling Infinisource
Extended Service at 1-800-733-8839.
Infinisource has carefully prepared, tested and inspected the written materials and disk(s) that com-
prise this Product. Nevertheless, the manual or disk(s) may contain errors or defects. As such,
Infinisource sells this Product AS IS. EXCEPT AS SPECIFICALLY SET FORTH IN THE LIM-
ITED WARRANTY ABOVE, INFINISOURCE DISCLAIMS ALL WARRANTIES OF QUALITY,

Infinisource
PERFORMANCE, MERCHANTABILITY OR FITNESS FOR A PARTICULAR PUR-
POSE OR APPLICATION. QQEST AND THOSE ASSOCIATED WITH THIS PROD-
UCT SHALL NOT BE HELD LIABLE TO YOU OR TO ANY OTHER PERSON OR
ENTITY FOR ANY SPECIAL, PUNITIVE, INCIDENTAL, CONSEQUENTIAL OR
INDIRECT DAMAGES WITH RESPECT TO ANY LIABILITY, LOSS, DAMAGE
CAUSED OR ALLEGED TO BE CAUSED, DIRECTLY OR INDIRECTLY, BY THIS
PRODUCT, INCLUDING LOSS OF USE, LOST PROFITS OR DATA, OR LOSSES
FROM BUSINESS INTERRUPTION. Without limiting the forgoing, Infinisource shall
not be liable for any loss or damage to person or property from misuse, neglect, alteration
or improper installation of the Product.
U.S. Government Restricted Rights. The Software and any accompanying materials are
provided with Restricted Rights. Use, duplication, or disclosure by the U.S. Government
is subject to restrictions as set forth in subparagraph (c) (1) (ii) of the Rights in Technical
Data and Computer Software clause at DFARS 252.227-7013 or subparagraphs (c) (1) and
(2) of the Commercial Computer Software — Restricted Rights at 48 CFR 52.227-19, as
applicable. Contractor/manufacturer is Infinisource, 9350 South 150 East Suite 300,
Sandy, Utah 84070.
Choice of Law, and Forum, Consent to Jurisdiction, Severability, Attorney’s Fees.
By accepting the terms of this Agreement, you agree to the following: (1) this Agreement
shall be construed in accordance with the laws of the State of Utah; (2) should any dispute
arise concerning this Agreement and/or your use of the Product, venue shall be laid in Salt
Lake County, Utah; (3) Utah state and federal courts shall have exclusive jurisdiction over
any dispute concerning this Agreement and/or your use of the Product, and the parties
hereby consent to the jurisdiction of such courts; and (4) if any provision of this Agree-
ment is deemed invalid or unenforceable, that provision shall be severed and the remain-
der of this Agreement shall remain in full force and effect.
General Provisions. If you breach any of the terms of this Agreement, it automatically
terminates and you must destroy all copies of the Software and documentation. You may
permanently transfer this Product to another person only if all copies, including any prior
and updated versions, are transferred together and the Transferee agrees to the terms of
this Agreement. If the Product is an upgrade from a previous version of the Product, you
may use either the current or prior version of the Product. However, both versions may
never be used at the same time. This Agreement supersedes any prior version license
agreement.
Copyright 2013 Infinisource
All rights reserved.
Printed in the United States of America

i
Table of Contents
Introduction . . . . . . . . . . . . . . . . . . . . . . . . . . . . . . . 1
Installing the ClockLink Utility . . . . . . . . . . . . . . . 3
Program Installation . . . . . . . . . . . . . . . . . . . . . . . . 3
Logging In. . . . . . . . . . . . . . . . . . . . . . . . . . . . . . . . 4
Clock Server. . . . . . . . . . . . . . . . . . . . . . . . . . . . . . . 5
Installing the Clock Server . . . . . . . . . . . . . . . . . . . 5
Setting Up the Clock Server . . . . . . . . . . . . . . . . . . 7
Add Database Connection . . . . . . . . . . . . . . . . . . 7
Network Interface Details . . . . . . . . . . . . . . . . . . 7
Add Company . . . . . . . . . . . . . . . . . . . . . . . . . . . 8
Add Clock . . . . . . . . . . . . . . . . . . . . . . . . . . . . . . 9
Determining Your Clock Model. . . . . . . . . . . . . . 11
Clock Codes . . . . . . . . . . . . . . . . . . . . . . . . . . . . . 11
ETC Clocks . . . . . . . . . . . . . . . . . . . . . . . . . . . . 11
IntelliClocks (IQ Clocks). . . . . . . . . . . . . . . . . . 12
Velocity Clocks . . . . . . . . . . . . . . . . . . . . . . . . . 15
ETC 100 Model Clock . . . . . . . . . . . . . . . . . . . . . . 17
Creating a Time Clock Profile . . . . . . . . . . . . . . . 17
Hardware Installation . . . . . . . . . . . . . . . . . . . . . . 18
Serial Clocks . . . . . . . . . . . . . . . . . . . . . . . . . . . 19
Modem Clocks. . . . . . . . . . . . . . . . . . . . . . . . . . 20
Uploading the Date and Time. . . . . . . . . . . . . . . . 21
Time Clock Usage Instructions. . . . . . . . . . . . . . . 22
Time & Attendance Clock (100 Series). . . . . . . 22
IntelliClock Setup Instructions. . . . . . . . . . . . . . . 23
Creating a Time Clock Profile . . . . . . . . . . . . . . . 23
Editing and Deleting Existing Clock Profiles . . 25

ii
Hardware Installation . . . . . . . . . . . . . . . . . . . . . . 26
Serial Clocks . . . . . . . . . . . . . . . . . . . . . . . . . . . 27
Modem Clocks. . . . . . . . . . . . . . . . . . . . . . . . . . 27
Ethernet Clocks . . . . . . . . . . . . . . . . . . . . . . . . . 28
Configuring the Ethernet Clock . . . . . . . . . . . 29
Configuring the Wireless Time Clock . . . . . . 29
How Do I Find the ID and Password? . . . . . . 32
Uploading the Date and Time. . . . . . . . . . . . . . . . 33
Using the Model IQ 300, 400 or 500 IntelliClock 35
Collecting Data . . . . . . . . . . . . . . . . . . . . . . . . . 35
IQ 300 Clock. . . . . . . . . . . . . . . . . . . . . . . . . . 35
IQ 400 Clock. . . . . . . . . . . . . . . . . . . . . . . . . . 37
IQ 500 Clock. . . . . . . . . . . . . . . . . . . . . . . . . . 39
Other Punch Options. . . . . . . . . . . . . . . . . . . . 43
Additional Features . . . . . . . . . . . . . . . . . . . . . . 43
Main Menu . . . . . . . . . . . . . . . . . . . . . . . . . . . 44
System Maintenance. . . . . . . . . . . . . . . . . . . . 44
System Options. . . . . . . . . . . . . . . . . . . . . . . . 47
Passwords . . . . . . . . . . . . . . . . . . . . . . . . . . . . 49
Using the Model IQ 1000 IntelliClock . . . . . . . . . 51
Creating an IQ 1000 Clock Profile . . . . . . . . . . . . 51
Customizing Time Clock Information . . . . . . . . . 54
Editing and Deleting Clock Profiles . . . . . . . . . 61
IQ 1000 Clock Messages. . . . . . . . . . . . . . . . . . 62
Creating Clock Messages . . . . . . . . . . . . . . . . 62
Editing and Deleting Existing Messages . . . . 65
How Do I Find the Number and Password? . . . 65
Finding the Clock ID . . . . . . . . . . . . . . . . . . . 65
Finding the Clock Password . . . . . . . . . . . . . . 66
Using the IQ 1000 Clock . . . . . . . . . . . . . . . . . . . 67
Enrolling Finger Templates . . . . . . . . . . . . . . . . 67
Check Existing Finger ID Records. . . . . . . . . 69
Deleting Existing Finger ID Records . . . . . . . 69

iii
Setting Finger ID Security Levels . . . . . . . . . 70
Setting the Global Security Level. . . . . . . . . . 71
Collecting Data . . . . . . . . . . . . . . . . . . . . . . . . . 71
Time & Attendance Punches . . . . . . . . . . . . . 71
Job Tracking Entries. . . . . . . . . . . . . . . . . . . . 73
Department Entries . . . . . . . . . . . . . . . . . . . . . 75
Other Punch Options. . . . . . . . . . . . . . . . . . . . 78
Additional Clock Features . . . . . . . . . . . . . . . . . 78
Admin Clock Interface . . . . . . . . . . . . . . . . . . 78
System Options. . . . . . . . . . . . . . . . . . . . . . . . 85
Personal Clock Interface. . . . . . . . . . . . . . . . . 93
Live Lookup . . . . . . . . . . . . . . . . . . . . . . . . . . . . . 94
Installing the Live Lookup Server . . . . . . . . . . . 94
Configuring the Server. . . . . . . . . . . . . . . . . . . . 95
Configuring the Time Clock . . . . . . . . . . . . . . . 96
Using Live Lookup Options . . . . . . . . . . . . . . . 97
Adjust Display Contrast . . . . . . . . . . . . . . . . . . . . 98
Reboot Sequence. . . . . . . . . . . . . . . . . . . . . . . . . . 98
Enter Date and Time Screen. . . . . . . . . . . . . . . . . 98
IQ 1000 Battery Backup Pack . . . . . . . . . . . . . . . 99
Connecting the Battery Backup Pack . . . . . . . . 99
LED Status Light . . . . . . . . . . . . . . . . . . . . . . . 100
On Demand Ethernet Settings. . . . . . . . . . . . . . . 100
Setting the IP Address . . . . . . . . . . . . . . . . . . . 100
Set Call Times . . . . . . . . . . . . . . . . . . . . . . . . . 101
Initiating a Manual Upload. . . . . . . . . . . . . . 102
Velocity Clocks. . . . . . . . . . . . . . . . . . . . . . . . . . . 105
How Do I Find the ID and Password? . . . . . . . . 105
Finding the Clock ID . . . . . . . . . . . . . . . . . . . . 106
Finding the Clock Password . . . . . . . . . . . . . . 106
Hardware Installation . . . . . . . . . . . . . . . . . . . . . 107
Configuring the Ethernet Clock. . . . . . . . . . . . 109
Set IP Address. . . . . . . . . . . . . . . . . . . . . . . . 110

iv
Set Subnet Mask . . . . . . . . . . . . . . . . . . . . . . 110
Set Gateway . . . . . . . . . . . . . . . . . . . . . . . . . 110
Enable DHCP . . . . . . . . . . . . . . . . . . . . . . . . 111
Configuring the Cellular Modem Clock . . . . . 111
Hardware Installation . . . . . . . . . . . . . . . . . . 112
Set Outbound Call Times . . . . . . . . . . . . . . . 113
Uploading the Date and Time. . . . . . . . . . . . . . . 114
V800 Clock Usage Instructions . . . . . . . . . . . . . 115
Creating a Clock Profile . . . . . . . . . . . . . . . . . 115
Customizing Time Clock Information . . . . . 117
Editing and Deleting Clock Profiles . . . . . . 121
Enrolling Finger ID Templates . . . . . . . . . . . . 123
Deleting Existing Finger ID Records . . . . . . 124
Setting the Global Security Level . . . . . . . . 124
Collecting Data . . . . . . . . . . . . . . . . . . . . . . . . . . 125
Time & Attendance Punches . . . . . . . . . . . . . . 125
Other Punch Options . . . . . . . . . . . . . . . . . . . . 126
V850 Clock Usage Instructions . . . . . . . . . . . . . 126
Creating a Clock Profile . . . . . . . . . . . . . . . . . . . 127
Customizing Time Clock Information . . . . . . . . 129
Editing and Deleting Clock Profiles . . . . . . . . 137
Enrolling Finger ID Templates . . . . . . . . . . . . 138
Deleting Existing Finger ID Records . . . . . . 140
Setting the Global Security Level . . . . . . . . 140
Collecting Data . . . . . . . . . . . . . . . . . . . . . . . . . . 141
Time & Attendance Punches . . . . . . . . . . . . . . 141
Job Tracking Entries . . . . . . . . . . . . . . . . . . . . 142
Department Entries . . . . . . . . . . . . . . . . . . . . . 144
Other Punch Options . . . . . . . . . . . . . . . . . . . . 146
Additional Clock Features . . . . . . . . . . . . . . . . . 147
Main Menu. . . . . . . . . . . . . . . . . . . . . . . . . . . . 147
Set Date/Time . . . . . . . . . . . . . . . . . . . . . . . 148
Manage Finger IDs . . . . . . . . . . . . . . . . . . . 149

v
Clock Setup . . . . . . . . . . . . . . . . . . . . . . . . . 149
Reports . . . . . . . . . . . . . . . . . . . . . . . . . . . . . 150
Manage Memory . . . . . . . . . . . . . . . . . . . . . 151
Clock Setup . . . . . . . . . . . . . . . . . . . . . . . . . . . 152
Communication . . . . . . . . . . . . . . . . . . . . . . 152
Clock ID/Pass . . . . . . . . . . . . . . . . . . . . . . . 153
Keypad Behavior . . . . . . . . . . . . . . . . . . . . . 153
Finger ID Devices . . . . . . . . . . . . . . . . . . . . 154
External Devices . . . . . . . . . . . . . . . . . . . . . 155
Display Options . . . . . . . . . . . . . . . . . . . . . . 156
Punch Restrictions . . . . . . . . . . . . . . . . . . . . 156
Personal Clock Interface. . . . . . . . . . . . . . . . . . . 158
Valid Punch Times. . . . . . . . . . . . . . . . . . . . . . 158
Accruals . . . . . . . . . . . . . . . . . . . . . . . . . . . . . . 158
Department and Personal. . . . . . . . . . . . . . . . . 158
Find Punches . . . . . . . . . . . . . . . . . . . . . . . . . . 158
V800 / V850 On Demand Ethernet Clock . . . . . 159
Setting the Push Server IP . . . . . . . . . . . . . . . . 159
Set Dial Times . . . . . . . . . . . . . . . . . . . . . . . . . 160
Initiating a Manual Upload . . . . . . . . . . . . . 161
Downloading Your Time Clock . . . . . . . . . . . . . 163
Setting Up a Scheduled Clock Download. . . . . . 163
Creating Scripts . . . . . . . . . . . . . . . . . . . . . . . . 164
Scheduling Scripts . . . . . . . . . . . . . . . . . . . . . . 165
Existing Schedules. . . . . . . . . . . . . . . . . . . . . . 167
Clock Communication Troubleshooting . . . . . . 169
Serial Clock Troubleshooting. . . . . . . . . . . . . . . 169
Modem Clock Troubleshooting . . . . . . . . . . . . . 170
Ethernet Clock Troubleshooting. . . . . . . . . . . . . 172
Installing a Bell/Buzzer . . . . . . . . . . . . . . . . . . . . 173
ETC Clocks. . . . . . . . . . . . . . . . . . . . . . . . . . . . . 173
Determining Your Hardware Configuration . . 173
Removing the Motherboard. . . . . . . . . . . . . . . 174

vi
Connecting the Bell/Buzzer. . . . . . . . . . . . . . . 175
Replacing the Motherboard . . . . . . . . . . . . . . . 177
IQ Clocks . . . . . . . . . . . . . . . . . . . . . . . . . . . . . . 178
IQ 300, 400 or 500 Time Clock. . . . . . . . . . . . 178
IQ 1000 Time Clock . . . . . . . . . . . . . . . . . . . . 181
Installing a Door Security Reader . . . . . . . . . . . 185
Introduction. . . . . . . . . . . . . . . . . . . . . . . . . . . . . 185
Before You Install the Reader . . . . . . . . . . . . . . 186
Installing the Reader. . . . . . . . . . . . . . . . . . . . . . 186
PoE Clocks . . . . . . . . . . . . . . . . . . . . . . . . . . . . . . 189
Clock Models . . . . . . . . . . . . . . . . . . . . . . . . . . . 189
Specifications . . . . . . . . . . . . . . . . . . . . . . . . . . . 189
Clock Installation . . . . . . . . . . . . . . . . . . . . . . . . 189
Identifying a PoE Clock . . . . . . . . . . . . . . . . . . . 190
Static Discharge Plate . . . . . . . . . . . . . . . . . . . . . 191
Installing the Static Discharge Plate. . . . . . . . . . 191
Fingerprint Sensor Security Guard . . . . . . . . . . 193
Finger Enrollment Station . . . . . . . . . . . . . . . . . 195
Hardware Installation . . . . . . . . . . . . . . . . . . . . . 195
Software Installation. . . . . . . . . . . . . . . . . . . . . . 196
Enrollment Station Utility Login . . . . . . . . . . . . 197
Using the Enrollment Station . . . . . . . . . . . . . . . 198
Enrolling Legible Finger Templates . . . . . . . . 198
Finger Pattern Types . . . . . . . . . . . . . . . . . . . . 200
Troubleshooting. . . . . . . . . . . . . . . . . . . . . . . . 202
Creating a Finger Template . . . . . . . . . . . . . . . . 202
Viewing a Template Image. . . . . . . . . . . . . . . . . 204
Enabling the “View Image” Option. . . . . . . . . 204
Using the “View Image” Option . . . . . . . . . . . 205
Common Error Messages . . . . . . . . . . . . . . . . . . 205
Cable Specifications. . . . . . . . . . . . . . . . . . . . . . . 207
Serial Clocks. . . . . . . . . . . . . . . . . . . . . . . . . . . . 207
Cable Pinouts. . . . . . . . . . . . . . . . . . . . . . . . . . 208

vii
Modem Clocks . . . . . . . . . . . . . . . . . . . . . . . . . . 210
Ethernet Clocks. . . . . . . . . . . . . . . . . . . . . . . . . . 210
How Do I Create Clock Groups? . . . . . . . . . . . . 211
Finger ID Sensor Cleaning Instructions . . . . . . 213
Cleaning the Finger ID Sensor . . . . . . . . . . . . . . 213
Caring for the Finger ID Sensor . . . . . . . . . . . . . 214
Index . . . . . . . . . . . . . . . . . . . . . . . . . . . . . . . . . . . 215

viii

TimeForce II Hardware Guide 1
Introduction
Introduction
There are three lines of time clocks available for use with TimeForce II.
Each line consists of multiple clock models, allowing you a range of
functionality and communication options. The lines of clocks that
Infinisource offers are ETC clocks, IntelliClocks (or IQ clocks), and
Velocity clocks (or V800/V850 clocks).
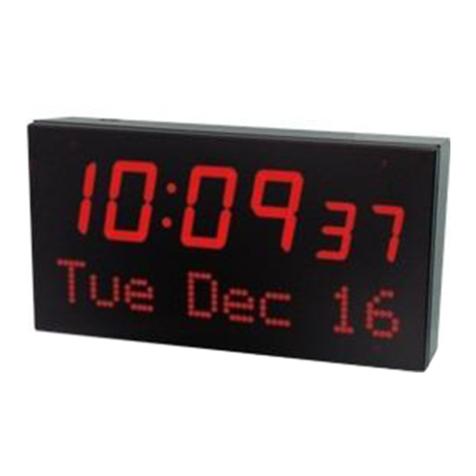
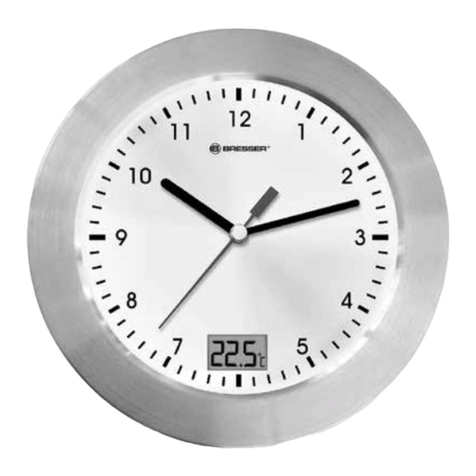
ETC 100 Clock
The 100 Series time clock is used for collecting only the most basic
Time & Attendance information, and uses a standard magnetic stripe
card reader.
IntelliClocks
There are four models of IntelliClocks which offer basic Time & Atten-
dance tracking, as well as Departmental and Job Tracking support. Intel-
liClock models are IQ 300, IQ 400, IQ 500, and IQ 1000.
Data may be entered into an IQ Series clock by using a magnetic card
reader and time cards, by using a bar code wand or reader, by using
proximity time cards, or by entering data directly into the clock’s key-
pad, if this option is enabled.
The IntelliClocks have In, Out, Lunch and Break buttons so that the
employee can designate very specific punches.
These clocks also offer multi-level password protection, so that the time
clock menu options can only be accessed by users with an “Admin” or
“Supervisor” password.
Both clock lines are available with a variety of options, each of which
will be explained in a later section.
The IQ 1000 model clock also comes equipped with a biometric reader,
allowing your employees to clock in and out using their finger tem-
plates.
Note: The biometric reader is optional on a model IQ 1000 clock.

2Infinisource
Velocity Clocks
The major difference between a Velocity clock and an ETC or IQ clock
is the absence of a card reader. Data is entered at the clock exclusively
through direct keypad entry and finger ID verification. This allows you
to eliminate the hassle of assigning and maintaining physical time cards
for your employees. The V800 clock model is used for basic Time &
Attendance tracking. The V850 offers the additional functionality of
Departmental, Job/Task and Disbursement (Tips) tracking.

TimeForce II Hardware Guide 3
Installing the ClockLink Utility
Installing the ClockLink Utility
Important Note:
The ClockLink utility is a separate utility to the TimeForce system
which connects to your time clock, downloads the stored punches and
sends them to the TimeForce II database. The majority of Infinisource
time clocks use the On Demand communication method, which negates
the need for a separate utility to facilitate communications. In its place,
the Clock Server utility is used to silently listen in the background of the
server machine for an automatic upload from the clock.
The ClockLink utility is for use only with clocks that are not running On
Demand. For On Demand clocks, the Clock Server utility is used.
Program Installation
The ClockLink utility must be installed on a machine that has access to
each time clock that you would like the utility to manage. The installa-
tion is located on the TimeForce II Installation disk.
1. Insert the TimeForce disk into your computer's CD-ROM drive.
2. The main “Installation Menu” should automatically appear. If it
does not, go to My Computer, browse the contents of your CD-
ROM drive and double-click on “Setup.exe.”
3. From the main “Installation Menu” screen, click on the [UTILI-
TIES] icon.
4. Click on the [ClockLink] icon.
5. A dialog box opens which reads “This will install ClockLink for
TimeForce II. Do you wish to continue?” Click on the [YES] icon.
The InstallShield Wizard opens and guides you through the rest of
the setup process.
6. The InstallShield Wizard opens with a “Welcome” screen. Click on
the [NEXT] icon to continue. The “Choose Destination Location”
screen opens.

4Infinisource
7. The default installation directory is “C:\Program Files\Qqest Soft-
ware Systems\TimeForce II\ClockLink.” To select a custom install
directory, click on the [BROWSE] icon. Once the install directory
has been selected, click on the [NEXT] icon to continue.
Note: It is recommended that you allow the program to be installed
in its default installation directory.
8. The “IP Address” screen opens. Enter the address of the machine
hosting the TimeForce II database into the IP Address field. Click
on [NEXT] to begin the program installation.
9. Once the program installation has completed, click on [FINISH] to
exit the InstallShield Wizard. You can now exit the TimeForce II
Installation Disk menu as well.
Logging In
The first time you open the ClockLink utility, you will be asked to sup-
ply the program with login information.
• The TimeForce Server is the network server name or IP address of
the machine that hosts the TimeForce II database.
• Enter the User Name of a TimeForce II user with administrative
access to the program.
• Enter the Password for the specified user name.
• Enter the Company Code that all users must specify when logging
into the TimeForce II system.
Once you have entered the required login information, click on the
icon. The login information will be saved by the system
unless you logout before closing the utility.

TimeForce II Hardware Guide 5
Clock Server
Clock Server
The Clock Server utility is used to download the punches from your On
Demand Ethernet or Cellular clock and send them to the TimeForce II
database. The server software listens on the specified port for a connec-
tion to the time clock. When the clock initiates an upload, the server
downloads the punches, logs off the clock and continues listening for
more connections.
Note:
The Clock Server is only used with Cellular or On Demand Ethernet
time clocks.
Installing the Clock Server
Use the following instructions to install the Clock Server software.
1. Insert the TimeForce II installation disk into your computer’s CD-
ROM drive. The main “Installation Menu” opens.
2. Click on the [UTILITIES] icon, and select [CLOCK SERVER].
This launches the InstallShield Wizard which guides you through
the rest of the installation procedure.
3. A “Welcome” screen opens. Click on the [NEXT] icon.
4. A pop-up box opens which reads “Clock Server requires access to a
SQL database server. Press yes if you have valid login information
to continue.” Click on the [YES] icon. A message appears warning
that if you are performing an update to an existing installation of
Clock Server, it must first be shut down before continuing. Click on
[YES] to continue.
5. The “Software License Agreement” window opens. If you accept
the terms stated in the agreement, click on the [YES] icon.
Note: The Licence Agreement must be accepted before the pro-
gram installation will continue.
6. The “Setup Type” screen opens asking whether you are using the
2000 or 2005 version of SQL. Make the appropriate selection and
click on the [NEXT] icon to continue.

6Infinisource
7. The “Installation Options” screen opens. This screen allows you to
select whether you would like to install the program files, database
files or both on this machine. Make the desired selection, and click
on [NEXT] to continue.
Note: This setting allows you to split the Clock Server install
between multiple machines. The machine(s) running the program
files must have access to the database machine.
8. If you have selected to install database files, the “Program Group”
screen allows you to select where in the Windows Start Menu the
program icons will be created. The default setting is “TimeForce.”
Enter the desired program group and click on the [NEXT] icon to
continue.
9. The “Clock Server SQL Database Advance Setup” screen opens.
•IntheComputer field, enter the computer name of the
machine hosting the TimeForce II database.
•IntheInstance field, enter the SQL instance name. Click on
the [NEXT] icon to continue.
10. Enter the User Name and Password for the SQL Server, and Con-
firm the password. Click on the [NEXT] icon.
11. The “Program Destination Path” screen allows you to select where
in the program files will be created. The default setting is “C:\Pro-
gram Files\Qqest Software Systems\Clock Server.” If you would
like to select a different directory, click on the [BROWSE] icon.
Click on [NEXT] to continue.
12. A pop-up window appears asking you if you are using Windows
2008 Server. Click on [YES] or [NO] as appropriate.
13. The program installation begins. Once it has completed, click on
[FINISH] to exit the InstallShield Wizard. You can now exit the
TimeForce II Installation Disk menu as well.
14. On the TimeForce II Installation Menu, click on the [RETURN TO
MAIN MENU] icon, then on [EXIT].
You are now ready to log into and configure the Clock Server utility.

TimeForce II Hardware Guide 7
Clock Server
Setting Up the Clock Server
Before you can use the Clock Server, the following setup steps must be
completed.
Add Database Connection
Before the Clock Server will be able to send the punches from your time
clock to TimeForce, you must first configure a connection to the Time-
Force II database.
1. From the main Clock Server menu, click on the “File” drop-down
menu and select Add/Edit Database Connection. The “SQL
Server Connection” window opens.
2. In the SQL Server field, enter the name of the SQL Server that the
TimeForce program is using.
3. Select “SQL Server Authentication” and enter the Login Name and
Password for the specified SQL Server.
4. Click on the [OK] icon to save the changes that you have made.
Network Interface Details
The Clock Server must be set up with the IP address of the machine that
is hosting the Clock Server utility.
Note: If you are using Cellular clocks, this computer must be set up so
that a publicly available IP address on the internet resolves to this
machine.
1. From the main Clock Server menu, click on the “Network Inter-
face” drop-down menu and select New. The “Network Interface
Details” screen opens.
2. From the IP drop-down menu, select the appropriate IP address.
3. Click on the [OK] icon. The specified settings appear on the main
Clock Settings screen.
• The MAC column displays the MAC address.
• The specified IP address is displayed in the IP Address col-
umn.

8Infinisource
• The port that the program listens on is displayed in the Port
column. This setting is always “5402.”
• The Status column displays the status of the network interface.
While listening, “Waiting” will be displayed in this column.
Add Company
The next step is to add a company to the database that pertains to the
clocks which will be connecting to the server for downloading.
1. From the main Clock Server menu, click on the “File” drop-down
menu and select Add/Edit Clocks.
2. Click on the [ADD COMPANY] icon located in the upper left-
hand corner of the screen. The right-hand section of the screen
opens, allowing you to insert company settings.
3. Enter your Company Name.
4. Enter the Company Code that all users must specify when logging
into the TimeForce system.
Note: The company code must be unique for each company in the
application.
5. Enter the main TimeForce administrator Username.
6. Enter the Password assigned to the main TimeForce administrator.
7. Enter the path to the TimeForce Server. If the server is installed on
the same machine as TimeForce a setting of “http://localhost/” will
suffice.
8. Enter the Port that is used for the TimeForce Punches Service. In
most cases the default setting of “5405” is used.
9. Click on the [OK] icon to save the company information.
The company information is displayed directly below the row of icons
in the upper left-hand corner of the screen. To delete a company, high-
light the desired company in the list and click on the [DELETE
COMPANY] icon.
This manual suits for next models
6
Table of contents
