manuals.online logo
Brands
  1. Home
  2. •
  3. Brands
  4. •
  5. Safety 1st
  6. •
  7. Stroller
  8. •
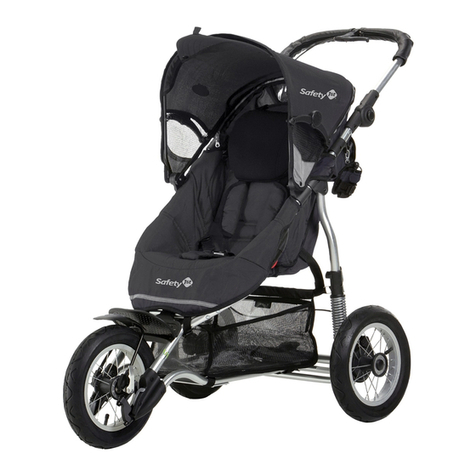
  9. Safety 1st Trend D968B User manual

Safety 1st Trend D968B User manual

20200116 REV3 D968B Trend GUIDE.indd 120200116 REV3 D968B Trend GUIDE.indd 1 16/01/2020 12:2316/01/2020 12:23
20200116 REV3 D968B Trend GUIDE.indd 220200116 REV3 D968B Trend GUIDE.indd 2 16/01/2020 12:2316/01/2020 12:23
20200116 REV3 D968B Trend GUIDE.indd 320200116 REV3 D968B Trend GUIDE.indd 3 16/01/2020 12:2316/01/2020 12:23
20200116 REV3 D968B Trend GUIDE.indd 420200116 REV3 D968B Trend GUIDE.indd 4 16/01/2020 12:2316/01/2020 12:23
6
Parts / Piezas
2x
Front Wheels /
Ruedas delanteras
Seat and Frame /
Asiento y el Armazón
Rear Wheels /
Ruedas traseras
Cup Holder /
Apoyavasos 2x
Carseat adapters /
Adaptadores de
asiento de automóvil
20200116 REV3 D968B Trend GUIDE.indd 520200116 REV3 D968B Trend GUIDE.indd 5 16/01/2020 12:2316/01/2020 12:23
7
Assembly / Ensamblaje
2
1
CLICK!
To attach front wheels, push wheel
onto front leg tube until it clicks into
place. Repeat on other side.
Pull on wheels to make sure both of
them are attached.
Para instalar las ruedas delanteras,
empuje la rueda en el tubo de la pata
delantera hasta que se trabe en su
lugar. Repita el procedimiento del otro
lado.
Tire rmemente de las ruedas para
asegurarse que las dos estén instaladas.
2
To attach rear wheels ( with grey brake),
push wheel onto rear leg tube until it
clicks into place. Repeat on other side.
Pull on wheels to make sure both of
them are attached.
Para instalar las ruedas traseras ( con el
freno gris) , empuje la rueda en el tubo
de la pata trasera hasta que se trabe en
su lugar. Repita el procedimiento del
otro lado.
Tire rmemente de las ruedas para
asegurarse que las dos estén instaladas.
CLICK!
Brake levers point toward
rear of stroller
/ Las palancas del freno
deben apuntar hacia la
parte trasera del cochecito
20200116 REV3 D968B Trend GUIDE.indd 620200116 REV3 D968B Trend GUIDE.indd 6 16/01/2020 12:2316/01/2020 12:23
7
Assembly / Ensamblaje
2
1
CLICK!
To attach front wheels, push wheel
onto front leg tube until it clicks into
place. Repeat on other side.
Pull on wheels to make sure both of
them are attached.
Para instalar las ruedas delanteras,
empuje la rueda en el tubo de la pata
delantera hasta que se trabe en su
lugar. Repita el procedimiento del otro
lado.
Tire rmemente de las ruedas para
asegurarse que las dos estén instaladas.
2
To attach rear wheels ( with grey brake),
push wheel onto rear leg tube until it
clicks into place. Repeat on other side.
Pull on wheels to make sure both of
them are attached.
Para instalar las ruedas traseras ( con el
freno gris) , empuje la rueda en el tubo
de la pata trasera hasta que se trabe en
su lugar. Repita el procedimiento del
otro lado.
Tire rmemente de las ruedas para
asegurarse que las dos estén instaladas.
CLICK!
Brake levers point toward
rear of stroller
/ Las palancas del freno
deben apuntar hacia la
parte trasera del cochecito
20200116 REV3 D968B Trend GUIDE.indd 720200116 REV3 D968B Trend GUIDE.indd 7 16/01/2020 12:2316/01/2020 12:23
9
Cup Holder / Apoyavaso
To attach cup holder, rotate cup
holder and slide down on the mount
as shown.
Para sujetar el apoyavasos, gírelo y
deslícelo hacia abajo en el montante
como se indica.
CLICK!
Swivel Wheels / Ruedas giratorias
Swivel wheels lock for use on rough
surfaces, such as gravel or stones.
Las ruedas giratorias se traban para
permitir el uso en super cies ásperas,
como de piedra o grava.
CLICK!
20200116 REV3 D968B Trend GUIDE.indd 820200116 REV3 D968B Trend GUIDE.indd 8 16/01/2020 12:2316/01/2020 12:23
8
1
To open / Para abrir
CLICK!
Squeeze the frame release levers then
pull up on the handles.
Oprima las palancas de liberación del
armazón y luego tire hacia arriba de las
manija.
2
3
Press down on the fold latch until it
clicks into place.
CHECK TO MAKE sure the stroller is
locked in the fully open position before
using it and both handles are securely
extended and locked into position.
Oprima hacia abajo la traba del pliegue
hasta que se trabe en su lugar.
VERIFIQUE PARA ESTAR seguro
que el cochecito esté trabado en la
posición totalmente abierta antes de
usarlo y que ambas manijas estén
extendidas con seguridad y trabadas
en posición.
20200116 REV3 D968B Trend GUIDE.indd 920200116 REV3 D968B Trend GUIDE.indd 9 16/01/2020 12:2316/01/2020 12:23
8
1
To open / Para abrir
CLICK!
Squeeze the frame release levers then
pull up on the handles.
Oprima las palancas de liberación del
armazón y luego tire hacia arriba de las
manija.
2
3
Press down on the fold latch until it
clicks into place.
CHECK TO MAKE sure the stroller is
locked in the fully open position before
using it and both handles are securely
extended and locked into position.
Oprima hacia abajo la traba del pliegue
hasta que se trabe en su lugar.
VERIFIQUE PARA ESTAR seguro
que el cochecito esté trabado en la
posición totalmente abierta antes de
usarlo y que ambas manijas estén
extendidas con seguridad y trabadas
en posición.
20200116 REV3 D968B Trend GUIDE.indd 1020200116 REV3 D968B Trend GUIDE.indd 10 16/01/2020 12:2316/01/2020 12:23
11
Removing Seat / Para Removar el asiento
To remove seat, press the tabs on the
edges of the seat TOWARD THE CENTER
OF SEAT and pull seat o of the frame
as shown.
Tab needs to be pushed toward the
center of the seat, DO NOT pull tabs
away from stroller.
Para sacar el asiento, oprima las
lengüetas en los bordes del asiento
HACIA EL CENTRO DEL ASIENTO y
saque el asiento del armazón como se
indica.
La lengüeta necesita ser empujada
hacia el centro del asiento, NO tire las
lengüetas lejos del cochecito.
20200116 REV3 D968B Trend GUIDE.indd 1120200116 REV3 D968B Trend GUIDE.indd 11 16/01/2020 12:2316/01/2020 12:23
12
Before attaching seat to stroller, CHECK to make sure the mounts are in the
most upright position.
If they are not set to the upright position, you will need to squeeze the handle
at the top of the seat and rotate them as shown. If they are not in the most
upright position you will not be able to properly attach the seat to the stroller
mounts.
Attaching Seat / Sujetar el asiento
Antes de el asiento al , VERIFIQUE que l s estén en
la posición más vertical.
Si no están en posición vertical, habrá que apretar la manija de arriba del
asiento y girar l s como se indica. Si no estén en la posición más
vertical, no se podrá sujetar correctamente el asiento a l s m del
coche.
20200116 REV3 D968B Trend GUIDE.indd 1220200116 REV3 D968B Trend GUIDE.indd 12 16/01/2020 12:2316/01/2020 12:23
3
4
2
3
4
2
20200116 REV3 D968B Trend GUIDE.indd 1320200116 REV3 D968B Trend GUIDE.indd 13 16/01/2020 12:2316/01/2020 12:23
20200116 REV3 D968B Trend GUIDE.indd 1420200116 REV3 D968B Trend GUIDE.indd 14 16/01/2020 12:2316/01/2020 12:23
9
Cup Holder / Apoyavaso
To attach cup holder, rotate cup
holder and slide down on the mount
as shown.
Para sujetar el apoyavasos, gírelo y
deslícelo hacia abajo en el montante
como se indica.
CLICK!
Swivel Wheels / Ruedas giratorias
Swivel wheels lock for use on rough
surfaces, such as gravel or stones.
Las ruedas giratorias se traban para
permitir el uso en super cies ásperas,
como de piedra o grava.
CLICK!
20200116 REV3 D968B Trend GUIDE.indd 1520200116 REV3 D968B Trend GUIDE.indd 15 16/01/2020 12:2316/01/2020 12:23
10
Brakes / Frenos
Always lock both brakes. Make sure brakes
are on by trying to push the stroller.
WARNING
ADVERTENCIA
WARNING
ADVERTENCIA
Trabe siempre ambos frenos.
Asegúrese que los frenos estén
activados tratando de empujar el
cochecito.
To lock, press lever DOWN on both rear
wheels.
Para trabarlos, oprima la palanca HACIA
ABAJO en ambas ruedas traseras.
To unlock, press lever UP on
both rear wheels.
Para destrabarlos, oprima la palanca
HACIA ARRIBA en ambas ruedas traseras.
CLICK!
CLICK!
20200116 REV3 D968B Trend GUIDE.indd 1620200116 REV3 D968B Trend GUIDE.indd 16 16/01/2020 12:2316/01/2020 12:23
17
Reclining Seat / Reclinación del asiento
To recline seat, squeeze handle and
pull seat down into one of three
positions.
Para reclinar el asiento, oprima la
manija y empuje el asiento hacia
abajo hasta alcanzar una de las tres
posiciones.
To place seat in upright position,
squeeze handle and pull up.
Para poner el asiento en la posición
vertical, oprima la manija y tire hacia
arriba.
20200116 REV3 D968B Trend GUIDE.indd 1720200116 REV3 D968B Trend GUIDE.indd 17 16/01/2020 12:2316/01/2020 12:23
16
Canopy / Capota
To open or close canopy, push to the
front or the rear of the stroller.
Para abrir o cerrar la capota, empújela
hacia el frente o la parte de atrás del
cochecito.
To extend the canopy further pull ap
out as shown.
Para extender la capota más, tire la
aleta hacia afuera como se indica.
Fasten snaps on both sides of the
canopy as shown.
Sujete los broches en ambos lados de
la capota como se muestra.
20200116 REV3 D968B Trend GUIDE.indd 1820200116 REV3 D968B Trend GUIDE.indd 18 16/01/2020 12:2316/01/2020 12:23
15
To change shoulder strap height
positions, reach one hand behind the
stroller and push the retainer out to
the front of seat then reinsert into the
desired set of slots that are closest to
your child’s shoulder.
Repeat with other harness strap.
When re-inserting the harness straps
MAKE SURE to always place harness
straps at the same height setting.
Para cambiar la posición de la latura de
la correa del hombro, estire la mano
detrás del cochecito y empuje el retén
hacia el frente del asiento y luego
vuelva a colocarlo en las ranuras
deseadas que estén más cerca a los
hombros del niño.
Repita el procedimiento con la otra
correa del arnés.
Cuando vuelve a insertar las correas
del arnés ASEGÚRESE de siempre
poner las correas del arnés a la misma
altura.
Changing Shoulder Strap Position /
Cambiar la posición de la correa del hombro
20200116 REV3 D968B Trend GUIDE.indd 1920200116 REV3 D968B Trend GUIDE.indd 19 16/01/2020 12:2316/01/2020 12:23
18
Adjusting Harness / Ajuste de arnés
To attach the harness and waist straps to
the crotch buckle, insert the buckles A
into the crotch strap as shown.
Para sujetar el arnés y las correas para
la cintura a la hebilla de la entrepierna,
inserte las hebillas Aen la correa de la
entrepierna como se indica.
To unlock harness, push the button on
the crotch buckle then slide the shoulder
Para destrabar el arnés, empuje el botón
en la hebilla de la entrepierna y luego
deslice las correas para el hombro fuera de
las hebillas para la cintura.
AA
To adjust harness around your child, tight-
en shoulder and waist straps by pulling on
the free end of the strap as shown.
Para ajustar el arnés alrededor de su
niño, tensione las correas del hombro y
la cintura tirando del extremo libre de las
correas como se indica.
CLICK!
To loosen the waist straps, push in the
release button on the buckle and pull.
Para aojar las correas de la cintura,
presione el botón de liberación en la
botón de liberación y jale.
20200116 REV3 D968B Trend GUIDE.indd 2020200116 REV3 D968B Trend GUIDE.indd 20 16/01/2020 12:2316/01/2020 12:23

Other Safety 1st Stroller manuals

Safety 1st Summit User manual

Safety 1st

Safety 1st Summit User manual

Safety 1st 01451C User manual

Safety 1st

Safety 1st 01451C User manual

Safety 1st Flap User manual

Safety 1st

Safety 1st Flap User manual

Safety 1st Easy Go User manual

Safety 1st

Safety 1st Easy Go User manual

Safety 1st WILLOW User manual

Safety 1st

Safety 1st WILLOW User manual

Safety 1st DORMICOQUE+ Troubleshooting guide

Safety 1st

Safety 1st DORMICOQUE+ Troubleshooting guide

Safety 1st Trivecta CV244 User manual

Safety 1st

Safety 1st Trivecta CV244 User manual

Safety 1st VERSO NEST User manual

Safety 1st

Safety 1st VERSO NEST User manual

Safety 1st TR314 User manual

Safety 1st

Safety 1st TR314 User manual

Safety 1st NOOK User manual

Safety 1st

Safety 1st NOOK User manual

Safety 1st Saunter 3-Wheel Travel System User manual

Safety 1st

Safety 1st Saunter 3-Wheel Travel System User manual

Safety 1st Acella LX User manual

Safety 1st

Safety 1st Acella LX User manual

Safety 1st RIVA User manual

Safety 1st

Safety 1st RIVA User manual

Safety 1st Saunter Luxe LC-22 User manual

Safety 1st

Safety 1st Saunter Luxe LC-22 User manual

Safety 1st Teeny Ultra Compact CV284 User manual

Safety 1st

Safety 1st Teeny Ultra Compact CV284 User manual

Safety 1st TR378 User manual

Safety 1st

Safety 1st TR378 User manual

Safety 1st Visto User manual

Safety 1st

Safety 1st Visto User manual

Safety 1st Advancer User manual

Safety 1st

Safety 1st Advancer User manual

Safety 1st Urban Trek User manual

Safety 1st

Safety 1st Urban Trek User manual

Safety 1st Teeny 01593C User manual

Safety 1st

Safety 1st Teeny 01593C User manual

Safety 1st ENVY User manual

Safety 1st

Safety 1st ENVY User manual

Safety 1st Saunter Luxe Travel System User manual

Safety 1st

Safety 1st Saunter Luxe Travel System User manual

Safety 1st Compa'city User manual

Safety 1st

Safety 1st Compa'city User manual
Safety 1st Grow and Go TR405 User manual

Safety 1st

Safety 1st Grow and Go TR405 User manual

Popular Stroller manuals by other brands

Bugaboo Cameleon3 Kite user guide

Bugaboo

Bugaboo Cameleon3 Kite user guide

UPPAbaby G-LUXE quick start guide

UPPAbaby

UPPAbaby G-LUXE quick start guide

Bebecar Icon instructions

Bebecar

Bebecar Icon instructions

Bugaboo Bee5 Tone user guide

Bugaboo

Bugaboo Bee5 Tone user guide

babyzen YOYO user guide

babyzen

babyzen YOYO user guide

MaxiCosi MURA manual

MaxiCosi

MaxiCosi MURA manual

Nuna Tavo instruction manual

Nuna

Nuna Tavo instruction manual

BabyGo TRAVEL XP Assembly

BabyGo

BabyGo TRAVEL XP Assembly

Bebecar one&two instructions

Bebecar

Bebecar one&two instructions

Hauck Candy Instruction

Hauck

Hauck Candy Instruction

Chicco Cortina Magic owner's manual

Chicco

Chicco Cortina Magic owner's manual

Nuna IVVI totl instructions

Nuna

Nuna IVVI totl instructions

Kolcraft S69-R1 instruction sheet

Kolcraft

Kolcraft S69-R1 instruction sheet

Advance mobility Baby Jogger Freedom Assembly instructions

Advance mobility

Advance mobility Baby Jogger Freedom Assembly instructions

Coccolle Selena user manual

Coccolle

Coccolle Selena user manual

Chicco TrioMYCITY Instructions for use

Chicco

Chicco TrioMYCITY Instructions for use

nurse roller instructions

nurse

nurse roller instructions

Technibilt Caroline’s Cart Safety and operating manual

Technibilt

Technibilt Caroline’s Cart Safety and operating manual

manuals.online logo
manuals.online logoBrands
  • About & Mission
  • Contact us
  • Privacy Policy
  • Terms and Conditions

Copyright 2025 Manuals.Online. All Rights Reserved.