Inglesina Culle Carrycots User manual

IT MANUALE ISTRUZIONI
EN INSTRUCTION MANUAL
FR MANUEL D’INSTRUCTIONS
DE BEDIENUNGSANLEITUNG
ES MANUAL DE INSTRUCCIONES
PT MANUAL DE INSTRUÇÕES
RU
РУКОВОДСТВО С ИНСТРУКЦИЯМИ
CS PŘÍŘUČKA POKYNŮ
PL INSTRUKCJA OBSŁUGI
RO MANUAL DE INSTRUCŢIUNI
READ THESE INSTRUCTIONS
CAREFULLY BEFORE USE AND KEEP
THEM FOR FUTURE REFERENCE.
Culle
Carrycots


Culle
Carrycots
ITALIANO 12
ENGLISH 14
FRANÇAIS 16
DEUTSCH 18
ESPAÑOL 20
PORTUGUÊS 22
РУССКИЙ 24
ČEŠTINA 26
POLSKI 28
ROMÂNĂ 30
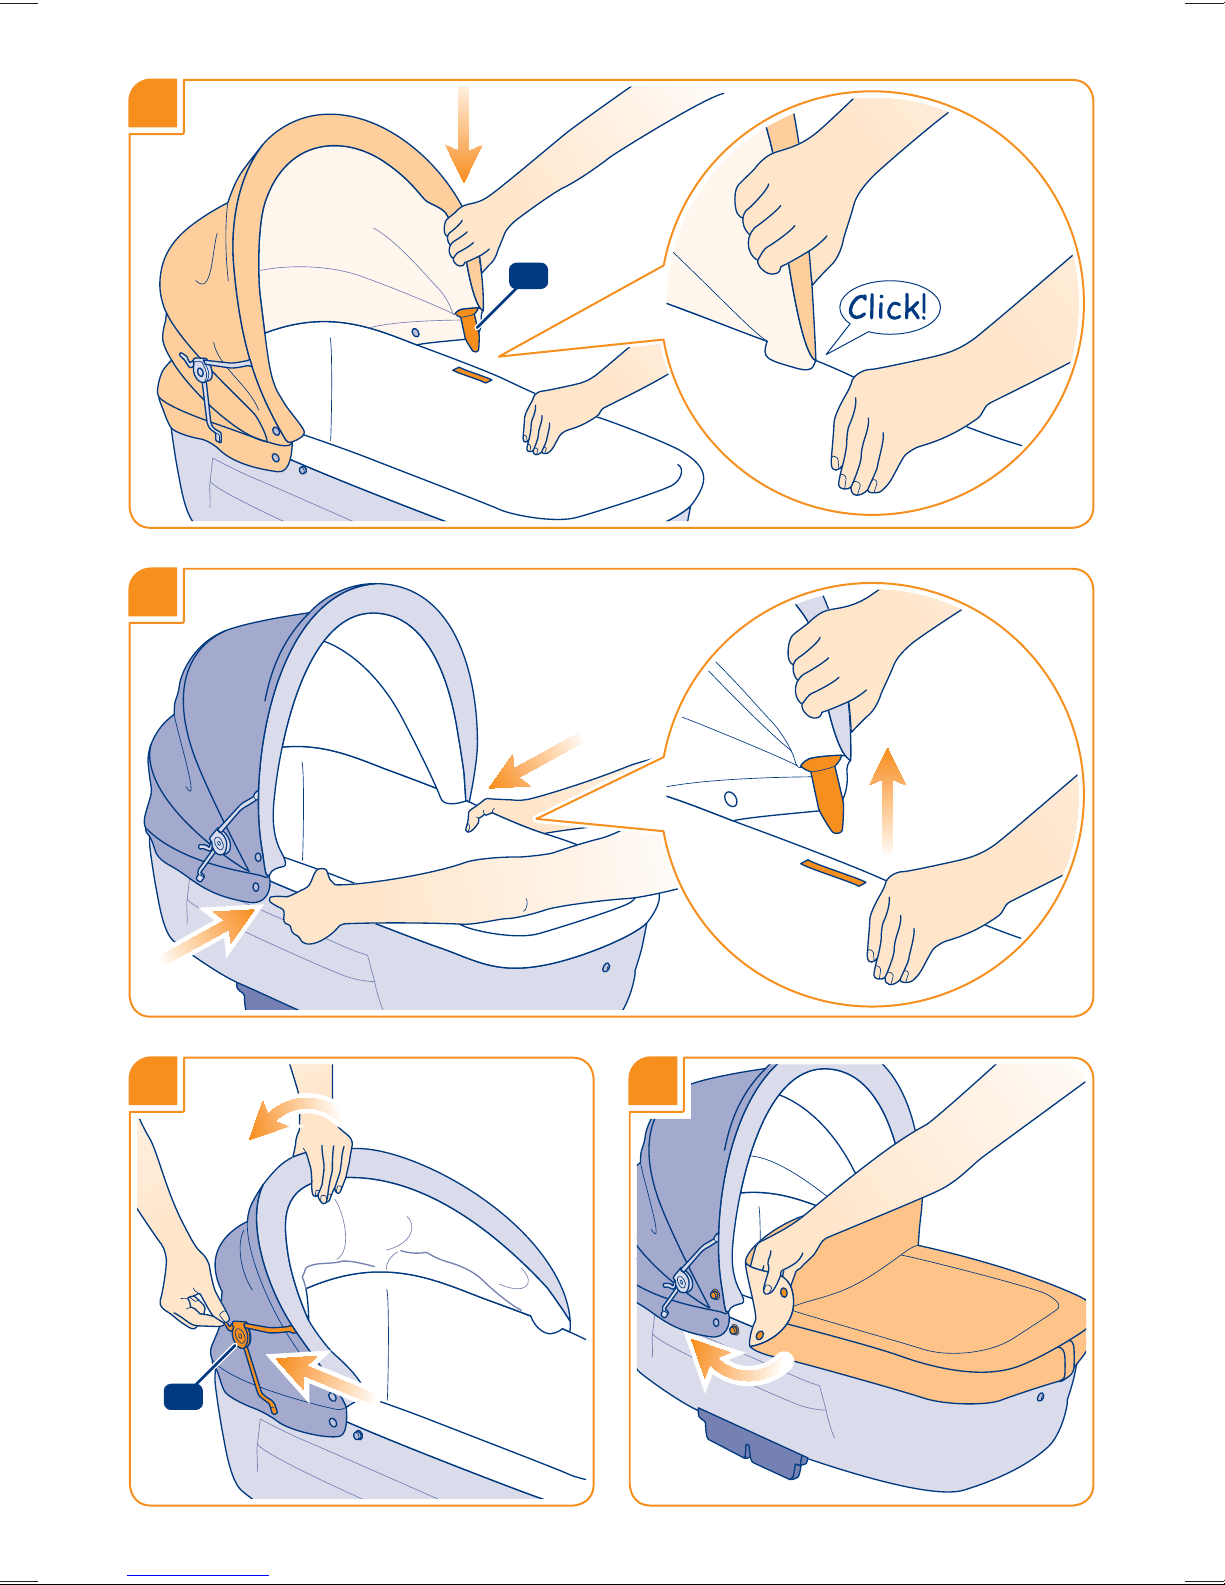
4
1
2
3 4
A
B
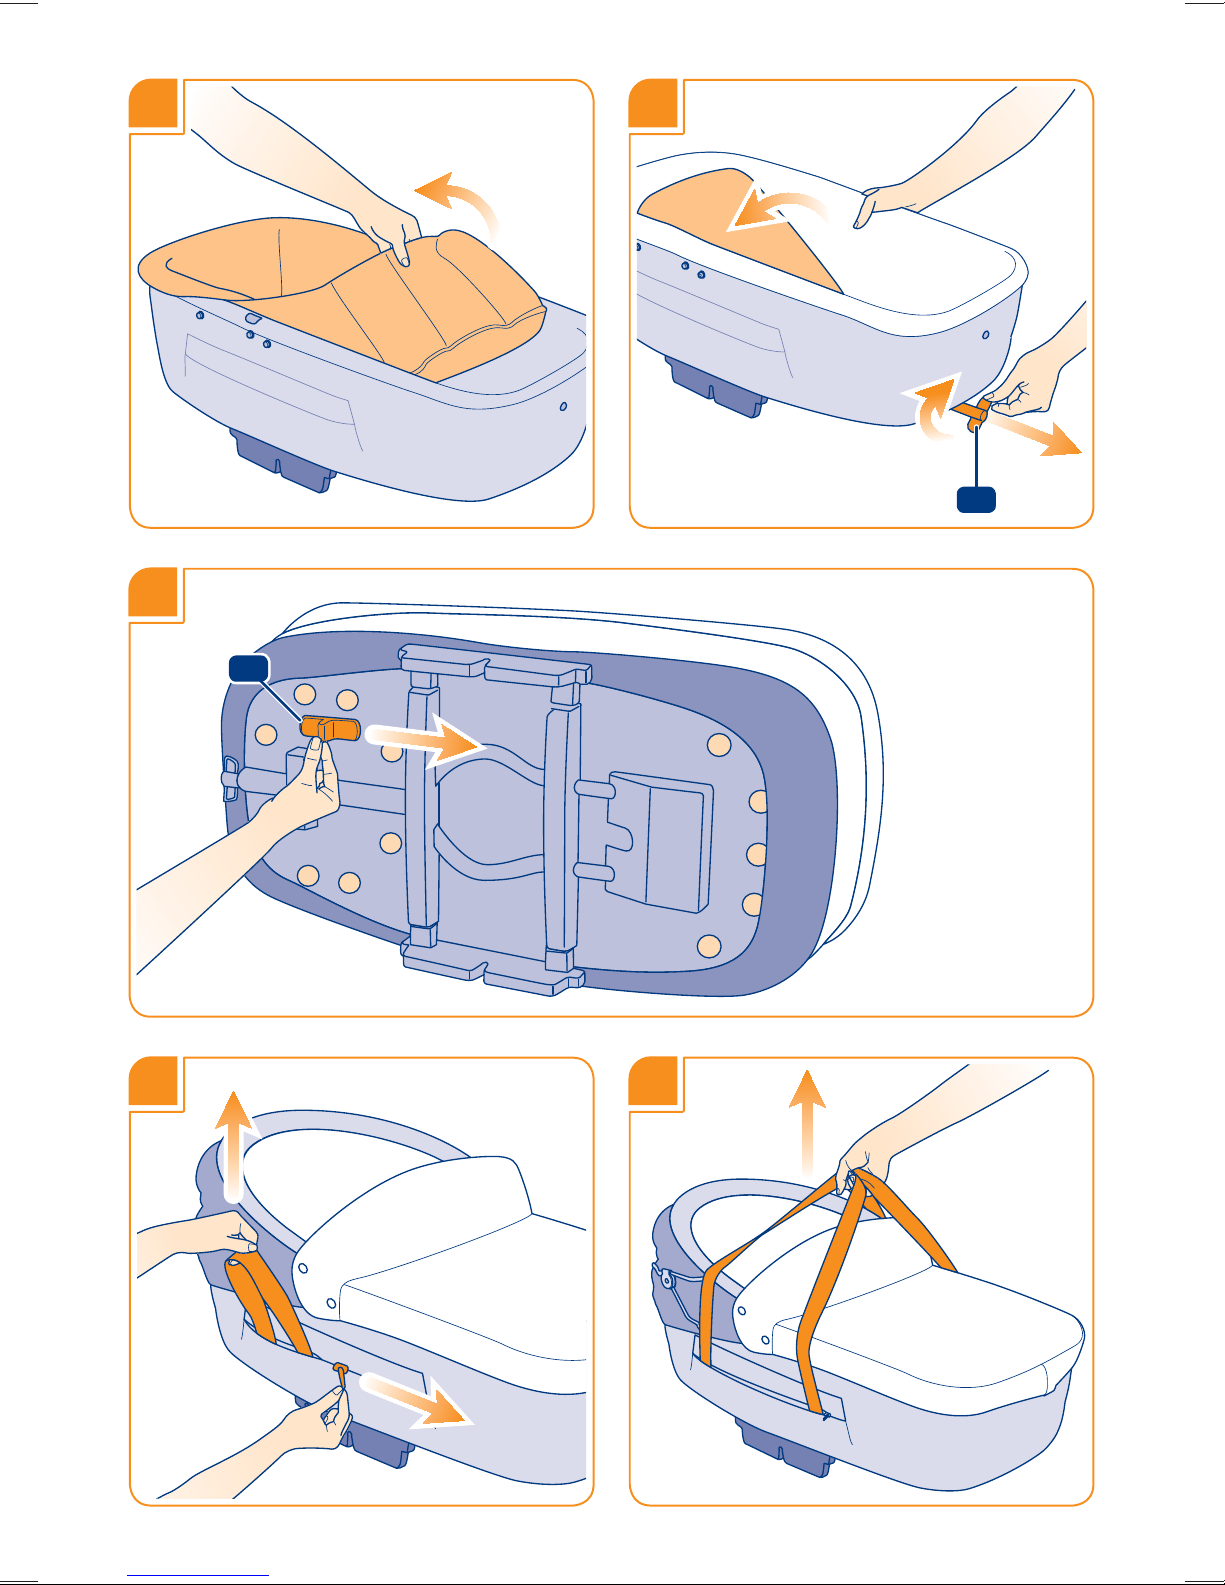
5
7
5 6
8 9
D
C
Table of contents
Languages:
Other Inglesina Baby Carrier manuals


