injen EVOLUTION EVO7006 User manual

Instruction Manual P/N:EVO7006
Vehicle Application:
Make: Chevrolet /GMC
Model: Silverado / Sierra
2500/3500
Year: 2015
Engine: 6.6L (TD) Duramax LML
EXPLODED VIEW
Page 1 EVO7006
TOOLS REQUIRED
• 10mm Ratchet & Socket
• 8mm nut drive
• Allen key
• Flat Blade Screwdriver
• Phillips Screwdriver
A Limited Lifetime Warranty to the original purchaser against defects in material and workmanship on all Injen intake systems excluding the filter element.
Any and all warranty coverage is limited to the repair or replacement of the defective part only, at Injen Technology’s discretion. The warranty does not
cover incidental or consequential damages, nor does it cover the cost of installation or removal of the defective part or its replacement. Proof of purchase
is required.
Report any defective or missing parts to the authorized Injen dealer you purchased this product from. Before installing any parts of this system,
please read the instructions thoroughly. If you have any questions regarding installation, please contact your Injen Technology dealer. Installation
DOES require some mechanical skills. A qualified mechanic is always recommended.
WARNING: FAILURE TO FOLLOW INSTALLATION INSTRUCTIONS AND NOT USING THE PRO-
VIDED HARDWARE MAY DAMAGE THE INTAKE SYSTEM, ENGINE AND COMPONENTS!!!
*
Do not attempt to install the intake system while the engine is hot.
Severe burn could result from touching hot engine components!
A
B
CD
E
F
G
H
I
J
KL
M
N
O
Item QTY. P/N Discription
A 1 #15054 Rotomold Tube
B 1 #15055 Rotomold Plenum
C 1 #15056 Rotomold Box
D 1 #1068 6.00" Filter
E 1 #3201 5.00" Hump Hose
F 1 #3163 4.25"- 4.50"Straight Hose
G 2 #4014 #72 Clamps
H 2 #4019 #80 Clamps
I 4 #6047 M4X10mm Button Head Bolts
J 1 #6095 M6X80mm Bolt
K 3 #6096 M6x30mm bolt
L 4 #8047 Rubberized washer
M 1 #15040 Filter Monitor
N 1 #3198 3mm-16" Vacuum Hose
O 1 #8026 Grommet
Instruction Manual P/N:EVO7006
Page 2 EVO7006
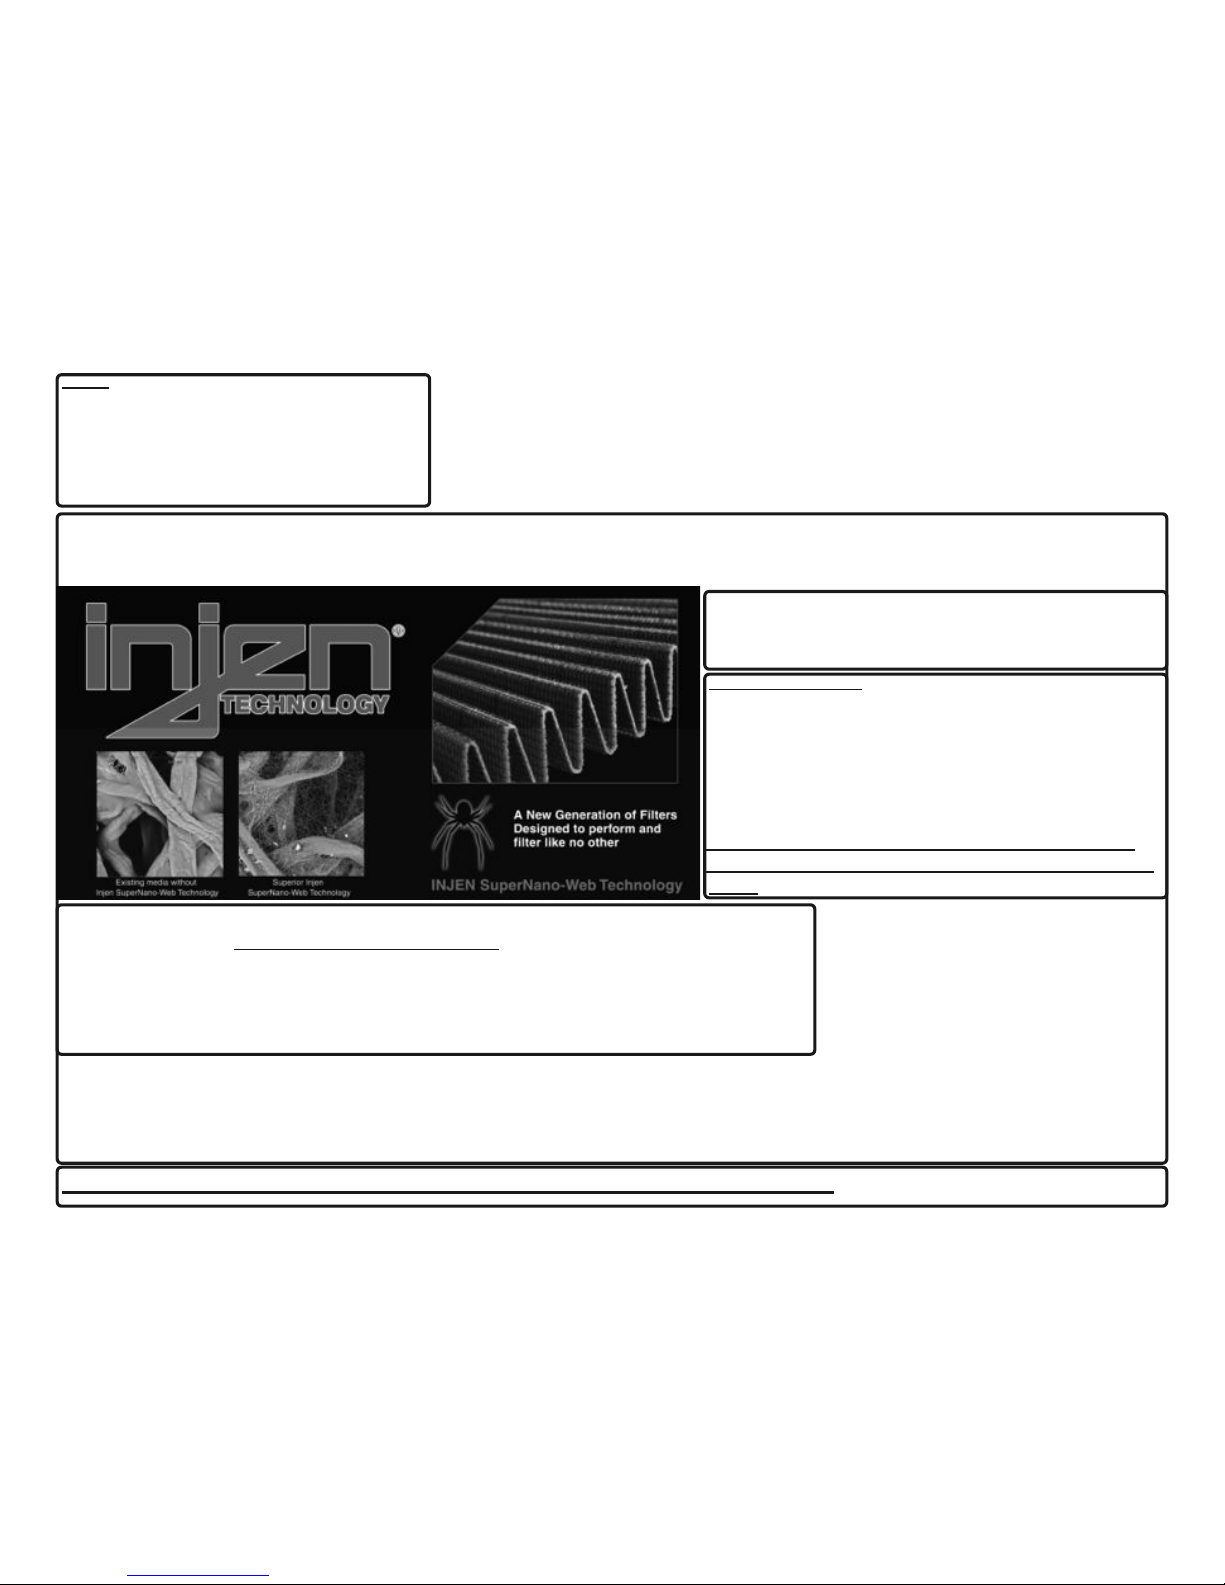
The SuperNano-Web filter media is a dry synthetic media that outperforms the competition. The media itself is a proprietary base blend of synthetics and cellulose. Cellu-
lose fibers are larger than synthetic fibers, and have larger spaces between the fibers, causing contaminants to load in the depth of the media and plug the airflow path.
This creates higher restriction levels and less capacity. The synthetic fibers in the SuperNano-Web media are submicron in diameter and have small interior fiber spaces,
which result in more contaminants being captured on the surface of the media. This can help keep restriction levels low as the filter loads with dirt and containments
NOTE: This intake kit may not work on vehicles with the
following aftermarket modifications.
•Aftermarket Intercooler piping
•Aftermarket intercooler
•Turbo upgrade
•Modified body panels
•Suspension & Chassis modifications
If you look at the picture to the left, you can see the Nano-fiber
web on top of our base media. That web, or SuperNano-Web
as we like to call it, helps trap smaller particles and protect your
engine.
NOTE: DISCONNECT BATTERY BEFORE INSTALLATION!!!
To Clean your filter:
Carefully remove the filter from the housing. Once removed,
wipe down the housing using a clean shop towel, being careful
not to knock any dirt and/or debris in the air inlet. Your filters
can be cleaned by carefully vacuuming the filter media from the
dirty side, or by holding the filter with one hand and carefully
blowing the filter media at a 45-degree angle from the clean
side using low-pressure shop air (15-20 lbs. psi).
*IT IS IMPORTANT TO NOT USE ANY CLEANERS
ON THE SUPERNANO-WEB MEDIA OR APPLY ANY
OIL!!!
Vehicle Emission Control Information:
If your OE air box has a Vehicle Emission Control Information decal affixed to it, removing your OE air
box will also remove the Vehicle Emission Control Information decal. A visible VECI decal must be visible
in the engine compartment to be CARB compliant. The VECI decal must be affixed to a component that
is not easily removable. You can purchase a replacement VECI decal from your local dealership. Failure
to have a visible Vehicle Emissions Control information decal will prevent the vehicle from passing a
smog test. Sample Vehicle Emission Control Information decal shown

Page 3 EVO7006
1. Stock intake system shown. 3. Remove the factory the two maf sen-
sors from the factory air box assembly.
4. Firmly lift up on the stock air box as-
sembly and pull the stock air box assem-
bly out of the engine bay.
2. Disconnect the MAF sensor harness.
Loosen the clamp on the intake duct and
then remove entire air duct
5. Place the grommet onto the drilled
hole on top of the Injen air box. Connect
the vacuum line to the filter minder then
run the Filter minder into the grommet.
8. Place the three M6X25mm bolts and
one M6X80mm into the plenum illustrated
by the photo. Your Injen air box assembly
is now complete.
7. Connect the 3mm vacuum hose
from figure 6 to the barbed fitting on the fil-
ter
6. Place the filter onto the the Injen in-
take plenum and then secure the clamp.
9. Remove the 10mm bolt from the
support bracket and then swing the support
bracket towards the right. This will allow
you to install the Injen air box.
12. Place the 4.25”-4.50” step hose
and two #72 clamps onto the turbo inlet.
Tighten the clamp on the turbo inlet side for
now.
11. Lower the Injen air box into the en-
gine bay. Make sure the pegs under the
Injen air box goes into the factory air box
grommets on the air box tray from figure 10.
Also re-install the support bracket.
Grommet
Filter minder
Instruction Manual P/N:EVO7006
M3X25MM
M3X80MM
Loosen clamp
Loosen clamp disconnect harness
Vacuum line
10. The factory air box assembly
bracket is shown in the photo. Arrows indi-
cate the grommets where the Injen air box
mounts will go.
Remove 10mm bolt

Page 4 EVO7006
13. Place the 5.00” hump hose and
two #80 clamps onto the Injen intake
plenum on the injen air box.
15. Place both MAF sensors onto their
appropriate location and then screw them
down with the supplied M4 bolts. Recon-
nect the MAF sensor harnesses
14. First slide the big end of the intake
pipe into the 5.0” hump hose on the air box
plenum. Then slip the smaller end into the
4.25”-4.50” step hose on the turbo inlet.
Once intake is adjusted, tighten all clamps.
Hump hose
1. Upon completion of the installation, reconnect the negative battery terminal before you start the engine.
2. Align the entire intake system for the best possible fit. Once the intake has been properly fitted continue to tighten all nuts, bolts and clamps.
3. Periodically, recheck the alignment of the intake system and make sure there is proper clearance around and along the length of the intake. Failure to follow proper
mainentance procedures may cause damage to the intake and will void the warranty.
4. Start the engine and listen carefully for any odd noises, rattles and/or air leaks prior to taking it for a test drive. If any problems arise go back and check the vacuum lines,
hoses and clamps that maybe causing leaks or rattles and correct the problem.
5.
Check the filter for excessive dirt build up.
Enjoy the added power and performance of your new intake system.
Congratulations! You have just completed
the installation of this intake system. Period-
ically, check the alignment of the intake, nor-
mal wear and tear can cause nuts and bolts
to come loose. Note: Check clearance and
adjust if needed! Failure to check the
alignment and adjust the intake can
cause damage that will void the warranty.
Injen Technology is not responsible for
any damages caused by/from improper
installation.
Instruction Manual P/N:EVO7006
Test Drive:
1. With the transmission in neutral or park and the parking brake engaged, start the engine. Listen for air leaks or odd noises. If air leaks are detected, secure hoses and con-
nections. For any odd noises, inspect entire system for cause and adjust intake as needed. The Injen intake will function identically to the factory system but will be louder and
more powerful.
2. Perform a road test. Listen for odd noises or rattles and fix as necessary.
3. If there are no issues, continue to enjoy your added performance from the Injen performance Intake kit.
4. Injen Technology recommends you periodically check clearance and adjust if needed! Failure to check the alignment and adjust the intake can cause damage that will
void the warranty. Injen Technology is not responsible for any damages caused by/from improper installation.
1st.
2nd.
Other injen Other manuals


Popular Other manuals by other brands

MERLYN
MERLYN 6 Series installation guide

VIAIR
VIAIR 91050 user manual

berlinger
berlinger Fridge-tag 2 user guide

Sunion
Sunion MD-150M user manual

Buyers Products Company
Buyers Products Company LT25 installation instructions

Clearlite Bathrooms
Clearlite Bathrooms Trombone Door Set installation instructions


