4
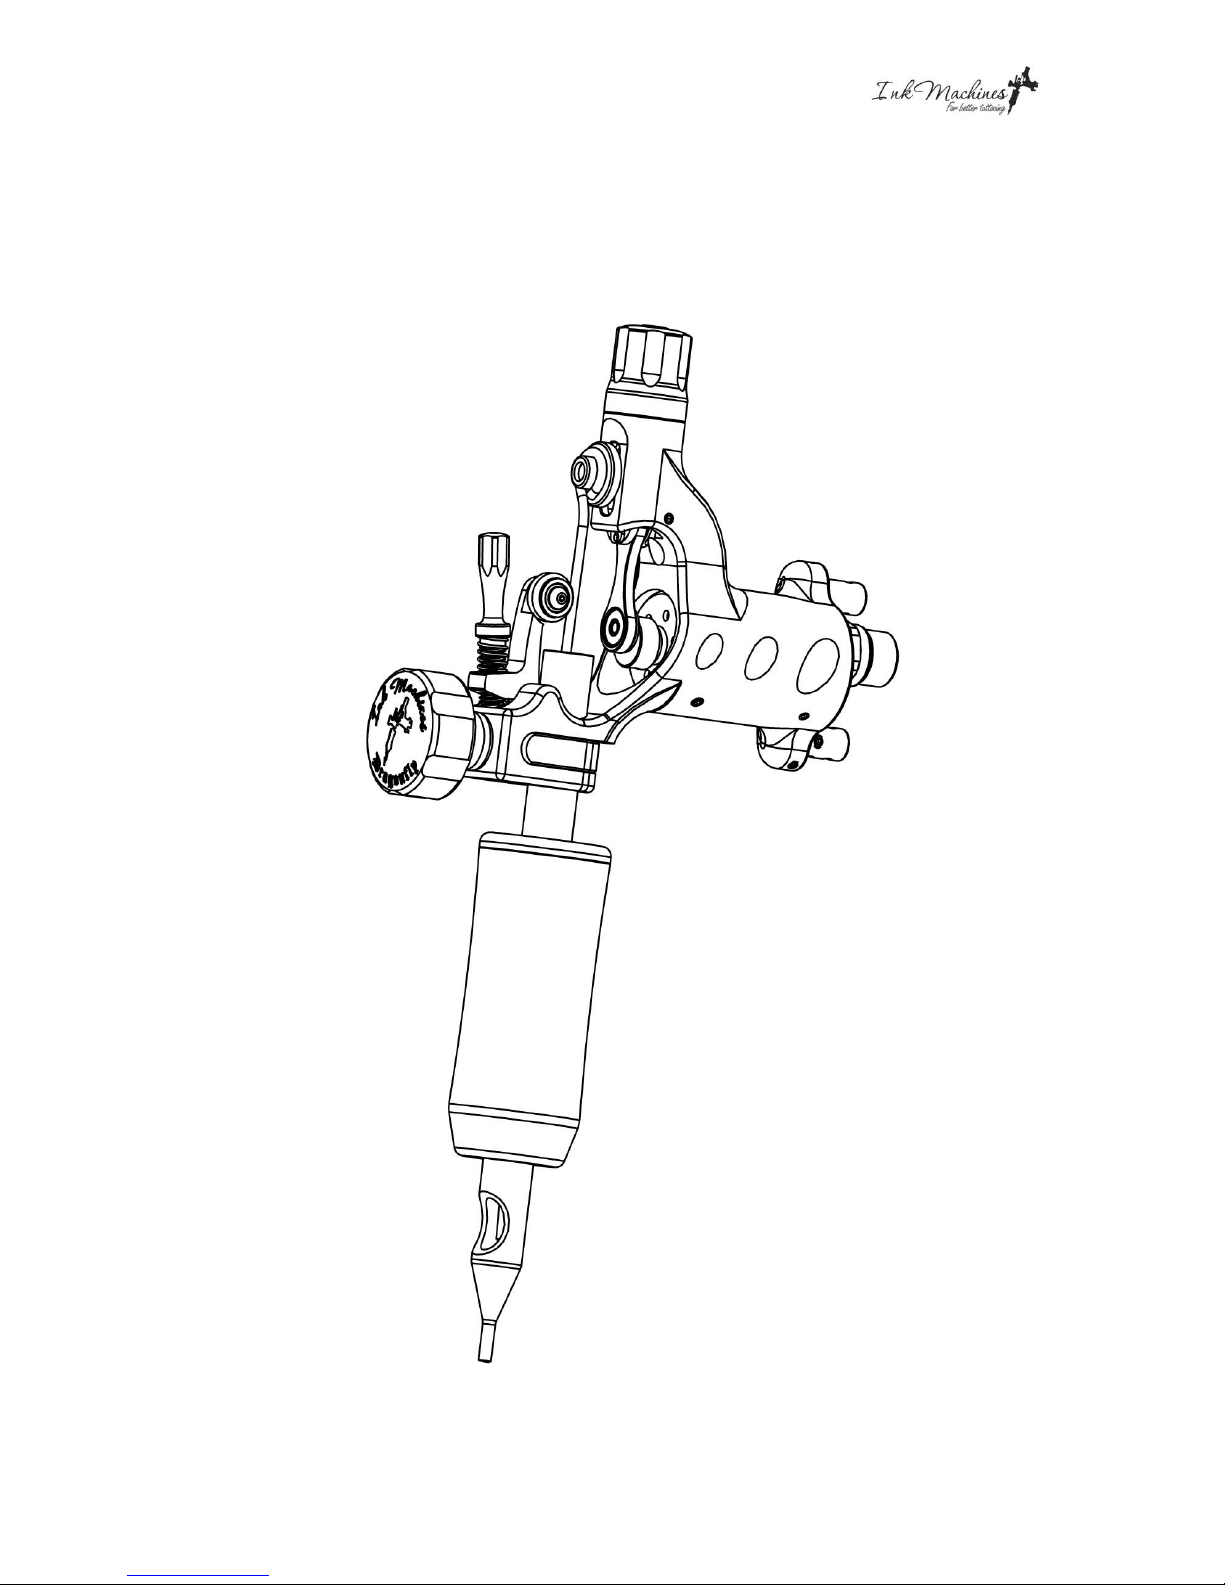
Getting started
1. Disconnect the machine from the power supply.
2. Attach a new quality rubber nipple or grommet to the needlebar pin . The nipple or
grommet should have a tight fit with the needlebar loop.
3. Open the retainer to make clearance for the needlebar and tube by adjusting the
retainer screw .
4. Bend the needlebar to a slight arc shape or make a bend just at the soldering to
compensate the pressure from the needlebar retainer. This enables the needles to work
straighter, prevent it from wobbling and making it more stable in the tip.
5. Insert the needle carefully into the tube without damaging the needle tips.
6. Insert the tube / needle assembly trough the tube vice clamp and tighten the vice
lightly. Attach the needlebar loop to the nipple.
7. Move the needlebar pin and the attached needlebar down to the bottom of its
stroke by pressing the needlebar pin downwards, if the needlebar pin won’t move
down push the excentric bearing to the side at the same time.
8. Inspect and adjust the protrusion and alignment of the needle and tip by moving the
grip and tube to the desired location. Tighten the tube vice firmly when done .
9. Adjust the needlebar retainer by turning the retainer screw until the retainer
o-rings makes contact with the needlebar. Don’t tighten more than necessary to
keep the needle stable in the tip. If the needlebar don’t align properly with the retainer
o-rings, adjust / bend the needlebar so that it aligns.
10. Connect the machine to a power supply ( max 14 volts DC ) either with a RCA cable
to the RCA contact or a clipcord to the clipcord binding posts , if you
choose to use a clipcord make sure to connect positive to + and negative to –marked
on the machine next to the bindingposts. The motor should turn clockwise when
looking at the front.
11. Run the machine between 9-12 volts depending on needle size and friction, fine adjust
the needlebar retainer until the needle feels stable in the tip and make sure that
everything runs smoothly without excessive friction or noise.
12. Run the machine and adjust the needle suspension by feeling the needlebar pin
and nipple with your finger and by turning the cap to get the desired hitting,
clockwise = harder, counter clockwise = softer. When the cap is turned clockwise to
the bottom the needlebar pin will be locked with the piston . This position will
give the hardest hitting. When the cap is turned counter clockwise the stroke will be
increasingly softer until the limit is reached. When the limit is reached the adjustment
screw will make contact with the cap from the inside and produce noise, turn the
cap clockwise until the adjustment screw clears the cap and the noise stops. If you turn
the cap too far and the cap should come off during this operation, screw down the
adjustment screw two turns and reattach the cap by pushing it until it clicks into place.
13. Encapsulate the machine and cord with plastic bags and wrappings for tattoo
equipment.
14. Typical start values would be around 10.5 volts for shading and filling. 11-12.5 volts
for lining. The adjustment is normally set to soft for shading and medium to hard for
filling (packing color) and lining. These are just start values and are very much
individual. You may find other values to suit you better depending on your technique,
equipment etc.