Innovation Technology ITNS-401 User manual
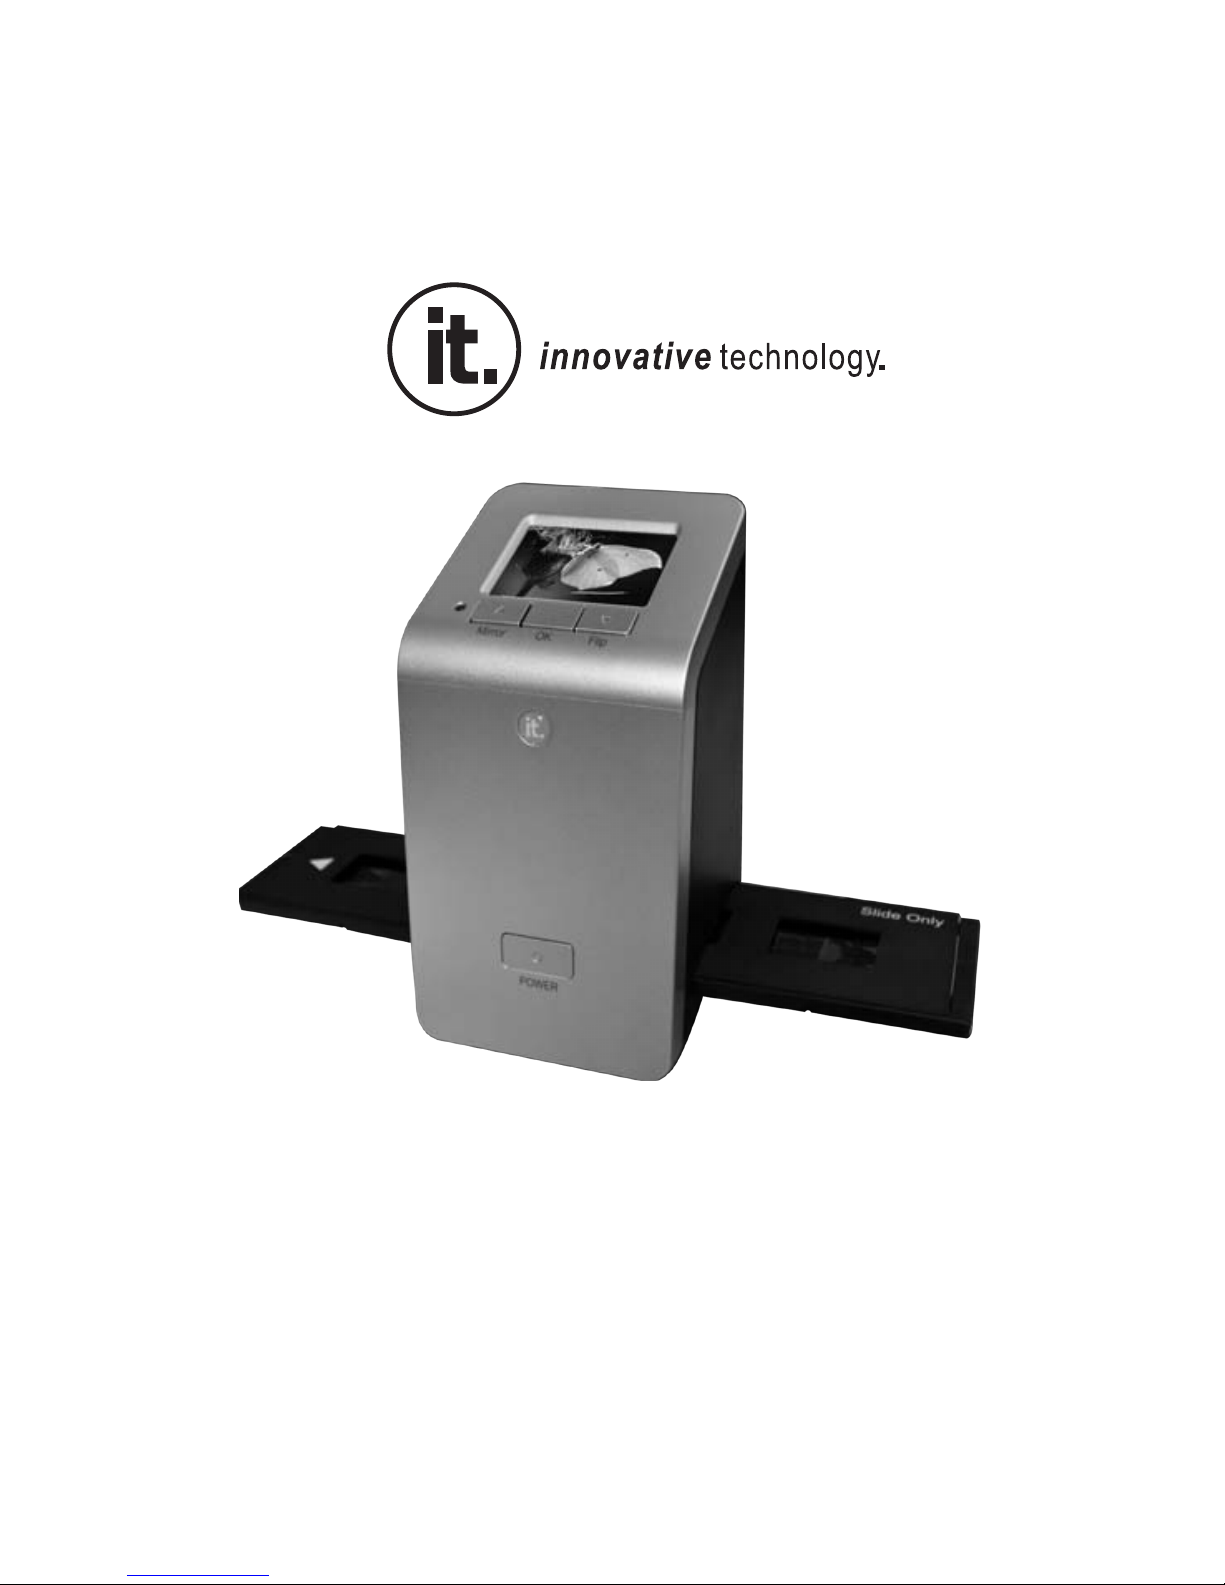
ITNS
Film and Slide Converter
-401
User Manual


-1-
Index
I. Unpack ITNS-401……........................................................2
II. Install film into the film holder........................................3
III. Quick Start.......................................................................6
IV.Operaon Guide............................................................11
V. Specificaons............
...................
.................................31
-2-
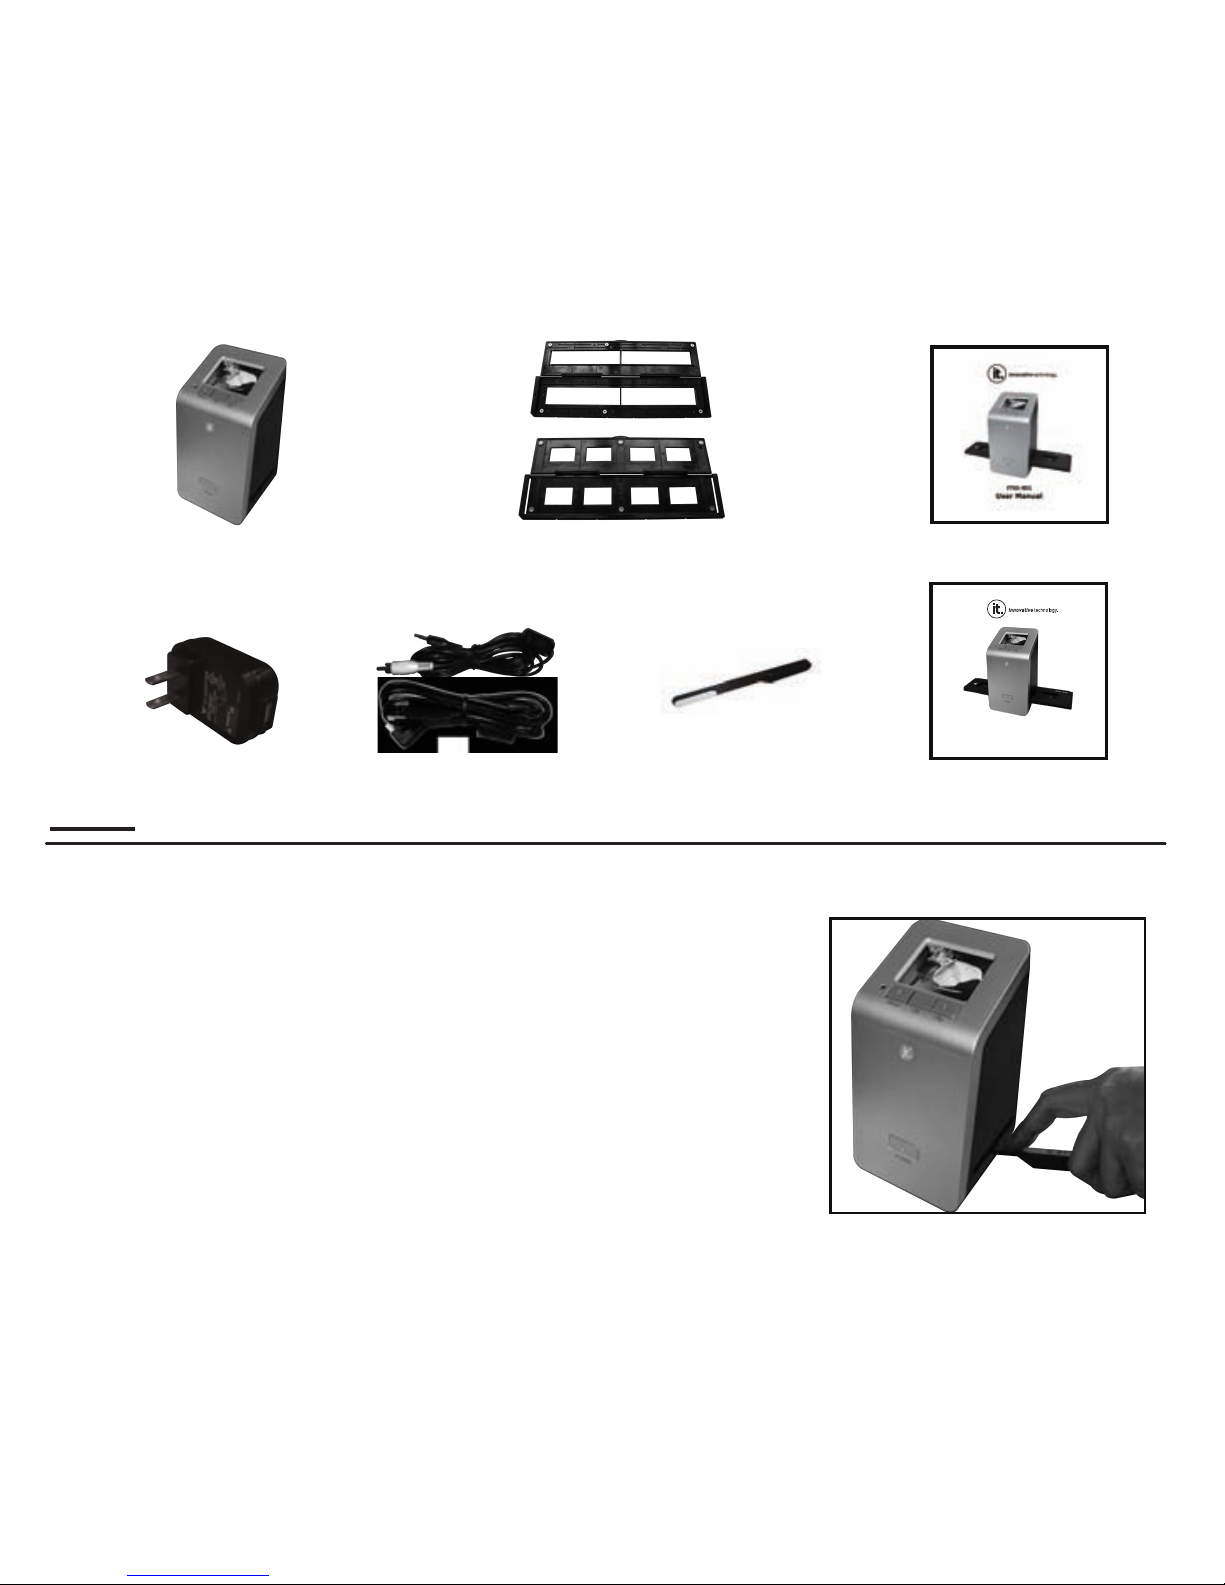
I. Unpacking the ITNS-401
Negave/Slide
ITNS-401 FilmHolder
User
Manual(EN)
User Manual(FR)
AC Adaptor
USB/Video Cable
Cleaning Brush
Note
We strongly suggest using a clean, dry, non-alcohol coon swab to clean the glass
surface periodically to produce a clear image during
operaon.
Clean dust from Film Scanner back light with the cleaning
brush.
Dust or dirt on negaves, slide films or cover trays may
affect the scanned image quality. Please make sure all
materials are cleaned before inserng into the scanner.
To avoid damage to your original negaves or slides,
clean only with a recommended, professional purger from your photo store.
ITNS-401
Guide d’ulisaon
-3-
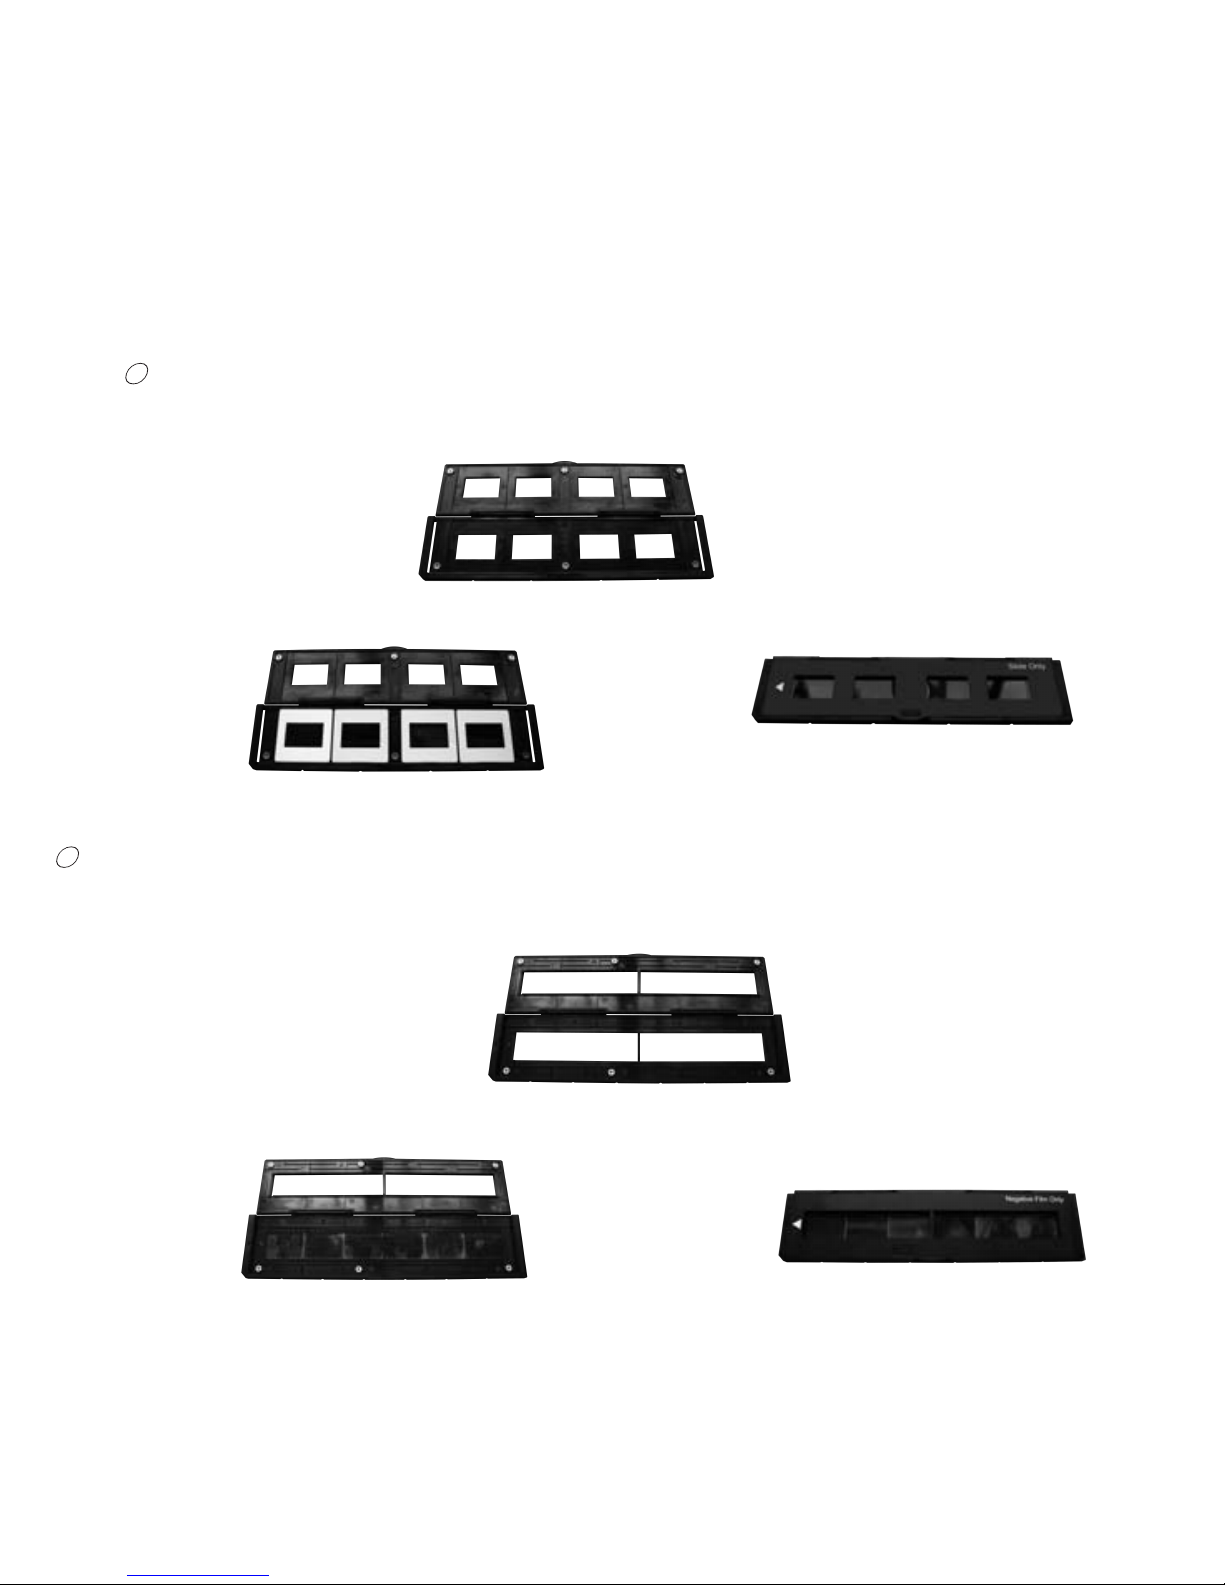
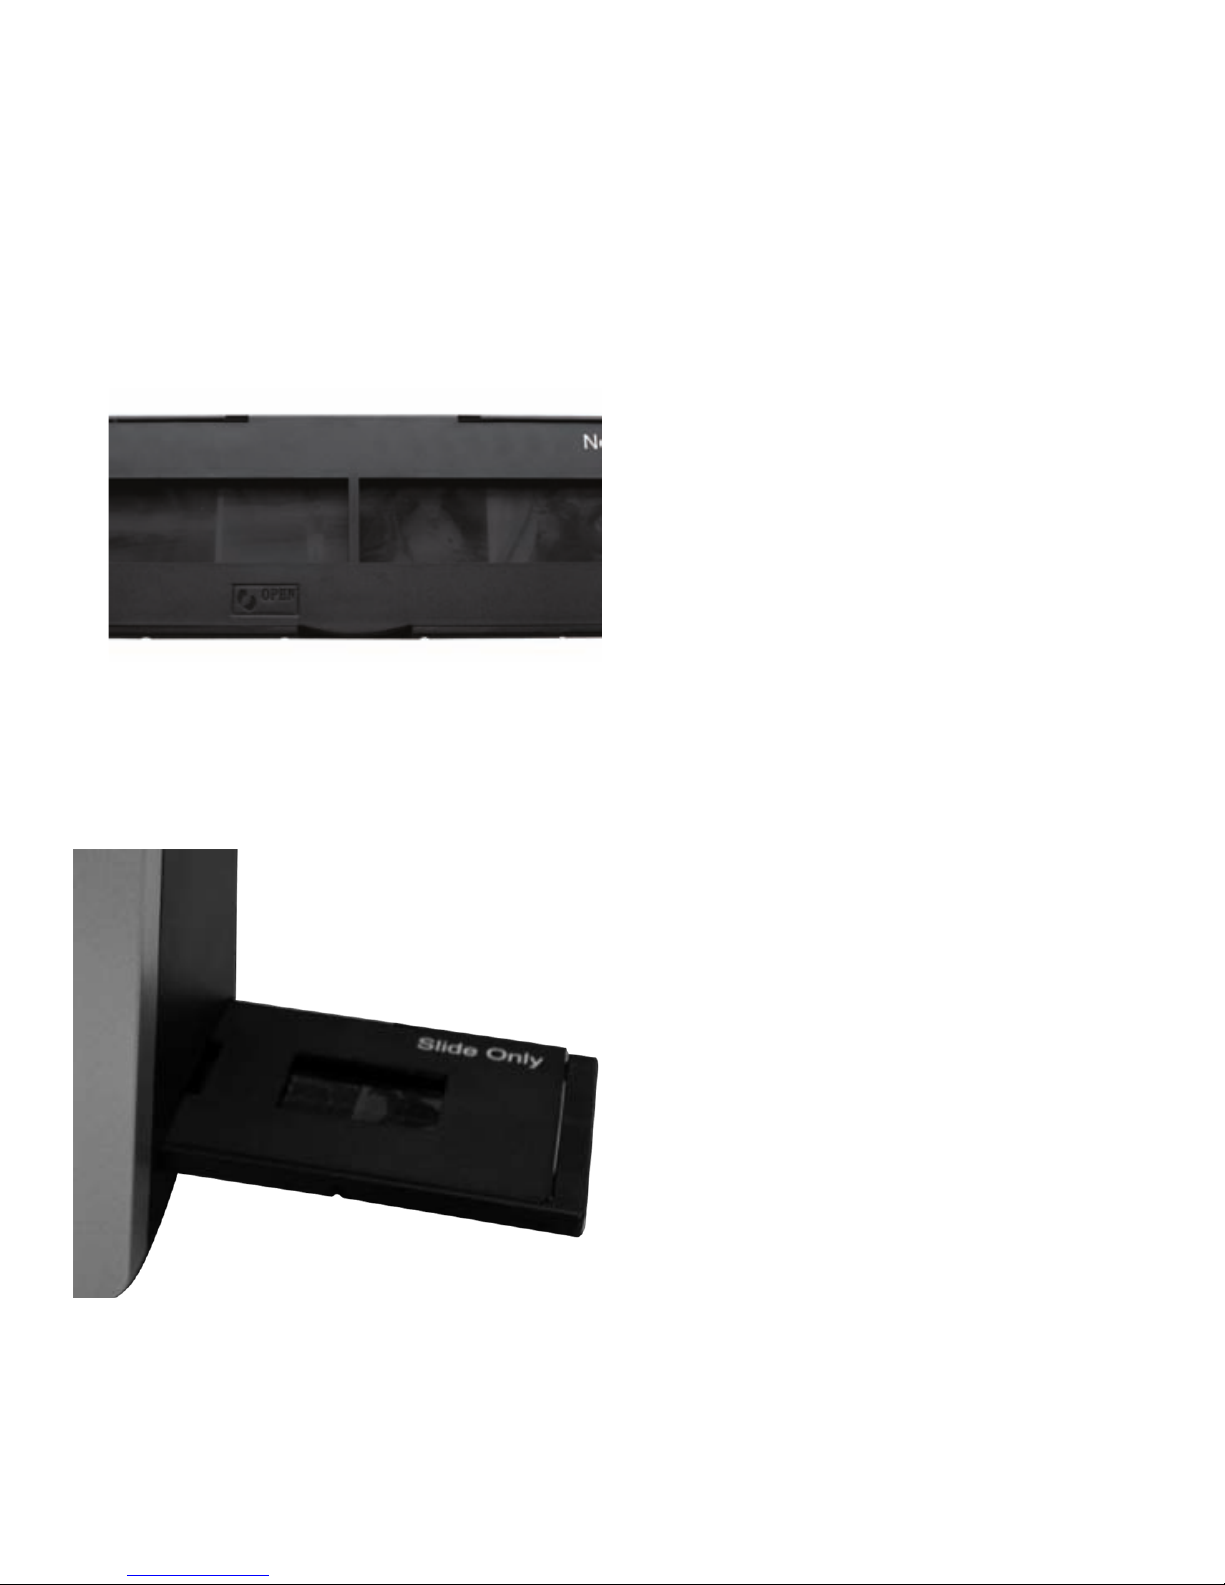
II. Install film into the film holder
●
Placing a slide into the slide holder
1. Open the slide holder as illustrated
2. Put slide into posive slide slot 3. Close the film holder
●
Placing negave film into the film holder
1. Open the film holder as illustrated
2. Install film into negave film slot 3. Close the film holder
-4-
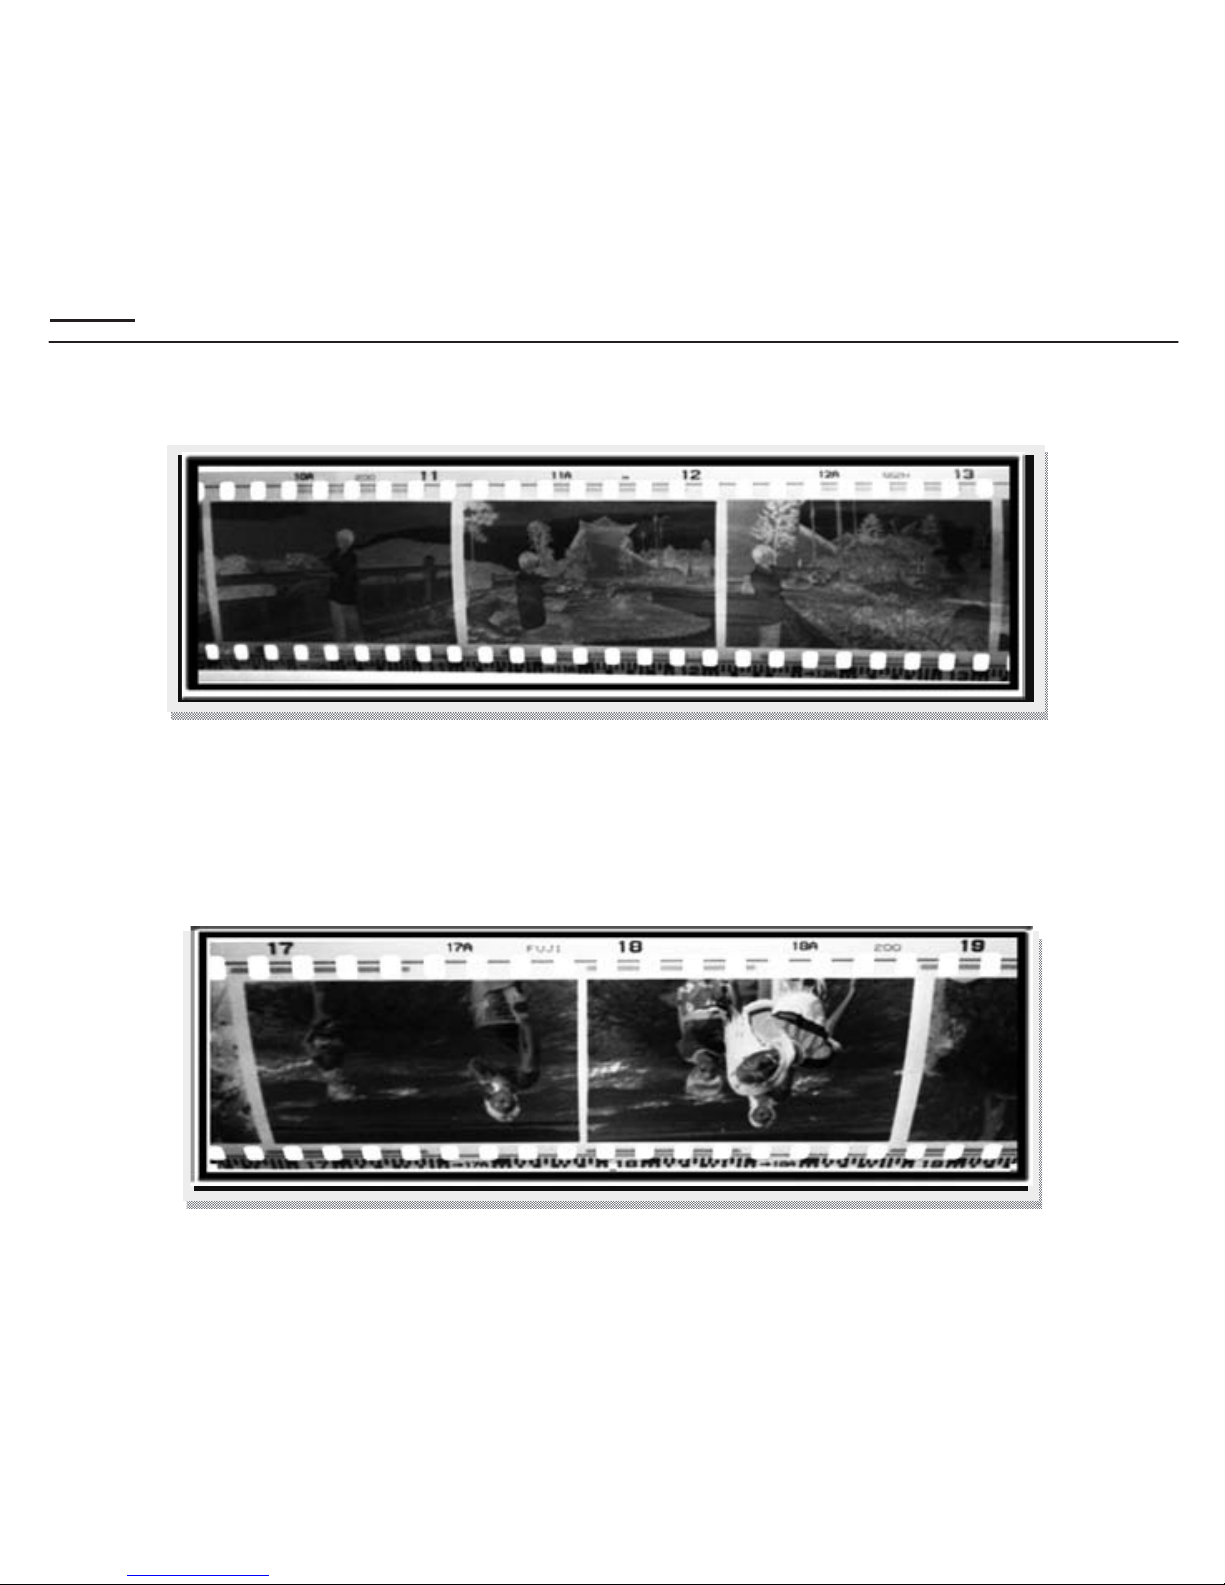
Note
To avoid creang a mirror image, make sure the serial numbers on top of the film read
correctly (from le to right) when placed into the holder [fig. 1].
If the image is upside down [see fig. 2], you can correct it with the Flip funcon. Press
the Flip funcon hard key on the device before image capture, or from the playback
edit menu aer capture [see fig. 3.1].
Figure 1
Figure 2

-5-
●
Press hardkey on top of device in live view
Figure 3
●
Playback mode menu
Figure 3.1
Down/Flip buon
(Flip hard key)
Flip
-6-
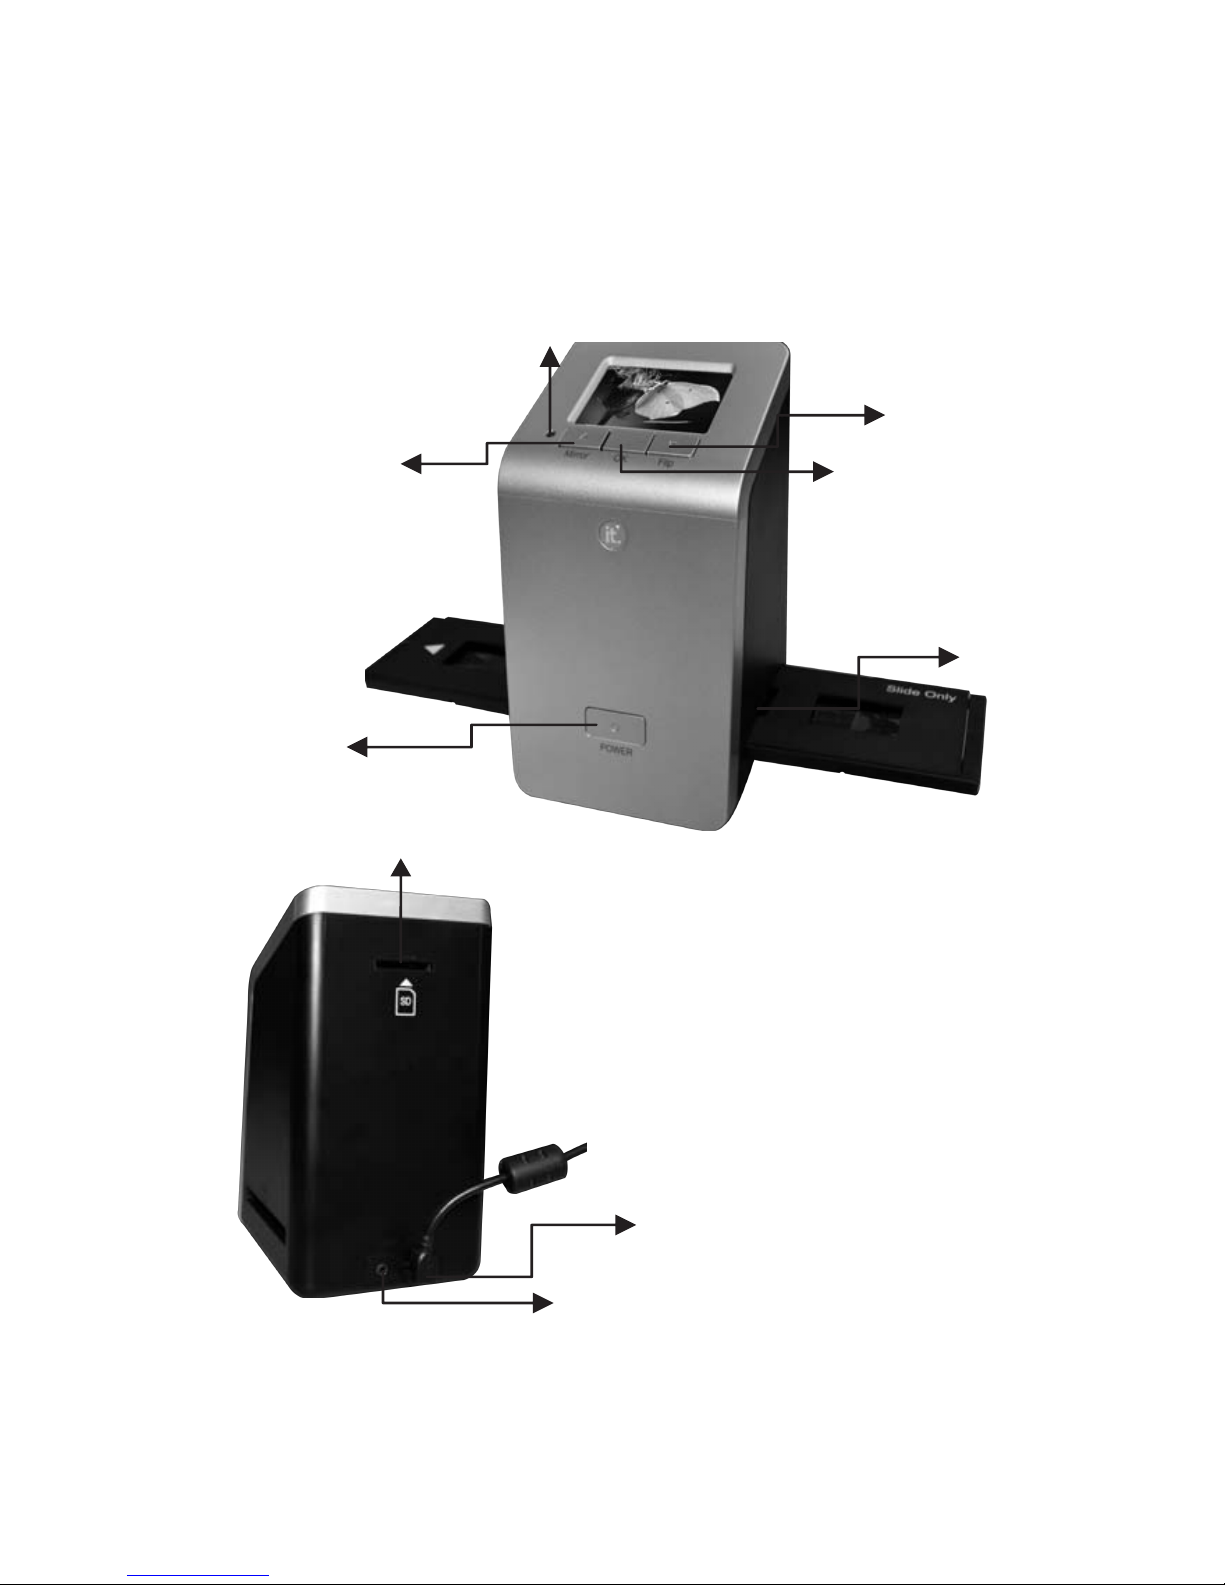
III. Quick Start
Up/Mirror buon
Film Slot
OK buon
SD cardSlot
Down/Flip buon
USB port
TV out jack
Power status LED
Power
/
Standby
buon
-7-
1.Put Film onto the film cartridge
2.Insert the film cartridge into the ITNS-401
-8-
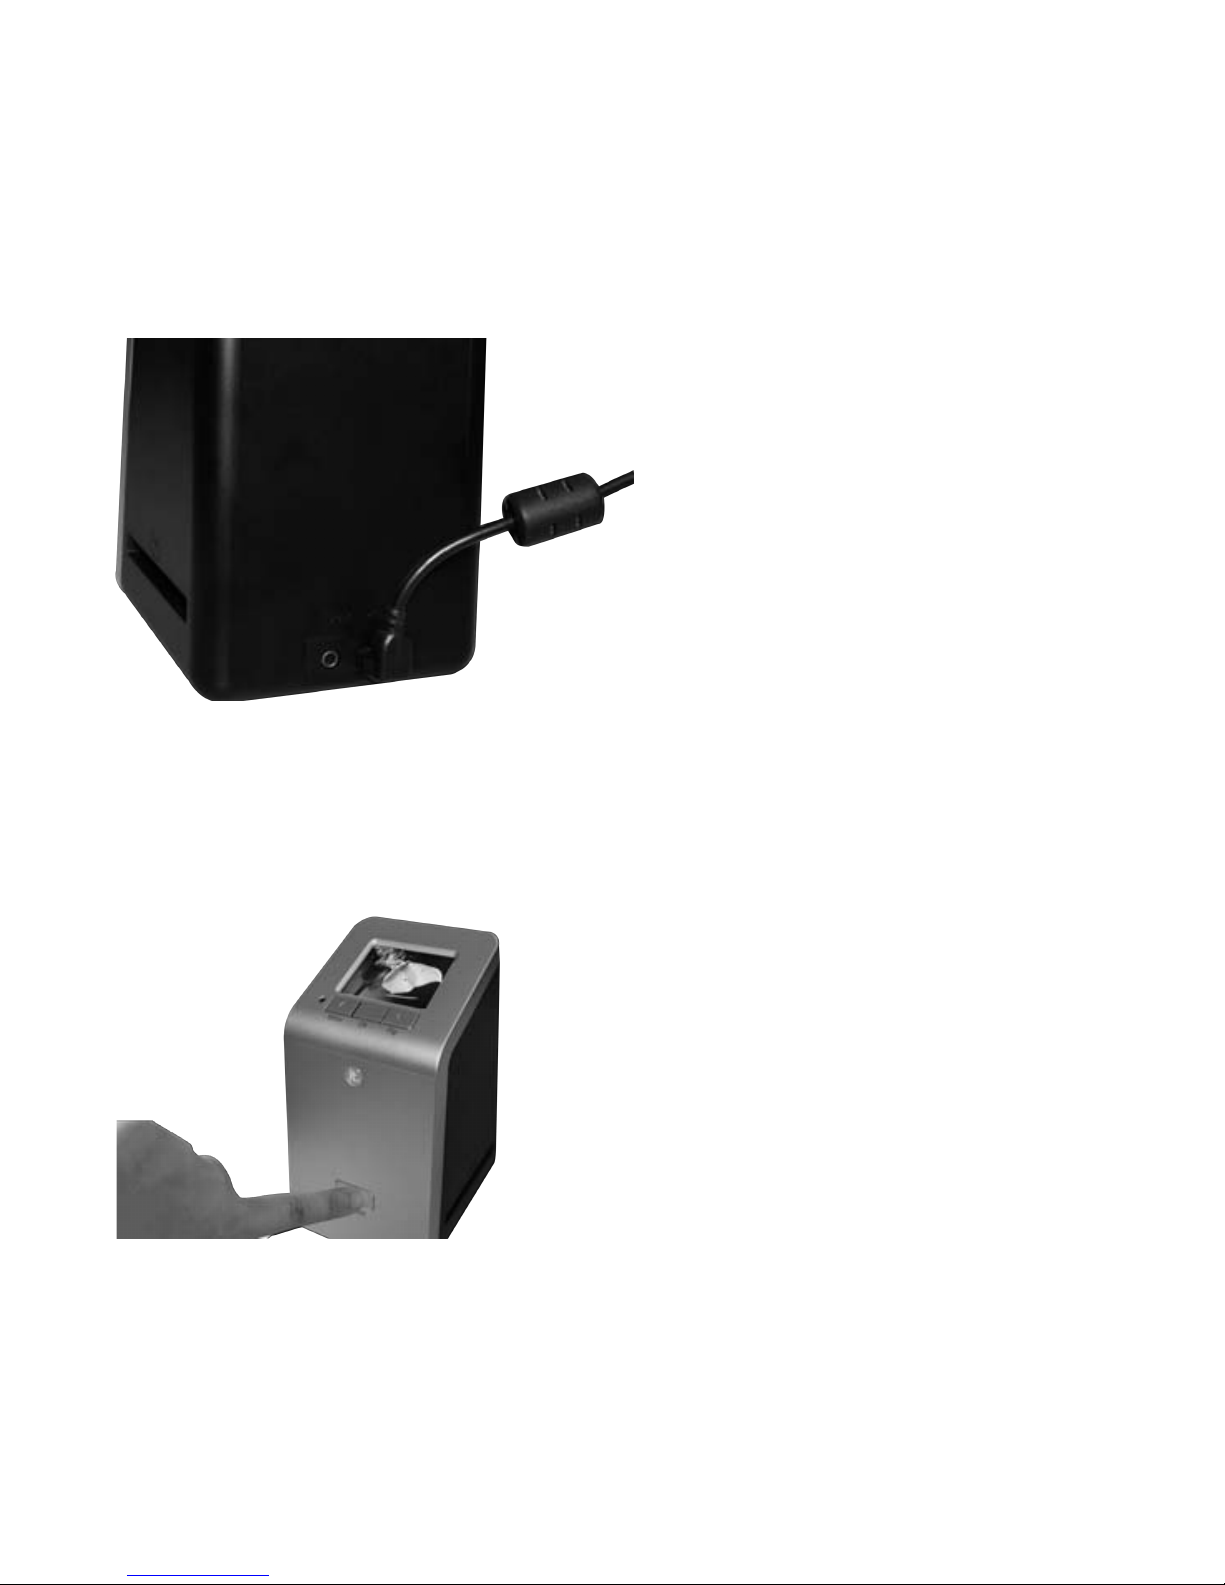
3.Connect USB cable to ITNS-401
4. Turn on the unit by pressing the Power / Standby buon

-9-
5.Press OK buon to capture the image
6.Follow the menu on display for scanning
-10-
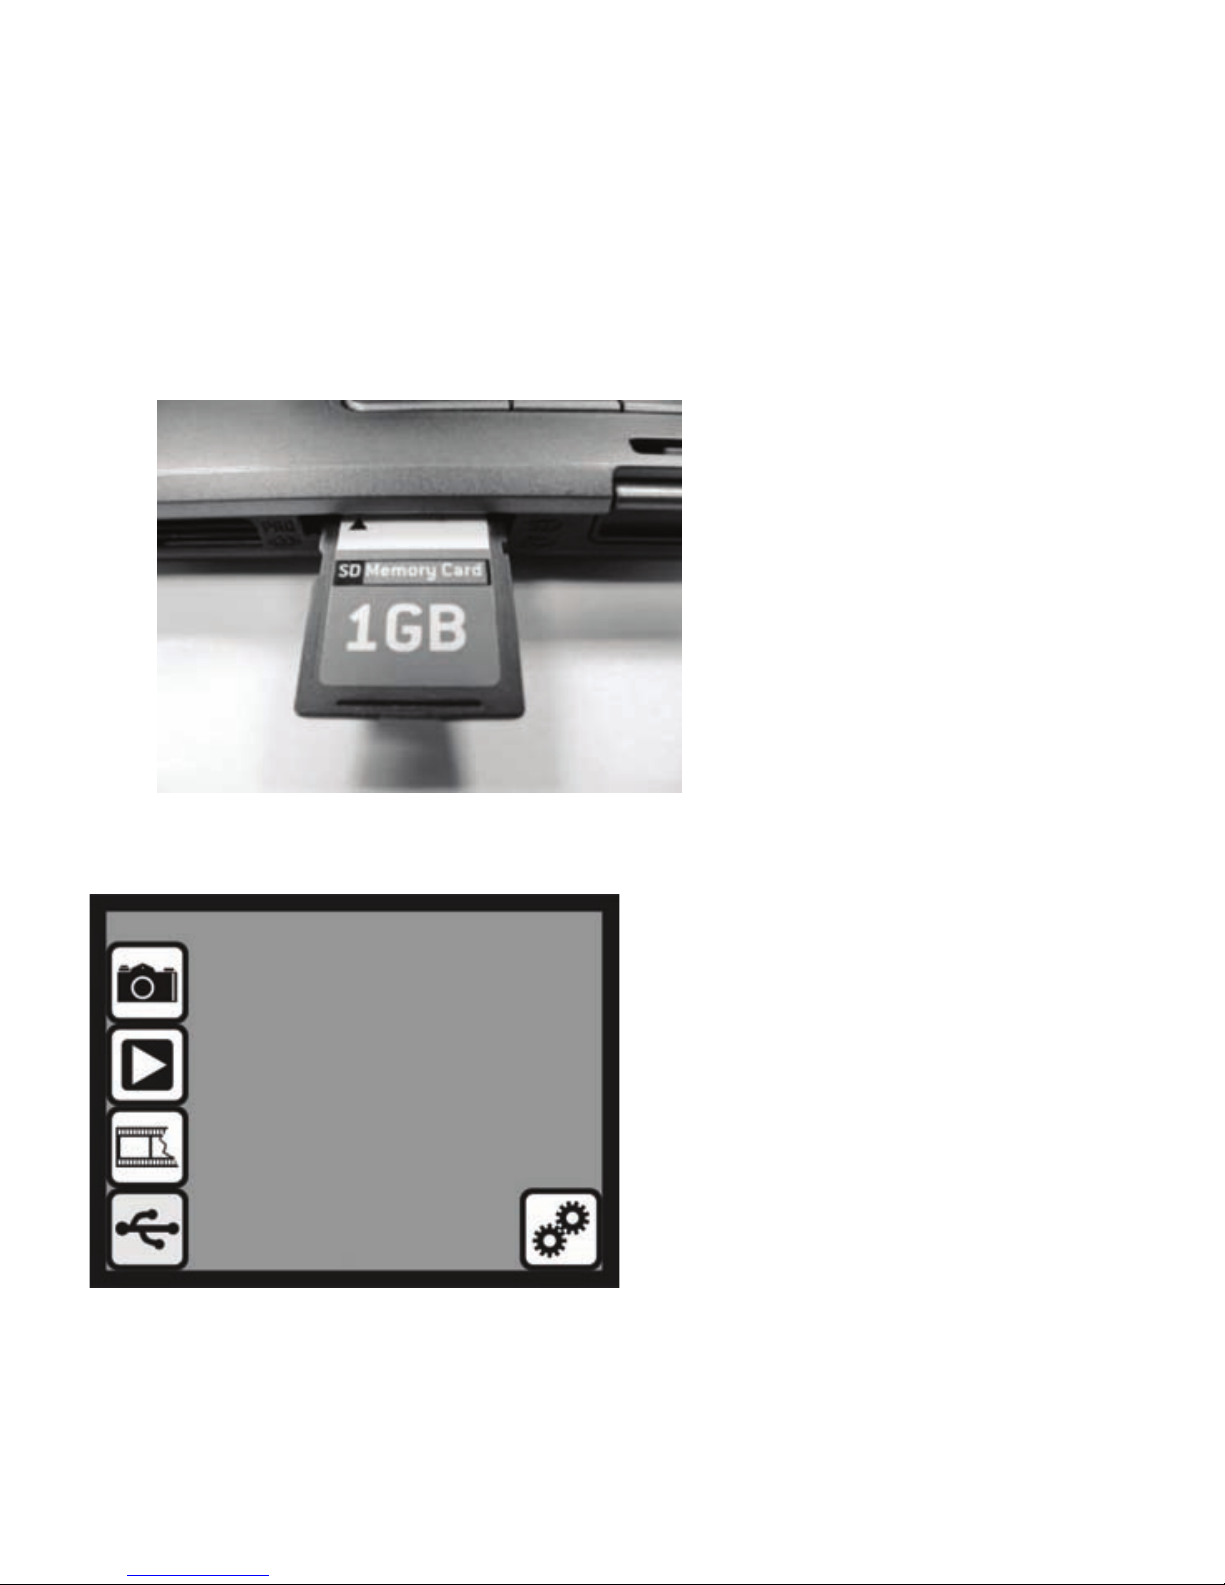
7. Once image capture is complete, take out the SD card where your
captured images are stored
8.Or read picture from PC by using MSDC (Mass Storage Device Class) mode
-11-
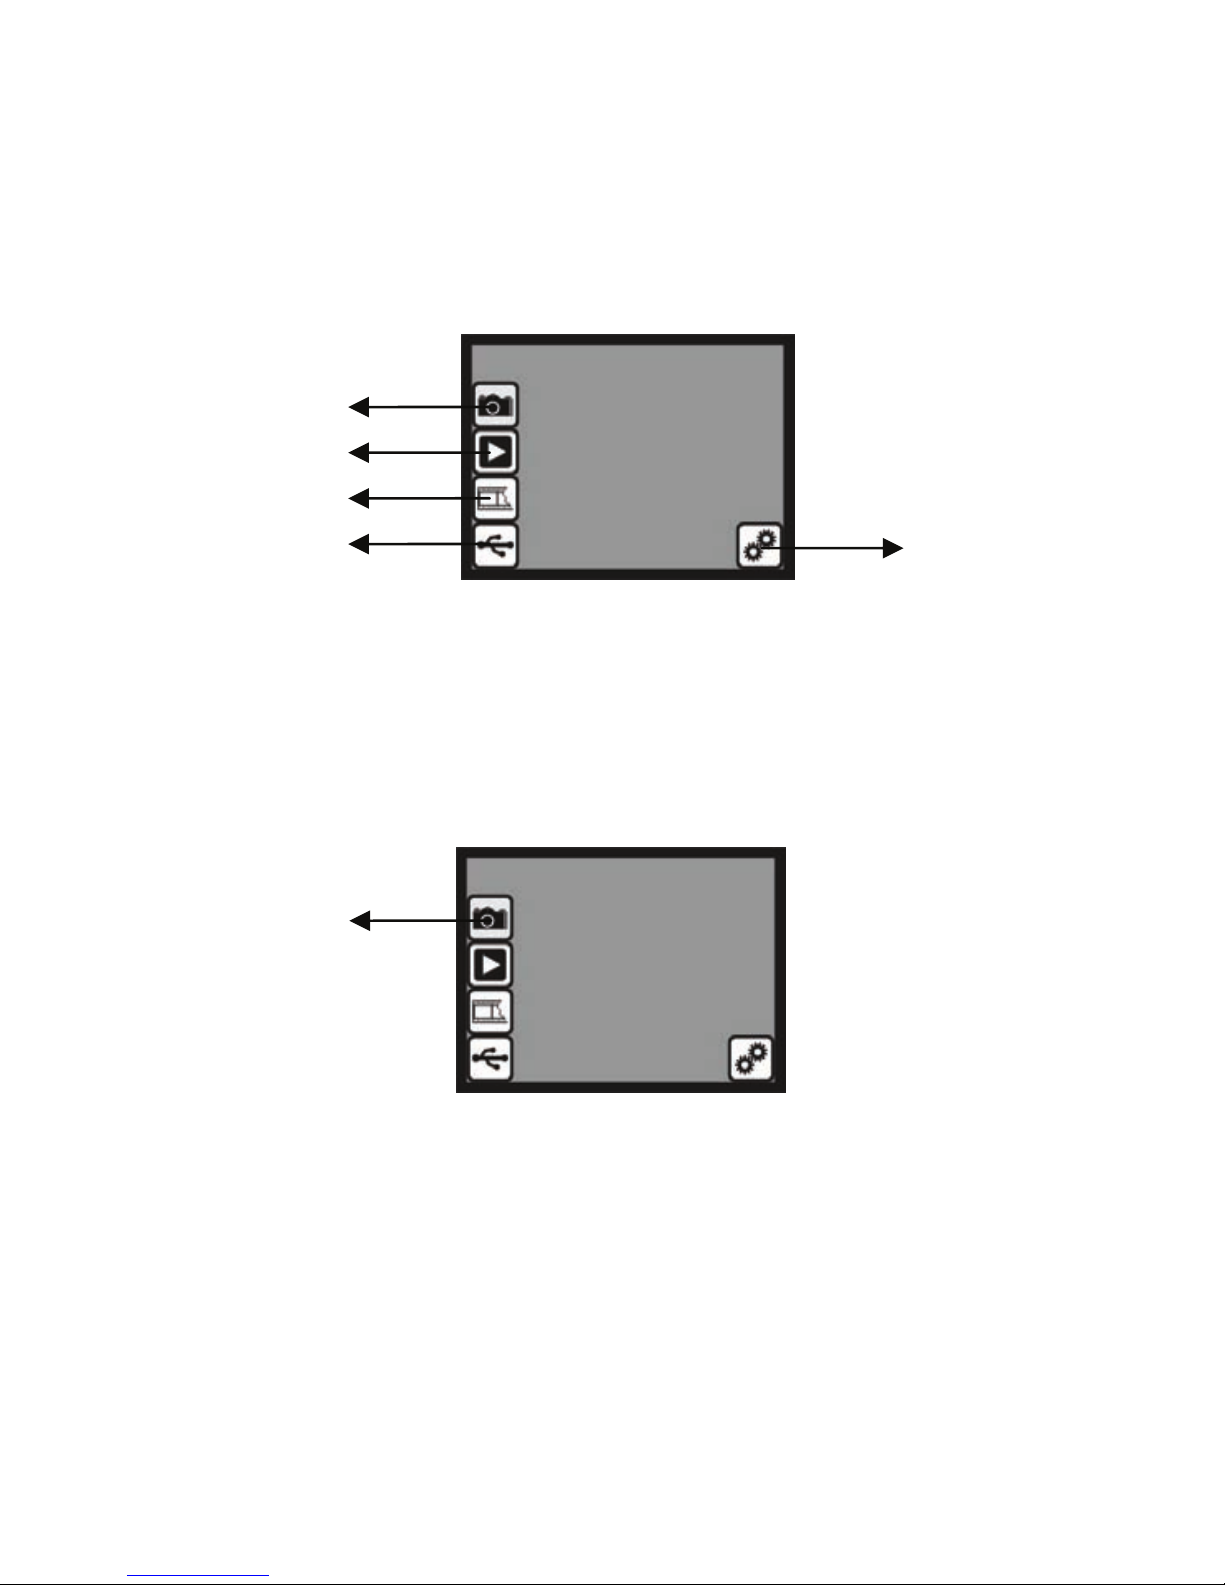
IV.Operaon Guide
Home: Main menu
●Capture: capture mode (default)
●Playback: playback mode
●Film Type: define the film type which is loaded in cartridge
●USB mode: MSDC (Mass Storage Device Class) mode
●Seng: TV out and format opon
1.Capture
Aer the welcome screen appears, the above menu will remain for 5 seconds. You can
press the up/down buon for desired menu. If there is no acon for 5 seconds, the
system will auto enter Capture mode.
Capture
Playback
FilmType
USB mode Seng
Capture

-12-
1.1 Capture: <Up>/<Mirror> - Down /<Flip> (Hot Key)
●
Press < Up > buon to flip an image le to right
●
Press < Down > buon to flip an image upside down
Up/Mirror buon
Down/Flip buon
<OK> Go Back to
1.1Capture
buon
<Mirror>
<Flip>

-13-
1.2 Capture mode
Once in capture mode, there will be a red indicator in the top le corner to indicate you
are in live view mode. When the film cartridge is inserted into the scanner slot, the image
will always show the posive image according to previously defined Film Type (aer power
on, the Film Type defaults to negave film). Reconfirm the film posion through the
display before pressing the OK buon.
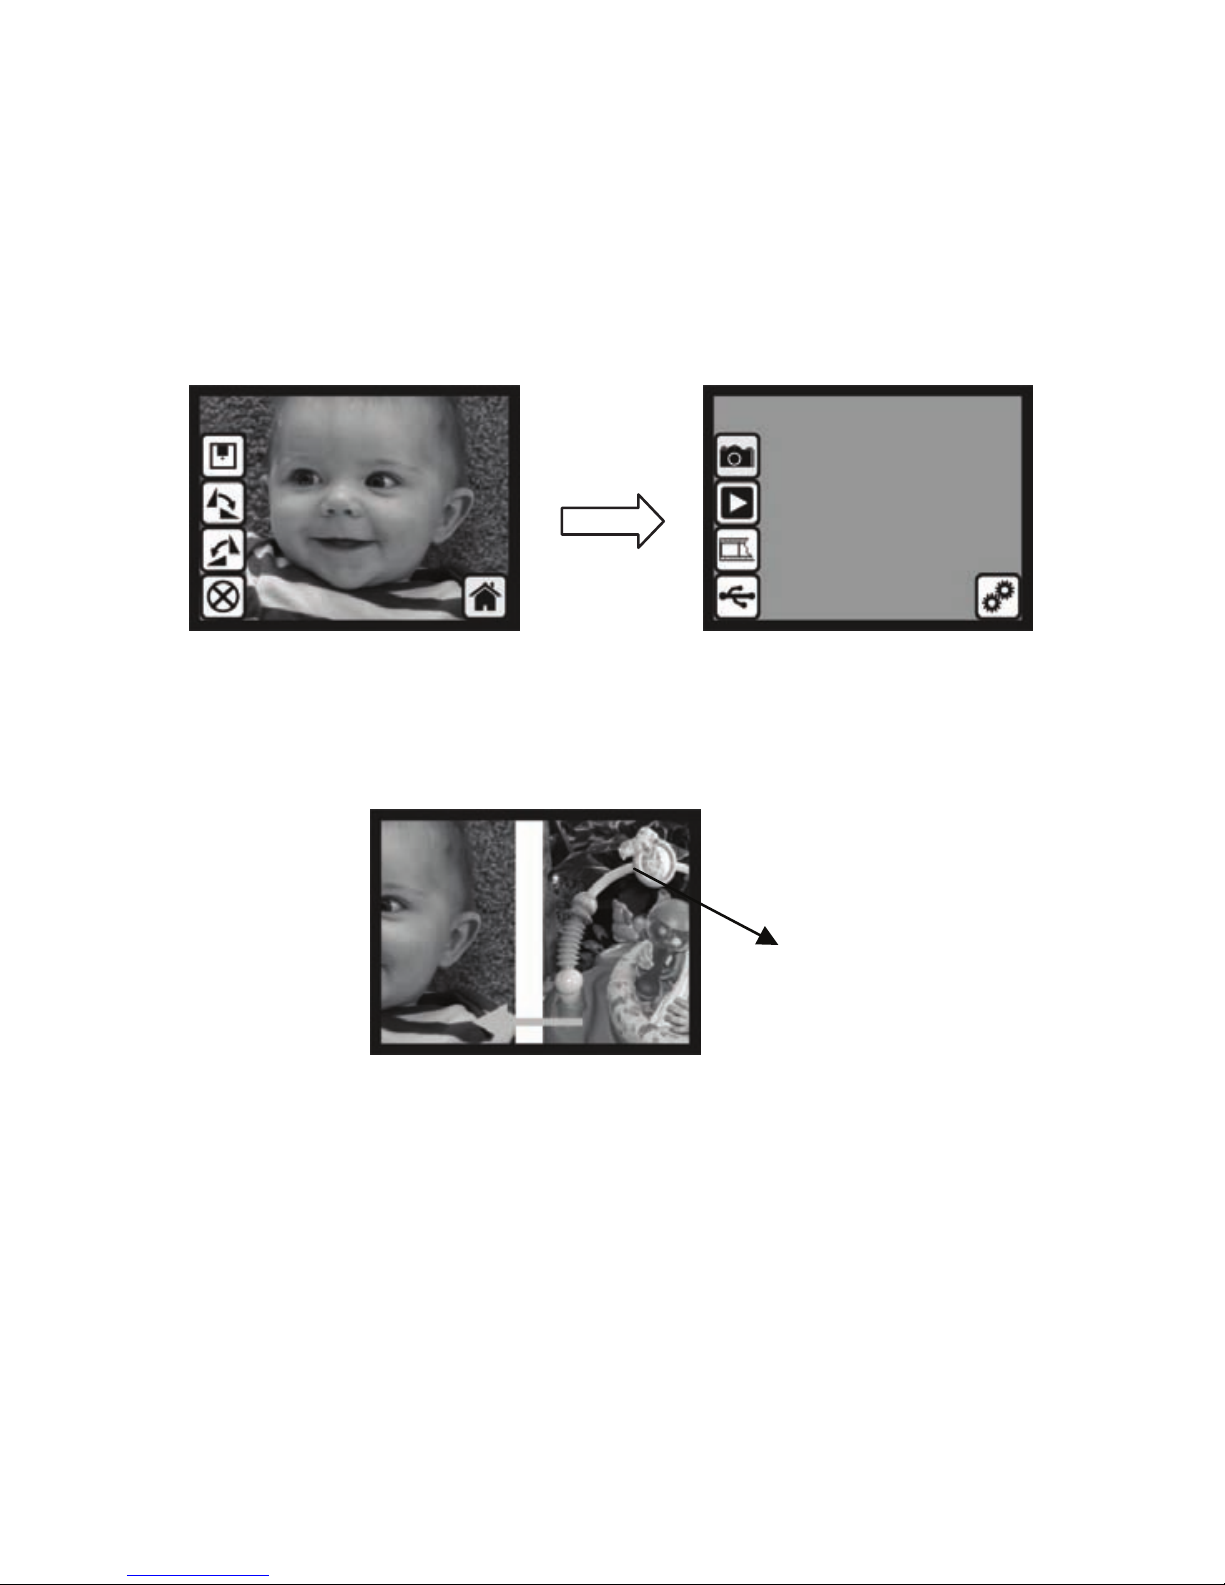
1.3 Capture: Edit Menu
●Save: save captured image
●Rotate +90: rotates the image 90 degrees clockwise
●Rotate -90: rotates the image 90 degrees counter-clockwise
(This is to adjust the image orientaon)
●Cancel: cancel any eding with this image
●Home: Back to main menu
Live view indicator
(
flashin
g
at 0.5sec rate
)
Save
Rotate +90
Cancel
Rotate -90
Home
Selected image

-14-
1.4 Live View -> Capture/Edit Menu
Live View Capture/Edit Menu
OK
OK
Press the OK buon once in live view and the edit menu will appear. Press the OK buon
again and the current image will be saved onto SD card. The display will return to live
view again.
1.5 Capture: Save
Once the the OK buon on top of the unit is pressed, a preview (live view) image will be
selected and shown on the TFT. This will take between 3-4 seconds. Four icons will then
appear on the le side of the screen. The save icon will be highlighted. To confirm saving,
press the OK buon. The display will then return to live view mode (preview).
Save

-15-
1.6 Capture: Rotate +/-90 degree
You can apply the up/down buon for further eding (rotate +90/-90). Once the user
confirms a +90 degree rotaon, they can press the OK buon. The image will rotate +90
degrees and the cursor will remain on Save. Press the OK buon again and it will save the
rotated image to the SD card and the screen will return to live view. To connuously
rotate +90 degrees, move cursor to rotate again and press OK.
1.7 Capture: Cancel
Select Cancel and press the OK buon to cancel eding on the currently selected image.
The ITNS-401 will return to live view mode (nothing will be saved onto the SD card).
OK
Playback
/captured image
-16-
1.8 Capture: Home
To go back to the main menu, select the Home icon and press the OK buon.
1.9 Exit from Edit mode back to Capture mode (Live View)
Once the OK buon is pressed to save or cancel, the display will return to capture
mode/live view. You can then move the film cartridge to the next image you would like
to capture.
Next image in
film cartridge
OK

-17-
1.10Memory full
You will be nofied when the internal memory or SD card is full. To connue with image
capture, press the OK buon and download the images to a PC or replace the SD card.
1.11 SD card locked
If the SD card is locked when you press the OK buon, an SD card locked icon displays on
screen. To unlock the SD card, slide the lock switch on the SD card to the off posion before
inserng it into the device.
OK
SD card locked
indicator

-18-
1.12 SD card error
If the scanner cannot detect an SD card in working condion, a warning icon with a queson
mark will be displayed. Please try to format the SD card or replace with a different SD card
to connue operaon. (Refer to Seng secon on page 30.)
FULL
SD card error
indicator
Table of contents
Popular Media Converter manuals by other brands

Dalsa
Dalsa Xtium2-CLHS PX8 user manual

UTEK
UTEK UT-2574 instruction manual

CARLO GAVAZZI
CARLO GAVAZZI Dupline ETHCONV4 Quick installation guide

Microchip Technology
Microchip Technology MCP19111 user guide

ADS Technologies
ADS Technologies HDUP-1500 Specifications

GRASS VALLEY
GRASS VALLEY ADVC3000 - user manual


