10
10. Recovery method of defective nozzle discharge
When this printer has not been used for an extended period of time, or depending on the environmental tem-
perature, the discharge at the nozzles could become unstable. In such a case, the following methods may be
taken to recover the status of the nozzles.
11. Supplies
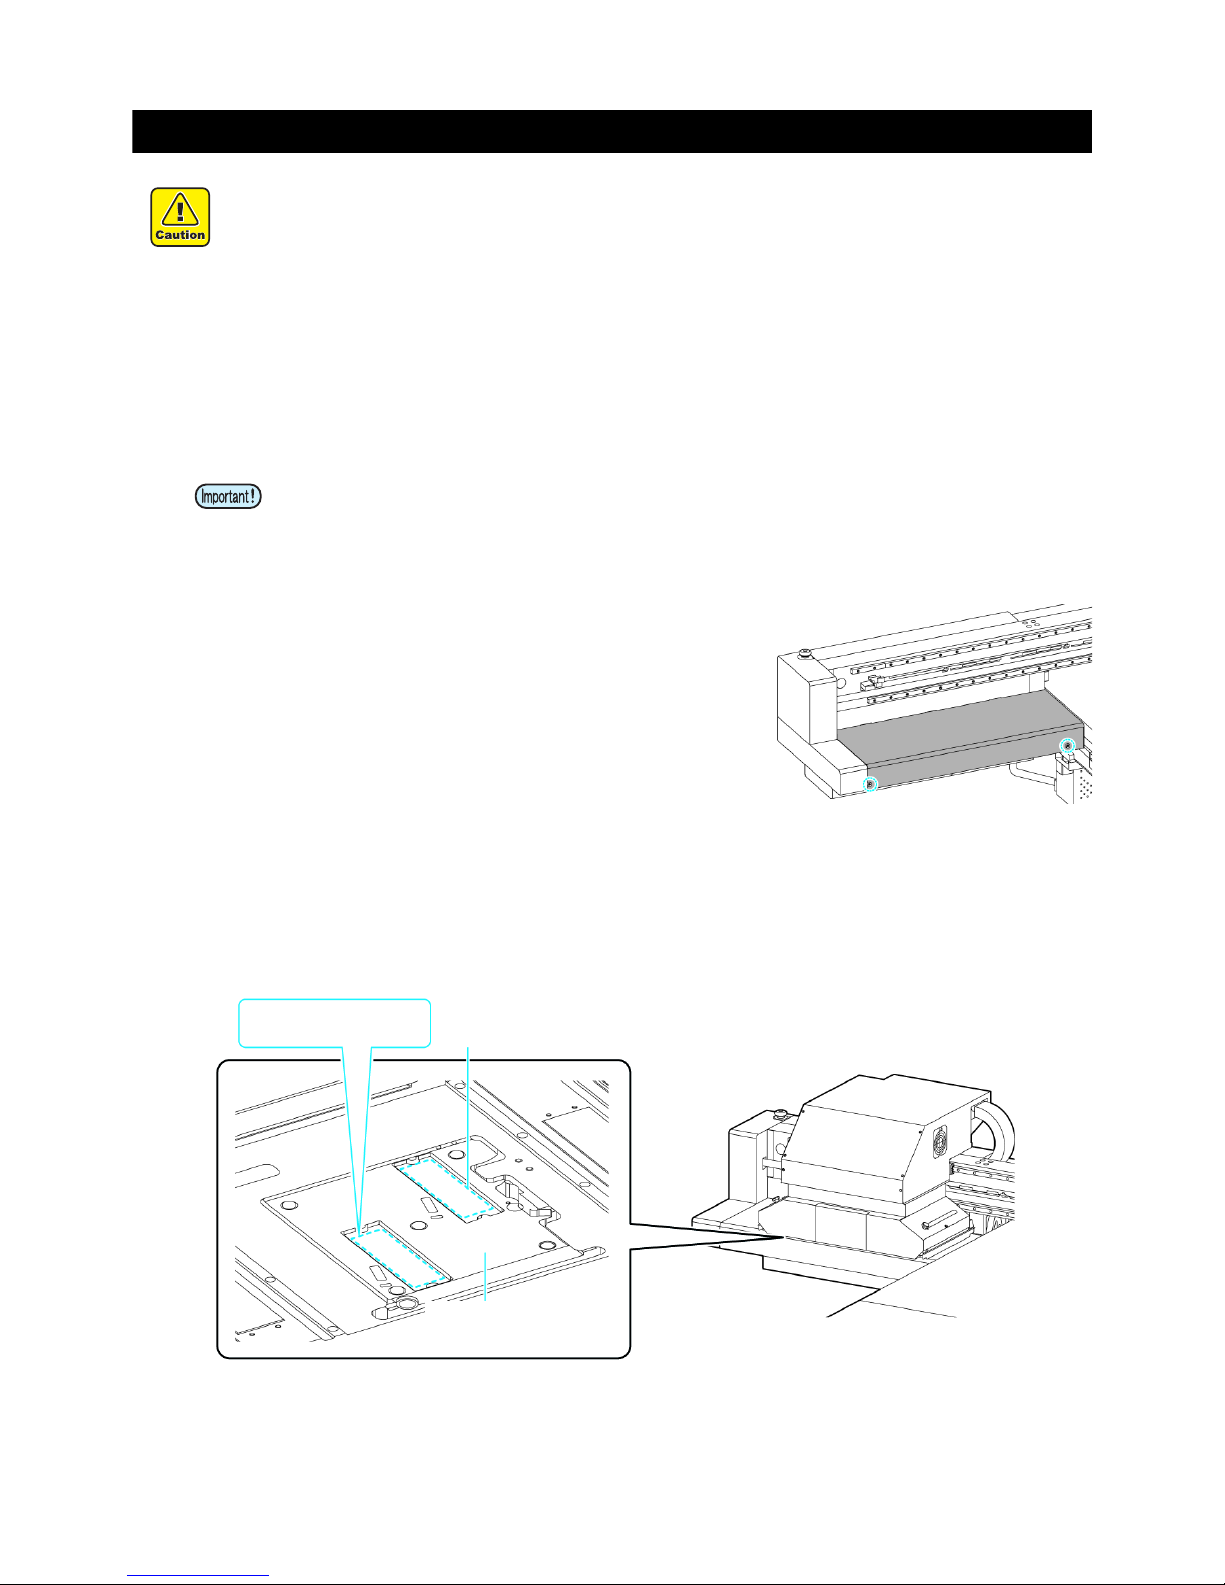
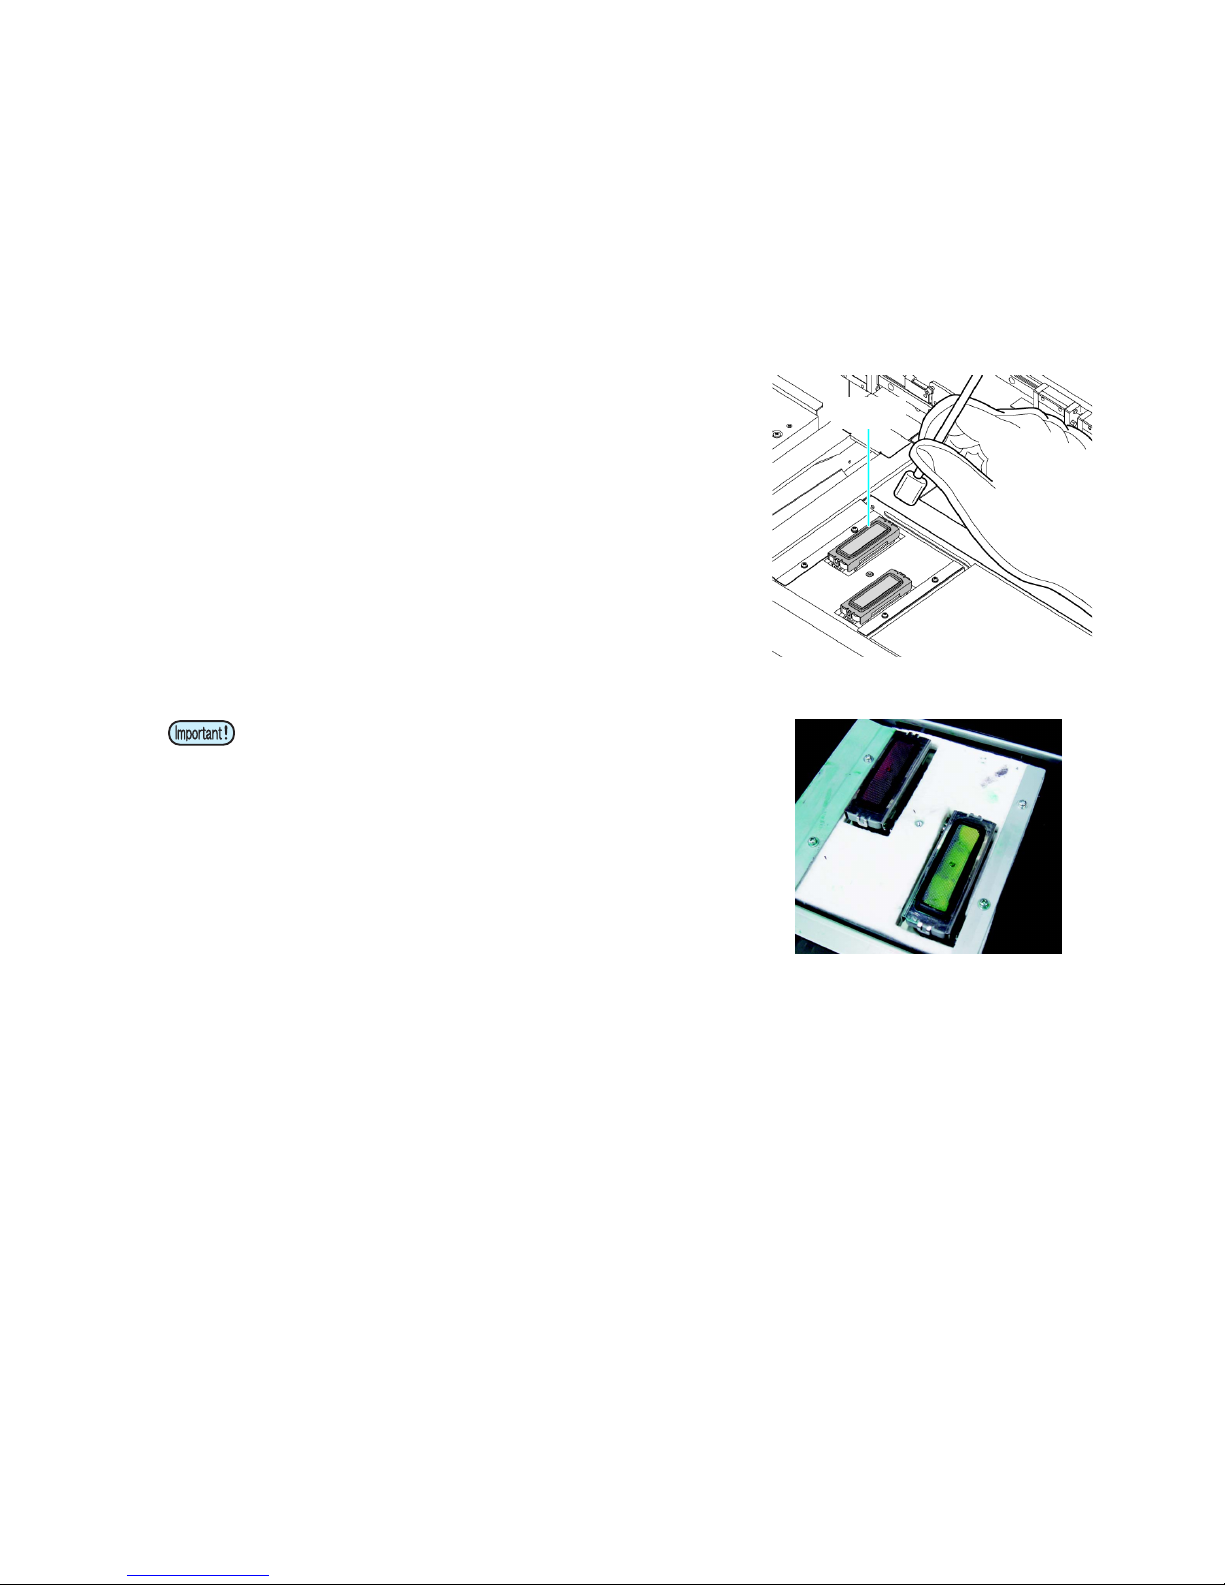
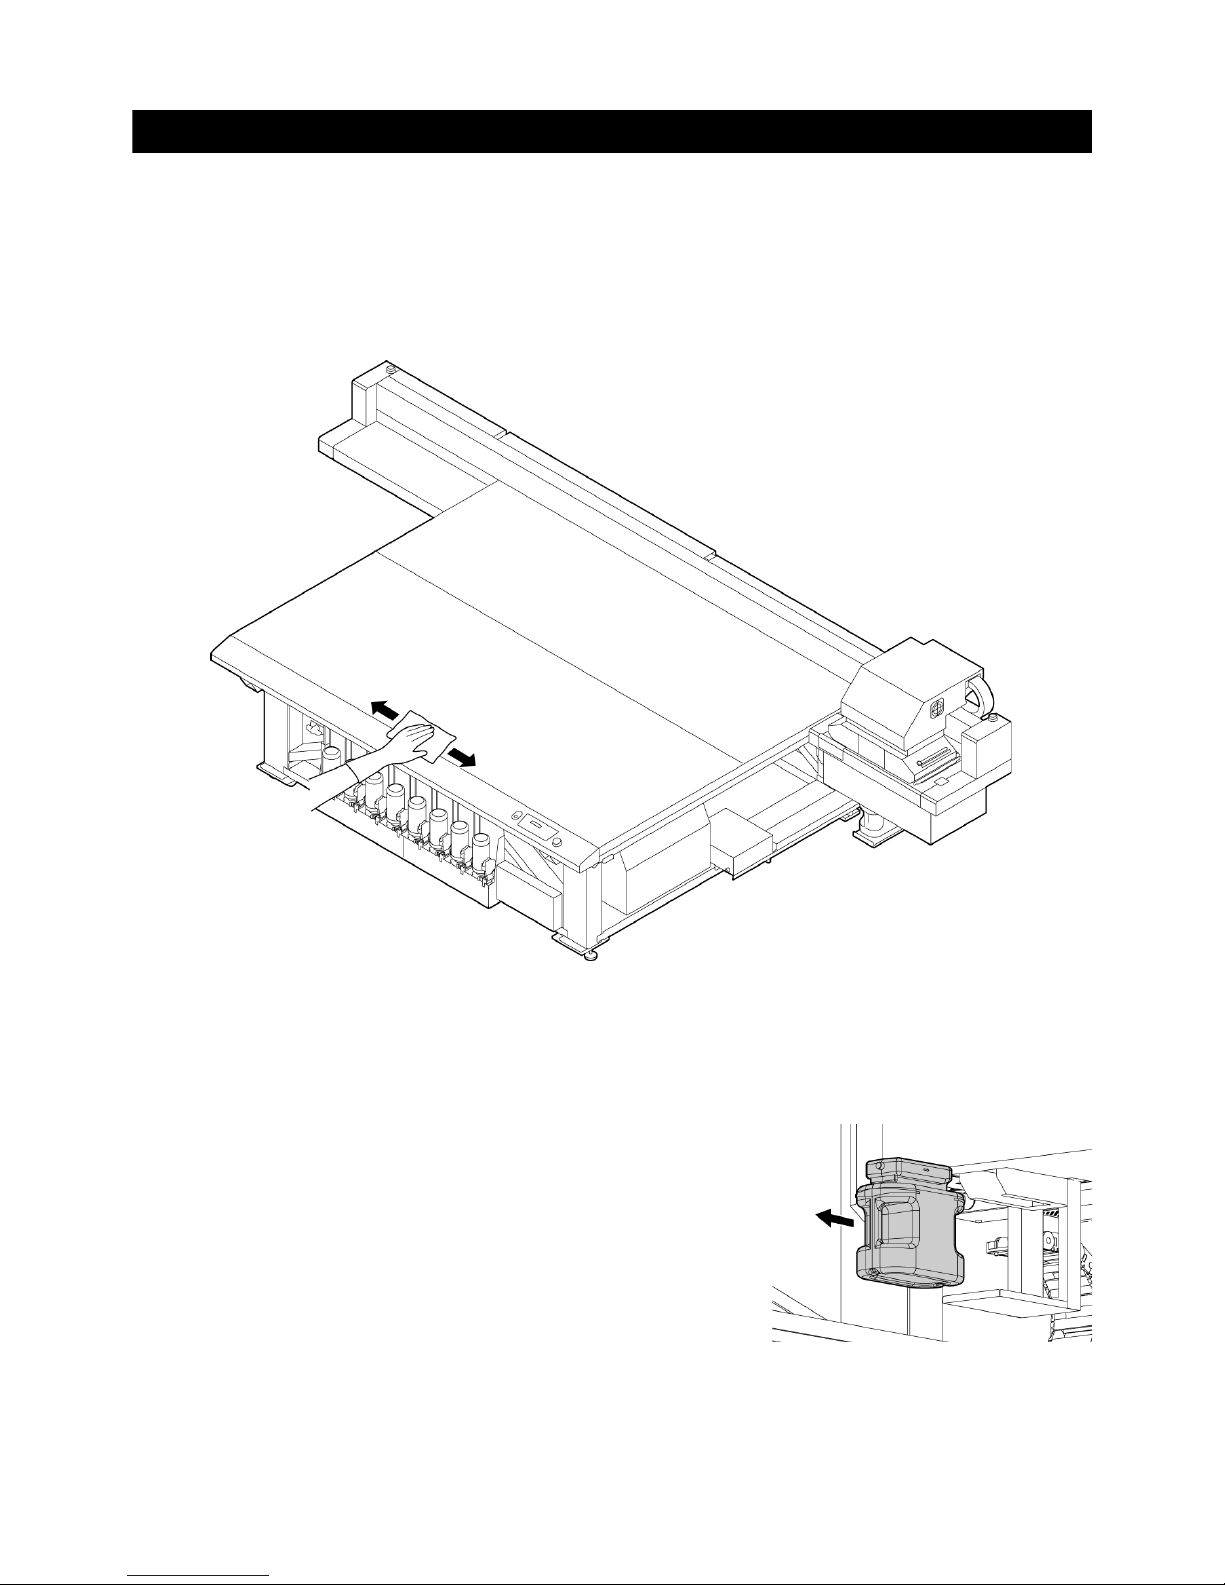
1.Daily maintenance and care
Perform the cleaning of the parts described in this document.
2. Performing Head Cleaning (normal). Refer to Chapter 2 of
Operation Manual.
After having performed the care and maintenance stated in step 1, perform
the cleaning of the heads in accordance with the procedures stated in Oper-
ation Manual.
Perform test printing and
check
(Chapter 2 of Operation Manual)
In the event nozzle missing etc. have not been improved
3. Performing Head Cleaning (hard). Refer to Chapter 2 of
Operation Manual.
If the nozzle missing does not disappear even after repeating the head
cleaning (normal) several times, reset the cleaning mode to "hard" and per-
form the cleaning again.
Perform test printing and
check
(Chapter 2 of Operation Manual)
In the event nozzle missing etc. have not been improved
4. Set the nozzle recovery function. Refer to Chapter 4 of
Operation Manual.
Set the nozzle recovery function.
Perform test printing and
check
(Chapter 2 of Operation Manual)
If the nozzle missing has not been improved even with the above operations,
please call us or your sales agent from whom you purchased this printer.
Product Name Product No. Product Name Product No.
Cleaning liquid for maintenance SPC-0568 Filter element SPA-0209
Waste ink tank SPA-0197 Carriage filter SPA-0189
Clean stick for the surroundings of the
head 50pcs SPC-0527 Wiper kit SPA-0193
Ink filter white SPA-0196