Inoi HD370 User manual
PC/TV
Link Disk
USB 2.0
Digital Video Storage Disk
User Manual
V1.0a

PC/TV Link Disk, pg. 1
TRADEMARKS
Copyright © INOi 2004. All rights reserved
No part of this document may be reproduced, transcribed, transmitted or used for
commercial purposes without the explicit permission of the copyright holder.
Windows®, Windows 95/98/Me/2000/XP and the Windows Logo are registered trademarks
of Microsoft. Macintosh and Mac OS are registered trademarks of Apple Computer Inc. Any
other Trademarks and Copyrights referred to are the property of their Respective Owners.
Notice: The information in this manual is provided for reference only. INOi does not assume
any liability arising out of the use of the information or the products described herein.
Product specifications and information in this manual are subject to change without prior
notice.

PC/TV Link Disk, pg. 2
Introduction …………………………………………………………….. 3
Product Specifications ……………………………………………….. 3
Product Safety ………………………………………………………….. 4
Connecting the PC/TV Link Disk to your Computer ……….. 5
- Connecting Cables ……………………………………………… 6
- OS Installation …………………………………………………… 7
Selecting the Partition Type …………………………………………. 10
Partitioning the Link Disk (Windows XP/2000) ………………. 11
Partitioning the Link Disk (Windows 98SE/Me) ……………… 13
Removing the Link Disk from a Windows PC ……………….. 14
Installing the Link Disk into the Media Player ………………. 16
Removing the Link Disk from the Media Player ……………. 17
Troubleshooting tips …………………………………………………. 18
FCC Compliance ……………………………………………………….. 20
TABLE OF CONTENTS

PC/TV Link Disk, pg. 3
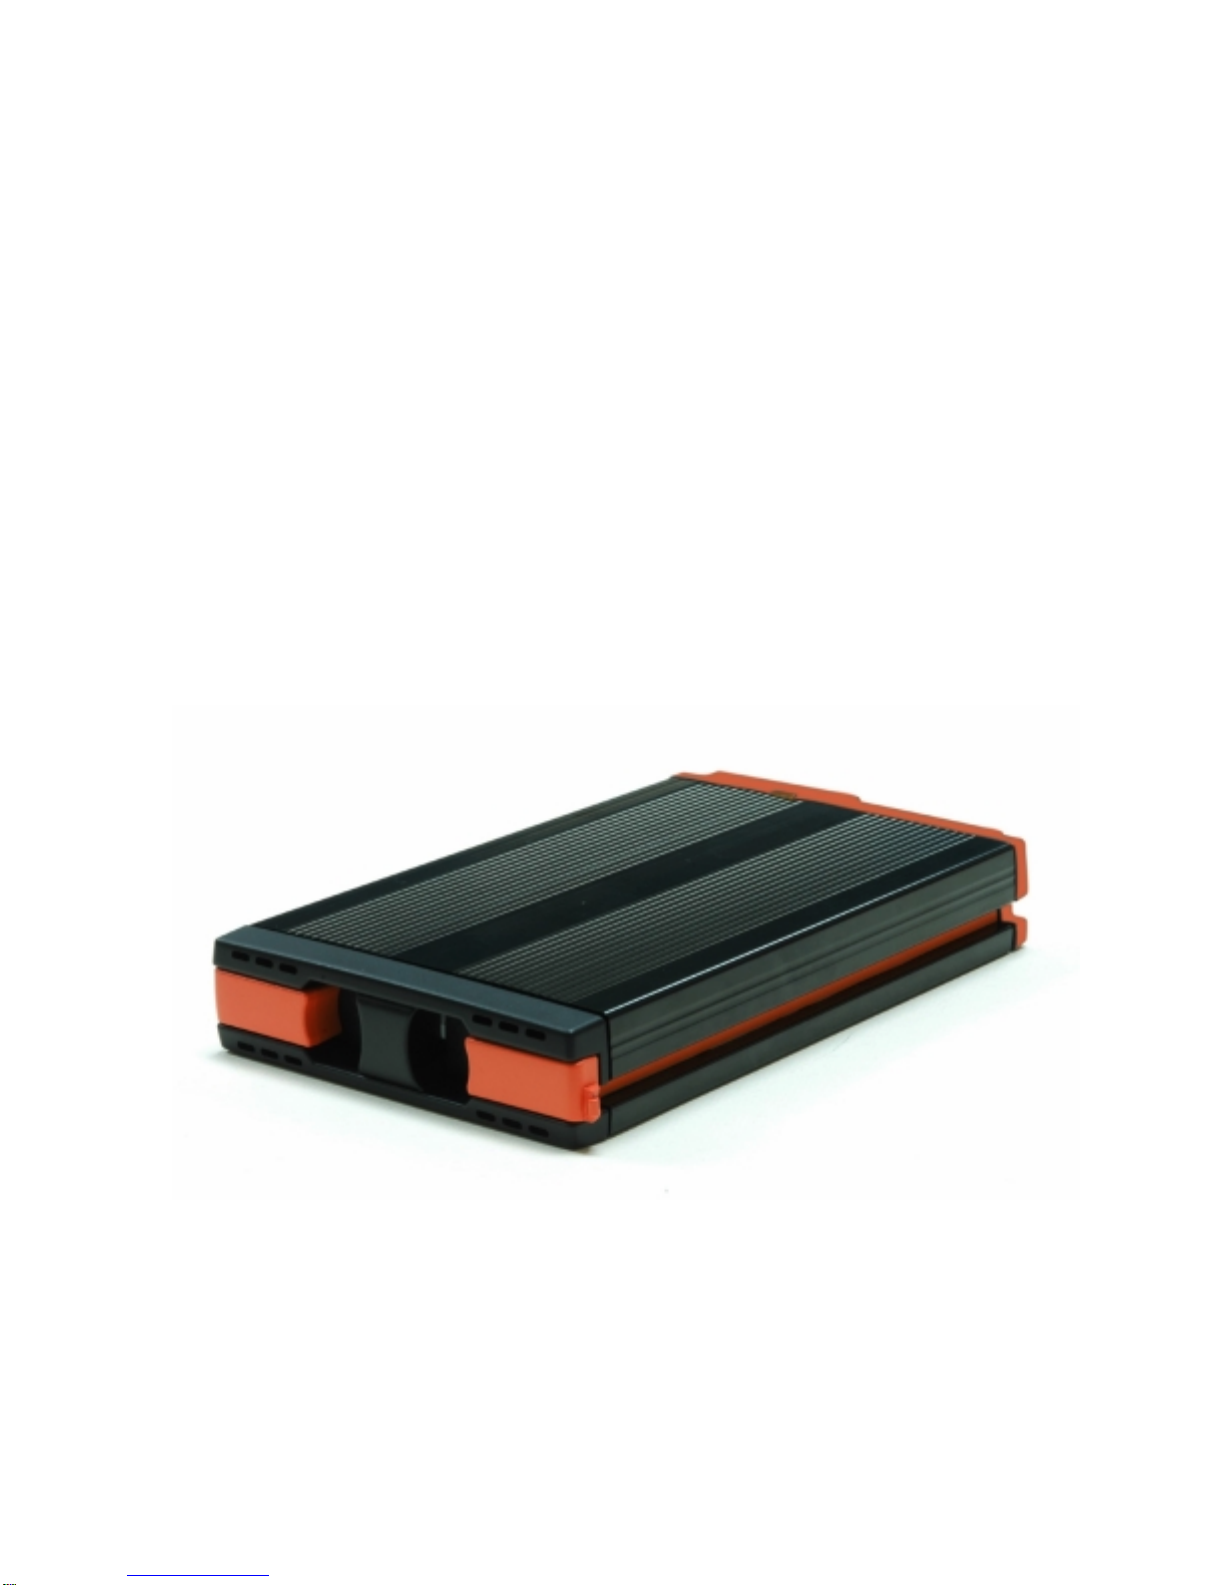
Thank you for selecting the PC/TV Link Disk, a new and innovative concept in USB disk
storage! The PC/TV Link Disk is a Plug-and Play External Hard Drive with special features
that make perfect for storage and play back of your all your digital video files. The Link Disk
was specially designed as a dual-use hard disk.
•File storage: When attached to your PC, it operates as a standard USB 2.0 External
Hard Disk Drive, with up to 250 Gigabytes of plug-and-play disk storage. Its large
size and USB 2.0 Hi-Speed connection (nearly 40times faster than standard USB)
make it ideal for downloading and storing large video files.
•Media Playback: When installed in the HDD/DVD Media Player, The PC/TV Link Disk
lets you browse and play back your entire video library directly from your TV! Just
unplug the drive from your PC and install it directly into the Media Player’s PC/TV Link
Disk slot; the HDD/DVD Media Player plays all your digital video files directly from the
hard disk!
PRODUCT SPECIFICATIONS
Device: USB 2.0 Hard Disk Drive
Power: Externally powered, 12V DC/2A (AC adapter included)
Disk: 3.5” ATA disk drive
Storage: up to 250 Gigabytes
File system: NTFS or FAT32
PC Interface: USB 2.0 Hi-Speed Connection (up to 480 Megabits/sec)
Mass Storage Class compatible device
HV-670 Interface: Direct IDE
File support: DivX, MP3, JPEG, Mpeg-1, Mpeg-2, and Mpeg-4
System
Requirements: Desktop or Notebook PC with USB 2.0 or USB 1.1 port
OS Requirements: Win98SE / ME / 2000 / XP,
Mac OS X (10.2 or higher)
INTRODUCTION

PC/TV Link Disk, pg. 4
Please follow these tips to enjoy the safe use of the product and protect Your PC/TV Link
Disk:
DON’T:
•Do not shake, drop, or hit this product! Vibrations or sharp impacts can
permanently damage the IDE disk drive.
•Do not operate this product in extreme temperatures. The Link Disk may not
operate correctly if used in temperatures below 0C or above 70C.
•Do not use or store this product in a hot or humid environment. Don’t transport or
store the PC/TV Link Disk in a glove box, trunk of a car, or any similar location.
•Do not use any liquids to clean this product! Water or fluids can leak into the case
and damage the electronics. Solvents or other cleaners may damage the external
case.
•Do not attempt to disassemble the PC/TV Link Disk or remove the Hard Drive from
its case. There are NO user-serviceable parts inside.
•Do not remove the Drive from the Media Player until you have turned off the power
or disabled the Drive by pressing “HDD OFF” on the remote.
•Caution: during extended playback, the PC/TV Link Disk can get HOT! Take caution
when removing the Drive from the HDD/DVD Media Player after extended use.
DO:
•Store this product in a dry location, at a room temperature.
•Protect this unit from excess shock, vibration, or sharp impacts.
•Use only a soft, dry cloth to clean this product.
PRODUCT SAFETY

PC/TV Link Disk, pg. 5
Before you begin the installation, use the diagrams below to identify important features on
the PC/TV Link Disk Drive:
Fron
t
Rear
1) Locking tab
2) Handle (pull here to remove drive from the HDD/DVD Media Player)
3) LED indicator (Power/Disk Activity)
4) DC power input (12V DC)
5) Power button
6) USB cable connection (type-B female)
7) HDD/DVD connector (do not touch! Not a user connection)
CONNECTING THE PC/TV LINK DISK TO YOUR COMPUTER

PC/TV Link Disk, pg. 6
The PC/TV Link Disk uses 1 standard USB cable and a single AC power adapter for external
power. Installing the PC/TV Link Disk is simple. Please follow these steps to connect the
PC/TV Link Disk to your computer.
1)
(Windows 98SE users only)
install software from CD-ROM
2) Connect the Power Adapter cable to the connector marked “DC-IN”
3) Install the USB cable and connect the PC/TV Link Disk Drive to your PC
4) Press the power button
5) Proceed to “OS Installation” on page 7
1
2
3
INSTALLING THE CABLES

PC/TV Link Disk, pg. 7
Installation steps are different for each Operating System. Please follow
the instructions for the OS used on your computer:
Installation steps for Windows 2000 and Windows XP:
1) Connect the Power cable and USB cable to the Drive (see page 6).
2) Press the Power button.
3) Wait a few moments for the operating system to detect the drive and begin loading
device driver files.
4) Windows 2000/XP operating system will install the drivers automatically and assign a
drive letter to the new disk. Once installation is complete, you should see the new
Drive listed in “My Computer.”
No additional device driver files are required. The PC/TV Link Disk uses a generic “USB Mass
Storage Class” drivers that are already installed as part of the operating system. Under
Windows XP and Windows 2000, the installation should be completely automatic and no user
intervention is required.
Note: Although the PC/TV Link Disk Drive uses standard device drivers, some USB 2.0 Hi-
Speed Host Controllers may require updated device driver files to operate properly. If you
are having problems with your USB connection, connect to the Windows Update Web site to
make sure you have all the latest Service Packs and device drivers installed on your
computer before contacting technical support.
OS INSTALLATION

PC/TV Link Disk, pg. 8
Installation steps for Windows Me:
1) Connect the Power cable and USB cable to the Drive (see page 6).
2) Press the Power button.
3) Wait a few moments for Windows Me to detect the drive and begin loading device
driver files. The PC/TV Link Disk uses generic “USB Mass Storage Class” device
drivers that are already installed as part of the operating system. Windows Me will
install the necessary device drivers automatically.
4) Open Window Device Manager to confirm the installation of a new USB device. Click
Start > Settings > Control Panel > System > Device Manager. Scroll down to
“Universal Serial Bus Controllers” and click the “+” sign to display all USB devices. If
installed correctly, “USB Mass Storage Device ” will be listed as a new USB device
(similar to Windows XP/2000).
5) FILE SYSTEM CONVERSION: If the PC/TV Link Disk is pre-formatted as a FAT32
Disk, you will see a new Hard Drive in Windows “My Computer,” indicating that the
installation is complete. If the PC/TV Link Disk is pre-formatted as an NTFS Disk,
Windows Me will not be able to access the drive even though the new hardware
device is listed correctly in Windows “Device Manager.” Windows Me does not
support the NTFS File system. You will need to delete the existing NTFS partition and
reformat the PC/TV Link Disk using the FAT32 file system. Use FDISK or a similar
disk utility program to re-partition and reformat the disk (see “Partitioning the Link
Disk (Windows 98SE/Me)” on page 13).
Installation Steps for Window 98SE:
WARNING: Windows 98SE does not support USB 2.0 Hi-Speed disk drives or USB 2.0 High
Speed Host Controllers without special device drivers supplied by the manufacturer. Product
software must be installed BEFORE connecting the PC/TV Link Disk.
1. Insert the Support CD-ROM into your CD-Drive to install the software (if the driver-
installation program does not start automatically, open the CD-ROM in “My
Computer” and select “Autorun.exe” to start the installation.
2. Click on “Install Device Driver” and follow the instructions in the installation program.
OS INSTALLATION (CONT’D)
PC/TV Link Disk, pg. 9
4. Connect the Power cable and USB Cable to the Drive (see page 6).
5. Press the power button.
6. Windows 98SE will detect the new Drive and begin installing the new device drivers.
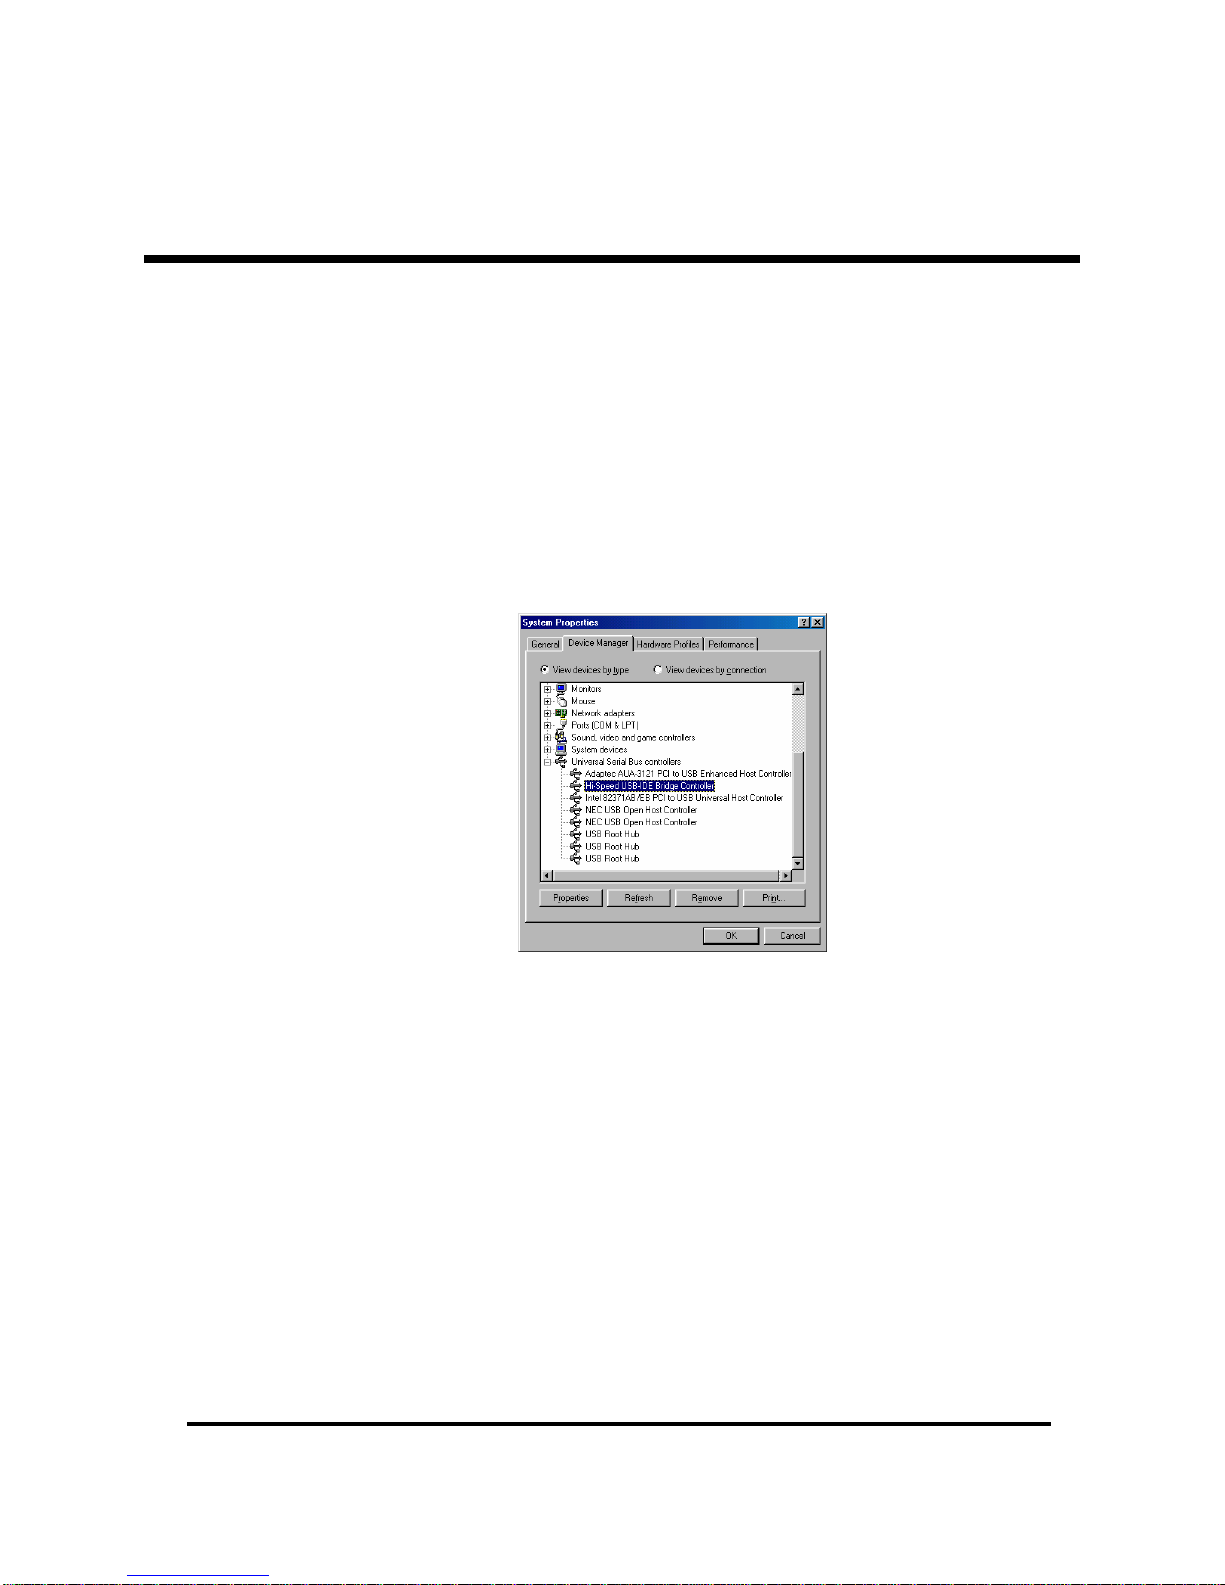
7. Open Windows Device Manager to confirm the installation of a new USB device. Click
Start > Settings > Control Panel > System > Device Manager. Scroll down to “Universal
Serial Bus Controllers” and click the “+” sign to display all USB devices. If installed
correctly, “Hi-Speed USB-IDE Bridge Controller” will be listed as a new USB device.
Note: after the device drivers are installed, you should see the PC/TV link disk as a new
hardware device but you will not be able to access the drive in “My Computer” until the
PC/TV Disk is formatted with the FAT32 file system.
8. FILE SYSTEM CONVERSION: If the PC/TV Link Disk is pre-formatted as a FAT32 Disk,
you will see a new Hard Drive in Windows “My Computer,” indicating that the installation
is complete. If the PC/TV Link Disk is pre-formatted as an NTFS Disk, Windows 98SE will
not be able to access the drive even though the new hardware device is listed correctly
in Windows “Device Manager.” Windows 98SE does not support the NTFS File system.
You will need to delete the existing NTFS partition and reformat the PC/TV Link Disk
using the FAT32 file system. Use FDISK or a similar disk utility program to re-partition
and reformat the disk (see “Partitioning the Link Disk (Windows 98SE/Me)” on page 13).
OS INSTALLATION (CONT’D)

PC/TV Link Disk, pg. 10
Once installed on your PC, You may still need to partition and format the PC/TV link disk so
you can store your digital video files. Although your operating system may support several
different file systems, FAT32 or NTFS partitions are strongly recommended. The HDD/DVD
Media Player can only read NTFS and FAT32 partitions on the PC/TV Link Disk!
This information should help you decide which file system is the best for you.
NTFS File System:
The NTFS file system is recommended for the PC/TV Link Disk, since it can support
very large files and extremely large drives. The NTFS File system is also compatible
with the HDD/DVD Media Player, and most newer versions of the Windows OS. The
PC/TV link disk comes pre-formatted from the factory as a single NTFS partition. If
your PC or laptop computer uses either Windows XP or Windows 2000 Operating
System, no changes are required to use the PC/TV Link Disk.
FAT32 File System
The FAT32 file system is required if your computer uses Windows 98SE, Windows ME
or the Mac OS X operating system. These older operating systems do not support
the NTFS file system (Windows 2000 and Windows XP support both FAT32 and NTFS
drives). The FAT32 file system has some size limitations, but it is also supported by
many different operating systems. Even if your computer does support NTFS
partitions, a FAT32 partition might still be a better choice if you expect to be moving
files between many different computers. The HDD/DVD Media Player can still play
video files from a Link Disk partitioned as a FAT32 drive. Hard drives formatted as
FAT32 volumes have the following limitations:
•Disks formatted with the FAT32 File System cannot store any file that is larger
than 4 Gigabytes
•Although you can create multiple FAT32 partitions on the Link Disk, the
HDD/DVD Media Player can only browse and playback media located in the
first (Primary) partition.
•The Windows Xp/2000 “New Partition Wizard” cannot create FAT32 partitions
larger 32 Gigabytes. This limitation is due to the Xp/2000 Operating System,
not the FAT32 file system. FDISK and other disk-partitioning utilities can
create FAT32 partitions much larger than 32Gb. Despite these limits when
partitioning new FAT32 drives, Windows Xp/2000 can still read and write to
drives that already have FAT32 partitions larger than 32Gb.
SELECTING THE PARTITION TYPE

PC/TV Link Disk, pg. 11
Partitioning the Drive under Windows XP and Windows 2000:
Note: The PC/TV Link Disk will not work when initialized as a "Dynamic" disk type. Do not
upgrade the hard disk to the "Dynamic" disk type; always use it with the "Basic" disk type.
1. To partition the Link Disk under Windows 2000 or Windows XP, you must first install
the Hard Disk under Windows, and confirm that it is properly recognized by the
Operating System. Then follow these steps:
•In Windows 2000: click Start > Settings > Control Panel > Administrative
Tools > Computer Management. This opens the Computer Management
Window. (see fig 3)
•In Windows XP: Click Start > Control Panel > Performance and Maintenance
> Administrative Tools > Computer Management. This opens the Computer
Management Window. (see fig 3)
Fig 3
2. Click on "Disk Management" on the left part of this window. All disk drives currently
connected to the system will be listed on the right side of the window. The Panel
also lists information about each disk, including size, partition type, and status of
each partition. Use this information to find out the Disk # that indicates the PC/TV
Link Disk.
PARTITIONING THE LINK DISK (WINDOWS XP/2000)

PC/TV Link Disk, pg. 12
Note: If the External disk drive is a new, unpartitioned drive, a "Stop" mark next to the drive
will indicate this drive is an "Unknown" type of disk. In this situation, Windows will not allow
you to create a partition on this drive. You must first initialize the disk:
•
In Windows 2000: Windows will start up the "Write Signature and Upgrade Disk
Wizard" immediately. Follow the steps in the wizard to initialize the hard disk.
Remember to select the "Basic" disk type. Once Windows 2000 has initialized the
disk and written a signature to the disk, follow the steps to create a new
partition.
•
In Windows XP: right-click on the "Stop" mark, then select "initialize disk" to
initialize the disk. Remember to initialize the disk as a "Basic" disk type. Once
Windows XP has initialized the disk and written a signature to the disk, follow the
steps to create a new partition.
3. To delete an existing partition: right-click on the drive and select "Delete Partition."
(
Warning: this action will erase all everything in the partition
).
4. To create a new partition: right click on the disk again and select ‘New Partition.’ This will
open the New Partition Wizard.
5. Click ‘Next’ to start the wizard.
6. Select ‘Primary Partition’ and click ‘Next.’
7. Set the partition size:
•If you are creating a FAT32 partition, set the partition size to 32000 MB or less
and click ‘Next’ (Windows “Disk Management cannot create FAT32 partitions any
larger than this)
•If you are creating an NTFS partition, select any size (Windows will default to the
largest drive size possible)
8. Assign a drive letter and click ‘Next.’
9. Set the file system to ‘FAT32’ or NTFS, and set the Allocation unit to ‘default’ and click
‘Next’ (note: if you want a FAT32 partition but it is not listed as an option, go back to
step 7 and reduce the Partition size to 32000MB or less).
10. Click ‘Next’ to confirm settings.
11. Click ‘Finish’ to close the wizard and complete the process.
PARTITIONING THE LINK DISK (WINDOWS XP/2000)

PC/TV Link Disk, pg. 13
Using FDISK under Windows 98SE/Me:
FDISK is a program to create one or more partitions on the hard disk drive. (Data can only
be written to the drive after the drive is partitioned and formatted.) To partition the external
hard disk drive, you must execute FDISK under the MS-DOS mode. Under Windows
98SE/Me, please follow these steps:
1. Boot-up the computer into Windows 98SE/Me system. Plug the external hard disk
drive to computer, and make sure it is recognized.
2. Go into the MS-DOS mode by click on Start > Programs > MS-DOS Prompt.
3. At the DOS prompt, type “FDISK” and press Enter.
4. In the first screen of FDISK, answer the question: “Do you want to enable large
disk support?” Select ‘Y’ to enable large disk support.
5. The next screen is “FDISK OPTIONS”. You must type 5 on this screen to change
the current fixed disk drive; the default fixed drive set by FDISK is the
internal hard disk drive. If you do not change it to the external hard disk
drive, the data of internal hard disk drive will be destroyed. If the option 5
does not appear on this screen, it means the external hard disk drive is not installed
properly, please check the software installation.
6. In “Change Current Fixed Disk Drive” screen, type the disk drive number that is
assigned to the external hard disk drive (usually, the external hard disk drive is the
fixed disk drive number 2).
7. Back to “FDISK OPTIONS” screen, type 4 to display the content of the fixed disk
drive, check the content to make sure the current drive is the external hard disk
drive.
8. Now you can create (type 1) or delete (type 3) the partition of the external hard disk
drive. (
Warning: the delete partition command will erase everything in the partition
).
9. Follow the instructions in FDISK to create a new Primary partition. Accepting default
values after selecting “create new partition” will create the largest FAT32 partition
possible on the disk.
10. After you finish FDISK, reboot computer to activate the change.
PARTITIONING THE LINK DISK (WINDOWS 98/ME)
PC/TV Link Disk, pg. 14
Plug-and-play devices like the PC/TV Link Disk can disrupt your computer if they are
suddenly removed from the system. “Pulling the plug” on your USB drive usually won’t hurt
the Link Disk, but it can easily corrupt files on the disk or cause your computer to lock up
unexpectedly. To protect your system from lost data or system crashes, use the “Safely
Remove Hardware” icon to disconnect the PC/TV Link Disk Drive from your computer.
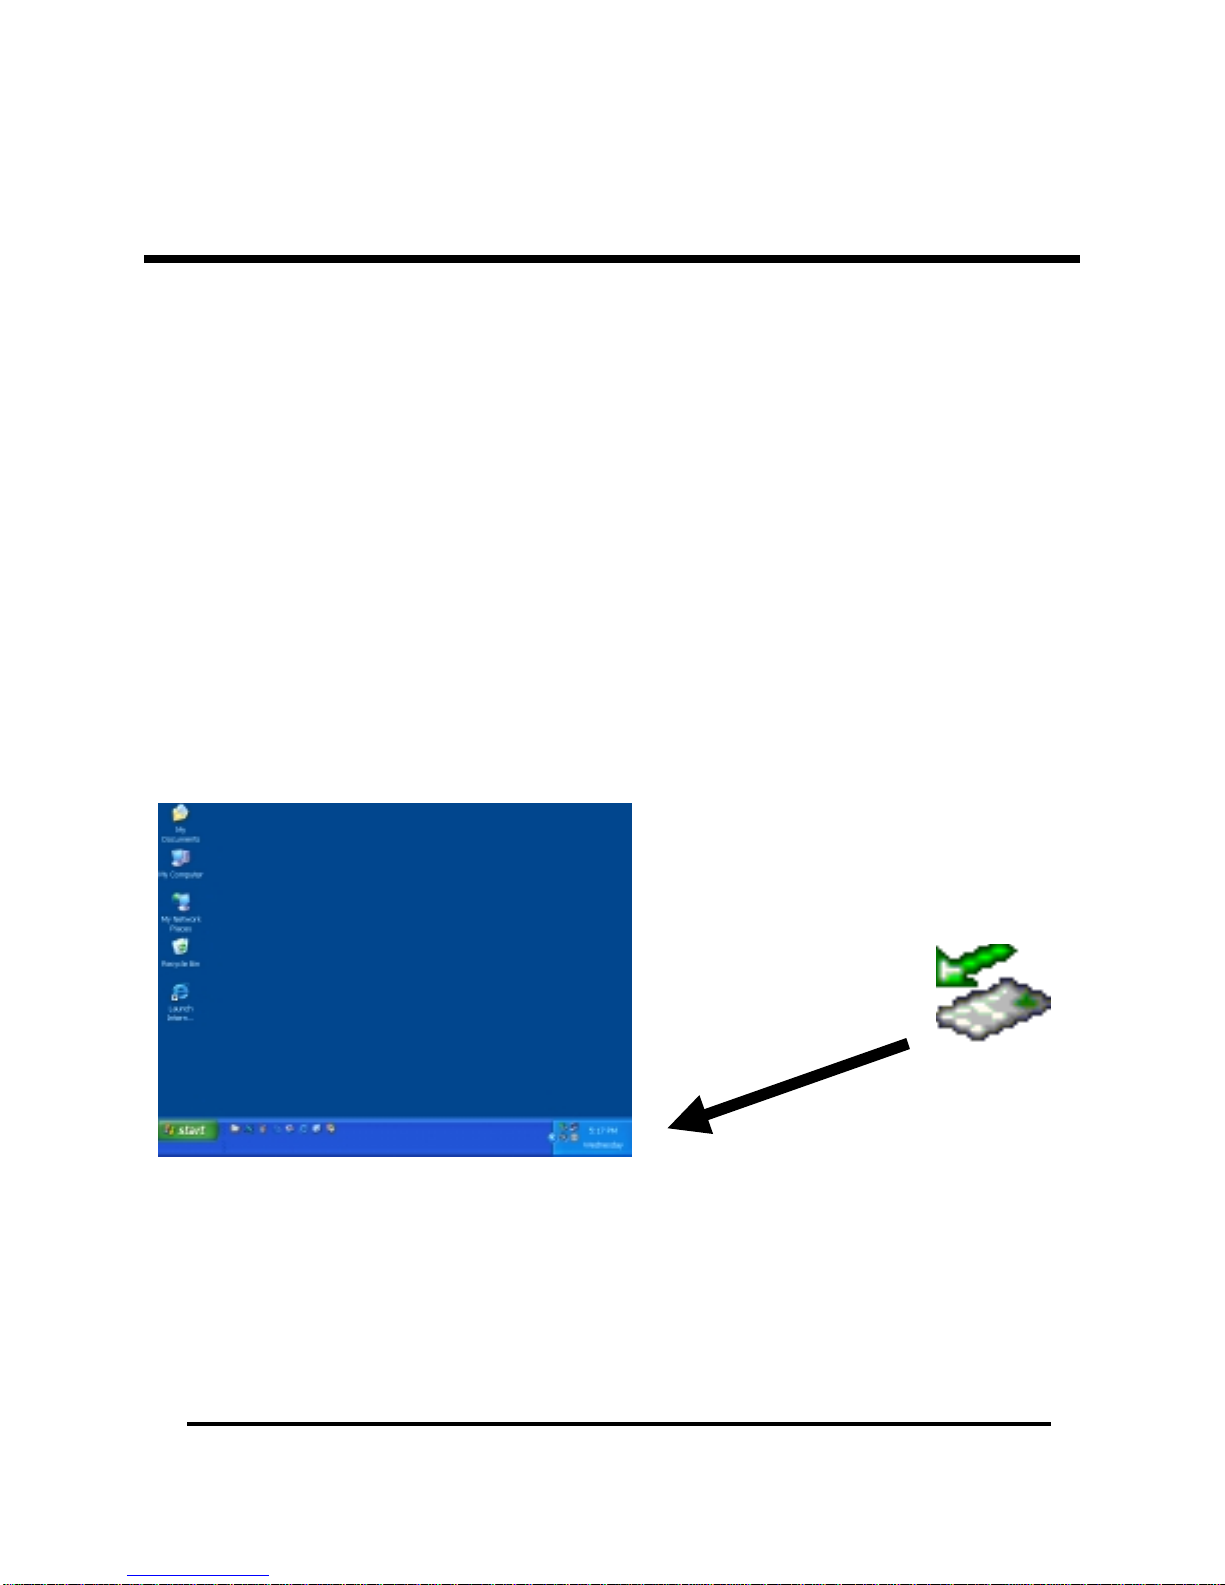
The “Remove Hardware” Icon is a small green arrow located in the System Tray on your
Windows Taskbar (see fig 4). When the PC/TV Link Disk drive is connected to your
computer, you should see the arrow near the time clock on your Desktop. Clicking this icon
notifies the Operating System that you are about to disconnect the drive from the computer,
and instructs all running programs to complete their USB disk operations immediately. Once
all disk activity is complete, Windows will notify you that it’s safe to remove the drive.
T
he “Safely Remove Hardware”
button is located in the System Tray
near the time cloc
k
Fig 4
REMOVING THE LINK DISK FROM A WINDOWS PC

PC/TV Link Disk, pg. 15
Follow these Steps to Remove the PC/TV Link Disk USB drive from you Windows-based
system:
WINDOWS REMOVAL (CONT’D)
1. Click on the "Safely Remove
Hardware" Icon (the Green Arrow
located in your Windows System
Tray). The Icon will display a list of
all removable devices currently
attached to the system.
2. Stop the PC/TV Link Disk by clicking
on "Safely remove USB Mass Storage
Device" (fig 5)
3. Wait a few moments for Windows to
stop the device. Once it has
completed all disk operations,
Windows will display a pop-up
message indicating that "The USB
Mass Storage Device can now be
safely removed from the system" (fig
6)
4. Unplug the USB cable from the
Computer.
5. If you are installing the PC/TV Link
Disk into your HDD/DVD Media
player, press the power button to
turn off the drive, and wait a few
seconds for the drive to spin down
before picking up the Link Disk.
Fig 5
Fig 6

PC/TV Link Disk, pg. 16
Please follow these steps to install the PC/TV Link Disk into the HDD/DVD Media Player:
INSTALLING THE LINK DISK IN THE MEDIA PLAYER
1. Open the locking tab 'A' on the front of
the Hard Drive (see fig 7)
2. Place the Hard Drive into the HDD slot
so that the locking tab is on the right
side of the Drive (towards the center of
the Player)
3. Slowly slide the drive into the slot 'B'.
The Drive will make a clicking sound as
it seats on the connector at the back of
the HDD slot.
4. Lock the Drive into place by closing the
locking tab 'C' (see fig 8)
5. Press the ‘HDD' button on the remote
control to activate the drive
6. Use the Arrow keys on the remote to
browse folders and Video Files on Hard
Drive. Press "Enter" to begin playback
of the selected file.
Figure 7
Figure 8
PC/TV Link Disk, pg. 17
Please follow the steps below to remove the PC/TV Link Disk from the HDD/DVD Media
Player:
REMOVING THE LINK DISK FROM THE MEDIA PLAYER
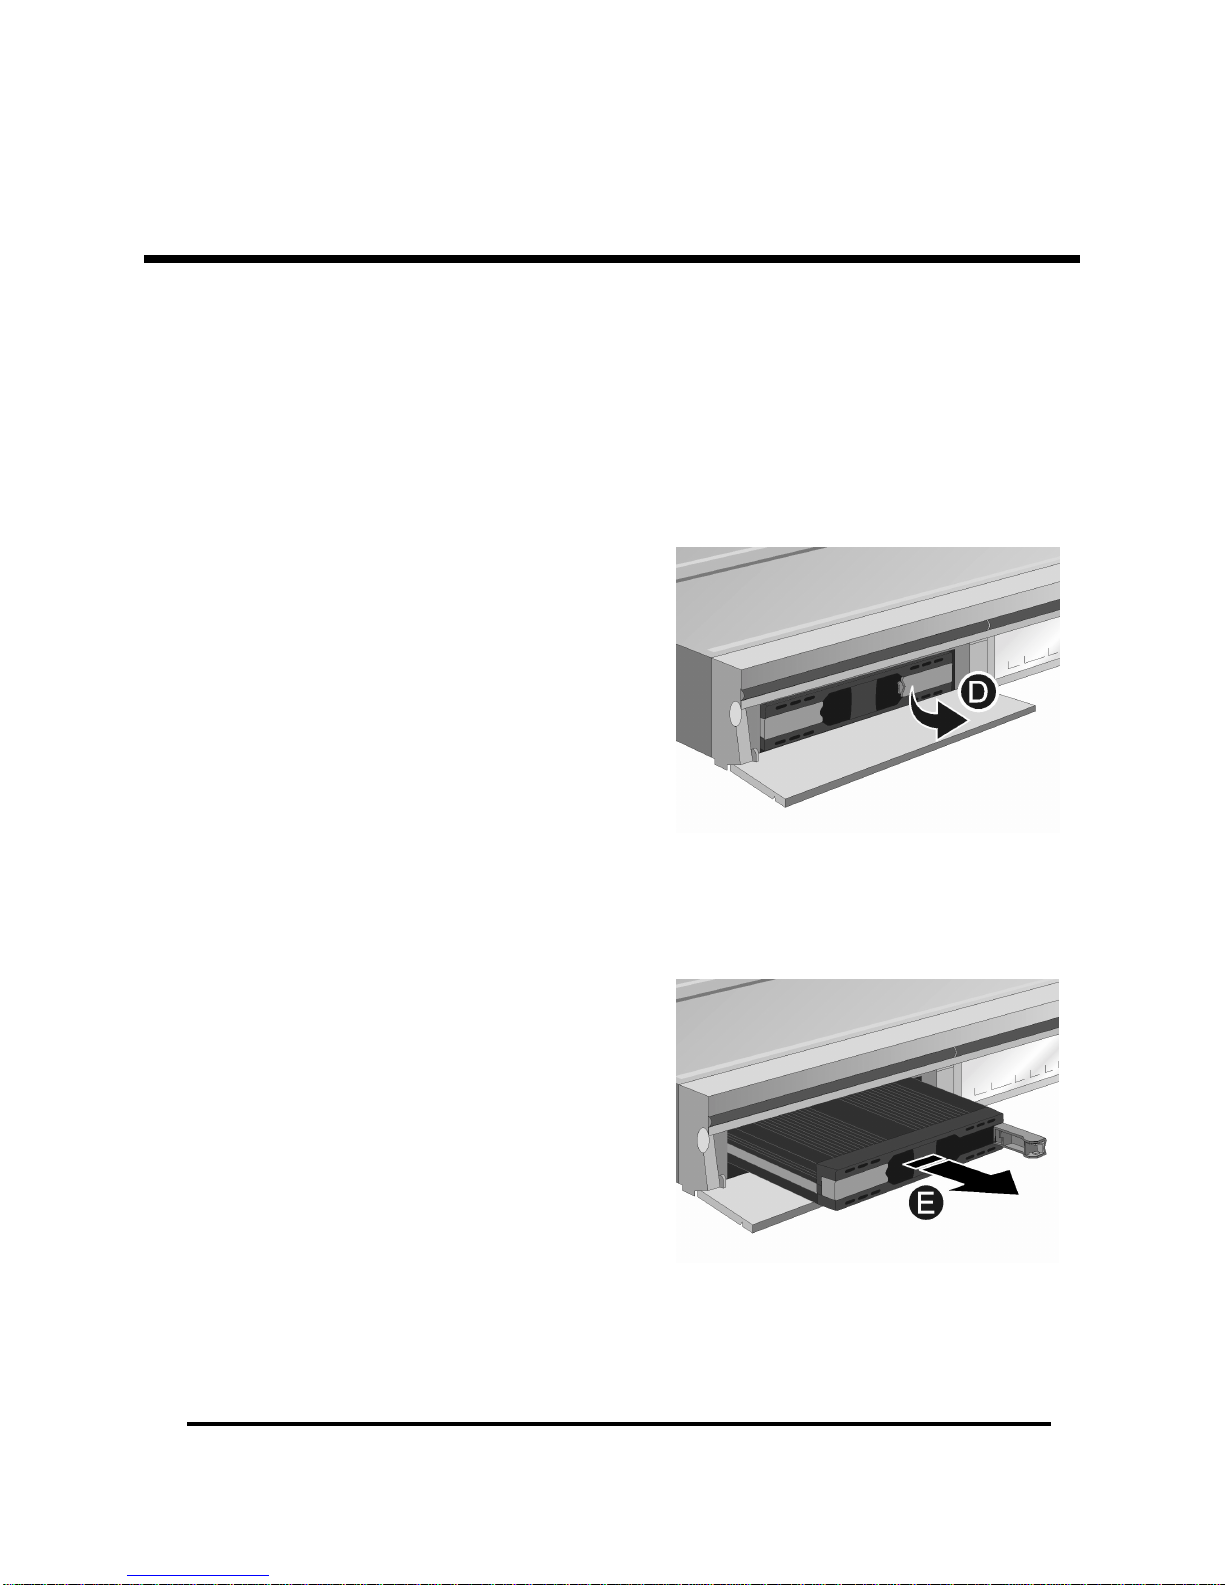
1. Turn Off the HDD/DVD Media Player
or disable the Link Disk by pressing
the "HDD-OFF" button on the Media
Player's remote control*
2. Unlock the Drive by opening the
Locking tab ‘D’ (see fig 6)
3. Grasp the drive by the finger handle
‘E’ and slowly remove it from the
HDD slot (see fig 7). Caution:
During extended use the PC/TV Link
Disk can get HOT! Be careful when
removing the Link Disk from the
HDD/DVD Media Player
*Warning:
The PC/TV Link Disk is
NOT a "Hot Swap" device. Pulling the
Drive from the player while it is still
playing files can result in damage to the
drive! Make sure to press the "HDD
OFF" button on the remote control, or
turn off the power to the Media Player
before trying to remove the PC/TV Link
Disk Drive!
Fi
g
ure 6
Fi
g
ure 7

PC/TV Link Disk, pg. 18
General Troubleshooting Procedures:
Whenever the PC/TV drive does not appear in you computer, complete each of these
troubleshooting steps in order:
1. Check all cable connections: Many times a loose cable or power adapter will cause the
drive to lose contact with the PC. Is the cable connected at the PC and the USB port? Is the
external power adapter connected?
Suggestions: make sure the USB cables are connected properly by removing and
reinstalling them. Make sure the unit has its external power adapter connected. Try
different USB cables in case the cable is bad.
2. Check power indicators: Does the RED Led come on after you connect the adapter and
press the power button? Can you hear the Drive spinning? If the Link Drive is connected
through a USB Hub, are the port LED’s showing an active connection?
Suggestions: Try cycling the power button on the Link Drive. Make sure your DC
converter is strong enough to power the drive (12V at 2amps). If the unit is
connected through a USB hub, check the power to the USB Hub.
3. Check OS correctly detected hardware: If the power and USB connections are good,
the operating system may not have detected the device correctly. Is there a Green Arrow
showing in the Windows System Tray? Is the new hardware visible in the Windows “Device
Manager”?
Suggestions: Try removing and reattaching the USB cables (this will force the USB
controller to rescan the Bus). Try running the "Add New Hardware" wizard in
Windows Control Panel (this will force the operating system to search for all new
hardware in the system). If the device is not listed correctly in Windows “Device
Manager,” (device is there but has a question mark or exclamation point next to it)
try reinstalling or updating the driver. Highlight the device and right-click, then click
on Properties > Driver > Update Driver to launch the Update Device Driver Wizard.
4. Check Disk Partition: If the device is connected properly and listed properly in
Windows “Device Manager” then the operating system may not be able to read data from
the disk.
Suggestions: Check the Partition on the drive by using FDISK in Windows 98SE/Me
or “Drive Management” in Windows 2000/XP. See “Selecting the Partition Type” on
page 10, and “Partitioning the Link Disk” pg. 11-13
TROUBLESHOOTING TIPS

PC/TV Link Disk, pg. 19
Solutions to Specific Problems:
Error: "The Device 'Generic volume' cannot be stopped right now. Try stopping
the device again later.
Cause: Some programs still have open files on the Link Disk.
Solution: Close all windows and stop all programs using the PC/TV Link Disk. Then
try again.
Error: "Hi-Speed Device connected to Low-Speed Port."
Cause: The PC/TV Link Disk supports USB 2.0 Hi-Speed data transfers, but the USB
Host controller does not.
Solution: Not all USB ports have the hardware to support USB 2.0 devices. If the
Computer has a USB 2.0 Port, try moving the Link Disk to that port. If no built in
USB 2.0 ports are available, consider purchasing an add-on card. USB 2.0 add-on
cards are available for Desktops (PCI add-on cards) or Laptops (Cardbus add-on
cards).
Error: Drive is listed in "My Computer" but not able to open the drive or save files
to the drive.
Cause: Drive needs to be formatted. Windows 98SE/Me will display a drive that is
properly partitioned even if it is not yet formatted.
Solution: Right click on the drive and select "Format" to create a new File Allocation
Table in the Partition.
Error: FAT32 is not listed as a partition type in the Windows Create Partition
Wizard.
Cause: FAT32 cannot create a volume larger than 32 Gigabytes.
Solution: Use NTFS (if you using Windows 2000/SP) or create a partition smaller
than 32 Gigabytes (32000Mb) see “Selecting the Partition Type” on page 10.
TROUBLESHOOTING TIPS (CONT’D)
Table of contents
Other Inoi Storage manuals


Popular Storage manuals by other brands


Dura-Max
Dura-Max 68006 Assembly instructions

Silvercrest
Silvercrest External Hard Drive User manual and service information

Overland Tandberg
Overland Tandberg RDX QuikStor quick start

Storage Options
Storage Options AirStore user manual

Oracle
Oracle 7116970 installation guide

Promise
Promise SmartStor NAS product manual


