1
www.insignia-products.com
Insignia NS-C5112
CD Car Deck with HD
Radio Receiver
Contents
Welcome . . . . . . . . . . . . . . . . . . . . . . . . . . . . . . . .1
Safety information . . . . . . . . . . . . . . . . . . . . . . . . .1
Features. . . . . . . . . . . . . . . . . . . . . . . . . . . . . . . . .1
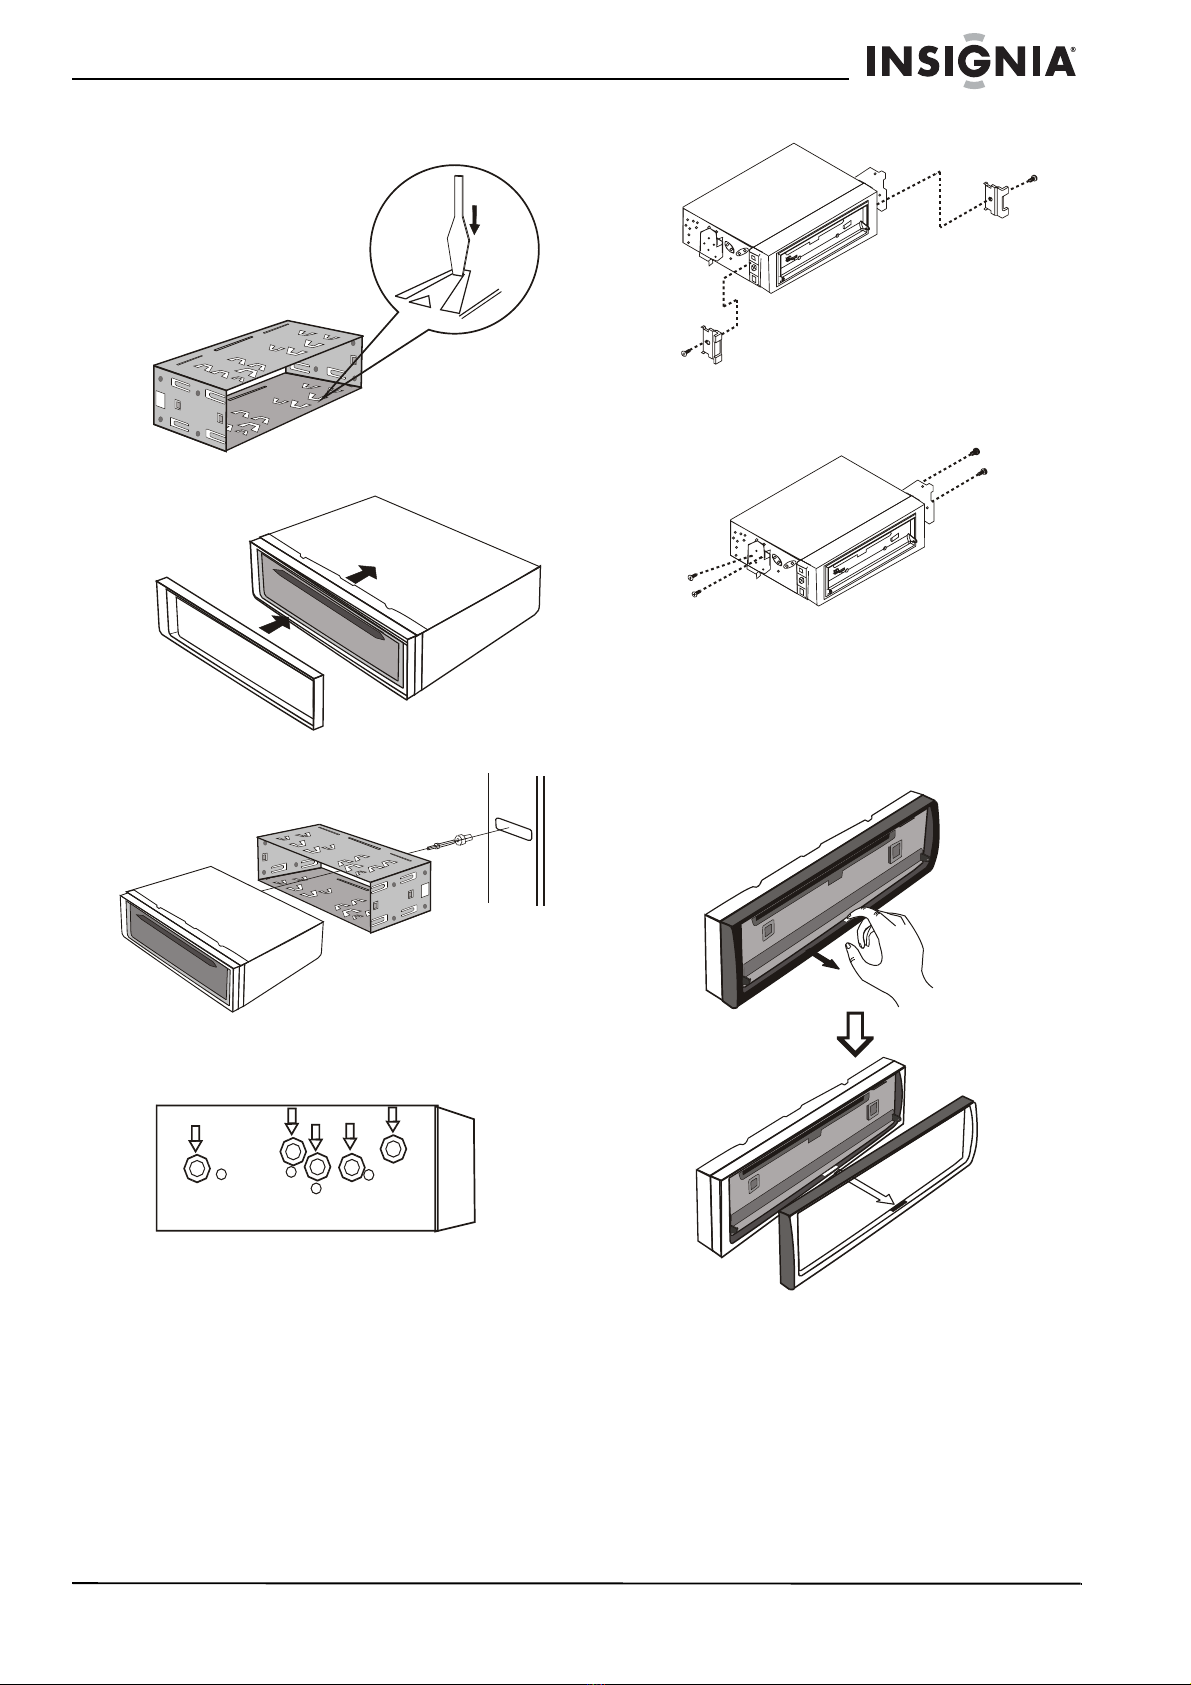
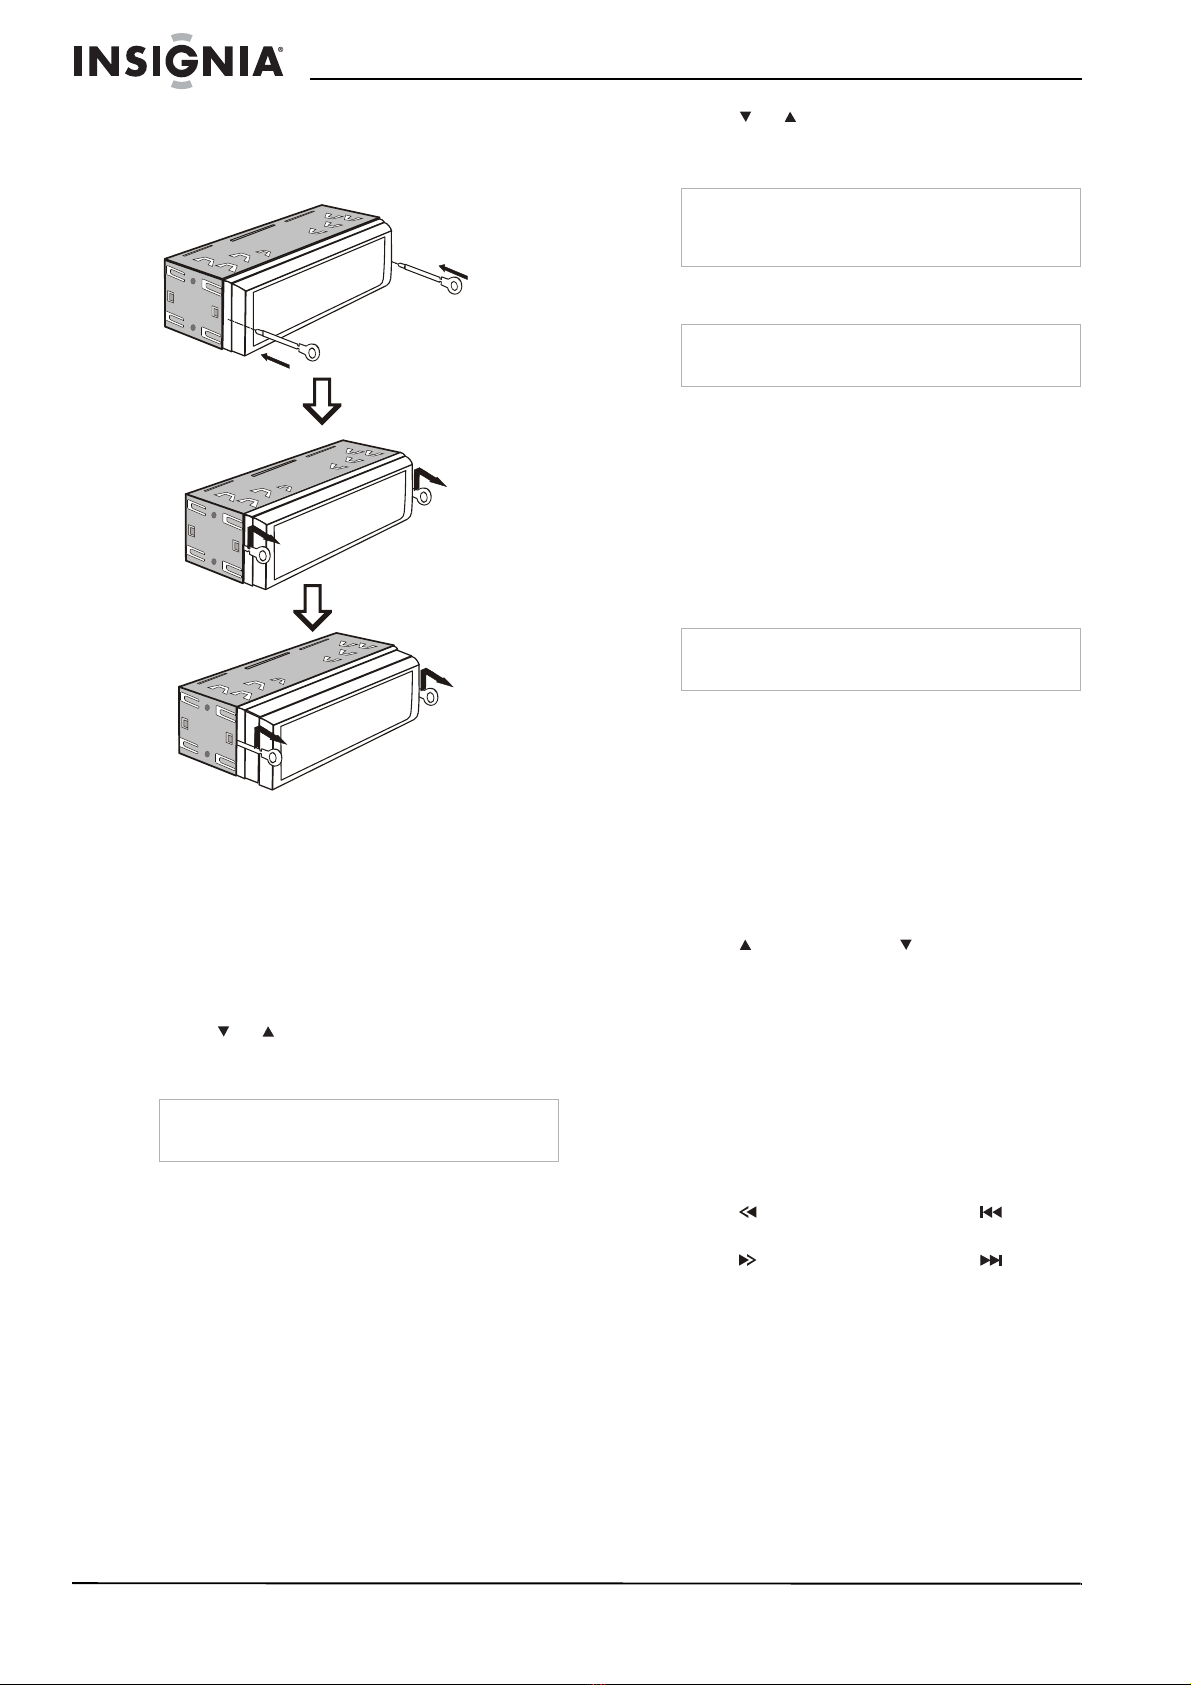
Installing your car deck . . . . . . . . . . . . . . . . . . . . .3
Using your car deck . . . . . . . . . . . . . . . . . . . . . . . .6
Using the radio. . . . . . . . . . . . . . . . . . . . . . . . . . . .7
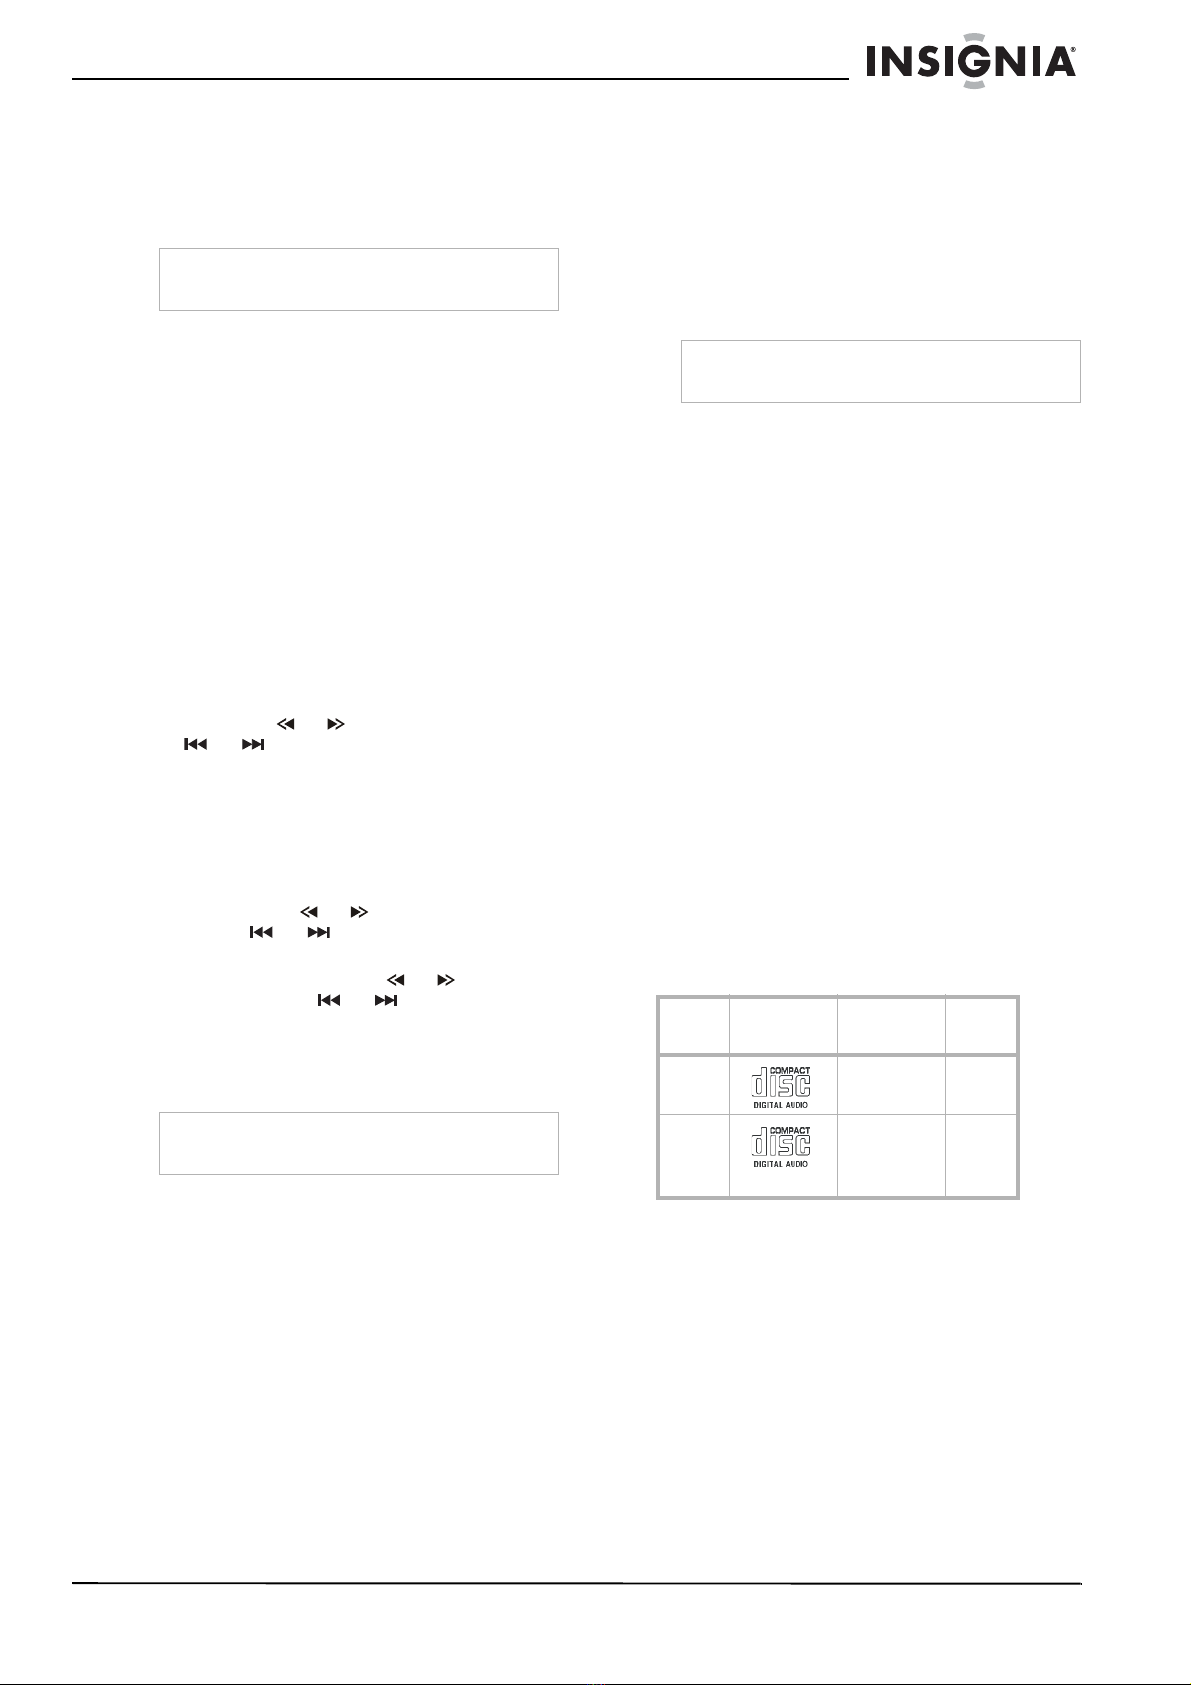
Using the CD player. . . . . . . . . . . . . . . . . . . . . . . .7
Troubleshooting . . . . . . . . . . . . . . . . . . . . . . . . . . .8
Maintaining. . . . . . . . . . . . . . . . . . . . . . . . . . . . . . .8
Specifications. . . . . . . . . . . . . . . . . . . . . . . . . . . .10
Legal notices . . . . . . . . . . . . . . . . . . . . . . . . . . . .10
90-Day Limited Warranty . . . . . . . . . . . . . . . . . . .11
Français. . . . . . . . . . . . . . . . . . . . . . . . 13
Español . . . . . . . . . . . . . . . . . . . . . . . . 27
Welcome
Congratulations on your purchase of a
high-quality Insignia product. Your NS-C5112
represents the state of the art in CD player and
HD radio design and is designed for reliable and
trouble-free performance.
Safety information
• Make sure that you connect the color coded
leads according to the diagram. Incorrect
connections can cause your car deck to
malfunction or damage the vehicle’s
electrical system.
• Make sure that you connect the speaker (-)
leads to the speaker (-) terminal. Never
connect the left and right channel speaker
cables to each other or to the vehicle body.
• Make sure that all the connections are
completed correctly before turning on your
car deck.
• When replacing the fuse(s), the replacement
fuse(s) must be of the same amperage as
shown on the fuse holder.
• Do not block vents or radiator panels.
Blocking them can cause heat build-up inside
that may result in fire.
• After you complete the installation and before
you use your car deck or when you replace
the vehicle battery, remove your car deck’s
front panel, then press the RESET button (on
the base) with a pointed object (such as
ball-point pen) to return your car deck to it’s
default settings.
• Do not attempt to modify your car deck.
Modifying it could cause a fire.
• Stop the vehicle before carrying out any
operation that could interfere with your
driving.
• Do not use your car deck in extremely high or
low temperatures. Make sure that the
temperature inside the vehicle is between
140°F and 14°F (+60°C and -10°C) before
turning on your car deck.
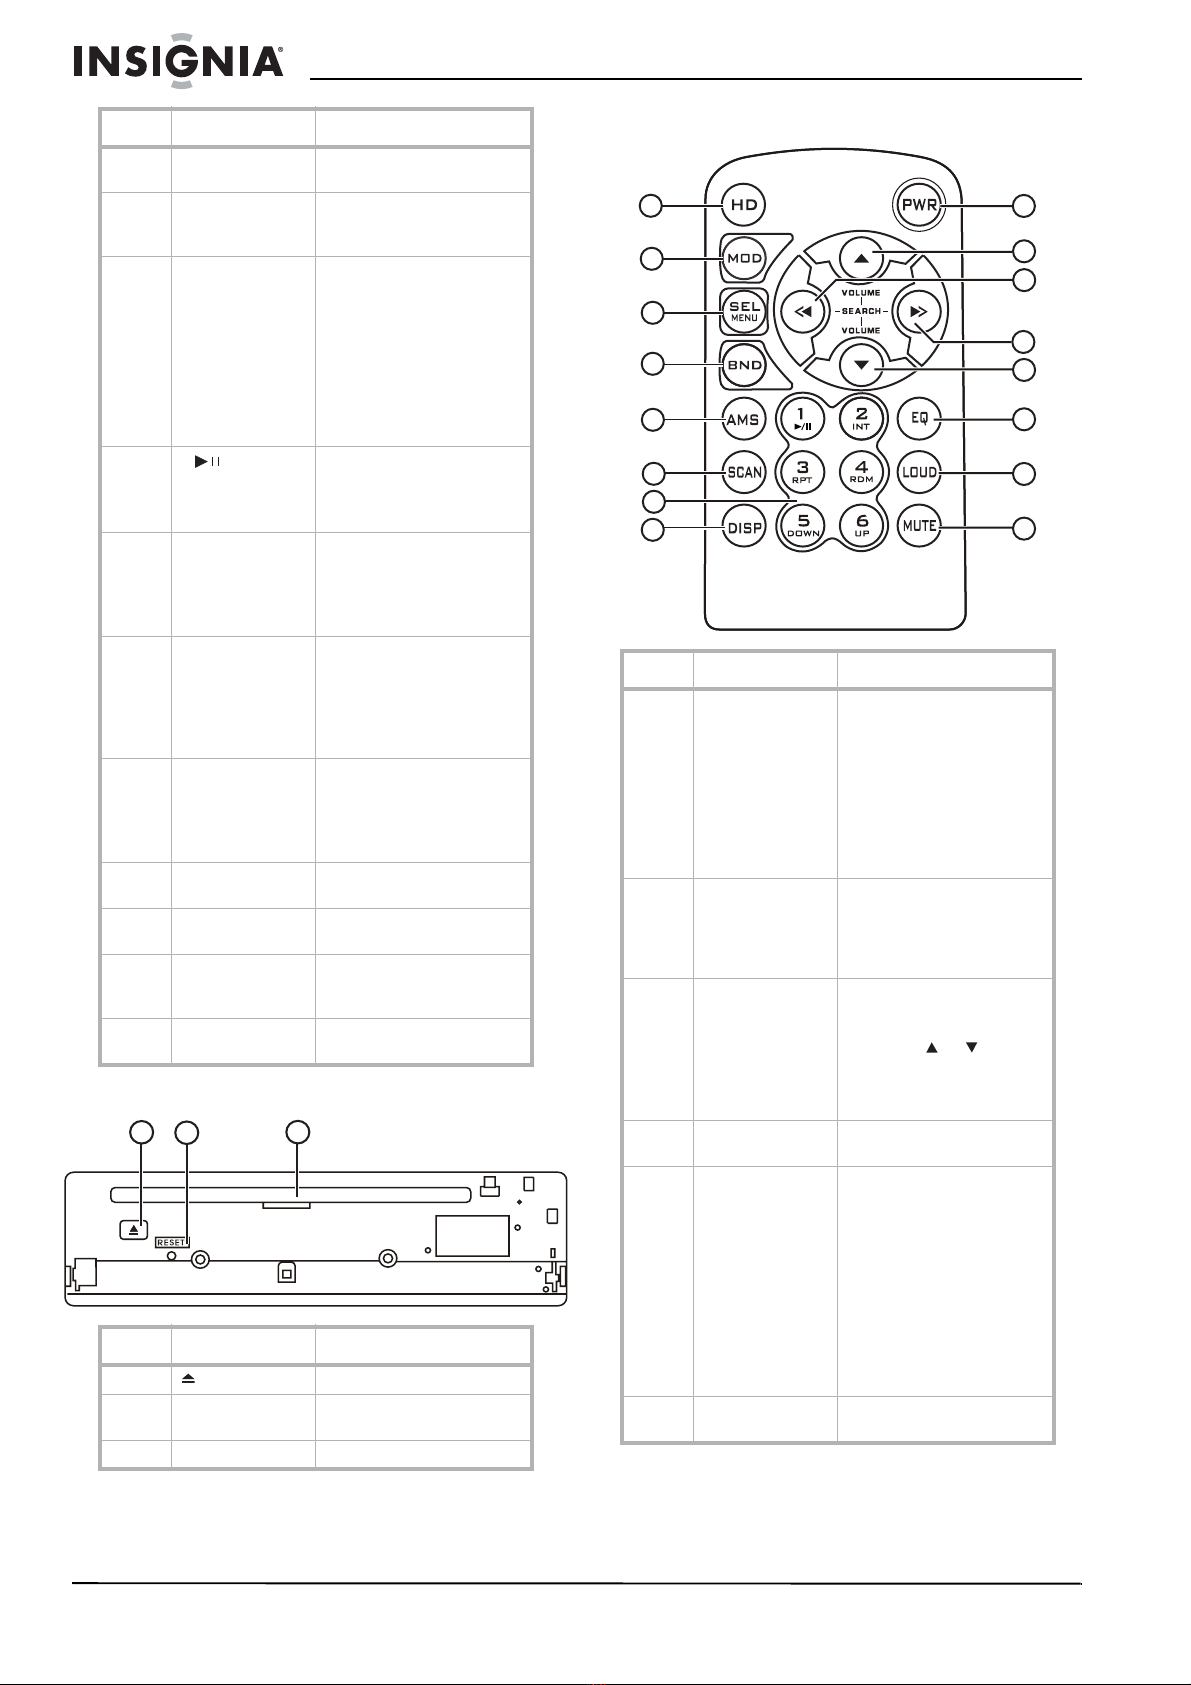
Features
Front panel
# Component Description
1 PWR Press to turn your car deck
on or off. Press and hold to
show the current volume
level.
2 MOD Press to select the audio
mode. You can select radio
mode, CD playback mode, or
AUX (external input source)
mode.
3 VOL–/VOL+/SEL Turn to adjust the volume.
Briefly press one or more
times to select the sound
option you want to adjust,
then turn the button to
adjust the option.
Press and hold to turn the
clock or alarm on or off.
4 DISP Press to display the time.
Press and hold to adjust the
time.
When playing an MP3 file,
press to display information
about the MP3 file.
5 Remote control
sensor Receives signals from the
remote control. Do not
block.
6 LCD Displays current status
information.
7 In radio mode, press to
select the next higher
station. Press and hold to
manually select a station.
In CD playback mode, press
to select the next higher
track. Press and hold to
fast-forward on a CD.
8 In radio mode, press to
select the next lower station.
Press and hold to manually
select a station.
In CD playback mode, press
to select the next lower
track. Press and hold to
fast-reverse on a CD.
12345689
10 11 12 1819
7
1314 15 16 17