InSinkErator Ultra System User manual

Installation, Care & Use
Instalacion, Cuidado & Uso
Installation, Sion & Utilisation
Owner’s Manual
The Emerson logo is a trademark and a
service mark of Emerson Electric, Co.
InSinkErator is a division
of Emerson Electric, Co.
44062 0407
www.insinkerator.com
Printed in USA ©2007 InSinkErator

Lock
Washer Hex Nut Deck Plate
Metal
Mounting Plate
UW/UWL Tank
3/4" Screws (2)
Snap-Connect
Fitting (3 pieces)
Plastic Mounting Gasket
3
HOW TO USE THISINSTRUCTION MANUAL
Providesa step-by-step narrative describing the installation step, with checkboxesthat
can be marked asyou progress through the installation.
Containssimple illustrationsthat provide visual instruction to support the narrative.
CAUTIONS, WARNINGS and DANGERSthat will require your attention during the step.
These instructionsare separated into main sections, indicated by numbers, and subsections,
indicated by capital letters. The manual issetup thisway to allow you to take a breakat any
point after completing a section or subsection without affecting the installation process.
What you’ll see in the
instruction manual:
1
2
3
A
■
Property Damage: Do not pinch or break copper
tubing. Do not distort the last 1 inch of tubing.
INSTALLING THE FAUCET
Unpack faucet components.
On a firm, flat surface, carefully
straighten the copper tubing.
1
2
An imminently hazardous situation, which,if not avoided, will result in death or serious injury.
A potentially hazardous situation, which,if not avoided, could result in death or serious injury.
A potentially hazardous situation, which,if not avoided, may result in minor or moderate injury.
3
Equipment You May Need:
QFor your satisfaction and safety, read all instructions,cautions, warnings and dangers before installing
or using this hot water faucet.
QMake sure that all electrical wiring and connections conform to local codes.
QA standard 120-volt grounded electrical outlet is required under the sink for the faucet’s electrical power.
QThe wall outlet powering the tank must have electrical power supplied to it continuously.
QThis outlet must be fused and should not be controlled by the same wall switch that operates a food
waste disposer, unless you have a SinkTop Switch™from InSinkErator®.
QIf you suspect elevated levels of chlorine in your water,it is recommended to use our water
filtration system.
QThe use of a water filter should NOT result in the water pressure to drop below 30 psi (207kPa).
If it does, this will prevent your unit from operating properly.
QMoving parts inside the tank causing a rattling noise is normal.
WHAT YOU SHOULD KNOW BEFORE YOU BEGIN
Equipment Required:
QCordless Drill
QCompression fitting,
T-fitting or saddle valve
QAdjustable wrench
QPhillipsand flat blade screwdrivers
QPencil
QTape Measure
QLevel
QAnchorsfor drywall
QHole saw
QBasin wrench
QHole punch
If you intend to use the sprayer hole in your sink for your faucet, you may need a basin wrench and a
1/8" plug or a 1/4" cap (not supplied) for the faucet spray hose line.
See Step 1-B.
If you need to cut a mounting hole in your stainless steel sink, you may need a 11
⁄4" - 11
⁄2" hole saw made
for cutting stainless steel or a hole punch. Consult a professional if you are drilling into a surface other
than stainless steel.
WHAT YOU NEED TO GET STARTED
2
A standard 120-volt
grounded electrical
outlet isrequired
under the sinkfor the
unit’selectrical power.
A minimum of
2"of space is
required from
the center of the
faucet head
to the backwall
in order for this
appliance to
operate properly.
Note: Tankmust be located
within 16"of faucet and
within 30"or less of a
standard grounded outlet.
DO NOT extend plumbing or
electrical lines.
2"
COMPONENTSIN THISPACKAGE

Deck Plate
Mounting Gasket
Property Damage: Do not pinch or break copper
tubing. Do not distort the last 1 inch of tubing.
2Q
Unpack faucet components.
Q
On a firm, flat surface, carefully
straighten the copper tubing.
A
C
D
INSTALLING THE FAUCET
5
QSlide plastic mounting gasket over
all tubes descending from faucet
body and seat mounting gasket into
bottom of faucet until flush.
QPosition supplied deck plate over
the hole into which the faucet will
be installed.
QWith mounting gasket in place, feed
tubes down into hole until faucet
rests on deck plate (see illustration).
B
QFrom under the sink, place the
metal mounting plate onto the
threaded stud.
QMake sure faucet head is at the
desired angle.
QPlace the supplied lock washer and
hex nut on to the threaded stud.
QTighten to secure the faucet to the
sink top. Do not overtighen.
The wall outlet for your faucet must have power supplied to it continuously
and must be fused. It should not be controlled by the same wall switch
that operates afood waste disposer.
PREPARATION
START HERE PROPER INSTALLATION SHOULD TAKE ABOUT 2-4 HOURS
QIdentify locations for the faucet and
tank.
QCheck to make sure there is proper
clearance for faucet handle to be fully
opened.
QCheck to make sure counter is not
too thick.
QMake sure there is a grounded
electrical outlet under the sink.
QTurn off water supply.
QIf using the sink sprayer hose hole,
remove nut that connects sprayer
hose at bottom of faucet.
QUsing adjustable wrench, remove nut
connecting sprayer washer flange in
sprayer hole.
QPlug hose opening with either a 1/8"
plug or a 1/4" cap (not supplied).
1A
B
4
Consult aprofessional before drilling into
asurface other than stainless steel.
CWhat if you don’t have asprayer hole or
don’t want to use it?
QIf drilling a hole into a stainless steel
sink or counter top, you can cut a
mounting hole for the faucet with a
hole saw for stainless steel, or you can
use a hole punch.
Required Hole Diameter
11⁄4" - 11⁄2"
Required minimum from
center of hole to wall
Maximum counter
thickness (depth)
2"
11⁄2"
B

7
Property Damage: Join remainingtube
to coldwater supply only.
A
5QIt is recommended that the water
connection be made using a shutoff
valve (not supplied).
QWhere plumbing codes permit, a
saddle valve (not supplied) can be
used to supply water to the faucet.
Follow the directions for “self-
piercing attachments” included with
the valve.
FINAL WATER CONNECTION
Scalding Hazard: Steam andhot water can spit
forcefully from the spout if the temperature isset
too high at startup.
B
A
Q
Check all connections to ensure they
are tight
and that there are no leaks.
Q
Plug in hot water tank.
Water will be cold at first.
Allow 12-15 minutes for water to reach
target temperature.
Gurgling or hissing is normal during the
initial heating cycle.
Property Damage: A standardgroundedoutlet within
30" of the faucet isrequiredunder the sink. Do not
use an extension cordset with the dispenser.
FILL TANK & THEN CONNECT POWER
QTurn on the cold water supply.
QLift handle to WARM position.
QLeave faucet open for at least
1 min. to fill the tank. Do not close
faucet until water is flowing freely
from the spout.
6
AQSelect a spot under the sink to mount
tank vertically within reach of both
plumbing and electrical connections.
The tank should be within 16" or less
of faucet water lines and within 30"
or less of a standard grounded outlet.
QWhile holding tank in place on
the spot selected for installation,
use a pencil to mark locations for
2 hanging screws.
Property Damage: Tank must be locatedwithin 16" of
faucet andwithin 30" or less of a standardgrounded
outlet. DO NOT extendplumbingor electrical lines.
3MOUNTING THE TANK
Tank must be
mountedlevel
to ensure
proper operation.
Mount tank vertically in an areathat
allows clearance on the underside of the
tank for drainage, if necessary.
DO NOT over tighten screws.
QPre-drill 1/8" pilot holes at marks.
QTurn screws into pre-drilled holes,
leaving 1/4" exposed.
QHang the tank on the screws.
QTighten the screws with only 1/2 turn
clockwise.
B
Screws provided are for use in wood
studs or cabinets only. Use wall anchors
(not supplied) for installation into drywall.
Leave 1/4" for
hanging tank.
QWithout depressing the gray button,
place the snap-connect fitting at
the end of the blue 1/4" tube onto
the left fitting on the tank, pushing
until it clicks into place. (1)
QSlip the flexible white 7/16" tube
over barbed middle fitting and slide
down approximately 1/2". (2)
4
12
A
Property Damage: Pinchedor blockedwater lines
may cause damage to the hot water tank.
QSlip the clear 5/16" tube over the
far right smooth fitting and slide
down approximately 1/2". (3)
QVisually check for pinched or
crimped tubes.
B
3
Property Damage: Check to make sure
tubesare connectedproperly andare
pushedin asfar aspossible.
CONNECTING FAUCET TO TANK
Hose clamps are not needed for any of the connections.
6
Nothing will happen until tank fills and
water begins running out of faucet.

9
Scalding Hazard: Do not allow
water to boil. May result in
severe burns.
Tank temperature is factory preset
to 200°F,which mixes with cool tap
water to produce an output water
temperature of approx. 110°F.
To reset the tank thermostat
to 200°, turn the indicator one
notch to the right of vertical.
After adjusting, lift faucet handle for
20 seconds for water to re-heat to the new setting.
Q
To adjust water temperature, turn thermostat
dial on the front of the tank clockwise to
increase temperature or turn counter clockwise
to decrease temperature. Repeat if necessary.
All changes should be minimal.
Q
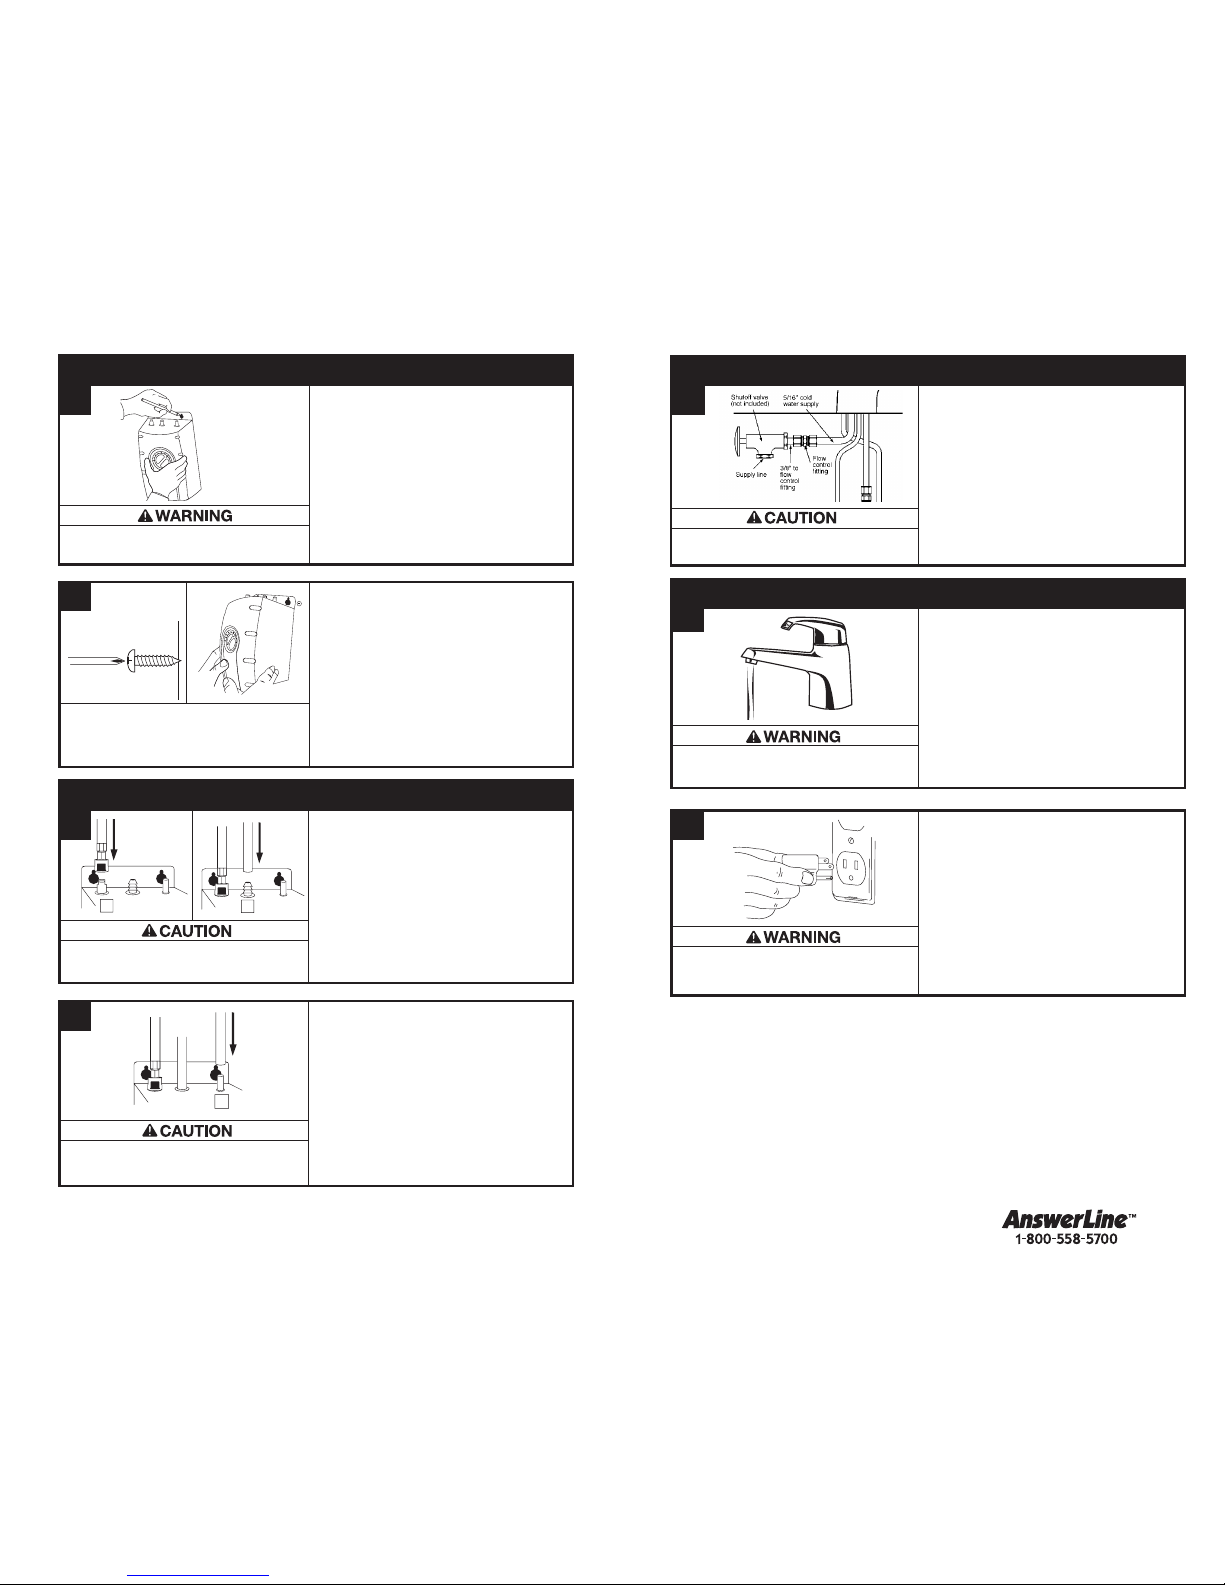
Regularly inspect the unit for any signs of
leakage. If there are signs of water damage,
immediately remove the unit from service.
Q
To avoid water damage from leakage,
replace all cut, loose or split tubing.
Q
A drain pan, plumbed to an appropriate
drain or outfitted with a leak detector,
should be used in those applications where
any leakage could cause property damage.
PROPERTY DAMAGE
CARE AND USE
Electric Shock Hazard: To prevent electrical shock, disconnect power before
servicing unit. Use only a properly grounded and polarized electric outlet.
approx. 200°
ADJUSTING THE THERMOSTAT
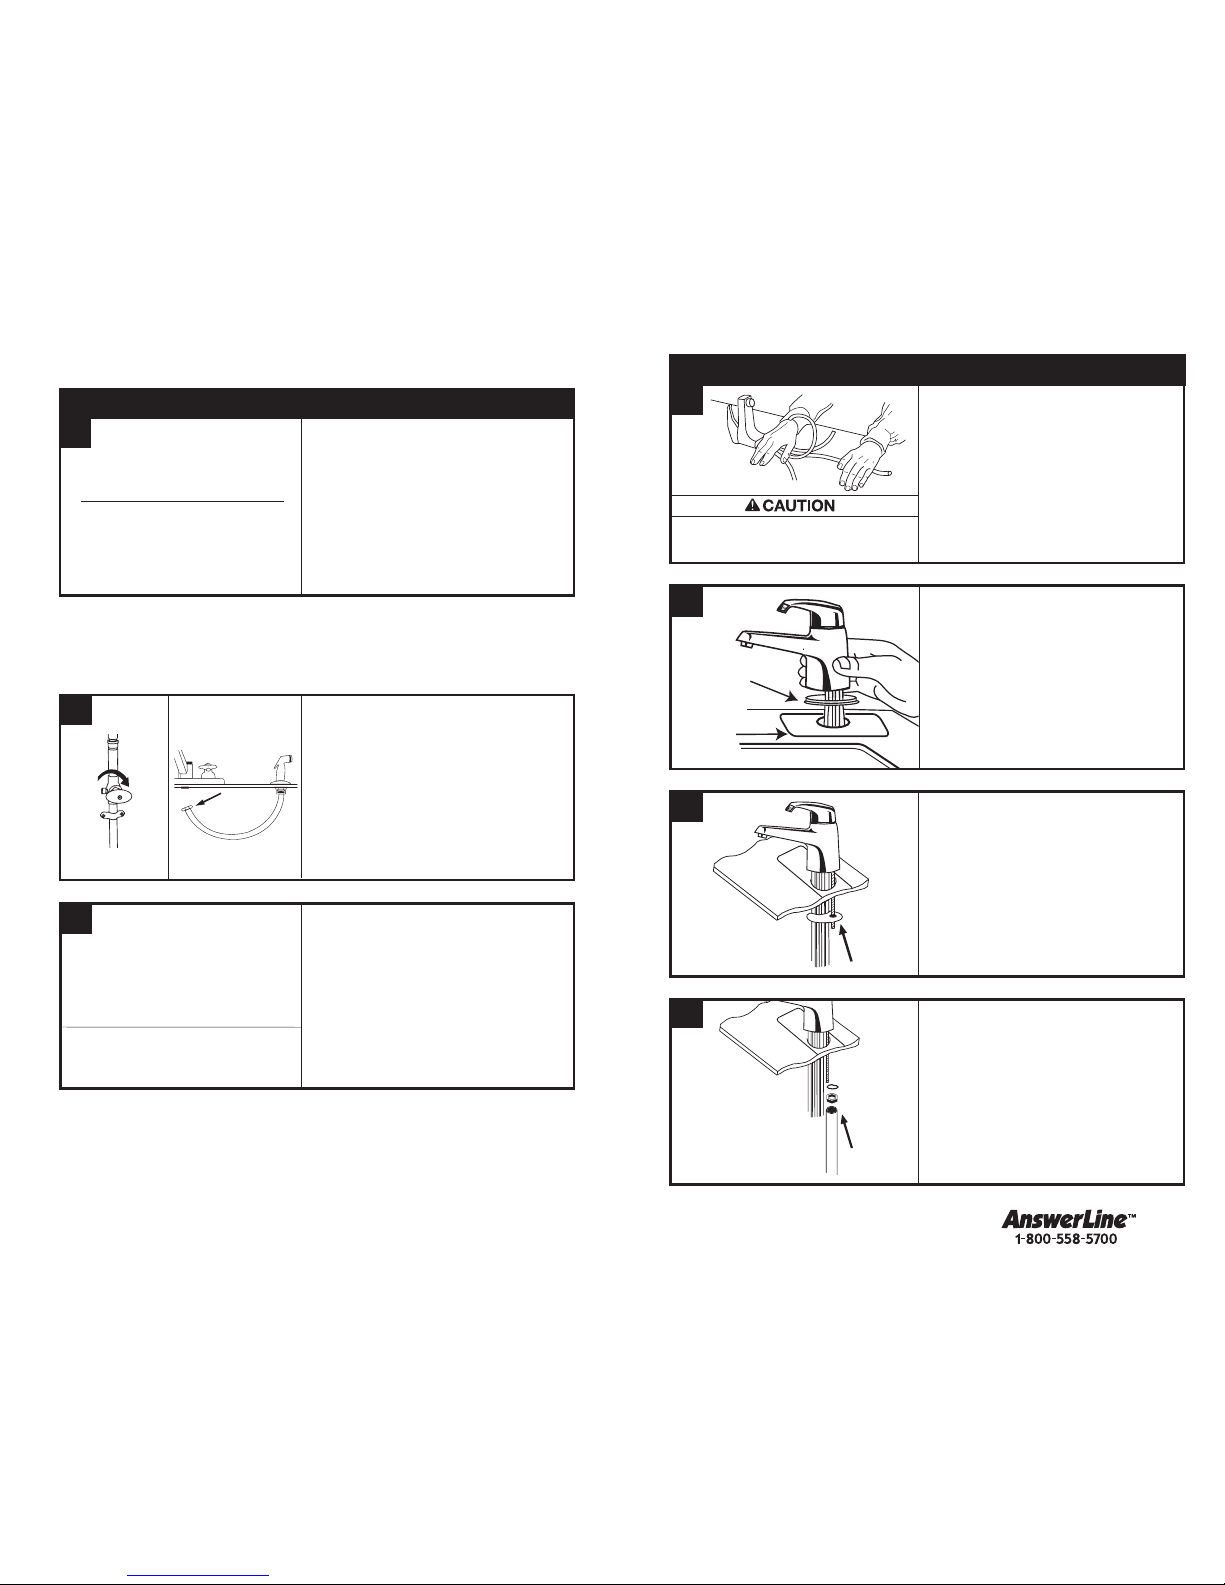
Q
Only use mild cleaners to clean the faucet
and plastic components.
Q
Cleaners with acids, abrasives, alkaline or
organic solvents will result in deterioration
of the plastic components and void the
warranty.
CLEANING THE FAUCET AND TANK
Anytime the hot water faucet is not used for extended
periods of time, unplug and drain unit. If it is below
freezing you will need to unplug the unit and drain it.
Q
Disconnect power from unit.
Q
Turn faucet lever to warm and allow
water to flow until it is cool.
Q
Shut the faucet off at the valve.
Q
Remove drain screw located on bottom
center of water tank and drain the water
into empty pail.
Q
Empty the tank and then reinstall drain
screw onto the bottom of tank, turning
until snug. Do NOT over tighten.
Q
To place back in working order, fill tank
with water and re-connect the plug.
SEASONAL STORAGE/DRAINAGE
8
Property Damage: To avoid water damage, replace any loose or split tubing.
Periodically inspect the unit for any signs of leakage and immediately remove from
service any unit suspected of leaking.
Personal Injury: This tank is a non-pressurized tank.DO NOT modify this system.
DO NOT close vent tube or connect other type faucet or valves to the tank.Use only the
InSinkErator faucet supplied. Use only parts provided.Contact an authorized
InSinkErator Service agent for repairs or replacement components.
Electric Shock Hazard: Using an ungrounded or improperly connected
appliance can result in serious injury or death from electrical shock.
1-year warranty
Covers all replacement parts and labor to correct defects in material or workmanship in
the faucet system, excluding the replaceable filter cartridge, for the full warranty period from
the date of installation in your home. If warranty service is required during the warranty period,
contact an authorized InSinkErator service agent to replace or repair the unit in your home at
no cost to you. If your faucet is replaced rather than repaired, the warranty on the new unit
shall be for the duration of the remaining portion of the original dispenser’s warranty.
Note: Warranty is determined by unit serial number and/or date of installation. Purchase or
installation receipt may be required to verify warranty status. When service is required, and for
the location of your nearest factory authorized service center, call toll free 1-800-558-5700.
The foregoing warranty does not apply to damage or inoperation resulting from accident,
alteration, misuse, abuse, improper installation, installation not in accordance with these
instructions or local electrical and/or plumbing codes. We do not assume any responsibility for
consequential damage. Install using genuine InSinkErator®manufactured components only. Use
of non InSinkErator components will void your warranty.
Some states do not allow limitations on how long an implied warranty lasts, or the
exclusion or limitations of incidental or consequential damages, so the above limitations or
exclusion may not apply to you. This warranty gives you specific legal rights, and you may
also have other rights which vary from state to state.
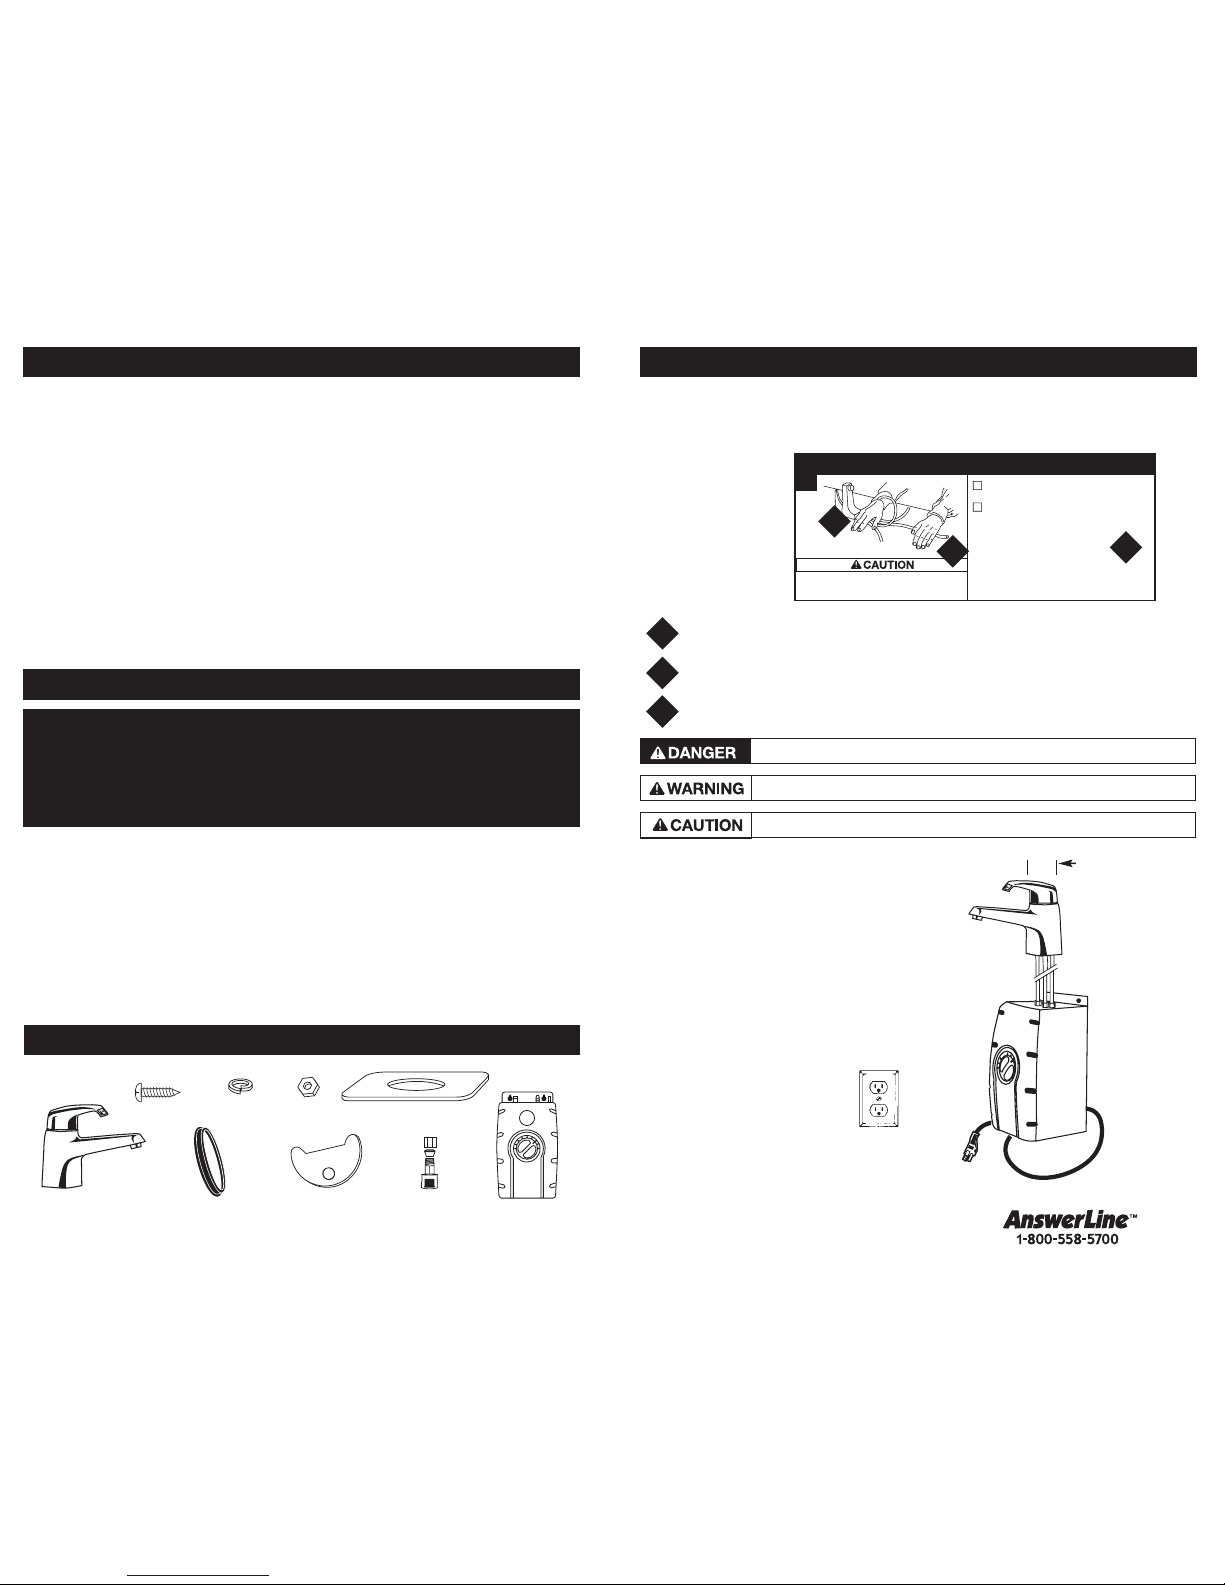
This appliance must be grounded.This hot water faucet is equipped with a cord that has a
grounding conductor and a grounding pin.The plug must be connected to an appropriate outlet that
is properly installed and grounded in accordance with all local codes and ordinances.
Do not modify the plug provided with the appliance – if it will not fit the outlet, have a proper outlet
installed by a qualified electrician. Check with a qualified electrician or serviceman if you are in
doubt as to whether the instant hot water dispenser is properly grounded.
WARRANTY INFORMATION
Fire Hazard: To minimize possibility of fire, DO NOT store flammable items such as
rags, paper or aerosol cans near the tank.DO NOT store or use gasoline or other
flammable vapors and liquids in the vicinity of this or any other appliance.
A hot water faucet, like any water heater, has a limited life and will eventually fail. To avoid
possible property damage, this hot water faucet should be regularly examined for leakage
and replaced when necessary. A drain pan, plumbed to an appropriate drain or outfitted
with a leak detector, should be used in those applications where any leakage could cause
property damage.

10
TROUBLESHOOTING
WHAT TO DO
Water and steam spits
forcefully from spout
without turning on the
faucet.
No warm water
•Water is boiling in storage tank.
May be normal during initial setup.
•The unit is unplugged.
•The electric outlet is inoperative.
•
Lift faucet lever to release some water from
the tank.
•Adjust water temperature down using dial on tank front.
Remember that at higher altitudes, water boils
at lower temperatures.
•
Make sure the unit is connected to a properly grounded
electric outlet.
• Make sure the circuit breaker or fuses are
functioning properly.
• Check that the outlet is not switched off.
Water is too hot
or not warm enough •Thermostat is not adjusted to
your needs. •
Adjust the thermostat slowly,then lift faucet handle for 20
seconds to bring in fresh water to be heated at the new setting.
Allow 5-7 minutes for water to reach new temperature.
Water comes out the
vent instead of spout • Outlet tube is blocked. •
Check that outlet tube is not kinked, twisted or pinched.
•
Unscrew spout end piece and clean out any debris.
Water is dripping from
the spout/vent
intermittently
•The expansion chamber isn’t draining
properly due to low water pressure.
•The spout is blocked.
• Unplug the unit.If the dripping doesn’t stop after a few
minutes,check the supply valve to ensure that is fully
open and there are no obstructions in the water line
reducing the pressure below 30 psi (
i.e.,a poorly mounted
saddle valve,a clogged water filter, or a partially opened
shut-off valve).
•
Unscrew spout end piece and clean out any debris.
Water is dripping
from the spout/vent
constantly
• Debris in the water line may be
in the faucet valve seat causing a
slow water leak.
•
Unscrew spout end piece and clean out any debris.
•
Lift faucet lever 7-10 times to flush faucet & lines.
Divided stream • Debris in the end piece. •
Unscrew spout end piece and clean out any debris.
PROBLEM POSSIBLE CAUSE
Please read Troubleshooting Guide and/or visit
www.insinkerator.com before calling AnswerLine™
If you are still experiencing trouble call the AnswerLine™1-800-558-5700.
Table of contents
Other InSinkErator Plumbing Product manuals
Popular Plumbing Product manuals by other brands

Moen
Moen Brushed Bronze TS294BB Replacement parts

Kohler
Kohler K-T11077 Installation and care guide

Sensea
Sensea KOMI 3276000251224 Assembly, Use, Maintenance Manual

Elkay
Elkay Moda LK7324 Specifications

Kohler
Kohler 10089W-CP Installation and user guide

American Standard
American Standard Two and Three Handle Bath/Shower 7220.700... parts list