Instant POT DUO PLUS Specification sheet

INSTANT POT®DUO™PLUS
112-0169-01_112-0169-01-0301_IB_DuoPlusV4_6QT_US_GSG_FINAL_05-24-22.indd 1112-0169-01_112-0169-01-0301_IB_DuoPlusV4_6QT_US_GSG_FINAL_05-24-22.indd 1 5/24/22 2:47 PM5/24/22 2:47 PM

to your new Instant Pot®Duo™Plus!
This Instant Pot Duo Plus multifunction cooker can help you cook
healthy, delicious meals more easily and in less time. We hope you
fall in love with Instant Pot cooking, and enjoy it in your kitchen for
years to come!
Get started with your Instant Pot!
OM.
Welcome
112-0169-01_112-0169-01-0301_IB_DuoPlusV4_6QT_US_GSG_FINAL_05-24-22.indd 2112-0169-01_112-0169-01-0301_IB_DuoPlusV4_6QT_US_GSG_FINAL_05-24-22.indd 2 5/24/22 2:47 PM5/24/22 2:47 PM

CONTENTS
What’s in the box 2
Using your Duo Plus 4
Initial setup 7
Using the lid 11
Slow Cook 17
Rice 19
Steam 21
Sauté 22
Yogurt 24
Sous Vide 26
Cake 28
Keep Warm 30
Cleaning 31
Learn more 32
112-0169-01_112-0169-01-0301_IB_DuoPlusV4_6QT_US_GSG_FINAL_05-24-22.indd 1112-0169-01_112-0169-01-0301_IB_DuoPlusV4_6QT_US_GSG_FINAL_05-24-22.indd 1 5/24/22 2:47 PM5/24/22 2:47 PM
2
Get started
3
Get started
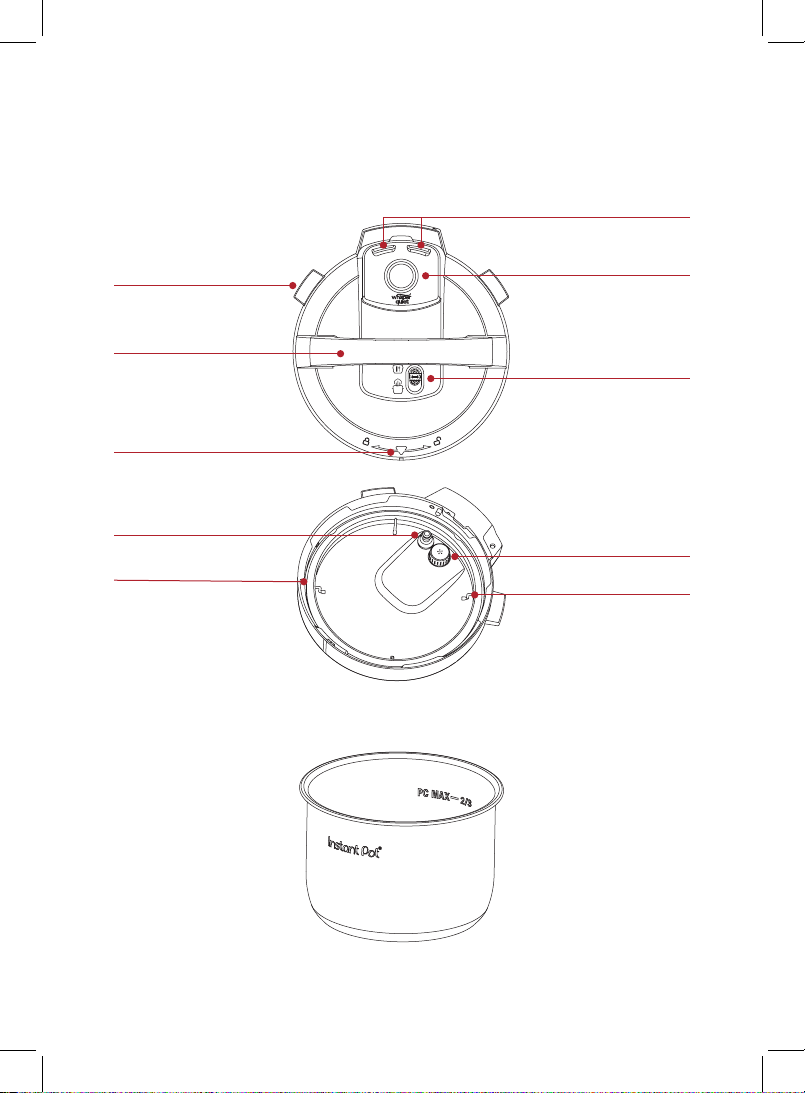
WHAT’S IN THE BOX
Lid
Stainless Steel Inner Cooking Pot
Whisper quiet lid cover
Sealing ring rack
Steam release valve and
Anti-Block shield
Float valve
Sealing ring
Steam release switch
Handle
Lid fins
Steam release vents
Lid position marker
112-0169-01_112-0169-01-0301_IB_DuoPlusV4_6QT_US_GSG_FINAL_05-24-22.indd 2112-0169-01_112-0169-01-0301_IB_DuoPlusV4_6QT_US_GSG_FINAL_05-24-22.indd 2 5/24/22 2:47 PM5/24/22 2:47 PM
3
Get started
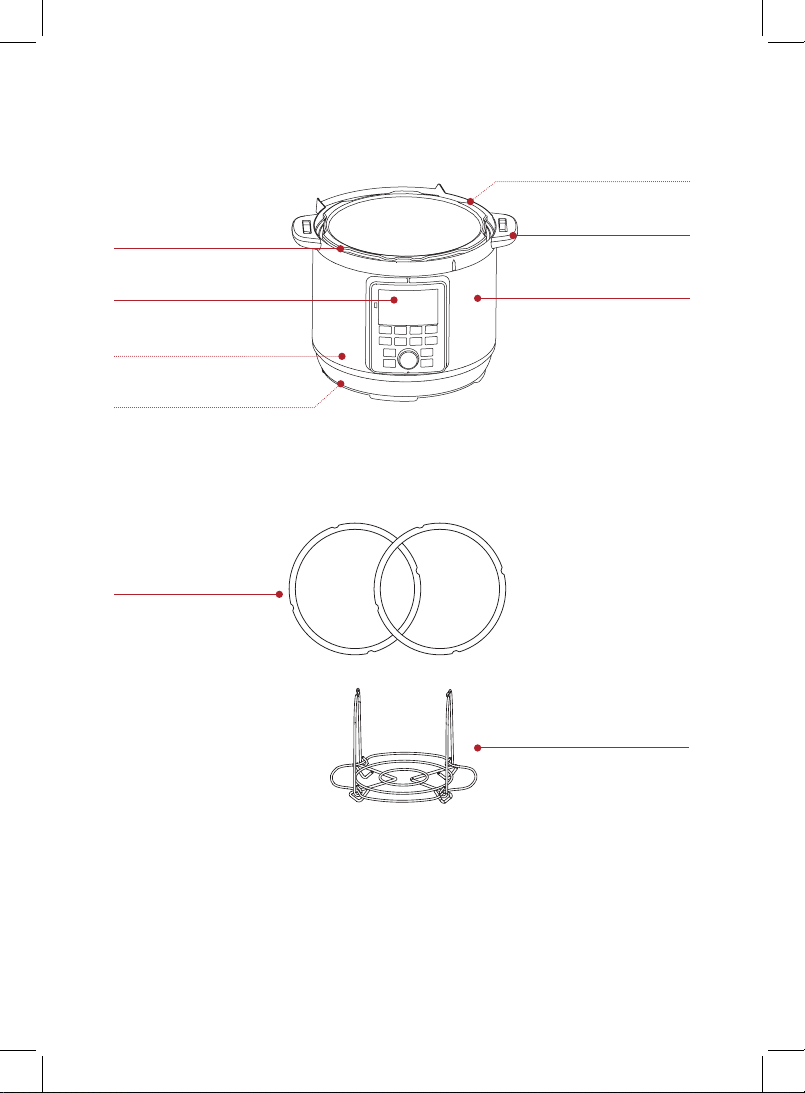
Cooker Base
Parts + Accessories
Illustrations are for reference only and may differ from the actual product.
Remember to recycle!
We designed this packaging with sustainability in mind. Please recycle
everything that can be recycled where you live.
Heating element (inside)
Cooker handles
Stainless steel exterior
Condensation collector (rear)
Power cord (rear, 8-quart
model has attached cord)
Condensation rim
Control panel
Sealing ring (extra)
1 sealing ring
comes installed
Stainless steel steam rack
with handles
112-0169-01_112-0169-01-0301_IB_DuoPlusV4_6QT_US_GSG_FINAL_05-24-22.indd 3112-0169-01_112-0169-01-0301_IB_DuoPlusV4_6QT_US_GSG_FINAL_05-24-22.indd 3 5/24/22 2:47 PM5/24/22 2:47 PM
Other manuals for POT DUO PLUS
1
Table of contents
Other Instant Electric Pressure Cooker manuals


