manuals.online logo
Brands
  1. Home
  2. •
  3. Brands
  4. •
  5. Instanta
  6. •
  7. Boiler
  8. •
  9. Instanta 3001F Guide

Instanta 3001F Guide

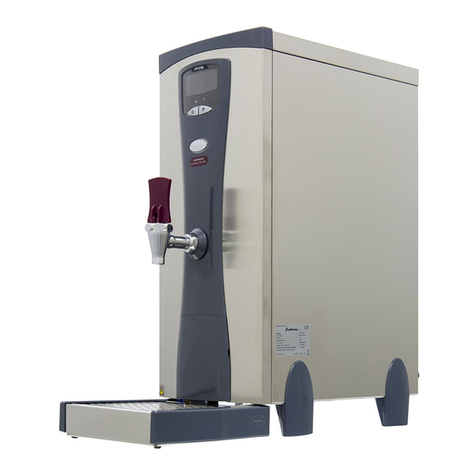
SureFlow Series: 1501F & 3001F
Auto-Fill Catering Water Boiler
With Integrated Multi-Filter
Installation And User Instructions
INSTANTA LIMITED
Canning Road, Southport, Merseyside, PR9 7SN
Tel: (01704) 501114 Fax: (01704) 501115
IB31 - ISS: 02
The Professional’s Choice
CONTENTS
CONTENTS & INTRODUCTION 2
SAFETY INFORMATION 2
ENVIRONMENTAL INFORMATION & DELIVERY CHECK-LIST 3
TECHNICAL SPECIFICATION 3
INSTALLATION 3
OPERATION 4
DAILY USE 4
FILTER & FILTER REPLACEMENT 4
ADJUSTING FILTER-MONITOR (optional) 6
CLEANING 6
MAINTENANCE, SPARES & SERVICE INFORMATION 7
SERVICE / TECHNICAL SUPPORT / GUARANTEE 7
SERVICE WARNINGS & FAULT DIAGNOSTICS 8
Introduction
Dear Customer,
Thank you for purchasing this Instanta product.
Your new water boiler is designed to give
you years of trouble-free service provided
that the instructions contained in this manual
are followed.
All new series Instanta products are energy
ecient, simple to operate and easy to service.
Find out more about Instanta products at
www.instanta.com
Safety Information
Please read the following
carefully before starting work on
this equipment.
A competent person should install this appliance
in accordance with the installation instructions
for this appliance and all relevant local and
national standards including the following:
• Health & Safety at Work Act
• IEE Regulations
• Local & national Building Regulations
• BS Codes of practice
• Water Supply Regulations
All personnel should be provided with sucient
training in the safe use of this appliance.
A warning notice displayed next to the
machine is often helpful in notifying users that
the appliance contains and dispenses near
boiling water.
• Inform users that certain surfaces will
become hot (especially the draw-o tap).
Care should be taken to avoid potential
injury from burns and scalding whilst
operating this appliance.
• In line with Health and Safety requirements
we recommend a risk assessment be carried
out after the boiler has been installed.
• Always disconnect the unit from the power
supply before servicing.
• The unit must be earthed.
• Keep these instructions in a safe place near
the unit for future reference.
2
This appliance is not intended for use by
persons (Including Children) with reduced
physical, sensory or mental capabilities, or lack
of experience and knowledge, unless they have
been given supervision or instruction concerning
use of the appliance by a person responsible for
their safety. Children should be supervised to
ensure they do not play with the appliance.
Environmental (Information
On Disposal For Users
Of Waste Electrical &
Electronic Equipment)
The “crossed out wheelie bin” symbol on
this product means that discarded electrical
and electronic products should not be mixed
with general waste. Disposing of the product
correctly will help to save valuable resources
and prevent any potential negative eects
on human health and the environment which
could otherwise arise from inappropriate
waste handling. For proper treatment,
recovery and recycling of end-of-life products,
please contact your dealer or supplier for further
information, or local authority for details of your
nearest designated collection point.
Delivery Checklist
Before starting installation, check that you have
the following parts;
• Catering Water Boiler
• Drip-tray
• Drip-tray tting kit
• White water inlet hose (3/4”BSP connection)
• User instructions
Technical Specification
Model 1501F 3001F
Width mm 252 310
Depth mm 518 518
Height mm 610 618
Power Rating KW 3.0 3.0
Weight (Empty) KG 13.5 15.5
Weight (Full) KG 28 36
Water Inlet Pressure: Bar 2 to 7 2 to 7
Installation
The boiler must be installed on a level work
surface with sucient strength to support
its weight. Ensure all vents are unobstructed.
Locate in an area where there is adequate space
to use the boiler safely (e.g. free from risk of
congestion and tripping hazards).
Connection to Mains Water Supply:
Connect the WRAS approved water lling hose
(3/4”BSP) to the inlet connection point on the
back of the boiler and the other end to the mains
water supply, via an accessible isolating tap with
a ¾”BSP thread*.
IMPORTANT: If micro-bore pipe is used instead
of the inlet hose supplied, the size must be
minimum OD 3/8”(10mm).
The water supply must have a pressure not
exceeding 7bar (96psi), and no lower than 2bar
(20psi) NOTE: If your water pressure exceeds
7bar, t a suitable pressure reduction valve.
We regret that Instanta cannot be held
responsible for any machine malfunctions if
the water pressure exceeds that stated. If in
doubt, consult your water supply company.
*To meet WRAS installation requirements, an
approved single-check valve providing back-
ow prevention protection, should be tted
at the point of connection between the water
supply and the appliances.
Electrical Connection:
The boiler must be Earthed.
Your machine is supplied with a standard 13amp
bonded plug with a 13amp fuse.
Overflow:
The drip-tray has a limited capacity and is
designed to handle small spillages and drips.
Wherever possible, we strongly recommend
that it is connected to a permanent waste outlet
using the tting kit provided.
If preferred, and as an alternative, the
overow can be connected from the back of
the machine using an optional rear-overow
kit (Pt. No: ROFK1) available from Instanta
Spares Department (01704 502905).
IMPORTANT: Whichever overow connection is
chosen, the diameter of the pipe used must be
no less than 15mm.
Failure to connect the overow-outlet to a
permanent waste of drain, could lead to property
damage from ooding.
If in all circumstances, it is absolutely not
possible to direct the boiler overow-outlet to
3
a permanent waste or drain, then the mains
water supply to the boiler should be isolated
and the unit switched o whenever it is left
unattended for long periods (e.g. overnight).
Whilst every reasonable precaution is taken
to prevent an overflow, Instanta cannot be
held responsible for any damage caused as a
result of incorrect installation or blockage of
the overflow or failure to direct the overflow
to a safe outlet.
Operation
First use (once water and electrical connections
have been made);
• Switch boiler on. The screen will light up red
and will run through an initial self-diagnostic
check before starting to ll with water
(screen reads; “NOT READY FILLING”).
• Once primed with water, the boiler will
begin to heat (screen reads;
“NOT READY HEATING”).
• When the correct temperature has been
reached, the display will change from Red
to White and will simply read “READY”.
• The boiler will then continue in a heat/
ll cycle until the tank is at full capacity.
(During the heat/ll cycle, small amounts of
water are added to ensure the water at the
tap is always at the correct temperature).
IMPORTANT NOTE: In normal daily use, the
boiler may be used as soon as the “READY”
message is displayed, but on rst install, wait
at least 15 minutes before starting to use.
• Drain o approximately 10 litres of water
(to ush the new lter cartridge through).
• The boiler is now ready for use.
Regular Daily Use
Switch boiler on and wait for the screen to turn
white and show “READY” message. The water
will then be at the correct temperature.
Dispense water via the lever tap.
(CAUTION: Boiler dispenses near-boiling water).
AQ35 Multi-Filter
Instanta’s new built-in ltration system ensures
that water is always to the highest standard,
whilst delivering lower maintenance costs and
improved energy eciency.
Quick and easy to change, the new lter reduces
sediment, chlorine taste & odour, and lime-scale
via a slow release scale inhibitor, providing
better water and therefore, better quality drinks.
Filter Replacement:
A series of bars on the FILTER display shows
the estimated remaining life in the current
lter cartridge. When the lter has just 200
Litres remaining, the lter icon will begin to
ash as a reminder. When the lter needs
replacing, the screen will show the message;
“CHANGE FILTER”.
The boiler will continue to operate with the
CHANGE FILTER screen but scale may build
up more rapidly and the water taste may
be aected.
Replace the lter as follows;
1. Switch boiler o and draw water down
to tap level.
2. Grip cartridge and rotate a quarter-turn to
the left and pull forward. CAUTION: A small
amount of water will drain from the head.
4
3. Align a at screw-driver or similar with the tab
on the lter and gently push.
4. With one tab loosened, pull the lter cap o
the old cartridge.
5. Align the shape on the inside of the lter cap
(highlighted above) with the shape on the end
of the new lter and push the two together
until it clicks rmly in place.
6. Remove protective cap from the top of the
new cartridge and ensure the two rubber
seals are in place.
7. Insert new cartridge and turn until it locates.
Install with a quarter-turn to the right
until cartridge comes to a complete stop
(Inlet water will automatically turn on).
8. Switch boiler back on and allow to ll
(15 minutes).
5
9. Drain-o approximately 10 litres of water.
10. TO RESET FILTER MONITOR: …Press and
hold “On/O” button, screen will go blank
but continue to hold, until “READY” message
is displayed on a red screen.
The boiler is now ready for use.
Adjusting Filter Monitor
(Optional):
The lter monitor is factory-set to “medium”
(default) which is suitable for most parts of the
UK with average or medium water hardness.
Hard and Soft Water: The eectiveness of
the lter will be reduced in hard water areas
(and should be replaced more frequently),
or extended in soft water areas where scale
is less of a problem.
If in doubt as to the hardness of water supplied
in your area, consult your local water authority or
Instanta Technical Support.
The lter monitor on the boiler can be changed
from the default “medium” setting to “hard” or
“soft” setting as follows;
Replace the lter cartridge (as steps 1 to 9
“AQ35 Filter Replacement” above). Then;
• Turn machine o.
• Press & hold “on/o” button (for
approximately 12 seconds) until red screen
shows “PR” in top-right corner, then release
button. Temperature setting is displayed.
• Press & hold button (long push)
for approximately 5 seconds until
screen changes to show “medium”
(default lter setting).
• Press button (short push) to scroll
between the dierent lter settings;
SOFT
MEDIUM
HARD
EMPTY FILTER SYMBOL (No Filter monitor).
• With the required lter setting selected,
Press & hold button (long push) for
4 seconds to save.
• Press & hold button (long push) for
approximately 6 seconds until display
goes blank.
• Turn machine back on again.
• TO RE-SET & CONFIRM NEW SETTINGS;
…Press & hold button, screen will go
blank but continue to hold, until “READY”
message is displayed on a red screen
(See; Step 10 above).
Cleaning
• Clean the external surfaces of the boiler
regularly to maintain good hygiene
• Empty the front drip-tray regularly
• Wipe external surfaces of the boiler with a
damp cloth. Do not use abrasive materials
on the outer surfaces.
• Wipe the draw-o tap each day to keep
clean and also prevent lime-scale deposits
from building up around the tap-outlet.
6
7
Maintenance & Service
Information
Filter:
Twist to the left and remove. See “AQ35
Filter Replacement” section above.
Descaling:
The boiler should be periodically checked for
scale build-up…see below:
In hard water areas, the boiler should be
descaled on a regular basis to maintain ecient
operation, minimise energy consumption, and
also retain the water quality. The frequency
depends on the hardness of the local mains
water supply and the regular replacement of
the AQ35 lter cartridge.
To de-scale:
• Disconnect machine from power supply
• Empty the machine through the draw-o
tap and allow to cool
• Lift o the outer-lid.
• Remove tank-lid (four xing screws).
• Lift out the evaporation plates (inside of
tank – Remember order of removal).
• Remove as much scale as possible by hand.
Any scale which is dicult to remove can be
dissolved by using a de-scaling solution.
• Wipe clean the level sensing probes.
• Flush with copious amounts of cold water to
ensure all traces of de-scaler are removed
before using the boiler again.
• Replace evaporation plates, tank-lid and
outer lid.
Draw-off tap:
The draw-o tap components are subject to
wear & tear. We strongly recommend that the
tap is inspected periodically (at least once a
year as part of a general maintenance routine).
It is advisable to keep a spare tap assembly in
case of emergencies.
Accessories & Spares (Tel: 01704 502905)
Tap Washer - TP1001/L
Tap Spring - TP1007/N
Tap Bonnet - HSTP100
Upper Tap Assembly - XTP1050/A
A full range of spares and accessories are
available from our spares department.
Service Warnings And Fault
Diagnosis
Your boiler is tted with an intelligent fault diagnosing
system and is able to detect various fault conditions.
Some of these are less serious and the machine will
continue to operate as normal, while others are more
serious and will disable the unit.
Before calling for service, switch the machine o
at the mains supply. Draw-o a small amount of
water and then switch back on after 10 minutes.
If the fault does not clear, call technical support
for advice.
7
The majority of possible faults have been
covered above. However, in certain
circumstances, safely controls within the
boiler may be activated. There are two
resettable safety cut-outs in your boiler:
1). Over-boil safety cut-out; (activates should
the boiler produce excess steam). This can be
due to;
- lime-scale within the tank,
- a temporary interruption in the water supply,
- a faulty temperature sensor.
To reset boiler; Switch o at the mains power
supply and allow the boiler to cool down for ten
minutes before switching back on (the safety
device should automatically reset).
2). Boil-dry safety cut-out – this will activate if
the boiler has been boiled dry, for example,
due to lime-scale build-up or water starvation.
If the boil-dry cut-out has activated, this will
require a manual reset. Contact Instanta
Technical Support department for assistance
with this.
Service/Technical Support:
Tel: 01704 502911
To ensure your service enquiry is handled
as eciently as possible, please have the
following information available;
• Brief description of problem
• Product Type (model)
• Serial Number (label on right-hand side
of machine). This is essential.
Guarantee
Your boiler is guaranteed for two years from date
of installation.
Our guarantee includes on site labour and parts
for problems caused by fault of manufacture and
component failure with the following exclusions:
• Problems caused by hard water and
lime scale. We regret that we cannot be
held responsible for problems caused by
hard water.
• Dripping Taps. These components are
subject to wear and tear but in the event
of a tap failing within twelve months of
installation, we will be pleased to replace the
tap assembly by post. Fitting is very simple
and requires no tools. An engineer call out is
not necessary.
• Accidental damage, misuse or use not in
accordance with these instructions and
damage caused by incorrect installation.
• The manufacturer disclaims any liability for
incidental, or consequential damages.
Safety Caution: Isolate boiler from
power supply before removing any
outer panels or attempting any reset.
FM 36413 EMS 75807

This manual suits for next models

4

Other Instanta Boiler manuals
Instanta WMS6TF Guide

Instanta

Instanta WMS6TF Guide

Instanta 1501F Guide

Instanta

Instanta 1501F Guide

Instanta SureFlow Touch WMS6PB Guide

Instanta

Instanta SureFlow Touch WMS6PB Guide
Instanta Barista Pro WB-2 Guide

Instanta

Instanta Barista Pro WB-2 Guide

Instanta SureFlow Compact Series Guide

Instanta

Instanta SureFlow Compact Series Guide

Instanta CTSP15PB Guide

Instanta

Instanta CTSP15PB Guide

Instanta CPF2100 Guide

Instanta

Instanta CPF2100 Guide

Instanta 1000-C Guide

Instanta

Instanta 1000-C Guide

Instanta SureFlow Plus Series Guide

Instanta

Instanta SureFlow Plus Series Guide

Instanta WM3 Guide

Instanta

Instanta WM3 Guide

Instanta SureFlow CTS13SL User manual

Instanta

Instanta SureFlow CTS13SL User manual

Instanta DB2000 Guide

Instanta

Instanta DB2000 Guide

Instanta Barista Pro SW Series User manual

Instanta

Instanta Barista Pro SW Series User manual

Instanta 1501F Guide

Instanta

Instanta 1501F Guide

Instanta InstaTap UCB Series Service manual

Instanta

Instanta InstaTap UCB Series Service manual

Instanta 1500 Operator's manual

Instanta

Instanta 1500 Operator's manual

Instanta SureFlow  Series Guide

Instanta

Instanta SureFlow Series Guide

Instanta CTS11F Guide

Instanta

Instanta CTS11F Guide

Instanta 1000-C Guide

Instanta

Instanta 1000-C Guide

Instanta WA2N Guide

Instanta

Instanta WA2N Guide

Instanta CH1000 Guide

Instanta

Instanta CH1000 Guide

Instanta Titan Pro Bulk User manual

Instanta

Instanta Titan Pro Bulk User manual

Instanta DB500 Guide

Instanta

Instanta DB500 Guide

Popular Boiler manuals by other brands

Viessmann Vitocrossal 300 CT3 SERIES Technical guide

Viessmann

Viessmann Vitocrossal 300 CT3 SERIES Technical guide

Laars MASCOT FT MFTCW user manual

Laars

Laars MASCOT FT MFTCW user manual

Ferroli ECONCEPT TECH 18 A Instructions for use

Ferroli

Ferroli ECONCEPT TECH 18 A Instructions for use

PB Heat Series GM User's information manual

PB Heat

PB Heat Series GM User's information manual

Slant/Fin Jaguar Caravan J-390C Series Application guide

Slant/Fin

Slant/Fin Jaguar Caravan J-390C Series Application guide

Potterton Performa 30 HE Installation & service instructions

Potterton

Potterton Performa 30 HE Installation & service instructions

Metal-Fach SMART EKO Operation and Maintenance Documentation

Metal-Fach

Metal-Fach SMART EKO Operation and Maintenance Documentation

Nibe PELLUX 100/20 user manual

Nibe

Nibe PELLUX 100/20 user manual

Baxi LUNA DUO-TEC 60 GA Installation instructions for the installer

Baxi

Baxi LUNA DUO-TEC 60 GA Installation instructions for the installer

Sharp EK-A205-CS Operation manual

Sharp

Sharp EK-A205-CS Operation manual

DOMUSA TEKNIK HDEEM SERIES Installation and operating instructions

DOMUSA TEKNIK

DOMUSA TEKNIK HDEEM SERIES Installation and operating instructions

Crown Boiler KSZ065 KSZ075 KSZ100 KSZ090 installation instructions

Crown Boiler

Crown Boiler KSZ065 KSZ075 KSZ100 KSZ090 installation instructions

Varmebaronen Vedolux 37 Installation, operation and maintenance

Varmebaronen

Varmebaronen Vedolux 37 Installation, operation and maintenance

Slant/Fin VSPH-120 Replacement parts list

Slant/Fin

Slant/Fin VSPH-120 Replacement parts list

A.O. Smith GWT-300 Specification sheet

A.O. Smith

A.O. Smith GWT-300 Specification sheet

Alpha Alpha HE CB25 Installation and servicing instructions

Alpha

Alpha Alpha HE CB25 Installation and servicing instructions

Atmos Multi Series Installation & servicing instructions

Atmos

Atmos Multi Series Installation & servicing instructions

Ecodense CELL CONDENSE 300 Installation, operating and maintenance manual

Ecodense

Ecodense CELL CONDENSE 300 Installation, operating and maintenance manual

manuals.online logo
manuals.online logoBrands
  • About & Mission
  • Contact us
  • Privacy Policy
  • Terms and Conditions

Copyright 2025 Manuals.Online. All Rights Reserved.