Installation [All Models]
a) POSITIONING THE UNIT
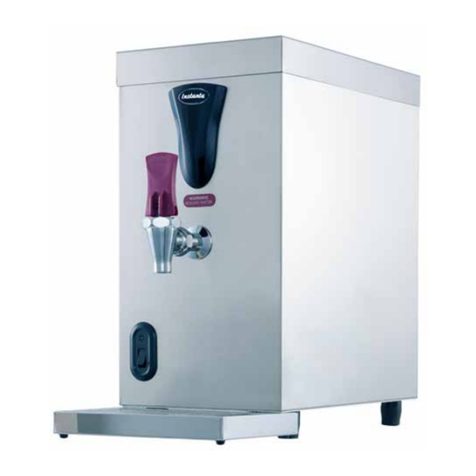
The heater should be positioned in a convenient
place, on a wall that is capable of supporting it safely
(refer to table above for weight of boiler). Use the
mounting template and fitting kit provided.
Position the boiler so that the tap is approximately
400mm above a draining board. Leave sufficient
space around the unit to enable access for servicing,
paying particular attention to the position of the top-
centre fixing screw that holds the case in place.
When mounting on wall…screw in the top two
screws leaving about 6mm protruding and hang the
machine using the keyhole slots provided. Once the
machine is positioned, tighten the top screws and
insert the bottom screw.
b) ELECTRICAL CONNECTION
The circuit should be protected by its own 13amp
double-pole connection unit with flex outlet to
BS5733, alternatively the circuit should have a means
of disconnection incorporated in fixed wiring, having a
contact separation of at least 3mm in all poles.
Minimum cable size is 1.5mm2. The use of an ELCB
is recommended.
• WARNING: This appliance must be earthed.
• Electrical installation should conform to current
I.E.E. wiring regulations.
• When using fixed wiring, the bare section of earth
must be sleeved to within 8mm of the end.
• Only a qualified electrician should carry out
this work.
BASE ENTRY OF CABLE: Use the cable gland.
Loosen cable-gripping nut and pass cable through
gland, leaving enough free cable to connect to
terminal block. Tighten cable gland grip nut.
Alternative Rear Entry Installation (Electrical):
The fixed or flexible cable is connected direct to the
terminal block – the cable gland is not utilised.
DO NOT SWITCH ON UNTIL THE INSTALLATION
IS COMPLETE AND THE CASE AND TAP ARE IN
PLACE
c) WATER CONNECTION
NOTE: Although it will not harm the boiler, it should
not be operated with the water supply turned off.
Model WA2N WA5N WA10N
Width mm 254 290 340
Depth mm 187 205 247
Height mm 428 432 480
Voltage & Supply V230, AC (50Hz) 230, AC (50Hz) 230, AC (50Hz)
Power Rating kW 2.0 single-phase 3.0 single-phase 3.0 single-phase
Fill Type Automatic Automatic Automatic
Rapid Draw Off Litres 2.5 5 10
Weight (empty) KG 6.5 7.5 9.7
Weight (full) KG 10.5 14.7 22.7
Water Inlet
Pressure Bar 2 to 7 2 to 7 bar 2 to 7 bar
Technical Information
Outer casing and tank are constructed in type-304 and type-316 grade stainless steel. The tank is fully
insulated with high-temperature polystyrene.
The appliance has electronic control of the main functions. This means that the heating, filling and temperature
are controlled precisely within given parameters.
The water supply must have a pressure not
exceeding 7 bar and no lower than 2 bar. If the
mains water pressure is below 2 bar a fault
situation could arise.
If the water pressure exceeds 7 bar a suitable water
pressure reducing valve will need to be fitted to the
water supply to bring it to a level that the machine
can cope with. Failure to do so could result in the
boiler overfilling.
THE MANUFACTURERS CANNOT BE HELD
RESPONSIBLE FOR ANY MACHINE MALFUNCTION
IF THE WATER PRESSURE IS NOT WITHIN THE
RANGE STATED. IF IN DOUBT, CONSULT YOUR
WATER SUPPLY COMPANY.
• Connect to a suitable cold water drinking
supply using 15mm copper pipe and using “T”
piece supplied.
• Push the “T” piece firmly onto the water inlet
solenoid pipe with the brass plug facing forward
(Note: the “T” has been blanked off using a brass
plug – leave the plug in-place).
• Push the 15mm cold water supply firmly into the
bottom of the fitting.
Alternative Rear Entry Installation (Water
Connection): Remove the brass plug from “T” piece
and re-fit into the bottom of the “T” piece instead.
Push firmly onto the inlet solenoid pipe with the “T”
facing the wall. Push the 15mm cold water supply
firmly into the “T” fitting.
NOTE: To avoid damage to the appliance, do not use
any solder connections whilst pipes are connected to
the boiler.
• A 15mm stop valve must be fitted between the
water supply and the boiler so that it can be
isolated.
• Water purification filters are available from
Instanta to ensure fresh tasting water. In hard
water areas, scale can cause problems.
Fitting a scale reducer will help minimise scale
but will not eliminate scale completely.
WE REGRET THAT INSTANTA CANNOT BE HELD
RESPONSIBLE FOR SCALE RELATED PROBLEMS
IF A SCALE REDUCER HAS BEEN INSTALLED
d) OVERFLOW/DRAIN
The fitting kit includes a 15mm, straight push-
fit coupling with a small piece of 15mm copper
pipe pushed into it. This connector must be
pushed onto the corresponding brass overflow
connection on the services-bracket (along side
the solenoid).
If the overflow is to be extended, remove the copper
pipe (supplied) and replace with 15mm pipe of your
chosen length. The pipe must have a continuous fall
and should not be longer than 300mm (if a longer run
is required, use 22mm pipe to avoid airlocks.
The overflow pipe should have no more than four
right angle bends and should discharge to a safe,
visible position.
Alternative Rear Entry Installation (Overflow/Drain):
If rear entry has been chosen, the straight push-on
coupling must be replaced with a 15mm push-fit
elbow (available from plumber’s merchants).
Push the elbow onto the brass overflow connection
on the services-bracket (alongside the solenoid).
As described above, the pipe must have a
continuous fall etc.
Under certain conditions the overflow pipe
could vent steam, hot water or cold water and
the manufacturers cannot be held responsible
should damage occur from such discharge if the
overflow pipe has not been directed to a suitable
position where overflowing water can run away
safely.
VENT PIPE:
A small silicone rubber tube connects the tank-lid to
the back panel. Ensure this is connected (and hasn’t
come off in transit) and that the outlet fitting in the
back-panel is not obstructed.
e) FITTING CASE
• Attach the Earth wire connection to bottom of
stainless steel boiler-case using M4 screw &
washer supplied.
• Offer up the case to the wall-mounted boiler and
plug-in communications-lead (from circuit board
to the LED light display) located on inside of
boiler-case.
• With the communications lead and Earth wire
connected, locate the boiler case onto the wall-
mounted boiler assembly. Secure case in position
using M4 screw (supplied) at top and bottom of
the case.
• Ensure yellow rubber sealing washer is in place
then carefully screw in the tap assembly (use a
28mm open-ended spanner to tighten). Do not
use grips that are likely to scratch the chrome.
• Push the grey tap collar firmly into place and
twist to snugly fit against the plastic front panel.
4 5


