5
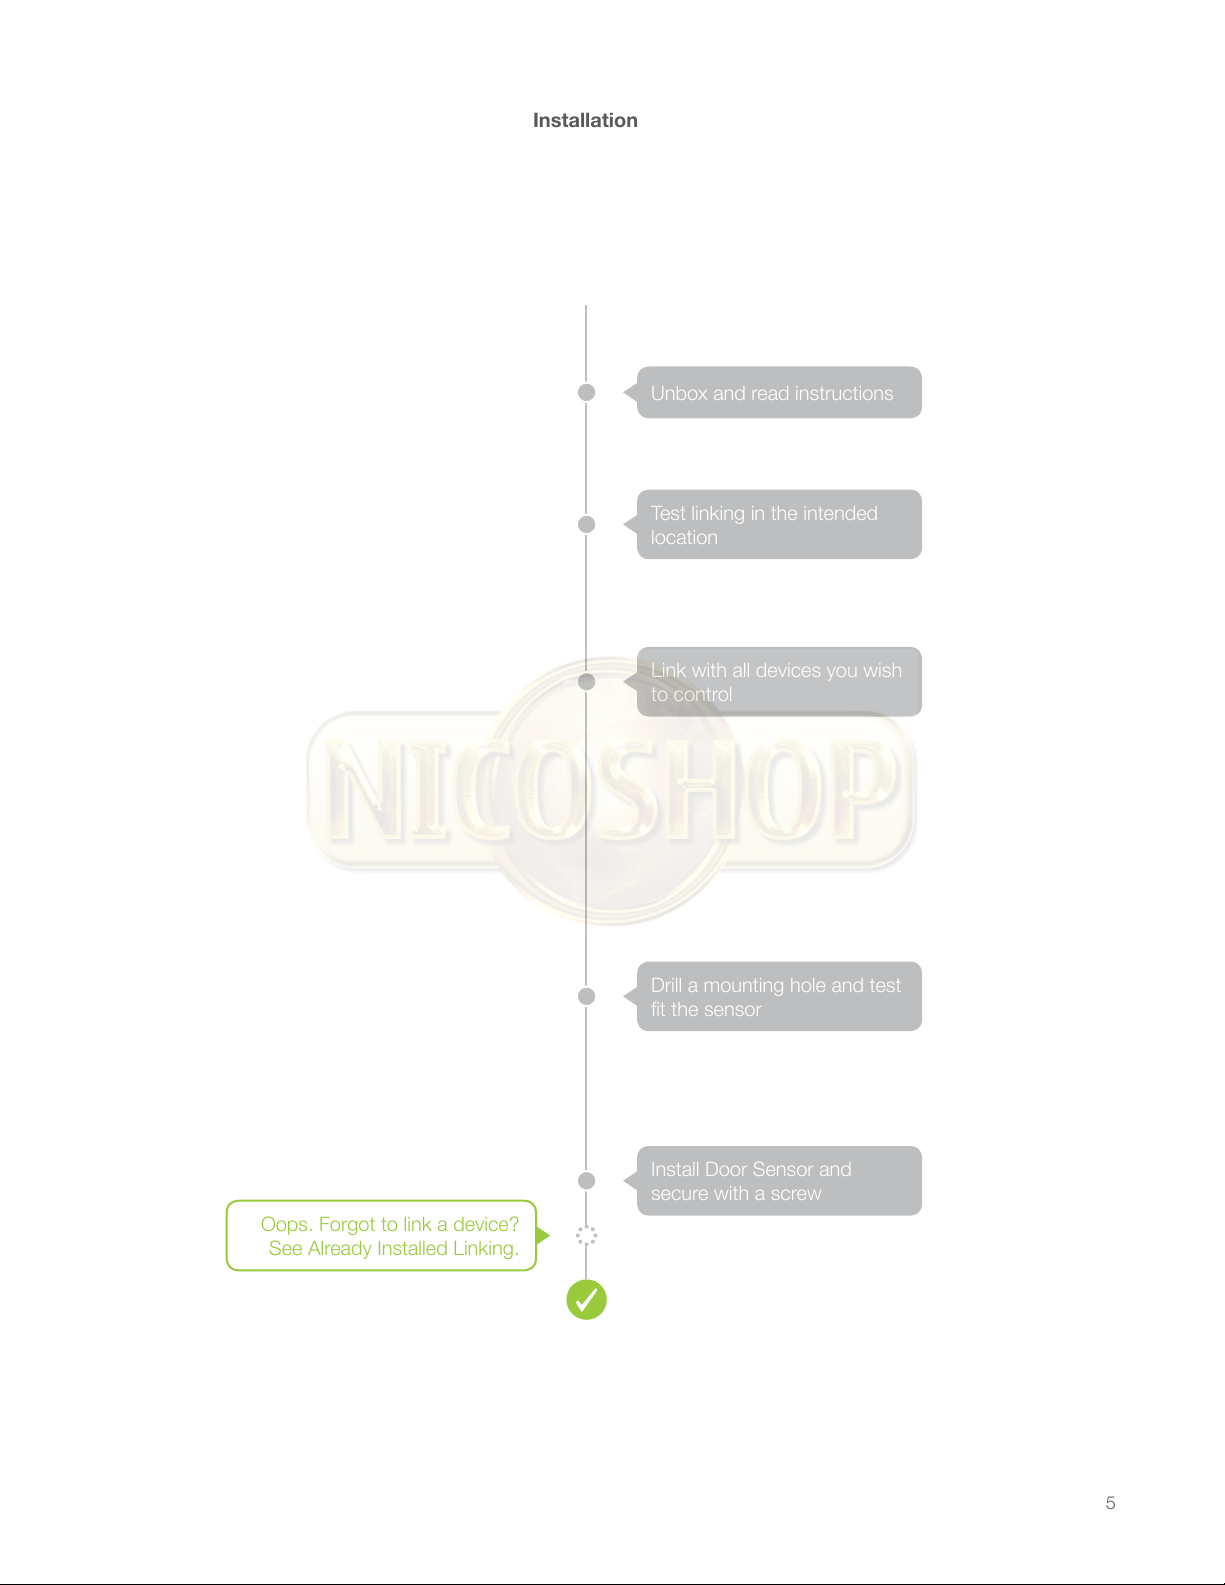
Installation
Unbox and read instructions
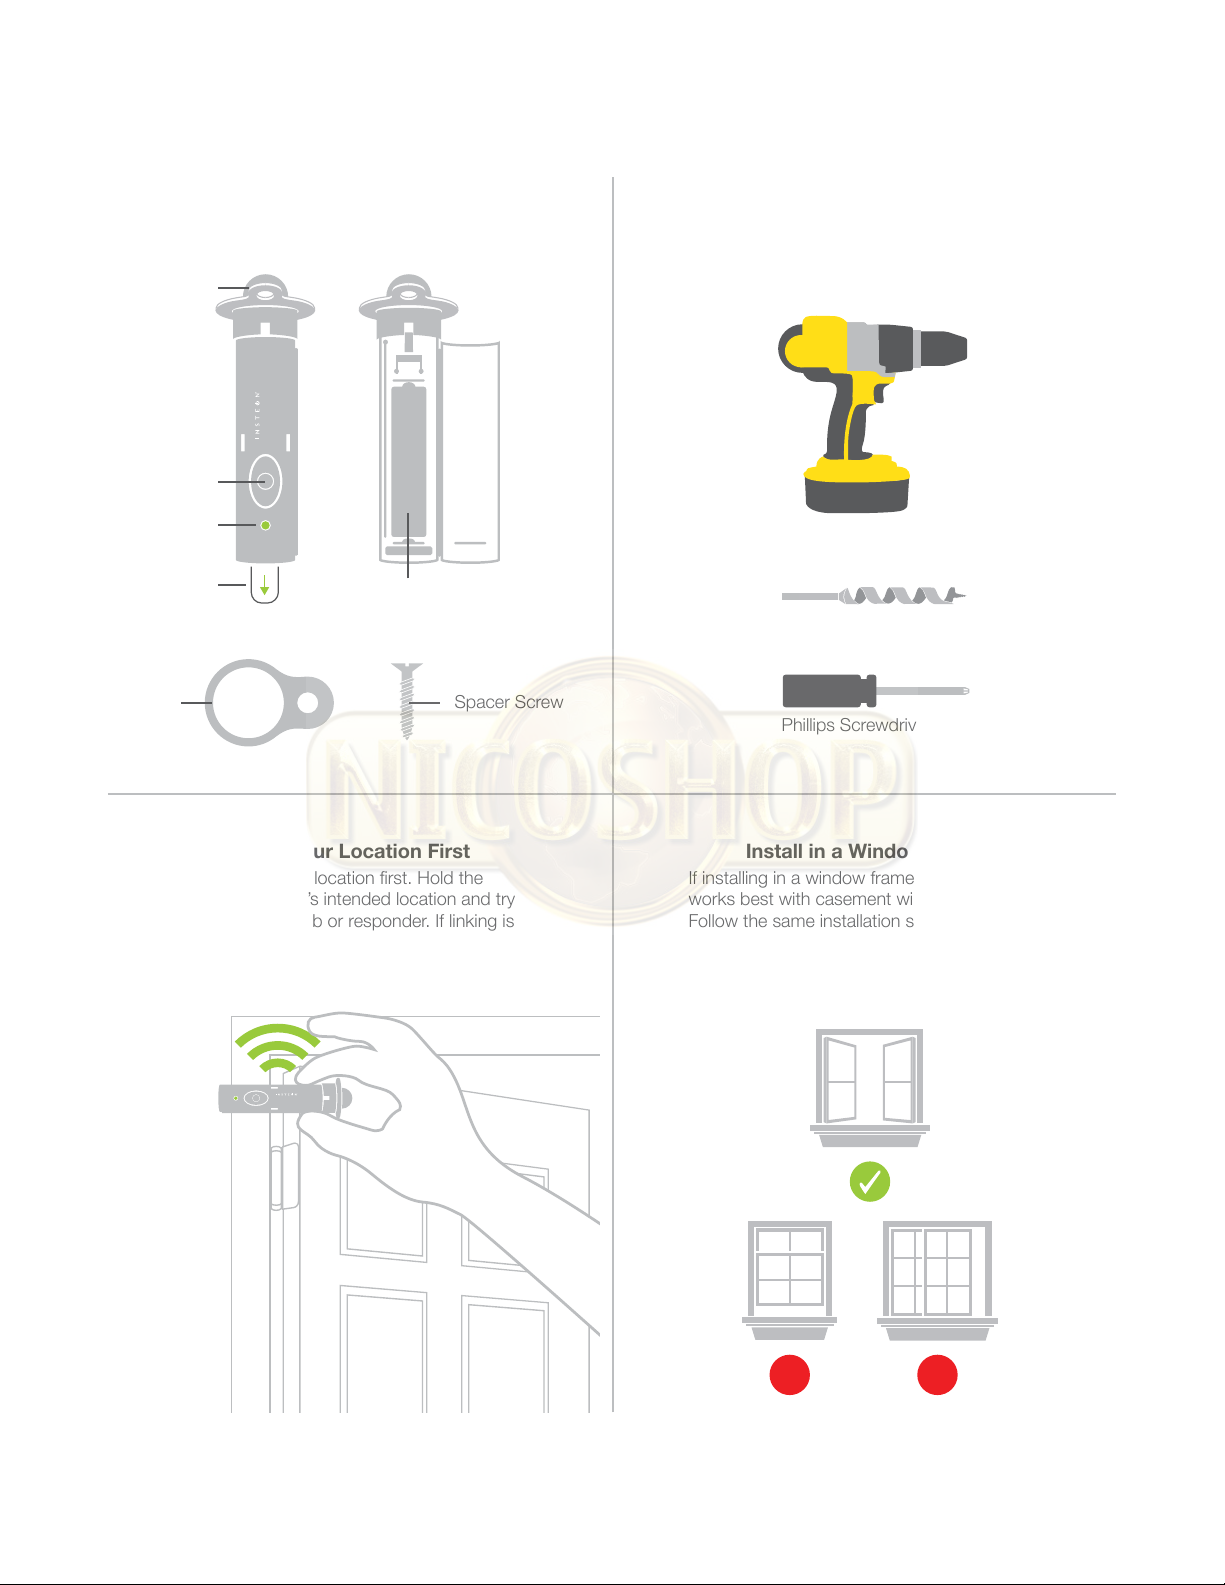
Test linking in the intended
location
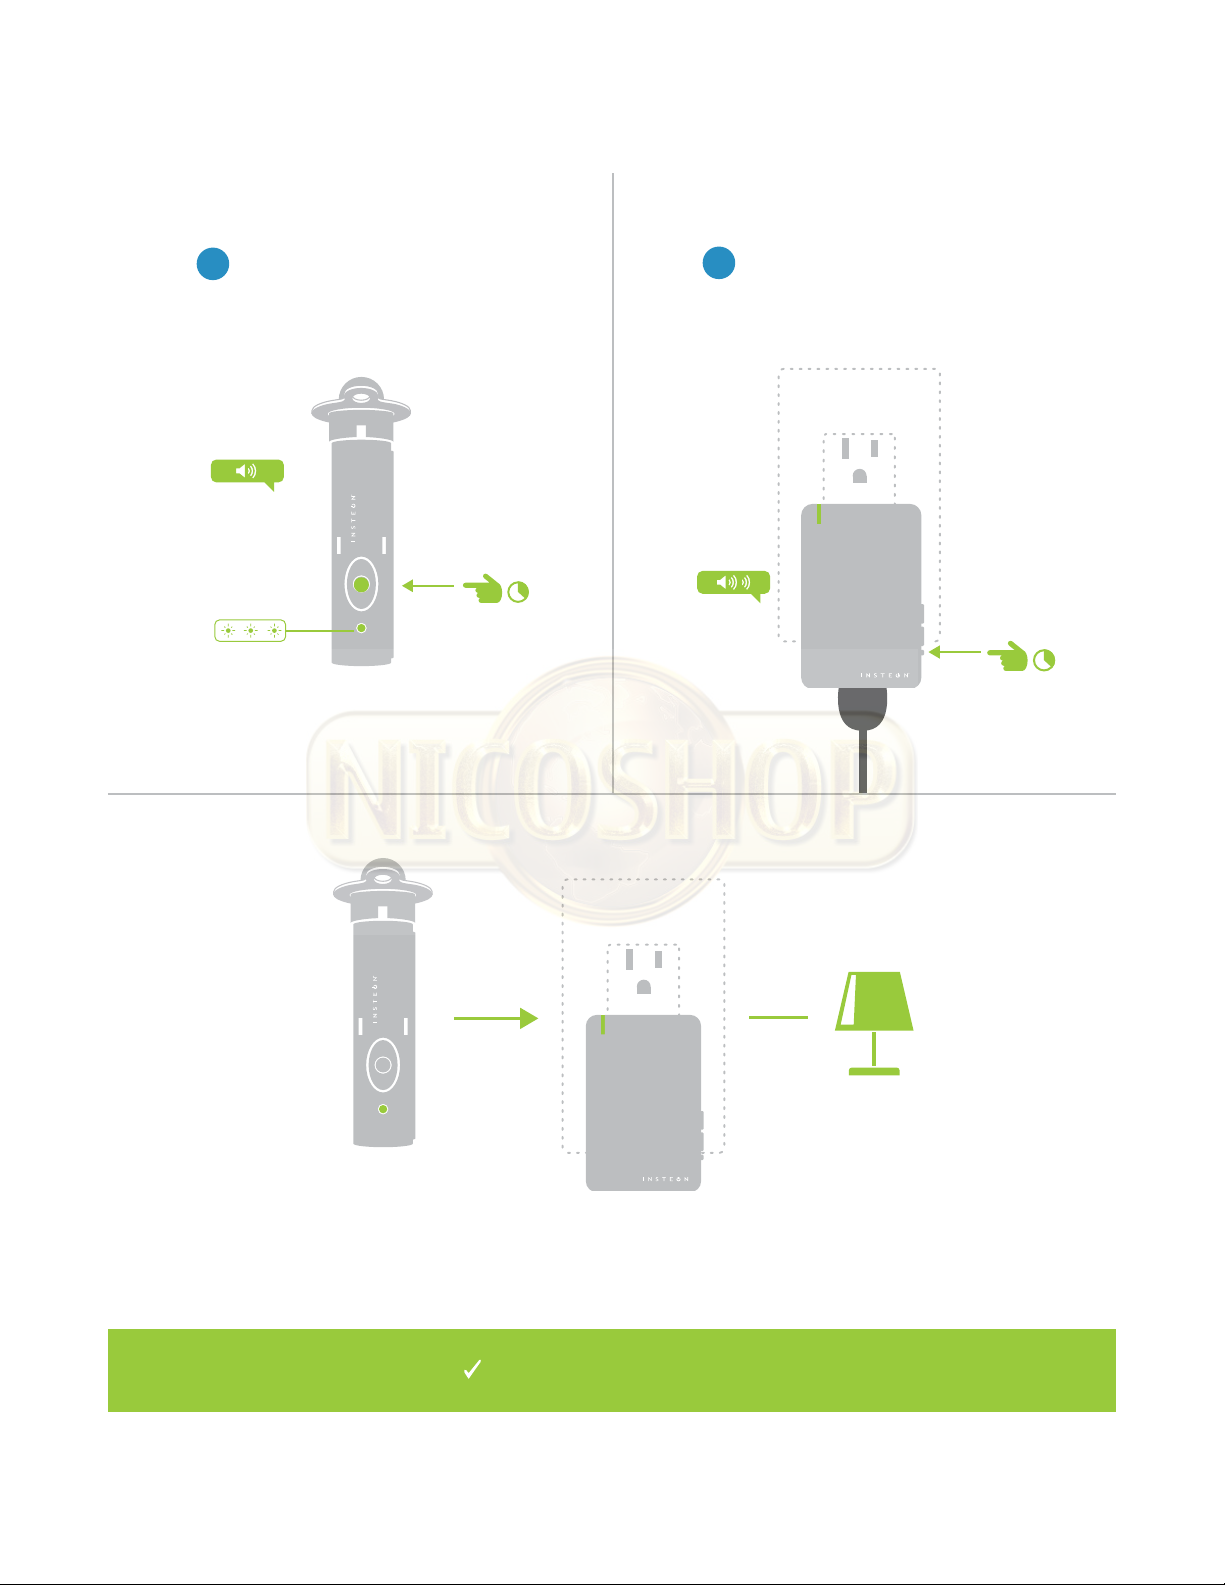
Link with all devices you wish
to control
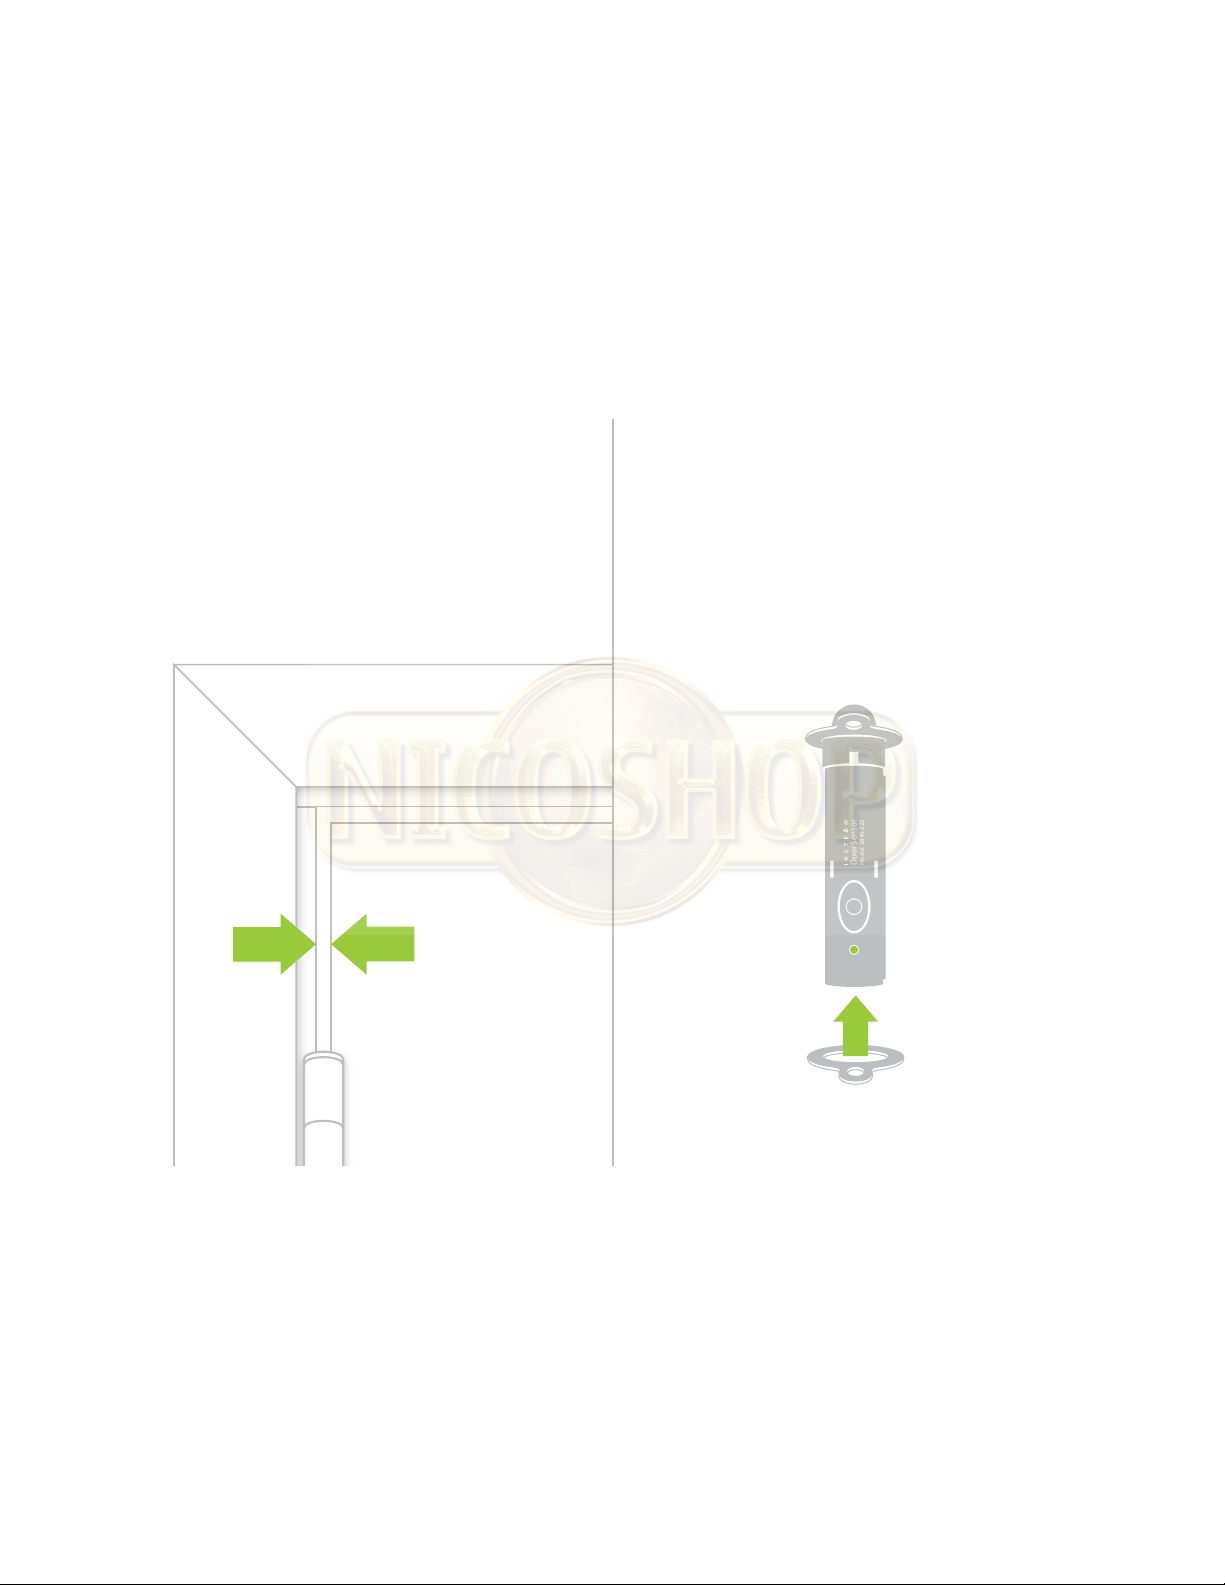
Drill a mounting hole and test
t the sensor
Install Door Sensor and
secure with a screw
Oops. Forgot to link a device?
See Already Installed Linking.
$
RADIO RADIO
SMOKEANDCARBON
MONOXIDEALARM
a
1:30
iOS
MANUAL
INSTEON
Quick Start Guide
INSTEON
Owner’s Manual
This device complies with FCC
Rules and Industry Canada
license-exempt RSS standard(s).
Operation is subject to the
following two conditions: (1) this
device may not cause harmful
interference, and (2) this device
must accept any interference,
including interference that may
cause undesired operation of
the device.
INSTEON
Documentation
720P
BUSINESS REPLY MAIL
ATTN: INSTEON
16542 MILLIKAN AVE
IRVINE CA 92606
ALWAYSON
Installation
Unbox and read instructions
Test linking in the intended
location
Link with all devices you wish
to control
Drill a mounting hole and test
t the sensor
Install Door Sensor and
secure with a screw
Oops. Forgot to link a device?
See Already Installed Linking.
$
RADIO RADIO
SMOKEANDCARBON
MONOXIDEALARM
a
1:30
iOS
MANUAL
INSTEON
Quick Start Guide
INSTEON
Owner’s Manual
This device complies with FCC
Rules and Industry Canada
license-exempt RSS standard(s).
Operation is subject to the
following two conditions: (1) this
device may not cause harmful
interference, and (2) this device
must accept any interference,
including interference that may
cause undesired operation of
the device.
This device complies with FCC
Rules and Industry Canada
license-exempt RSS standard(s).
Operation is subject to the
following two conditions: (1) this
device may not cause harmful
interference, and (2) this device
must accept any interference,
including interference that may
cause undesired operation of
the device.
INSTEON
Documentation
720P
BUSINESS REPLY MAIL
ATTN: INSTEON
16542 MILLIKAN AVE
IRVINE CA 92606
ALWAYSON