Instron AutoX Manual

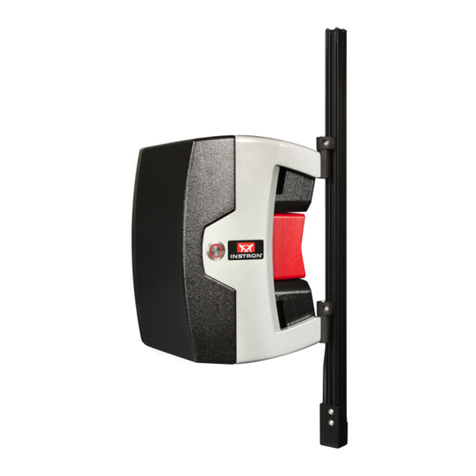
AutoX Automatic Contacting Extensometer
Operator’s Guide M16-16654-EN Revision C
The difference is measurable
®

Electromagnetic Compatibility
Where applicable, this equipment is designed to comply with International Electromagnetic
Compatibility (EMC) standards.
To ensure reproduction of this EMC performance, connect this equipment to a low impedance
ground connection. Typical suitable connections are a ground spike or the steel frame of a
building.
Proprietary Rights Notice
This document and the information that it contains are the property of Illinois Tool Works Inc.
(ITW). Rights to duplicate or otherwise copy this document and rights to disclose the document
and the information that it contains to others and the right to use the information contained
therein may be acquired only by written permission signed by a duly authorized officer of ITW.
Trademarks
Instron®is a registered trademark of Illinois Tool Works Inc. (ITW). Other names, logos, icons
and marks identifying Instron products and services referenced herein are trademarks of ITW
and may not be used without the prior written permission of ITW.
Other product and company names listed are trademarks or trade names of their respective
companies.
Original Instructions
Copyright © 2013 Illinois Tool Works Inc. All rights reserved. All of the specifications shown
in this document are subject to change without notice.
Worldwide Headquarters
Instron
825 University Avenue
Norwood, MA 02062-2643
United States of America
European Headquarters
Instron
Coronation Road
High Wycombe, Bucks HP12 3SY
United Kingdom
Industrial Products Group
Instron
900 Liberty Street
Grove City, PA 16127
United States of America

3
Preliminary Pages
Product Support: www.instron.com
General Safety Precautions
Materials testing systems are potentially hazardous.
Materials testing involves inherent hazards from high forces, rapid motions, and
stored energy. You must be aware of all moving and operating components in
the testing system that are potentially hazardous, particularly force actuators or
a moving crosshead.
Carefully read all relevant manuals and observe all Warnings and Cautions. The
term Warning is used where a hazard may lead to injury or death. The term
Caution is used where a hazard may lead to damage to equipment or to loss of
data.
Instron products, to the best of its knowledge, comply with various national and
international safety standards, in as much as they apply to materials and
structural testing. We certify that our products comply with all relevant EU
directives (CE mark).
Because of the wide range of applications with which our instruments are used,
and over which we have no control, additional protection devices and operating
procedures may be necessary due to specific accident prevention regulations,
safety regulations, further EEA directives or locally valid regulations. The extent
of our delivery regarding protective devices is defined in your initial sales
quotation. We are thus free of liability in this respect.
At your request, we will gladly provide advice and quotations for additional
safety devices such as protective shielding, warning signs or methods of
restricting access to the equipment.
The following pages detail various general warnings that you must heed at all
times while using materials testing equipment. You will find more specific
Warnings and Cautions in the text whenever a potential hazard exists.
Your best safety precautions are to gain a thorough understanding of the
equipment by reading your instruction manuals and to always use good
judgement.
It is our strong recommendation that you should carry out your own product
safety risk assessment.

Preliminary Pages
4M16-16654-EN
Hazard - Press the Emergency Stop button whenever you consider that an
unsafe condition exists.
The Emergency Stop button removes hydraulic power or electrical drive from the
testing system and brings the hazardous elements of the system to a stop as
quickly as possible. It does not isolate the system from electrical power, other
means are provided to disconnect the electrical supply. Whenever you consider
that safety may be compromised, stop the test using the Emergency Stop
button. Investigate and resolve the situation that caused the use of the
Emergency Stop button before you reset it.
Flying Debris Hazard - Make sure that test specimens are installed correctly
in grips or fixtures in order to eliminate stresses that can cause breakage of
grip jaws or fixture components.
Incorrect installation of test specimens creates stresses in grip jaws or fixture
components that can result in breakage of these components. The high
energies involved can cause the broken parts to be projected forcefully some
distance from the test area. Install specimens in the center of the grip jaws in
line with the load path. Insert specimens into the jaws by at least the amount
recommended in your grip documentation. This amount can vary between 66%
to 100% insertion depth; refer to supplied instructions for your specific grips.
Use any centering and alignment devices provided.
Hazard - Protect electrical cables from damage and inadvertent
disconnection.
The loss of controlling and feedback signals that can result from a disconnected
or damaged cable causes an open loop condition that may drive the actuator or
crosshead rapidly to its extremes of motion. Protect all electrical cables,
particularly transducer cables, from damage. Never route cables across the
floor without protection, nor suspend cables overhead under excessive strain.
Use padding to avoid chafing where cables are routed around corners or
through wall openings.
High/Low Temperature Hazard - Wear protective clothing when handling
equipment at extremes of temperature.
Materials testing is often carried out at non-ambient temperatures using ovens,
furnaces or cryogenic chambers. Extreme temperature means an operating
temperature exceeding 60 °C (140 °F) or below 0 °C (32 °F). You must use
protective clothing, such as gloves, when handling equipment at these
temperatures. Display a warning notice concerning low or high temperature
operation whenever temperature control equipment is in use. You should note
that the hazard from extreme temperature can extend beyond the immediate
area of the test.

5
Preliminary Pages
Product Support: www.instron.com
Crush Hazard - Take care when installing or removing a specimen,
assembly, structure, or load string component.
Installation or removal of a specimen, assembly, structure, or load string
component involves working inside the hazard area between the grips or
fixtures. When working in this area, ensure that other personnel cannot operate
any of the system controls. Keep clear of the jaws of a grip or fixture at all times.
Keep clear of the hazard area between the grips or fixtures during actuator or
crosshead movement. Ensure that all actuator or crosshead movements
necessary for installation or removal are slow and, where possible, at a low
force setting.
Hazard - Do not place a testing system off-line from computer control
without first ensuring that no actuator or crosshead movement will occur
upon transfer to manual control.
The actuator or crosshead will immediately respond to manual control settings
when the system is placed off-line from computer control. Before transferring to
manual control, make sure that the control settings are such that unexpected
actuator or crosshead movement cannot occur.
Robotic Motion Hazard - Keep clear of the operating envelope of a robotic
device unless the device is de-activated.
The robot in an automated testing system presents a hazard because its
movements are hard to predict. The robot can go instantly from a waiting state
to high speed operation in several axes of motion. During system operation,
keep away from the operating envelope of the robot. De-activate the robot
before entering the envelope for any purpose, such as reloading the specimen
magazine.
Hazard - Set the appropriate limits before performing loop tuning or running
waveforms or tests.
Operational limits are included within your testing system to suspend motion or
shut off the system when upper and/or lower bounds of actuator or crosshead
travel, or force or strain, are reached during testing. Correct setting of
operational limits by the operator, prior to testing, will reduce the risk of damage
to test article and system and associated hazard to the operator.
Electrical Hazard - Disconnect the electrical power supply before removing
the covers to electrical equipment.
Disconnect equipment from the electrical power supply before removing any
electrical safety covers or replacing fuses. Do not reconnect the power source
while the covers are removed. Refit covers as soon as possible.

Preliminary Pages
6M16-16654-EN
Rotating Machinery Hazard - Disconnect power supplies before removing
the covers to rotating machinery.
Disconnect equipment from all power supplies before removing any cover which
gives access to rotating machinery. Do not reconnect any power supply while
the covers are removed unless you are specifically instructed to do so in the
manual. If the equipment needs to be operated to perform maintenance tasks
with the covers removed, ensure that all loose clothing, long hair, etc. is tied
back. Refit covers as soon as possible.
Hazard - Shut down the hydraulic power supply and discharge hydraulic
pressure before disconnection of any hydraulic fluid coupling.
Do not disconnect any hydraulic coupling without first shutting down the
hydraulic power supply and discharging stored pressure to zero. Tie down or
otherwise secure all pressurized hoses to prevent movement during system
operation and to prevent the hose from whipping about in the event of a
rupture.
Hazard - Shut off the supply of compressed gas and discharge residual gas
pressure before you disconnect any compressed gas coupling.
Do not release gas connections without first disconnecting the gas supply and
discharging any residual pressure to zero.
Explosion Hazard - Wear eye protection and use protective shields or
screens whenever any possibility exists of a hazard from the failure of a
specimen, assembly or structure under test.
Wear eye protection and use protective shields or screens whenever a risk of
injury to operators and observers exists from the failure of a test specimen,
assembly or structure, particularly where explosive disintegration may occur.
Due to the wide range of specimen materials, assemblies or structures that may
be tested, any hazard resulting from the failure of a test specimen, assembly or
structure is entirely the responsibility of the owner and the user of the
equipment.
Hazard - Ensure components of the load string are correctly pre-loaded to
minimize the risk of fatigue failure.
Dynamic systems, especially where load reversals through zero are occurring,
are at risk of fatigue cracks developing if components of the load string are not
correctly pre-loaded to one another. Apply the specified torque to all load string
fasteners and the correct setting to wedge washers or spiral washers. Visually
inspect highly stressed components such as grips and threaded adapters prior
to every fatigue test for signs of wear or fatigue damage.

7
Preliminary Pages
Product Support: www.instron.com
Table of Contents
Chapter 1 Introduction . . . . . . . . . . . . . . . . . . . . . . . . . . . . . . . . . . . . . . . . . . . . . . . . 9
Description . . . . . . . . . . . . . . . . . . . . . . . . . . . . . . . . . . . . . . . . . . . . . . . . . . . . . . . . . . . . . . . . 9
Principle of Operation. . . . . . . . . . . . . . . . . . . . . . . . . . . . . . . . . . . . . . . . . . . . . . . . . . . . . . . . 9
Applications. . . . . . . . . . . . . . . . . . . . . . . . . . . . . . . . . . . . . . . . . . . . . . . . . . . . . . . . . . . . . . . 11
Product Support . . . . . . . . . . . . . . . . . . . . . . . . . . . . . . . . . . . . . . . . . . . . . . . . . . . . . . . . . . . 11
Product Documentation . . . . . . . . . . . . . . . . . . . . . . . . . . . . . . . . . . . . . . . . . . . . . . . . . . . . . 11
Chapter 2 Specifications. . . . . . . . . . . . . . . . . . . . . . . . . . . . . . . . . . . . . . . . . . . . . . 13
General . . . . . . . . . . . . . . . . . . . . . . . . . . . . . . . . . . . . . . . . . . . . . . . . . . . . . . . . . . . . . . . . . . 13
Environmental. . . . . . . . . . . . . . . . . . . . . . . . . . . . . . . . . . . . . . . . . . . . . . . . . . . . . . . . . . . . . 14
Dimensions and Weight . . . . . . . . . . . . . . . . . . . . . . . . . . . . . . . . . . . . . . . . . . . . . . . . . . . . . 14
Chapter 3 Installation . . . . . . . . . . . . . . . . . . . . . . . . . . . . . . . . . . . . . . . . . . . . . . . . 17
Before you Begin. . . . . . . . . . . . . . . . . . . . . . . . . . . . . . . . . . . . . . . . . . . . . . . . . . . . . . . . . . . 17
Equipment. . . . . . . . . . . . . . . . . . . . . . . . . . . . . . . . . . . . . . . . . . . . . . . . . . . . . . . . . . . . . . . . 18
Moving the AutoX . . . . . . . . . . . . . . . . . . . . . . . . . . . . . . . . . . . . . . . . . . . . . . . . . . . . . . . . . . 18
Removing the AutoX from a frame. . . . . . . . . . . . . . . . . . . . . . . . . . . . . . . . . . . . . . . . . 18
Reinstalling the AutoX onto a frame . . . . . . . . . . . . . . . . . . . . . . . . . . . . . . . . . . . . . . . 25
Alignment and Setup . . . . . . . . . . . . . . . . . . . . . . . . . . . . . . . . . . . . . . . . . . . . . . . . . . . 27
Chapter 4 Preparing to Test . . . . . . . . . . . . . . . . . . . . . . . . . . . . . . . . . . . . . . . . . . . 31
Setting up the AutoX for Flexure Testing . . . . . . . . . . . . . . . . . . . . . . . . . . . . . . . . . . . . . . . . 31
Moving the AutoX into and out of the Test Space. . . . . . . . . . . . . . . . . . . . . . . . . . . . . . . . . 33
Electromechanical Frame Mounting . . . . . . . . . . . . . . . . . . . . . . . . . . . . . . . . . . . . . . . 33
Static Hydraulic Frame Mounting . . . . . . . . . . . . . . . . . . . . . . . . . . . . . . . . . . . . . . . . . 34
Routine Adjustments . . . . . . . . . . . . . . . . . . . . . . . . . . . . . . . . . . . . . . . . . . . . . . . . . . . . . . . 35
Setting the Default Opening of the Wide Arms. . . . . . . . . . . . . . . . . . . . . . . . . . . . . . . 35
Setting the Tension of the Arms. . . . . . . . . . . . . . . . . . . . . . . . . . . . . . . . . . . . . . . . . . . 36
Setting Limit Stops . . . . . . . . . . . . . . . . . . . . . . . . . . . . . . . . . . . . . . . . . . . . . . . . . . . . . . . . . 36
Initialization. . . . . . . . . . . . . . . . . . . . . . . . . . . . . . . . . . . . . . . . . . . . . . . . . . . . . . . . . . . . . . . 37
Reference stop settings . . . . . . . . . . . . . . . . . . . . . . . . . . . . . . . . . . . . . . . . . . . . . . . . . . . . . 40

Preliminary Pages
8M16-16654-EN
Guidelines for setting the reference stop . . . . . . . . . . . . . . . . . . . . . . . . . . . . . . . . . . . 40
Chapter 5 Testing. . . . . . . . . . . . . . . . . . . . . . . . . . . . . . . . . . . . . . . . . . . . . . . . . . . . 43
Before you Begin. . . . . . . . . . . . . . . . . . . . . . . . . . . . . . . . . . . . . . . . . . . . . . . . . . . . . . . . . . . 43
Running a Test . . . . . . . . . . . . . . . . . . . . . . . . . . . . . . . . . . . . . . . . . . . . . . . . . . . . . . . . . . . . 43
Troubleshooting . . . . . . . . . . . . . . . . . . . . . . . . . . . . . . . . . . . . . . . . . . . . . . . . . . . . . . . . . . . 46
Effects of Vibration . . . . . . . . . . . . . . . . . . . . . . . . . . . . . . . . . . . . . . . . . . . . . . . . . . . . . 46
High Energy Breaks . . . . . . . . . . . . . . . . . . . . . . . . . . . . . . . . . . . . . . . . . . . . . . . . . . . . 47
Specimens that can damage the extensometer. . . . . . . . . . . . . . . . . . . . . . . . . . . . . . 47
Arms resist being moved manually . . . . . . . . . . . . . . . . . . . . . . . . . . . . . . . . . . . . . . . . 47
Chapter 6 Maintenance and Parts. . . . . . . . . . . . . . . . . . . . . . . . . . . . . . . . . . . . . . 49
Routine Maintenance . . . . . . . . . . . . . . . . . . . . . . . . . . . . . . . . . . . . . . . . . . . . . . . . . . . . . . . 49
Daily Maintenance . . . . . . . . . . . . . . . . . . . . . . . . . . . . . . . . . . . . . . . . . . . . . . . . . . . . . 49
Maintenance of Knife Edges . . . . . . . . . . . . . . . . . . . . . . . . . . . . . . . . . . . . . . . . . . . . . 49
Replacing the Return Spring . . . . . . . . . . . . . . . . . . . . . . . . . . . . . . . . . . . . . . . . . . . . . 50
Installing Shock-Tolerant Knife Edges . . . . . . . . . . . . . . . . . . . . . . . . . . . . . . . . . . . . . . 51
Repair . . . . . . . . . . . . . . . . . . . . . . . . . . . . . . . . . . . . . . . . . . . . . . . . . . . . . . . . . . . . . . . . . . . 52
Ancillary Parts . . . . . . . . . . . . . . . . . . . . . . . . . . . . . . . . . . . . . . . . . . . . . . . . . . . . . . . . . . . . . 53
Replaceable Parts . . . . . . . . . . . . . . . . . . . . . . . . . . . . . . . . . . . . . . . . . . . . . . . . . . . . . . . . . 53
Appendix A Conformance Documents . . . . . . . . . . . . . . . . . . . . . . . . . . . . . . . . . . . 55
Certificate of Conformance . . . . . . . . . . . . . . . . . . . . . . . . . . . . . . . . . . . . . . . . . . . . . . . . . . 56

9
Product Support: www.instron.com
Chapter 1
Introduction
•Description . . . . . . . . . . . . . . . . . . . . . . . . . . . . . . . . . . . . . . . . . . . . . . . . . . . . . . . . . . 9
•Principle of Operation . . . . . . . . . . . . . . . . . . . . . . . . . . . . . . . . . . . . . . . . . . . . . . . . . 9
•Applications . . . . . . . . . . . . . . . . . . . . . . . . . . . . . . . . . . . . . . . . . . . . . . . . . . . . . . . . 11
•Product Support . . . . . . . . . . . . . . . . . . . . . . . . . . . . . . . . . . . . . . . . . . . . . . . . . . . . . 11
•Product Documentation . . . . . . . . . . . . . . . . . . . . . . . . . . . . . . . . . . . . . . . . . . . . . . . 11
Description
The AutoX Automatic Contacting Extensometer utilizes automatic gauge length
positioning and attachment to the test specimen to improve productivity and
repeatability compared to traditional clip-on extensometers.
When not in use, the sliding mounting assembly allows operators to quickly move the
extensometer out of the test area to a safe storage location behind the frame. This
allows operators to switch grips and fixtures without the need to remove the
extensometer completely from the test setup.
Principle of Operation
The AutoX is controlled through a USB interface to the Instron testing machine and
Bluehill®software. The software user interface facilitates opening and closing the arms,
setting the reference arm position and setting the gauge length.
Prior to the start of a test, the motor automatically disengages from the measuring
arms, allowing them to travel freely with the specimen. The measuring arms are
counterbalanced on a nearly frictionless guidance system, minimizing any influence on
the properties of the test specimen.

Chapter: Introduction
10 M16-16654-EN
Figure 1. Overview of the AutoX Automatic Contacting Extensometer

11
Applications
Product Support: www.instron.com
Applications
The AutoX is suitable for the following:
•Metals tensile testing
•Composites tensile testing
•Plastics tensile and flexure testing
•Elastomer tensile testing (refer to Caution note below)
•Compression testing
•Various specimen shapes including round, flat, hexagonal and strip
Caution
The AutoX may not be suitable for specimens, typically elastomers, that break with a
“whipping” motion that could damage the measuring arms.
The AutoX is supplied with arms that reach 250mm from the body of the instrument. For
certain specialist systems, longer arms (300mm and 350mm) are available.
Product Support
Instron provides documentation, including manuals and online help, that can answer
many of the questions you may have. It is recommended that you review the
documentation sent with the system you purchased for possible solutions to your
questions.
If you cannot find answers in these sources, contact Instron’s Service department
directly. A list of Instron offices is available on our website at www.instron.com. In the
US and Canada, you can call directly at 1-800-473-7838.
Product Documentation
Instron offers a comprehensive range of documentation to help you get the most out of
your Instron products. Depending on what you have purchased, your documentation
may include some or all of the following:

Chapter: Introduction
12 M16-16654-EN
We welcome your feedback on any aspect of the product documentation. Please email
Operator’s Guide How to use your system components and controls,
procedures for setting limits, calibration and other
frequently performed operating tasks.
System Support Information about system installation, set up and
configuration, transducer connection and
calibration.
Online Help Software products come complete with context
sensitive help, which provides detailed information
on how to use all software features.
Accessory
Equipment
Reference
How to set up and use any accessories you have
purchased, for example grips, fixtures,
extensometers, transducers, and environmental
chambers.

13
Product Support: www.instron.com
Chapter 2
Specifications
•General . . . . . . . . . . . . . . . . . . . . . . . . . . . . . . . . . . . . . . . . . . . . . . . . . . . . . . . . . . . . 13
•Environmental . . . . . . . . . . . . . . . . . . . . . . . . . . . . . . . . . . . . . . . . . . . . . . . . . . . . . . 14
•Dimensions and Weight . . . . . . . . . . . . . . . . . . . . . . . . . . . . . . . . . . . . . . . . . . . . . . . 14
General
Table 1. General Specifications
Parameter Specification
Travel (derived from maximum separation of knife edges
minus gauge length)
750 mm (29.5 in)
Gauge length 10 - 750 mm (0.4 - 29.5 in)
Resolution 0.1 m (0.004 in)
Accuracy ± 1 m (0.04 in)
Clamping force 0 - 2.5 N (0 - 9 oz)
Drag force < 0.08 N (8 gF)
Maximum arm speed (driven) 110 mm/sec (4.3 in/sec)
Maximum arm read speed 200 mm/sec (7.9 in/sec)
Maximum specimen diameter
standard width arms
wide arms
50 mm (2 in)
100 mm (4 in)
Maximum specimen thickness (at a maximum width of
30mm)
standard width arms
wide arms
50 mm (2 in)
100 mm (4 in)
Maximum specimen width (at a maximum thickness of
30mm)
200 mm (8 in)

Chapter: Specifications
14 M16-16654-EN
Environmental
Dimensions and Weight
Figure 1 on page 15 shows and the AutoX dimensions for standard width arms.
Figure 2 on page 16 shows the differences in dimensions for wide arms. All dimensions
are in millimeters. Table 3 on page 14 shows the different dimensions for different arm
lengths, designated A, B, C and D on the figures.
The weight of the AutoX (without the mounting assembly) is 32kg (70lb).
Table 2. Environmental Specifications
Parameter Specifications
Operating temperature +10°C to +38°C (+50°F to +100°F)
Storage temperature -25°C to +55°C (-13°F to +131°F)
Humidity 10% to 90% (non-condensing)
Environmental conditions Designed for use under normal laboratory conditions.
Protective measures may be required if excessive dust,
corrosive fumes, electromagnetic fields or hazardous
conditions are encountered.
Table 3. AutoX Dimensions for Different Arm Lengths (mm)
A
Arm length
B
AutoX Depth
C
Carriage Depth
D
Arm Height
250 485 258 55
300 535 308 55
350 585 358 61.5

15
Dimensions and Weight
Product Support: www.instron.com
Figure 1. Dimensions - Standard Width Arms
1217
A
124
1180
D
148 MIN.
D
260
116
204
15
130
20
232
B
102
130
C
190
354
50
95
42
25
8
80mm max arm opening
Specimen width
0 to 50mm
Mounting slots
Knife edge
Knife edge
Output
connectors
Ground
stud Power
Knife separation
750 max 10 min

Chapter: Specifications
16 M16-16654-EN
Figure 2. Dimensions - Wide Arms
A
D
D
B
C
130mm max arm opening
Specimen width
0 to 100mm
Knife separation
750 max 10 min

17
Product Support: www.instron.com
Chapter 3
Installation
•Before you Begin . . . . . . . . . . . . . . . . . . . . . . . . . . . . . . . . . . . . . . . . . . . . . . . . . . . . 17
•Equipment. . . . . . . . . . . . . . . . . . . . . . . . . . . . . . . . . . . . . . . . . . . . . . . . . . . . . . . . . . 18
•Moving the AutoX . . . . . . . . . . . . . . . . . . . . . . . . . . . . . . . . . . . . . . . . . . . . . . . . . . . 18
Before you Begin
Warning
Caution
Any frame that you want to use for testing with the AutoX must have been modified
internally for use with the AutoX.
Initial installation of the AutoX is carried out by Instron Service and includes the
following:
•modification of the wiring on the frame controller board
•installation of the mounting bracket, sliding assembly and AutoX instrument
•alignment and verification of the instrument
You can move the AutoX and the mounting bracket between different load frames, but
each frame must have the wiring modification. The modification is indicated by a label
(AUTOX) added to the frame controller panel adjacent to the appropriate connector,
usually Strain 1. Contact Instron Service to purchase this modification on any additional
frames.
Crush hazard - Do not attempt to lift the AutoX manually. Doing so can cause
personal injury and equipment damage.
Always use certified lifting equipment operated by trained personnel when moving
the AutoX. The lifting equipment should be rated at least twice the weight of the
AutoX. The weight of the AutoX is 32 kg (70 lb).

Chapter: Installation
18 M16-16654-EN
Caution
Although it is possible to move the AutoX from frame to frame, realignment and
leveling each time may be time consuming, especially if your testing involves an
extended range of travel of the AutoX arms. If you perform these types of test, it is
recommended that you have a dedicated test setup of load frame and AutoX.
Equipment
•A suitable lifting device with a rated capacity of at least twice the weight of the
AutoX. The AutoX weighs 32kg (70 lb).
•Metric hex keys (provided).
Moving the AutoX
Caution
Position the arms at the top of the instrument before moving it. Secure the
mechanical limit stops close to the arms to prevent movement of the arms during
transportation.
To avoid internal damage caused by the counter balance weights, position the arms at
the top of the instrument.
Caution
Take care to avoid damage to the extensometer arms during transportation.
The AutoX is a precision instrument. Its construction is robust but the extensometer
arms are vulnerable during any move.
Removing the AutoX from a frame
The procedure for removal and re-installation of the AutoX varies slightly depending on
the type of frame that it is installed on. The following procedure refers to:
•Electromechanical frames, for example 5900 and 3300 Series
•Static hydraulic frames, for example DX, LX, HDX, KX, KPX

19
Moving the AutoX
Product Support: www.instron.com
In addition, the mounting and sliding assembly for electromechanical frames is
universal and can be moved from one frame to another. Typically, each static hydraulic
frame has a different mounting and sliding assembly therefore you would not normally
remove it. This difference is reflected in the following procedure.
1. Turn off power to the AutoX (see Figure 3 on page 20).
2. Turn off power to the frame.
Warning
3. For electromechanical frames, stand in front of the frame. Move the sliding
assembly on the mounting bracket away from you so that it is at the end of its travel
toward the rear of the frame. This ensures that the AutoX is free to move upwards
when lifted. If necessary, refer to “Electromechanical Frame Mounting” on
page 33 for instructions on how to operate the sliding assembly.
For static hydraulic frames, stand at the rear of the frame. Release and pull the
sliding assembly toward you so that it is at the end of its travel. This ensures that the
AutoX is free to move upwards when lifted. If necessary, refer to “Static Hydraulic
Frame Mounting” on page 34 for instructions on how to operate the sliding
assembly.
4. Disconnect and remove the following cables from the rear panel of the AutoX (see
Figure 3 on page 20):
•power cable
•transducer connection cable (connected to controller on frame)
•USB cable (connected to computer)
•ground cable
5. Attach the lifting hook (supplied) to the top of the AutoX body (see Figure 4 on
page 20).
6. Attach the lifting equipment to the lifting hook.
7. Using a 5mm hex wrench, remove the four M6 bolts that attach the AutoX to the
sliding assembly (see Figure 5 on page 21 for electromechanical frames or
Figure 6 on page 22 for static hydraulic frames).
Take care to avoid pinch points when operating the sliding assembly on the AutoX
mounting bracket.
There may be obstructions in the test area that could produce pinch points when you
slide the AutoX on the mounting bracket. These include the bolts that attach the
mounting bracket to the frame base and may also include large grips and fixtures that
form part of your testing system.

Chapter: Installation
20 M16-16654-EN
Figure 3. AutoX Connections
Figure 4. Attach the Lifting Hook
Mains power
To controller on frame
Power on/off
Ground
USB to
computer
Lifting hook
Table of contents
Other Instron Measuring Instrument manuals
