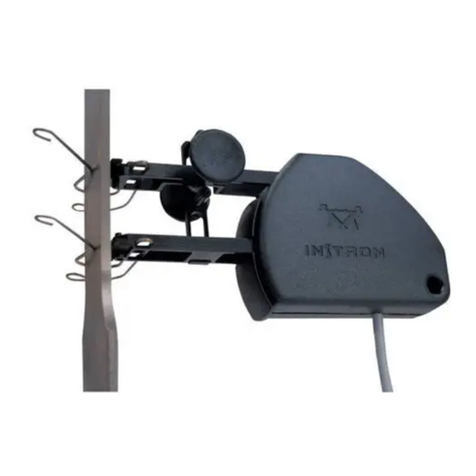
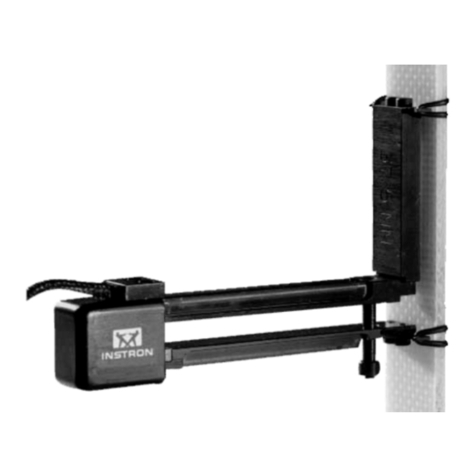
Instron 2603-080 User manual

Long Travel Elastomeric Extensometers
Reference Manual - Equipment M26-16269-EN Revision D
The difference is measurable
®

Electromagnetic Compatibility
Where applicable, this equipment is designed to comply with International Electromagnetic Com-
patibility (EMC) standards.
To ensure reproduction of this EMC performance, connect this equipment to a low impedance
ground connection. Typical suitable connections are a ground spike or the steel frame of a building.
Proprietary Rights Notice
This document and the information that it contains are the property of Illinois Tool Works Inc.
(ITW). Rights to duplicate or otherwise copy this document and rights to disclose the document and
the information that it contains to others and the right to use the information contained therein may
be acquired only by written permission signed by a duly authorized officer of ITW.
Trademarks
Instron®is a registered trademark of Illinois Tool Works Inc. (ITW). Other names, logos, icons and
marks identifying Instron products and services referenced herein are trademarks of ITW and may
not be used without the prior written permission of ITW.
Other product and company names listed are trademarks or trade names of their respective
companies.
Copyright © 2010 Illinois Tool Works Inc.
All rights reserved.
All of the specifications shown in this document are subject to change without notice.
Worldwide Headquarters
Instron
825 University Avenue
Norwood, MA 02062-2643
United States of America
European Headquarters
Instron
Coronation Road
High Wycombe, Bucks HP12 3SY
United Kingdom
Industrial Products Group
Instron
900 Liberty Street
Grove City, PA 16127
United States of America

iii
Preliminary Pages
Product Support: www.instron.com
General Safety Precautions
Materials testing systems are potentially hazardous.
Materials testing involves inherent hazards from high forces, rapid motions, and stored
energy. You must be aware of all moving and operating components in the testing system
that are potentially hazardous, particularly force actuators or a moving crosshead.
Before operating the system, ensure you gain a thorough understanding of the equipment by:
•receiving training on the safe operation of the system.
•reading and understanding the general hazards associated with materials testing
systems as detailed on pages iv to vi.
•carefully reading all relevant manuals and observing all Warnings and Cautions. The
term Warning is used where a hazard may lead to injury or death. The term Caution
is used where a hazard may lead to damage to equipment or to loss of data.
•carrying out your own safety risk assessment on the use of the test system, test
methods employed, specimen loading and specimen behavior at failure.
Instron products, to the best of its knowledge, comply with various national and
international safety standards, in as much as they apply to materials and structural
testing. We certify that our products comply with all relevant EU directives (CE mark).
Because of the wide range of applications with which our instruments are used, and over
which we have no control, additional protection devices and operating procedures may
be necessary due to specific accident prevention regulations, safety regulations, further
EEA directives or locally valid regulations. The extent of our delivery regarding
protective devices is defined in your initial sales quotation. We are thus free of liability in
this respect.
At your request, we will gladly provide advice and quotations for additional safety
devices such as protective shielding, warning signs or methods of restricting access to
the equipment.

Preliminary Pages
iv M26-16269-EN
Warnings
Crush Hazard - Allow only one person to handle or operate the system at all times.
Operator injury may result if more than one person operates the system. Before working
inside the hazard area between the grips or fixtures, ensure that no other personnel can
operate the computer or any of the system controls.
Crush Hazard - Take care when installing or removing a specimen, assembly,
structure, or load string component.
Installation or removal of a specimen, assembly, structure, or load string component
involves working inside the hazard area between the grips or fixtures. Keep clear of the
jaws of a grip or fixture at all times. Keep clear of the hazard area between the grips or
fixtures during actuator or crosshead movement. Ensure that all actuator or crosshead
movements necessary for installation or removal are slow and, where possible, at a low
force setting.
Hazard - Press the Emergency Stop button whenever you consider that an unsafe
condition exists.
The Emergency Stop button removes hydraulic power or electrical drive from the testing
system and brings the hazardous elements of the system to a stop as quickly as possible.
It does not isolate the system from electrical power, other means are provided to
disconnect the electrical supply. Whenever you consider that safety may be
compromised, stop the test using the Emergency Stop button. Investigate and resolve the
situation that caused the use of the Emergency Stop button before you reset it.
Flying Debris Hazard - Wear eye protection and use protective shields or screens
whenever any possibility exists of a hazard from the failure of a specimen,
assembly or structure under test.
Wear eye protection and use protective shields or screens whenever a risk of injury to
operators and observers exists from the failure of a test specimen, assembly or structure,
particularly where explosive disintegration may occur. Due to the wide range of
specimen materials, assemblies or structures that may be tested, any hazard resulting
from the failure of a test specimen, assembly or structure is entirely the responsibility of
the owner and the user of the equipment.

v
Preliminary Pages
Product Support: www.instron.com
Flying Debris Hazard - Make sure that test specimens are installed correctly in
grips or fixtures in order to eliminate stresses that can cause breakage of grip
jaws or fixture components.
Incorrect installation of test specimens creates stresses in grip jaws or fixture components
that can result in breakage of these components. The high energies involved can cause
the broken parts to be projected forcefully some distance from the test area. Install
specimens in the center of the grip jaws in line with the load path. Insert specimens into
the jaws by at least the amount recommended in your grip documentation. This amount
can vary between 66% to 100% insertion depth; refer to supplied instructions for your
specific grips. Use any centering and alignment devices provided.
Hazard - Protect electrical cables from damage and inadvertent disconnection.
The loss of controlling and feedback signals that can result from a disconnected or
damaged cable causes an open loop condition that may drive the actuator or crosshead
rapidly to its extremes of motion. Protect all electrical cables, particularly transducer
cables, from damage. Never route cables across the floor without protection, nor suspend
cables overhead under excessive strain. Use padding to avoid chafing where cables are
routed around corners or through wall openings.
Hazard - Set appropriate limits before running waveforms, tests or loop tuning.
Operational limits are included within your testing system to suspend motion or shut off
the system when upper and/or lower bounds of actuator or crosshead travel, or force or
strain, are reached during testing. Correct setting of operational limits by the operator,
prior to testing, will reduce the risk of damage to test article and system and associated
hazard to the operator.
High/Low Temperature Hazard - Wear protective clothing when handling
equipment at extremes of temperature.
Materials testing is often carried out at non-ambient temperatures using ovens, furnaces
or cryogenic chambers. Extreme temperature means an operating temperature exceeding
60 °C (140 °F) or below 0 °C (32 °F). You must use protective clothing, such as gloves,
when handling equipment at these temperatures. Display a warning notice concerning
low or high temperature operation whenever temperature control equipment is in use.
You should note that the hazard from extreme temperature can extend beyond the
immediate area of the test.
Electrical Hazard - Disconnect the electrical power supply before removing the
covers to electrical equipment.
Disconnect equipment from the electrical power supply before removing any electrical
safety covers or replacing fuses. Do not reconnect the power source while the covers are
removed. Refit covers as soon as possible. Ensure any fluids used during testing are
suitably contained.
Warnings

Preliminary Pages
vi M26-16269-EN
Hazard - Do not place a testing system off-line from computer control without first
ensuring that no actuator or crosshead movement will occur upon transfer to
manual control.
The actuator or crosshead will immediately respond to manual control settings when the
system is placed off-line from computer control. Before transferring to manual control,
make sure that the control settings are such that unexpected actuator or crosshead
movement cannot occur.
Rotating Machinery Hazard - Disconnect power supplies before removing the
covers to rotating machinery.
Disconnect equipment from all power supplies before removing any cover which gives
access to rotating machinery. Do not reconnect any power supply while the covers are
removed unless you are specifically instructed to do so in the manual. If the equipment
needs to be operated to perform maintenance tasks with the covers removed, ensure that
all loose clothing, long hair, etc. is tied back. Refit covers as soon as possible.
Hazard - Shut down the hydraulic power supply and discharge hydraulic pressure
before disconnection of any hydraulic fluid coupling.
Do not disconnect any hydraulic coupling without first shutting down the hydraulic
power supply and discharging stored pressure to zero. Tie down or otherwise secure all
pressurized hoses to prevent movement during system operation and to prevent the hose
from whipping about in the event of a rupture.
Hazard - Shut off the supply of compressed gas and discharge residual gas
pressure before you disconnect any compressed gas coupling.
Do not release gas connections without first disconnecting the gas supply and
discharging any residual pressure to zero.
Hazard - Ensure components of the load string are correctly pre-loaded to
minimize the risk of fatigue failure.
Dynamic systems, especially where load reversals through zero are occurring, are at risk
of fatigue cracks developing if components of the load string are not correctly pre-loaded
to one another. Apply the specified torque to all load string fasteners and the correct
setting to wedge washers or spiral washers. Visually inspect highly stressed components
such as grips and threaded adapters prior to every fatigue test for signs of wear or fatigue
damage.
Warnings

vii
Preliminary Pages
Product Support: www.instron.com
Table of Contents
Chapter 1 Introduction . . . . . . . . . . . . . . . . . . . . . . . . . . . . . . . . . . . . . . . . . . . . . . . 1-1
About this Manual . . . . . . . . . . . . . . . . . . . . . . . . . . . . . . . . . . . . . . . . . . . . . . . . . . . 1-1
Intended Purpose . . . . . . . . . . . . . . . . . . . . . . . . . . . . . . . . . . . . . . . . . . . . . . . . . . . 1-1
Description . . . . . . . . . . . . . . . . . . . . . . . . . . . . . . . . . . . . . . . . . . . . . . . . . . . . . . . . 1-3
Principle of Operation . . . . . . . . . . . . . . . . . . . . . . . . . . . . . . . . . . . . . . . . . . . . . 1-3
Basic Features . . . . . . . . . . . . . . . . . . . . . . . . . . . . . . . . . . . . . . . . . . . . . . . . . . 1-3
Chapter 2 Installation . . . . . . . . . . . . . . . . . . . . . . . . . . . . . . . . . . . . . . . . . . . . . . . . 2-1
Unpacking, Handling and Storage. . . . . . . . . . . . . . . . . . . . . . . . . . . . . . . . . . . . . . . 2-1
Unpacking . . . . . . . . . . . . . . . . . . . . . . . . . . . . . . . . . . . . . . . . . . . . . . . . . . . . . . 2-1
Handling . . . . . . . . . . . . . . . . . . . . . . . . . . . . . . . . . . . . . . . . . . . . . . . . . . . . . . . 2-1
Storage . . . . . . . . . . . . . . . . . . . . . . . . . . . . . . . . . . . . . . . . . . . . . . . . . . . . . . . . 2-2
Installation of the 2603-080 or 2603-085 . . . . . . . . . . . . . . . . . . . . . . . . . . . . . . . . . 2-3
Installation of the 2603-080 or 2603-085 onto 3300, 4200, 4400, 5500
5800 and 5900 Series Two Column Machines . . . . . . . . . . . . . . . . . . . . . . . . . 2-3
Installation of the 2603-080 or 2603-085 onto
4300 Series Two Column Machines . . . . . . . . . . . . . . . . . . . . . . . . . . . . . . . . . 2-4
Installation of the 2603-080 or 2603-085 onto
4501 and 4502 Two Column Machines . . . . . . . . . . . . . . . . . . . . . . . . . . . . . . . 2-6
Installation of the 2603-080 or 2603-085 onto 4505 and 4507 Machines . . . . . . 2-6
Extensometer Alignment on Two Column Machines. . . . . . . . . . . . . . . . . . . . . . 2-8
Installation of the 2603-084 or 2603-086 . . . . . . . . . . . . . . . . . . . . . . . . . . . . . . . . . 2-9
Installation of the 2603-084 or 2603-086 onto 3300, 4400, 5500
and 5900 Series Single Column Machines . . . . . . . . . . . . . . . . . . . . . . . . . . . . 2-9
Full Scale Travel Setting . . . . . . . . . . . . . . . . . . . . . . . . . . . . . . . . . . . . . . . . . . . . . 2-10
Chapter 3 Operation . . . . . . . . . . . . . . . . . . . . . . . . . . . . . . . . . . . . . . . . . . . . . . . . . 3-1
Adjustments . . . . . . . . . . . . . . . . . . . . . . . . . . . . . . . . . . . . . . . . . . . . . . . . . . . . . . . 3-1
Horizontal Position of the Specimen Clamp Assemblies. . . . . . . . . . . . . . . . . . . 3-1
Specimen Gripping Force Adjustment. . . . . . . . . . . . . . . . . . . . . . . . . . . . . . . . . 3-1
Gauge Length Setting (Vertical Adjustment) . . . . . . . . . . . . . . . . . . . . . . . . . . . . 3-2

Preliminary Pages
viii M26-16269-EN
Calibration. . . . . . . . . . . . . . . . . . . . . . . . . . . . . . . . . . . . . . . . . . . . . . . . . . . . . . . . . 3-3
5800 Controller . . . . . . . . . . . . . . . . . . . . . . . . . . . . . . . . . . . . . . . . . . . . . . . . . . 3-3
3300, 5500 and 5900 Machines with 2603-080 or 2603-084 . . . . . . . . . . . . . . . 3-4
3300, 5500 and 5900 Machines with 2603-085 or 2603-086 . . . . . . . . . . . . . . . 3-4
4200, 4300 and 4400 Machines . . . . . . . . . . . . . . . . . . . . . . . . . . . . . . . . . . . . . 3-6
Calibration Verification . . . . . . . . . . . . . . . . . . . . . . . . . . . . . . . . . . . . . . . . . . . . . . . 3-7
Appendix A Specifications . . . . . . . . . . . . . . . . . . . . . . . . . . . . . . . . . . . . . . . . . . . . . A-1
General . . . . . . . . . . . . . . . . . . . . . . . . . . . . . . . . . . . . . . . . . . . . . . . . . . . . . . . . . . A-1
System Classification . . . . . . . . . . . . . . . . . . . . . . . . . . . . . . . . . . . . . . . . . . . . . . . . A-3
Machine Compatibility. . . . . . . . . . . . . . . . . . . . . . . . . . . . . . . . . . . . . . . . . . . . . . . . A-4

1-1
Chapter 1
Introduction
•About this Manual . . . . . . . . . . . . . . . . . . . . . . . . . . . . . . . . . . . . . . . . . . . . . . . . . . 1-1
•Intended Purpose . . . . . . . . . . . . . . . . . . . . . . . . . . . . . . . . . . . . . . . . . . . . . . . . . . . 1-1
•Description . . . . . . . . . . . . . . . . . . . . . . . . . . . . . . . . . . . . . . . . . . . . . . . . . . . . . . . . 1-3
About this Manual
This manual documents the following Instron®Long Travel Extensometer catalog numbers:
•2603-080 - 250 mm travel - for Instron twin column electromechanical testing
machines.
•2603-084 - 250 mm travel - for Instron single column electromechanical testing
machines.
•2603-085 - 750 mm travel - for Instron twin column electromechanical testing
machines.
•2603-086 - 750 mm travel - for Instron single column electromechanical testing
machines.
Intended Purpose
The Long Travel Extensometer is intended to provide an accurate and reliable method of
strain measurement in elastomeric and other highly extensible materials.

Chapter: Introduction
1-2 M26-16269-EN
Figure 1-1. The Long Travel Elastomeric Extensometer
Head Assembly
Support Cable
Upper Carriage
Upper Specimen
Clamp Assembly
(see Figure 3-1)
Lower Specimen
Clamp Assembly
(see Figure 3-1)
Lower Carriage
Guide Rod
Base Plate
Reversible Header
Connector
Counterweights
Thumbscrew
Keep Plate
Support Tubes
Headplate

1-3
Description
Product Support: www.instron.com
Description
Principle of Operation
Operation of the Long Travel Elastomeric Extensometer is based on a pair of separately
counterbalanced clamp assemblies (see Figure 1-1) which attach to the specimen.
The clamp assemblies are mounted on carriages. Their vertical position on the carriages can
be adjusted, with the carriages touching, to set the gauge length. The horizontal position of
the clamp assemblies can also be adjusted to allow for different specimen thicknesses. The
clamping force on the specimen can be varied and the clamps are designed to release at
specimen break.
Cables run from each carriage over precision machined pulleys in the head of the unit and
into support tubes. Inside the support tubes, weights counterbalance each clamp assembly.
One pulley carries the body of a rotary potentiometer, the other pulley is fixed to the
potentiometer shaft.
The carriages are guided by linear bearings on a ground and polished rod. This feature,
along with careful counterbalancing of each assembly, prevents any of the extensometer’s
weight being applied to the specimen.
The precision, single-turn potentiometer tracks the differential movement between the two
clamp assemblies. The excitation voltage, generated by the testing machine, is applied to the
potentiometer. The potentiometer wiper voltage is buffered and applied to a resistor bridge.
Thus the output voltage from the extensometer is proportional to the specimen extension.
Mechanical stops fitted to the pulleys prevent overtravel of the potentiometer.
Basic Features
•The upper and lower specimen clamp assemblies are accurately counter-balanced so that
the extensometer applies a load of only 0.15 N (15 g) when attached to the specimen and
should therefore have negligible effect on test results.
•Variable gauge length settings can be obtained. The calibration bar supplied with the
extensometer provides a range of settings. See Appendix Afor specification details.
•The clamp assemblies can be moved vertically on carriages and are locked at the
required gauge length by knurled thumb nuts.
•The horizontal position of the clamp assemblies can be adjusted, using knurled
thumbscrews, to allow for different specimen thicknesses.
•The specimen gripping force is adjustable.

Chapter: Introduction
1-4 M26-16269-EN
•If the specimen is still extending at the end of the extensometer travel, or if specimen
break occurs, the clamp rods on the clamp assemblies rotate outwards, reacting against a
spring-loaded roller, to automatically release the specimen and prevent damage to the
extensometer.
•The 2603-080 and 2603-084 extensometers are self-identifying, so that they can be
calibrated automatically on suitably equipped machines. The 2603-085 and 2603-086
extensometers are not self identifying and require different calibration procedures
depending on the load frame model and application software in use. Refer to
“Calibration” on page 3-3 for details.
•The full scale travel can be set to either SI units or US Customary units. The
extensometer is shipped with the SI units selected.

2-1
Chapter 2
Installation
•Unpacking, Handling and Storage . . . . . . . . . . . . . . . . . . . . . . . . . . . . . . . . . . . . . . 2-1
•Installation of the 2603-080 or 2603-085. . . . . . . . . . . . . . . . . . . . . . . . . . . . . . . . . 2-3
•Installation of the 2603-084 or 2603-086. . . . . . . . . . . . . . . . . . . . . . . . . . . . . . . . . 2-9
•Full Scale Travel Setting . . . . . . . . . . . . . . . . . . . . . . . . . . . . . . . . . . . . . . . . . . . . 2-10
Unpacking, Handling and Storage
Unpacking
It is recommended that the transportation case is retained for storing the extensometer if it is
removed from the testing machine.
Handling
The Long Travel Elastomeric Extensometer is a delicate precision instrument and must be
handled with care at all times.
Caution
After the counterweights have been released from the keep plate, the extensometer
must be kept upright at all times to prevent the support cables becoming tangled.
Caution
For 2603-085 and 2603-086, the maximum separation between the inside faces of the
stops must never be greater than 780 mm (30.7 inch).
Failure to observe this restriction can result in damage to the precision potentiometer used in
the long travel extensometer.

Chapter: Installation
2-2 M26-16269-EN
Storage
Caution
Never lay down or invert the extensometer unless the keep plate is in position.
The most common customer return is for tangled or displaced counterweight cables. The
counterweights must be secured by the keep plate when the extensometer is removed from
the testing machine:
1. Move the arm to the top.
2. Slacken the thumbscrew and slide the keep plate to clamp the counterweights. Re-
tighten the thumbscrew (see Figure 2-1).
Figure 2-1. Use of Keep Plate
Keep Plate Locking the Counterweights Keep Plate Free of Counterweights

2-3
Unpacking, Handling and Storage
Product Support: www.instron.com
Installation of the 2603-080 or 2603-085
Installation of the 2603-080 or 2603-085 onto 3300, 4200, 4400, 5500, 5800 and
5900 Series Two Column Machines
The extensometer is mounted on the base platen of the machine. Figure 2-2 shows the
installation.
Figure 2-2. Installation onto 3300, 4200, 4400, 4501/2, 5500, 5800 and 5900 Machines
M10 Screw
M10 Washer
Support Plate
Thick M10 Washer
(4501/2, 6021/2
only)
Shoulder Screw
Spring
Jacking Screw
Base Platen
Extensometer
Base Plate

Chapter: Installation
2-4 M26-16269-EN
1. Bolt the support plates to the base platen using M10 screws and washers. Do not tighten
at this stage.
2. Slacken the thumbscrew and slide the keep plate forwards on the extensometer to
release the counterweights (see Figure 2-1). Re-tighten the thumbscrew.
3. Attach the extensometer to the support plates with the shoulder screws and springs.
4. Tighten the M10 support plate screws.
5. Remove the thumb nuts, washers and bolts from the arms. Slide the arms over the top of
their respective carriage, as shown in Figure 1-1 and Figure 3-1. Replace the thumb
nuts, washers and bolts.
6. On 4200 Series machines, plug the extensometer into the socket on the end of the
console extensometer cable.
7. On 3300, 4400, 5500, 5800 and 5900 machines with two T-slots on the back of the
column covers, ensure that the load cell cable is secured by a cable clip in the inboard T-
slot. Remove the cable tie holding the extensometer cable to the support tube and secure
the cable with two cable clips in the outboard T-slot. Plug the extensometer into the 25-
way extensometer socket on the testing machine.
8. On 3300, 4400, 5500, 5800 and 5900 Series machines without two T-slots on the back of
the column covers, plug the extensometer into the 25-way extensometer socket on the
testing machine.
9. Ensure that the spring clips on the extensometer connector are gripping the socket.
10. Insert the four M6 jacking screws into the extensometer base plate such that they just
touch the support plates.
Installation of the 2603-080 or 2603-085 onto 4300 Series Two Column Machines
The extensometer is normally mounted on the base platen of the machine but it can also be
fitted to the underside of the fixed crosshead. Figure 2-3 shows a base mounted installation.
1. Fit the four pillars to the base platen in the two pairs of M10 holes 280 mm apart.
Tighten the pillars.
2. Bolt the support plates to the pillars using M10 screws and washers. Do not tighten at
this stage.
3. Slacken the thumbscrew and slide the keep plate forwards on the extensometer to
release the counterweights (see Figure 2-1). Re-tighten the thumbscrew.
4. Attach the extensometer to the support plates with the shoulder screws and springs.
5. Tighten the M10 support plate screws.

Chapter: Installation
2-6 M26-16269-EN
6. Remove the thumb nuts, washers and bolts from the arms. Slide the arms over the top of
their respective carriages, as shown in Figure 1-1 and Figure 3-1. Replace the thumb
nuts, washers and bolts.
7. Plug the extensometer into the 25-way extensometer socket on the machine. Ensure that
the spring clips on the extensometer connector are gripping the panel.
8. Insert the four M6 jacking screws into the extensometer base plate such that they just
touch the support plates.
9. Install the long lower pullrod assembly.
Installation of the 2603-080 or 2603-085 onto 4501 and 4502 Two Column
Machines
The extensometer is normally mounted onto the base platen of the machine but it can also be
fitted to the underside of the fixed crosshead. Figure 2-2 shows a base mounted installation.
1. Bolt the support plates to the base platen using M10 screws and washers. Space the
plates off the platen with the thick washers. Do not tighten the screws at this stage.
2. Slacken the thumbscrew and slide the keep plate forwards on the extensometer to
release the counterweights (see Figure 2-1). Re-tighten the thumbscrew.
3. Attach the extensometer to the support plates with shoulder screws and springs.
4. Tighten the M10 support plate screws.
5. Remove the thumb nuts, washers and bolts from the arms. Slide the arms over the top of
their respective carriages, as shown in Figure 1-1 and Figure 3-1. Replace the thumb
nuts, washers and bolts.
6. Plug the extensometer into the 25-way extensometer socket on the machine. Ensure that
the spring clips on the extensometer connector are gripping the panel.
7. Insert the four M6 jacking screws into the extensometer base plate such that they just
touch the support plates.
Installation of the 2603-080 or 2603-085 onto 4505 and 4507 Machines
The extensometer is normally mounted on the underside of the fixed crosshead but, with use
of the appropriate compression beam or pillars, it can also be fitted to the base platen of the
machine. Figure 2-4 shows the extensometer installed on the fixed crosshead.
1. Bolt the support plates onto the underside of the fixed crosshead using M10 screws and
washers. If required, the plates can be spaced away from the crosshead with the pillars.
Do not tighten the screws at this stage.
2. Attach the extensometer to the support plates with the shoulder screws and springs.

2-7
Unpacking, Handling and Storage
Product Support: www.instron.com
3. Tighten the M10 support plate screws.
4. Slacken the thumbscrew and slide the keep plate forwards on the extensometer to
release the counterweights (see Figure 2-1). Re-tighten the thumbscrew.
Figure 2-4. Installation onto 4505 and 4507 Machines
M10 Screw
M10 Washer
Optional Pillar
Shoulder Screw
Spring
Jacking Screw
Extensometer
Head Plate
Fixed Crosshead
Support Plate

Chapter: Installation
2-8 M26-16269-EN
5. Remove the thumb nuts, washers and bolts from the arms. Slide the arms over the top of
their respective carriages, as shown in Figure 1-1 and Figure 3-1. Replace the thumb
nuts, washers and bolts.
6. Plug the extensometer into the 25-way socket on the machine. Ensure that the spring
clips on the extensometer are gripping the panel.
7. Insert the four M6 jacking screws into the support plates such that they just touch the
extensometer head plate.
Extensometer Alignment on Two Column Machines
The vertical axis of the extensometer must to be adjusted to be parallel with that of the two
column load frame. To align the extensometer:
1. Move the carriages to one end of the guide rod.
2. Check that the testing area is free from obstruction and place a straight edge on the
crosshead, touching the guide rod as shown in Figure 2-5.
3. Move the crosshead the maximum possible distance and check the alignment between
the rod and the straight edges at the extremities of travel.
4. Adjust the jacking screws in pairs until the guide rod is aligned to within 1 mm over the
full travel of the crosshead. Note that one (1) revolution of the jacking screws = 6 mm.
To prevent the extensometer rocking after alignment, ensure that all four jacking screws are
in contact with the support plates (or head plate).
Figure 2-5. Extensometer Alignment
Guide Rod
Straight Edge
Crosshead
This manual suits for next models
3
Table of contents
Other Instron Measuring Instrument manuals

