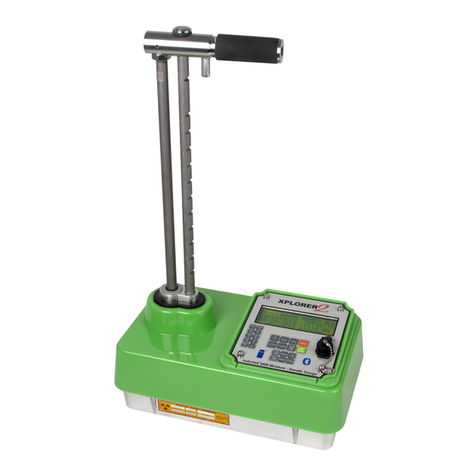
InstroTek NoNuke User manual

www.InstroTek.com
OPERATING MANUAL
innovators in instrumentation technology
Moisture / Density Gauge

‘This page may be removed from the
manual to prevent the unauthorized
access to the restricted menu functions of
the InstroTek®NoNuke™.’
Restricted Menu Function
Access Code:
5557


© 2021 InstroTek, Inc.
NoNuke Density Gauge
Operation Manual Version 1.7
07.06.2021

InstroTek
1
1. Table of Contents
****************************************
1. INTRODUCTION 2
2. CHARGING THE BATTERIES 6
3. KEYPAD 7
4. GETTING STARTED 8
5. MENU FUNCTIONS 16
6. VERIFICATION 18
7. READING MODES 19
8. MAX DENSITY VALUE 22
9. INPUT MIX INFORMATION 22
10. DENSITY OFFSET 24
11. PROJECT STORAGE AND PRINTING 27
12. GPS 35
13. KEYPAD SOUND 36
14 LED BACKLIGHT 38
15. DIAGNOSTICS 39
16. BLUETOOTH AND ANDROID SOFTWARE 41
17. SPECIFICATIONS AND APPENDICES 54
18. INDEX 57
19. WARRANTY 60

InstroTek
2
1. Introduction
Thank you for your purchase of the InstroTek NoNuke, the most
advanced non-nuclear asphalt density gauge. InstroTek has
led the industry in Innovation and development of advanced
instrumentation technologies since 1997. InstroTek designs and
manufactures gauges used in a variety of applications, such
as construction, agriculture and irrigation control, coal density
and many different moisture measurement technologies,
including moisture measurement in pipe insulation at chemical
plants.
The NoNuke gauge was designed to meet the demands of the
construction market with reliability and accuracy. The NoNuke
density gauge utilizes state of the art technology to reduce the
uncertainty inherent in electric density measurements,
providing enhanced reliability and improved density resolution
in the rugged construction environment. Its primary features
are:
•No license or radioactive certification required
•Faster and easier to use
•Lightweight
•Capable of storing large amounts of data
•Automatic excessive moisture alert
•Data download via USB
•Meets and exceeds the requirement of ASTM D7113
and AASHTO T343

InstroTek
3
The software features are easy to follow. The four-line display
provides large characters and intuitive instructions to help the
operators navigate through the different functions. The
diagnostics features allow diagnoses of gauge problems in the
field, increasing productivity.
Our technical staff includes some of the most experienced
density gauge developers and engineers in the world with over
100 years of combined experience. We believe you will be
impressed with the NoNuke’s quality and functionality.
Our promise with each delivery is a superior gauge,
unmatched expertise and exceptional service.
Gauge Technology
The NoNuke gauge uses Electrical Capacitance to measure
permittivity properties of pavement. NoNuke’s internal software
automatically corrects for temperature. In addition, it will alert
the user to high surface moisture. The sensitivity of the sensors
allows this device to measure accurate density results. The
NoNuke provides density, % compaction and pavement
temperature as output in various units of measure. The gauge
can be used for:
•Pavement density and % compaction measurements
•Optimum Rolling pattern and Pavement quality control
•Segregation
Safety
The NoNuke gauge is a safe, reliable, non-nuclear device.
Thus, it does not require any special handling, monitoring
badges, license, special storage or have any special

InstroTek
4
transportation requirements.
Please follow the important steps below regarding use, safety
and maintenance, as well as any other internal
company/agency specific use or safety procedures to prevent
injury and obtain accurate results:
•Only use Acetone to clean bottom sensor surface. Do
not use WD-40 or any solvent that do not evaporate.
•Do not use the unit near exposed electrical wiring due
to potential shock hazard.
•Do not use or place gauge at proximity of high electro-
static fields.
•Unauthorized disassembly of the unit voids the warranty
•Turn the gauge off during transportation or when it is
unused.
•Do not leave the case lid open and unattended to
avoid moisture and debris from getting inside the case.
•Avoid exposing gauge to moisture.
•Clean the bottom plate of the gauge periodically to
remove debris. This will improve the quality of the
readings and reduces potential maintenance
problems.

InstroTek
5
Model NoNuke and Standard Accessories
Model NoNuke
1. NoNuke
2. AC, DC charger, and flash drive, one each
3. Gauge Case with removable wheels
4. Standard Block
5. Manual of operation and gauge paperwork
2
3
5
Fig 1.1 NoNuke Gauge & Accessories
1
4

InstroTek
6
2. Charging the Batteries
When the gauge is powered on, check for the low battery
warning (“Low Battery” displayed). If the low battery warning
does not appear on the display, the gauge is ready for use and
does not require additional charge.
The NoNuke contains a pack of six AA size Rechargeable Nickel
Metal Hydride batteries. The batteries are charged at the
factory prior to shipment. Life of rechargeable batteries
depends on the number of charge/discharges cycles. The
gauge will display a “Low Battery” on the display when the
battery is getting low.
The provided 12VDC car charger can be used for emergency
charging in the field. Plug this charger into your vehicle charger
outlet and charge the gauge for 30 minutes. This should
provide enough battery power to your gauge to complete your
testing for the day. Charge the gauge using your AC charger,
after using the car charger to obtain a full charge.
During a charging session a “C” will appear in the upper right-
hand corner of the display
It will take about 3 hours to charge an empty battery pack
using either the AC or 12 VDC charger. The internal charge
circuitry continuously monitors the battery voltage, and it stops
the charging when the batteries are full. The batteries can be
charged daily or when the low battery indicator appears on
the screen.

InstroTek
7
3. Keypad
Note: Press each alphabetic key repeatedly to select a
desired letter.
Note:
The minus key <-> is also the <DOWN> key.
The decimal point is entered by holding the <0> key down for
over one second. Decimal limited to use in setting offset value
only.
To backup and change the offset, the Clear Entry key <CE> is
used.

InstroTek
8
4. Getting Started
Before using this gauge, it is recommended that the user read
this manual and understand the operation of the gauge.
Operating the NoNuke
This chapter covers the initial set up and basic operation and
procedures of your gauge from powering on to taking a
measurement. The following initial steps are recommended to
start taking measurements with the NoNuke.
1. Powering the gauge ON
2. Set Time/Date
3. Set Units
4. Input Max Density
5. Taking Measurements
1. Powering the Gauge ON
Press the ON key to power the gauge on. When the gauge is
powered on the NoNuke will show:
After 3 seconds the serial # and battery voltage will be
displayed:
NoNuke Rev #.##
Serial #:#
Battery: # V
InstroTek

InstroTek
9
After displaying this for 2 seconds the gauge will be ready to be
used for testing.
Note: To preserve battery life for extended gauge operations,
the gauge will go into a shutdown mode if no key is pressed for
10 minutes. Simply press the ON key when you are ready to
restart again.
Note: The GPS on the NoNuke gauge will stay off until it is turned
on though the menu function by the user. When the GPS is
turned on, the battery consumption if increased and the gauge
may have to charged more often.
Press the OFF key and hold for 3 seconds to turn the gauge off.
2. Setting Time/Date
To provide proper time and date for measurements, complete
the following steps.
Press the MENU, the first screen will be:
Press the DOWN key twice.
Gauge Ready
<Start> to Begin
Date Time
-MENU-
1. Verification
2. Density Offset
3. Reading Mode
-MENU-
4. Set Units
5. Set Time/Date
6. LED Backlight

InstroTek
10
Press 5.
Press 1 to modify time/date
If the Date and Time are correct, press NO, otherwise, press YES
to change.
Proceed through the Month, Day, Year, Hour, and Minute
screens to enter the data and time information. Select AM or
PM for the last setting.
After selecting the Date and Time, the NoNuke returns to the
first menu screen.
Date Time
Change Value?
Press YES or NO
ESC to Exit
Enter Value for
Month: 1
<ENTER> to Accept
<ESC> to Exit
-MENU-
1. Verification
2. Density Offset
3. Reading Mode
1.Change Time/Date
2.Change M/D Order
3. 24 Hour Time
ESC to Exit
Select
1. AM
2. PM

InstroTek
11
Press 5to return to date/time screen
Press 2 to select between Month/Day/Year and
Day/Month/Year. Select Yes to make changes.
Return to the Date/Time menu and press 3 to select between
AM-PM or 24-hour display.
After selecting Yes, the NoNuke returns to the first menu screen.
Press ESC to return to the Gauge Ready screen:
Gauge Ready
<Start> to Begin
Date Time
1.Change Time/Date
2.Change M/D Order
3. 24 Hour Time
ESC to Exit
Date Displayed in
Day/Month/Year Order
<YES> to Change
<ESC> to Exit
Time Displayed in
24 Hour Mode
<YES> to Change
<ESC> to Exit

InstroTek
12
3. Setting Units
The default for the gauge is in English units; lb/ft3(PCF). The
units displayed can be (PCF/ºF), (kg/m3/ ºC), or (g/cc / ºC).
Press the MENU, the first screen will be:
press the DOWN key once
Press 4.
Press 1for (lb/ft3-inch-ºF), 2for (kg/m3-mm- ºC), or 3for (g/cc
/mm/ ºC).
After selecting the Unit of Measurement, the NoNuke returns to
the first menu screen.
Press ESC to return to the Gauge Ready Screen,
1. Lb/ft3
2. kg/m3
3. G/CC
Select#, ESC Exit
-MENU-
1. Verification
2. Density Offset
3. Reading Mode
-MENU-
4. Set Units
5. Set Time/Date
6. LED Backlight
-MENU-
1. Verification
2. Density Offset
3. Reading Mode

InstroTek
13
4. Input Max Density
NoNuke measures % compaction based on the MAX Density
input by the operator. In NoNuke, you can easily change the
MAX density value as needed to accurately measure %
compaction. To set the daily MAX density value complete the
following steps. If no max density is entered the gauge will use a
default maximum density of 145 PCF (2323 kg/m3).
From the main screen (Gauge Ready Screen),
PRESS MAX key on the keypad.
PRESS YES or NO to change the value or confirm the current
value. This value is provided by the lab and can be changed as
needed to account for daily production variations. Press YES to
change the displayed value, NO to use the displayed value, or
ESC to exit.
Gauge Ready
<Start> to Begin
Date Time
Gauge Ready
<Start> to Begin
Date Time
MAX: # PCF
Change Value?
<YES> or <NO>
<ESC> to Exit

InstroTek
14
5. Take a Measurement
To assure a good measurement, the gauge should be placed
on the pavement making sure there is proper contact between
the gauge bottom surface and the pavement. Avoid wet
areas for best accuracy. Then from the main screen,
Press START on the keypad or push the quick button on the
handle, which will measure density, % compaction, air void,
road temperature and further information of GPS and project if
applicable. To view GPS and project information scroll
UP/DOWN.
Gauge Ready
<Start> to Begin
Date Time
Density: ##
% Comp: ##
% Air: ##
<Start> or <ESC>
Road Temp: ##
Date Time
LAT:
LNG:
ALT:

InstroTek
15
The gauge results can be compared to cores, used to setup an
optimum rolling patten or as quality checks during pavement
construction.
If the NoNuke measures density values greater than 171 PCF
(2440 kg/m3), the user will see a warning message on the
screen. This message instructs the user to change the factory
calibration from Factory 1 to Factory 2. Menu item 12 will
change this setting. Factory 2 calibration is needed when the
asphalt/aggregate mixture is causing the gauge to measure
higher than normal dielectric values. Always keep the Factory 1
settings active until a high density warning is displayed.

InstroTek
16
5. Menu Functions
Pressing the MENU button on the front panel will access the
menu functions. Some of the menu functions require an access
code; contact your supervisor to obtain this code.
The following list of functions are available under MENU:
1. Verification – Verifies gauge performance and operations.
2. Density Offset – Enable/Disable density offset.
3. Reading Mode – Sets the gauge to single or multiple reading
modes.
4. Set Units – Change units of density, road temperature
measurements, and maximum aggregate size.
5. Set Time/Date – Enables setting of time and date for each
project and reading.
6. LED Backlight – Enables/Disables the LED backlight display
and keypad for easy viewing during night work.
7. Keypad Sound – Enables/Disables the buzzer/alarm function
of the NoNuke.
8.GPS – Enables or disables the GPS module. Note, to preserve
battery life, the GPS module is normally off. Enable the GPS
by using this Menu option.
9. Bluetooth – Enables or disables the Bluetooth module.
10. Diagnostics – Allows checking of the SD storage test, USB
test, GPS test, Battery Voltage, Temperature, Factory
Calibration, Serial # details, Update Firmware, Memory
Reset and Extended tests. Extended test module is provided
Table of contents
Other InstroTek Measuring Instrument manuals

