Condition Green LED Red LED
Normal, no event OFF OFF
Normal, event detected Flicker OFF
Normal, break detected OFF ON
Power-up self-test ON, one second ON, one second
Trouble detected Flash ON/OFF Flash OFF/ON
Test mode, no alarm Flash once per second OFF
Test mode, event detected Flicker OFF
Test mode, alarm Flash once per second ON
SPECIFICATIONS
Alarm Relay:
Form A
125 mA maximum
25 VDC maximum
Alarm Duration:
5 seconds
Tamper Switch:
Cover tamper
25 mA maximum
24 VDC maximum
Power Requirements:
8 - 14 VDC; 25 mA typical at
12 VDC, 35 mA max
AC Ripple: 4 Volts peak-to-peak at
Nominal 12 VDC
ESD Immunity:
10 kV, Discharges of either polarity to
exposedsurfaces
OperatingTemperature:
32oto 120oF (0oto 49oC)
Storage: -4oto 122oF
(-20oto 50oC)
Protected Glass:
Minimum size for all types is 11" (28 cm) square;Glass must be framed
in the wall of the room or mounted in a barrier of 36" (0.9 m) minimum
width.
TM
5-051-401-00 Rev A
U.S. and International Patents Applied For.
IntelliSense is a trademark of IntelliSense Systems, Inc.
Thickness
Glass Type Minimum Maximum
Plate 3/32" (2.4 mm) 1/4" (6.4 mm)
Tempered 1/8" (3.2 mm) 1/4" (6.4 mm)
Laminated11/8" (3.2 mm) 9/16" (14.3 mm)
Wired 1/4" (6.4 mm) 1/4" (6.4 mm)
Coated21/8" (3.2 mm) 1/4" (6.4 mm)
Sealed Insulating11/8" (3.2 mm) 1/4" (6.4 mm)
1Laminated and sealed insulating glass types are protected only if both plates of glass are
broken.
2For glass coated on the inner surface with 3M scotchshield type RE35NEARL or Hard Glass
Security Film, reduce maximum range to 10 feet (3.1 m).
Accessories:
FG-701 Glass-Break Simulator
FG-SP1 Spacer Plate - depth 0.6" (1.52 cm)
FG-SP3 Spacer Plate - depth 0.3" (0.76 cm)
NOTE: The FG-1015 Glass-Break Detector is designed for primary
perimeter security. For a complete security system, additional
interior protection devices are recommended.
After testing, exit the Test Mode using the same procedure for activating
the Test Mode. The FG-1015 will also automatically exit Test Mode after
ten minutes.
APPLICATIONS INFORMATION
The FG-1015 is designed to detect framed glass broken by an impact
sufficient to make a hole.
To minimize the chance of false alarms:
• Do not use outside.
• Avoid installing in rooms with high-level noise sources, such as air
compressors, bells, power tools, etc., if those sources can be active
when the detector can signal an alarm.
• Test false alarm immunity by activating any known noise sources in
the room.
To maximize detection:
• Mount the unit on a wall or ceiling directly opposite the glass if
possible. The least desirable mounting location is on the same wall
as the glass.
• Minimize range to the glass. Do not install beyond the maximum
specified range even if testing indicates greater range.
• Verify the installation back to the panel to be sure that the protection
loop is intact.
LED Indicators:
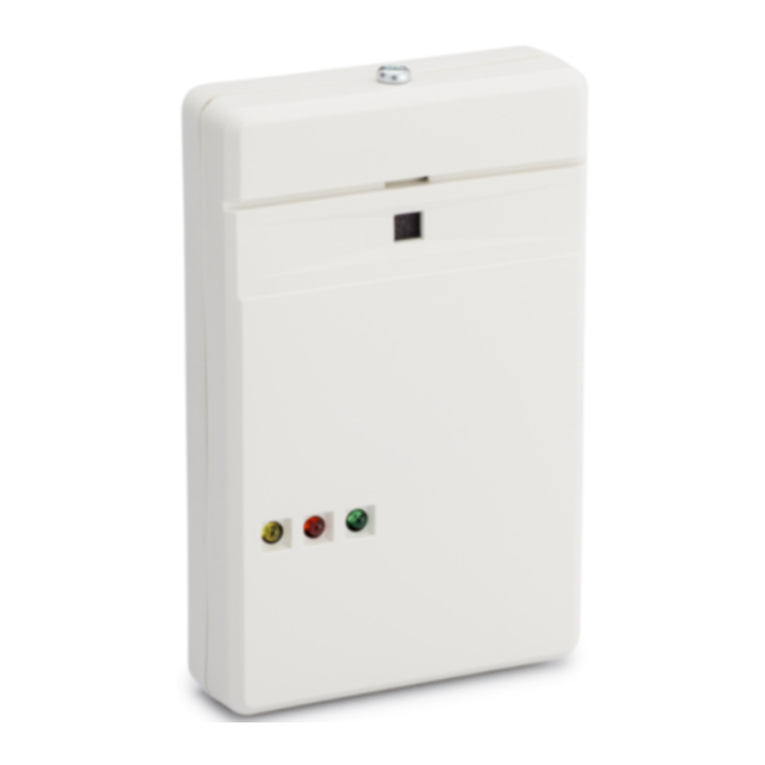
The two LEDs on the front cover are used to indicate the
sensor's operational status. The following table summarizes the
LED operation when the LEDs are enabled.
IMPORTANT: If window coverings are present, close them fully and hold
the FG-701 behind the window coverings for testing.
NOTE: You can also use the simulator in the MANual mode to test
audio alone. The blinking green LED on the unit will flicker when
the simulator audio is received correctly. (See the FG-701
Operating Instructions for additional information.)
Range:
15' (4.6 M) maximum
No minimum range
Weight:
3.2 oz., (90 g)
Packaged Product:4.1 oz, (116 g)
Approvals/Listings:
RF Immunity:
30 V/m, 10 MHz - 1000 MHz
Dimensions:
3.86" H x 2.44" W x 0.86" D
(98 mm x 62 mm x 21.8 mm)
Copyright 1995 IntelliSense Systems, Inc.
All Rights Reserved
UL Listed
FCC Verified
Seller does not represent that its product may not be compromised or circumvented; that the
product will prevent any personal injury or property loss by burglary, robbery, fire, or otherwise;
or that the product will in all cases provide adequate warning or protection. Buyer understands
that a properly installed and maintained alarm system may only reduce the risk of burglary,
robbery,orfirewithoutwarning,but it is not insurance or guarantee that such will notoccurorthat
there will be no personal injury or property loss as a result. CONSEQUENTLY, SELLER SHALL
HAVENOLIABILITYFORANYPERSONALINJURY,PROPERTYDAMAGE,OROTHERLOSS
BASEDONACLAIMTHATTHEPRODUCTFAILED TO GIVE WARNING. However, ifSellerbe
held liable, whether directly or indirectly, for any loss or damage arising under this Limited
Warranty or otherwise, regardless of cause or origin, Seller's maximum liability shall not in any
case exceed the purchase price of the product, which shall be fixed as liquidated damages and
not as a penalty, and shall be the complete and exclusive remedy against Seller.
This warranty replaces all previous warranties and is the only warranty made by IntelliSense on
this product. No increase or alteration, written or verbal, of the obligation of this warranty is
authorized.
Seller warrants its products to be in accordance with its own plans and specifications and to be
freefromdefects inmaterialsandworkmanshipundernormaluseandservice for18monthsfrom
the date stamp control on the product; or for products not having an IntelliSense date stamp, for
12monthsfromthedateoforiginalpurchase,unlesstheinstallationinstructionsorcataloguesets
forth a shorter period, in which case the shorter period shall apply.
Seller'sobligationshallbelimitedtorepairingorreplacing,atitsoption,freeofchargeformaterials
orlabor,anypart whichisprovednotin compliancewithSeller'sspecificationsor provesdefective
in materials or workmanship under normal use and service. This warranty is void if the product
isalteredorimproperlyrepairedorservicedbyanyoneotherthanIntelliSensefactoryservice. For
warranty service, contact the nearest IntelliSense service center.
THERE ARE NO WARRANTIES, EXPRESS OR IMPLIED, OF MERCHANTABILITY, OR FIT-
NESS FOR A PARTICULAR PURPOSE OR OTHERWISE, WHICH EXTEND BEYOND THE
DESCRIPTION ON THE FACE HEREOF. In no case shall Seller be liable to anyone for any
consequential or incidental damages for breach of this or any other warranty, express or implied,
or upon any other basis of liability whatsoever, even if the loss or damage is caused by Seller's
own negligence or fault.
LIMITED WARRANTY
FCC Notice:
This equipment has been tested and found to comply with the limits for a Class B digital device,
pursuant to part 15 of the FCC Rules. These limits are designed to provide reasonable protection
against harmful interference in a residential installation. This equipment generates, uses and can
radiate radio frequency energy and, if not installed and used in accordance with the instructions,
may cause harmful interference to radio communications. However, there is no guarantee that
interference will not occur in a particular installation. If this equipment does cause harmful interfer-
ence to radio or television reception, which can be determined by turning the equipment off and on,
the user is encouraged to try to correct the interference by one or more of the following measures:
1) Reorient or relocate the receiving antenna, 2) Increase the separation between the equipment
and receiver, 3) Connect the equipment into an outlet on a circuit different from that to which the
receiver is connected. The installer can also consult an experienced radio/television technician for
additional suggestions, if necessary.
In addition, a booklet on interference, prepared by the Federal Communications Commission, is
also available for reference. Order "Interference Handbook" from the U.S. Government Printing
Office, Washington D.C. 20402, stock no. 0004-000-00450-7.
SELF-TESTS
The FG-1015 automatically performs a series of self-tests during power-
up, and continuously (when the sensor is not detecting a trouble or alarm
condition).
If any self-test fails, the unit will signal trouble by flashing the LED's alter-
nately about once per second. Protection will continue if possible. If the
trouble condition clears, the LED's will return to the normal state. Always
return the unit for repair if there is any indication of trouble, even if the
trouble is temporary.


