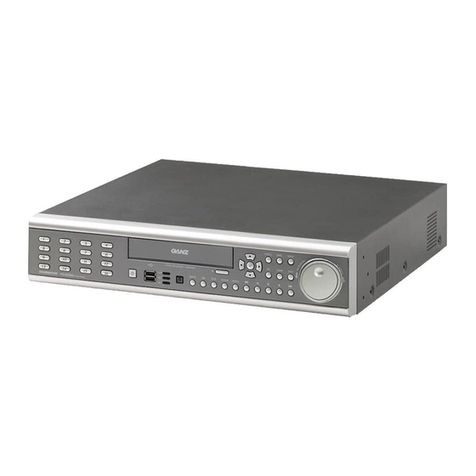
Intellix XVR1648 User manual

USER MANUAL
XVR-1648
(Server)
Stand Alone Type
DVR
SYSTEM

Front Panel
1
2
3
4
10
11
9
8
7
6
5
POWER : System Power On/Off
System Control key : Shortcut button for convenience
CD/DVD RW : Back up image to CD/DVD RW
HOLD : Hold JOG
Return : Cancel Setup or Return Previous Mode
Direction Control Button : Control direction
Enter : Apply Changing Setup.
Channel Selection Button : Select Channel or Input Password.
: Set up focus / Increase the backward playback speed
: Select reverse playback
: Pause/resume the playback
: Increase the forward playback speed
12
:Setup Iris / Select the forward playback
1234
11
12
9
8
765 10

System Control Key 123
4
9
8
7
6
5
DISPLAY : Select Screen Division Mode or Rotation Mode.
SEQ : Select sequence screen mode.
PANIC : Select the panic recording mode.
ZOOM : Zoom image.
LOCK : Lock button. Password input needed.
When locked, “LOCK” is displayed on screen. Press lock button to unlock.
ARCHIVE : Go to archive setup menu. Password input needed.
PTZ : Go to Camera PTZ Control.
SETUP : Go to System setup.
SEARCH : Go to Search Mode for Searching Recorded Data.
1
2
3
4
9
8
7
6
5
FOCUS / IRIS button FOCUS IRIS
1 2 3 4
1
2
3
4
NEAR : Set camera focus nearly.
FAR : Set camera focus far.
CLOSE : Close camera iris.
OPEN : Open camera iris.
Front Panel

• When System Installation, Please Install under System Power Off Status.
• Please Use Specific Adaptor when Power Supply.
Tip
1
2
3
4
7
6
5
Video IN / Loop Out : 16 camera inputs & Loop out
11
12
9
8
10
13
LAN : Connection to a router or internal network
POWER : Power Cable connection.
Monitor out : Output the video to AV Monitor.
S-VHS : Output Video by Connected S-VHS.
Spot #1 ~ #4 : Output Spot-out Video to AV Monitor.
Audio In : 4 Audio Input Terminal Related with Camera.
Audio Out : 1 Output Audio Data.
Alarm in : 16 alarm inputs
USB : USB port for use the USB memory stick and USB HDD Backup. (5 VDC, 500mA)
VGA OUT : VGA main monitor connection
RS-232C : Connect external RS-232 devices.
ARI/Panic/RS-485 : Alarm Reset, Panic alarm and PTZ connection
Alarm out : 16 alarm outputs
12
98 10 13
1 2 3
476
511
Rear Panel

Start Up
Press the power button.
The DVR startup screen detects and checks the HDD and
CD-RW/DVD-RW.
After startup process is complete, it appear the “logon”
display and input the Password.
(Default password is none. So click the “Logon” button.)
The DVR start the normal operation and show default
display of all 16channels.
Three pop-up displays show current system information
and live log and live alarm situation.

Start Up
• Live System Info
1) The percentage of HDD used.
2) User Connection Information
3) Current recording Frame information
4) Backup situation
•Livelog
It shows the live log.
: Live log can be removed by pressing this button.
• Live Alarm
Alarm Detection channel show each channel.
When operator drag the mouse at left side of bottom, this
pop-up screen is appeared.
When pressing each button, the operator can
Control (On/Off) above pop-up screen.

System Setup
• Press the mouse right button from live display.
It shows the menu screen.
• Select the “DISPLAY” icon and press the “DISPLAY” button.
• Display Type
The operator can select 5 different display type.
• Camera Arrangement
The operator can edit the camera location each
display type. After clicking the one of 16 channel
buttons, select below section. Then display channel
will be changed.
Additionally the operator can select next display with
clicking the arrow buttons.
Configuring the Live Display

System Setup
PTZ control
• Select the “PTZ” icon and press the “PTZ” button. PTZ controls appear like above.
1) Select the camera.
2) Control the camera direction.
3) Press this button. The operator can control the PTZ detailed configuration with pop-up
screen.
4) Control the Zoom, Focus, Iris.
5) Assign the Preset.
After moving the location, Select the number and press the “save” button.
Camera will move as assigned location when pressing the “Run” button after selecting the number” .
6) Assign the Pattern.
After selecting the number, click the “ Run” button.

System Setup
Search
- The operator can search the recorded data as normal, panorama search1,2.
• Normal Search
Select the “SEARCH” icon and press the “SEARCH” button.
Logon display shows and input the password.
(A) It shows the backup display.
(B) Select the “Playback” or “Log”
(C) Select the “Date and Time” for search
(D) The window for search in detail.
(E) It shows different color each recording configuration at
(F) It shows the recorded data .
(F) It show recorded area.
(A)
(B)
(D)
(C)
(E)
(F)
- Select the date. In case of date that have recorded data, it shows with
color at (F).
- Select the time,
The operator can select the time from timer or by drag the timeline bar
form (F).
- Click the button for playback from (D),
- Playback speed is from X1 to X128 forward and backward.
Playback-> Date/time
The display cloor about the recorded data at Timeline appear differently each type like above.

System Setup
Click button for snapshot archiving from (D).
Then it shows below screen. During the playback, the operator can save the image that want to save.
Input the snapshot tag.
Select the channel,
Select the screen.
Input the Memo.
For saving the image, click the “reserve” button.
(The operator can check the saved image from
Archived Date Management of Archive menu).
The operator can send the image with E-mail.
Input the E-mail address and click “send” button.
For burning directly, click the “Start burning”
button. Then it shows “burn” screen.
Input the archiving tag.
Select the device(CD/DVD,USB)
Foreground: During backup, the operator
can not control the other function.
Background: During backup, the operator
can control the other function.

System Setup
Click button for AVI archiving from (D).
Then it shows below screen. During the playback, the operator can save the AVI file about period that want to
save.
Input the archiving tag.
Select the channel,
Select log, text. rec index table
Input the Memo.
Click the “start” button.
Then “AVI archiving” button color is changed as red.
(For using this function, it should work the playback
certainly. If not, it can not save AVI file).
For stopping, click ”AVI archiving” button again.
Then it shows left screen.
For recording continuously, click the “continue” button.
If want to stop, click the “stop” button.
It shows left screen with archiving data information.
How to burning and reserve is same with how to save the
snapshot.
(The operator can check the saved image from
Archived Date Management of Archive menu).

For returning, drag the mouse to the bottom of screen.
Then appear below icon with return icon.
Click the “return” button then return original screen.
The operator can control the playback speed with above icon
from full screen playback mode.
System Setup
Click button for full screen from (D).
Then it shows below screen.
Click button for viewing the log from (D).
Then it shows left screen. Current log is appeared.
For returning, click the same button again.
Click button for changing the playback display from (D).
The operator can select the playback display mode.

System Setup
Playback-> Live View
Select the “live view”.
Then it shows current live display instead of calendar.
The function with below icon work equally.
Log
Click the “log”.
Then it shows left screen.
Select the date that want to see the log from calendar.
Select the event section that want to see.
Click to start the “search”.
Click the button with viewing with timeline.

System Setup
Select the log.
Then the recorded data about selected log move as center.
( : location)
For playing the recording data with log, click the log double.
Click same button again for returning original screen.
• Panorama Search1
- The operator can search frame by frame.
• Select the channel.
• Select the date.
• Select the time.
• The operator can select the time form timer or by
drag the timeline bar.
• How to search is almost same with normal search.

System Setup
• Panorama Search2
- The operator can search with divided screen per 3 hour.
• Select the channel.
• Select the date.
• How to search is almost same with normal search.
The operator can select the playback location by Drag
and drop Timeline bar.

System Setup
Archiving
- New archiving
• Select the “ARCHIVING” icon and press the “ARCHIVE”
button.
• Logon display shows and input the password.
It shows the archiving display.
• Select the Start time and End time with timer or timeline bar.
• Click the “query” button.
Then it shows data information at archiving info.
Click button for saving the data after inputting the archiving tag.
(The operator can see the saved data from Archived Data Management.
Click button for burning the data.
Then it shows “burn” screen.
Select the device(CD/DVD,USB)
Foreground: During backup, the operator can not control the other
function.
Background: During backup, the operator can control the other
function.
- Archived Data Management
• The operator can see the saved snapshot image and AVI
file form New archiving menu and search menu.
: Detailed information
: Delete
: Burning

System Setup
Setup-System
• Select the SETUP” icon and press the “SETUP” button.
Then select the “SYSTEM” icon. Logon display shows and input the password.
It shows the system setup display.
CAMERA
• Camera Title: Input the Title and description by virtual keyboard.
• Camera color setup: Select the Brightness, Contrast, Tint, Color
The operator can control the color with live display when clicking the button.

System Setup
• PTZ setup: Select the address, protocol and Baud rate each camera.
The operator can control PTZ detailed setup when clicking the button.
• Covert/OSD setup: Select the covert and main display, spot OSD setup
※How to use the virtual keyboard
Click Mouse left button double from the location that operator want to input.
Then it shows the virtual keyboard. Select each character from virtual keyboard.
For using the small character. Click the button.

System Setup
ALARM/EVENT
• Sensor Event Setup: Select the Activation, Active State (High/Low-It is related with sensor type) and input
the description.
• Video Loss Event Setup: Select the video loss Activation.
• Motion Detection Event Setup: Select the Motion Detection Activation and Sensitivity(1~10)
and Motion Area.
The operator can select the motion area from above screen after clicking the button.
After selecting the motion area with mouse drag, click the mouse right button, Then it shows pop-up menu
that related with selection.

System Setup
• Storage Event Setup: Select the File system Event, Smart Event.
Disk Full: When disk full, Activation On/Off.
Smart Check Period: Select from 1 hour to 24 hour.
Smart Warning: When HDD has trouble, Activation
On/Off.
• User Defined Event Setup.
The operator can make the User Defined Event with current event’s mixing.
When happen the over two events at the same time, the operator can setup how it work.
(Mixing condition is “AND” not “OR”)
Setup the detail configuration after entering the “EDITER” with clicking the button.
Select the sensor, motion, Videoloss, Storage Event and User defined Event as user want.
After selecting it, action type can setup from Event Action Setup.
Other manuals for XVR1648
1
Table of contents
Other Intellix DVR manuals
