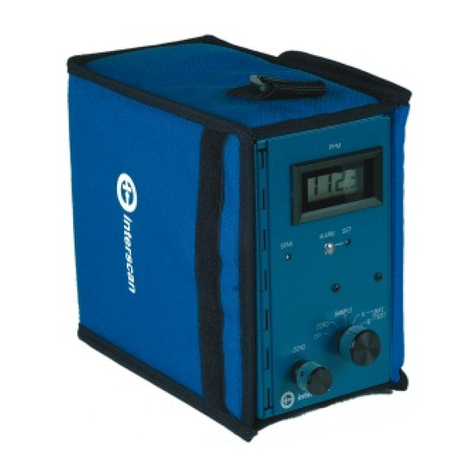
Interscan Corporation 4000 Series User manual

120-00008 REV D 4000 DIGITAL MANUAL –NEW OVERLAY Page 1 of 28
Instruction Manual
4000 Series Digital Portable Analyzer
Service Department
(800) 458-6153 ext. 121
(818) 882-2331 ext. 121
FAX (818) 341-0642 E-mail: service@gasdetection.com

120-00008 REV D 4000 DIGITAL MANUAL –NEW OVERLAY Page 2 of 28
THIS PAGE INTENTIONALLY LEFT BLANK

120-00008 REV D 4000 DIGITAL MANUAL –NEW OVERLAY Page 3 of 28
TABLE OF CONTENTS
SECTION TITLE PAGE
1.0 Equipment Description
Front Panel 4
Rear Panel 6
Right Side Panel 7
Internal components 8
2.0 Operating Instructions
Setting the Alarm 9
Zeroing the Instrument 10
Sampling 11
3.0 Calibration
Introduction 12
Sample Bag & Pressurized Cylinder Calibration14
Calibration Procedure 15
4.0 General Maintenance
Battery Life 16
Battery Charging & Replacement 16
Water loss in Refillable Sensors 18
Long Term Storage 23
Post Storage Startup 23
5.0 Troubleshooting 24
6.0 Warranty 25
7.0 Return Authorization 26
8.0 Appendix
INTERFERING GAS DATA 27
SCRUBBERINFORMATION 31

120-00008 REV D 4000 DIGITAL MANUAL –NEW OVERLAY Page 4 of 28
Introduction
Note: It is not necessary to calibrate the monitor when
received from the Interscan or an authorized distributor.
All Interscan monitors are calibrated at the factory prior to
shipment.
TheInterscan4000Digitalseriesoperatesontheprincipleofpulling
a sample (Sample draw) through a sensor. The Electrochemical
sensor is manufactured by Interscan. Electrochemical means that
it produces an electrical current proportional to the level of gas
passing through. The large size of the Interscan sensors results in
larger reactive surface area which yields greater sensitivity.
Equipment Description
1.0 Front Panel
(fig. 1)
Designation Function

120-00008 REV D 4000 DIGITAL MANUAL –NEW OVERLAY Page 5 of 28
LCD Display: Indicates gas level when function switch is in
ZERO, SAMPLE INACTIVE or SAMPLE
ACTIVE, and battery level when on BAT.
TEST A or B.
ALARM Light: LED. Flashes ON/OFF when alarm set
point is exceeded.
ALARM SET: 25-Turn potentiometer with a screwdriver
adjustment. Sets the alarm trip point at the
desired gas level. (low alarm set must be
greater than 5% of the full scale).
SPAN/CAL: 25-Turn potentiometer with a screwdriver
adjustment. Sets display to correspond to the
concentration of the calibration gas used for
calibrating the instrument or to the level
specified on ECS certificate.
FUNCTION SWITCH: Rotary switch as follows:
OFF: Analyzer power is OFF.
SAMPLE
INACTIVE: Analyzer power is ON (pump is OFF),
Sampling is inactive.
SAMPLE
ACTIVE: Analyzer power and pump are on. Also in this
position the analyzer is zeroed. Sample
measurements and calibration are
accomplished in the sample mode.
BAT. TEST A: Indicates state of charge of the Nickel-
Cadmium (NiCd) batteries on the LCD
Display. These batteries power the pump &
alarm. Recharge ifthe LCD Display level falls
to or below 100 (ignore decimal point).
BAT. TEST B: Indicates state of charge of the “C” size
alkaline batteries on the LCD Display. These

120-00008 REV D 4000 DIGITAL MANUAL –NEW OVERLAY Page 6 of 28
batteries power the main circuitry, display and
are NOT re-chargeable. Replace if the LCD
Display level falls to or below 100 (ignore
decimalpoint).Youmustallowanovernight
stabilize prior to use if the batteries are
replaced. Batteries are to be checked
every 30 days.
ZERO: 10-TurnPotentiometer.Allowsthemetertobe
adjusted to zero, by compensating for any
background signal.
1.1 Rear Panel
(fig. 2)
Designation Function

120-00008 REV D 4000 DIGITAL MANUAL –NEW OVERLAY Page 7 of 28
INLET: ¼” O.D. Quick connect or compression gas
fitting.
OUTLET: ¼” O.D. Quick connect or compression gas
fitting.
RECORDER OUTPUT: ¼” phone jack for Analog recorder output
connection. Typically 0-100mV. Tip –
positive, Ring –ground.
CHARGER INPUT: 3.5mm phone jack for 9V DC, 100mA charger
input. Tip –positive, Ring –ground.
SENSOR SCREWS: Used to hold Sensor or Sensor base in place.
1.2 Right Side Panel
(fig. 3)
AUDIBLE ALARM: Piezoelectric Horn, sounds when alarm set
point is exceeded.

120-00008 REV D 4000 DIGITAL MANUAL –NEW OVERLAY Page 8 of 28
The above (fig 3) page 7, #12 indicates two #1 Phillips-head screws
located on the right side panel. Removing these screws allows access to
the internal components. Do not remove any other screws
1.3 Internal Components
(fig. 4)

120-00008 REV D 4000 DIGITAL MANUAL –NEW OVERLAY Page 9 of 28
Operating Instructions
2.0 Setting the Alarm
Normally, the alarm is set at the Factory at 50% of full scale. The
alarm can be reset to any desired level by following the procedure
below. Minimum alarm level must be greater than 5% of the full
scale measuring range.
Set FUNCTION switch to SAMPLE INACTIVE. Using the ZERO
control, advance the LCD display to the desired alarm set point.
Some analyzersrequiretheuseof spantool(provided). Adjustthe
ALARM SET (fig. 1 pg. 4) control until the alarm sounds. Adjust the
ZERO control slightly counterclockwise until the alarm is silent. To
confirm setting slowly adjust the ZERO control clockwise until the
alarm sounds. Re-adjust the ALARM SET control if necessary.
Adjust the ZERO control for a reading of “0” on the display.
2.1 Zeroing the Analyzer
The Analyzer must always be zeroed, prior to use.
Zero adjustments must be made in the SAMPLE ACTIVE mode,
i.e. with the pump on, in air free of interfering gases. If necessary,
usezeroairoraC-12 filter(ifprovided)tozerointhesamplingarea.
When using C-12 zero filter, connect externally to gas inlet. Allow
reading to stabilize, before making final zero adjustment,
(stabilization can take approximately 20 minutes). The C-12 filter
must be removed after zeroing the analyzer.

120-00008 REV D 4000 DIGITAL MANUAL –NEW OVERLAY Page 10 of 28
2.2 Sampling
Analyzer must be zeroed prior to sampling (section 2.1).
Set the FUNCTION switch to SAMPLE ACTIVE to activate the
pump. If the INLET or OUTLET is blocked, the pump may stall.
Note: Running the Analyzer with blocked INLET or OUTLET
may lead to the sensor leaking caustic electrolyte leading to
analyzer damage. Power analyzer off, and clear the blockage.
To reset the pump, set the FUNCTION switch to SAMPLE
INACTIVE momentarily and then switch again to SAMPLE
ACTIVE.
Nominal sample rate in MOST analyzers is approximately 1.0,
0.2 liter per minute. NOTE: For hydrazine analyzers with the
measuring range of 0-100ppbthe sample flow rate is 2.2
0.2 liters
per minute. The Average sample run time, starting with fully
charged “C” NiCdbatteries,is12hours.IftheBATTERY TEST “A”
indicationisdownto100ontheLCDdisplay,theflowratemayhave
started to decrease. This is usually not a problem unless very
precise readings are required.
Sampling from high pressure may only be achieved by using the
method indicated in (fig. 5).
Note: The sample to the Interscan Analyzer must be drawn
perpendicular to the Sample flow stream.
(fig. 5)

120-00008 REV D 4000 DIGITAL MANUAL –NEW OVERLAY Page 11 of 28
Calibration
3.0 Introduction
All analyzers are factory calibrated prior to shipment.
There is no easy answer as to how often a monitor should be
calibrated. This is strictly a function of the application (gas
concentration and frequency of exposure to target gas). The
purpose for calibration is to compensate for any possible decrease
in sensor sensitivity. The primary cause of sensitivity decrease is
excessive loss of water by evaporation. A secondary cause may
be by contamination from unknown sources. H2Ssensors show an
additionaldecreaseinsensitivityduetointernalsulfurformation,the
rate of which depends on the gas concentration.
3.1 INTERSCAN’S Sensor Express - Electronic
Calibration Service
Interscan’s SENSOR EXPRESS® program streamlines downtime
bysendingyou apre-calibratedsensorsonaregularbasisperyour
needs, without the burden of returning sensors to our factory for re-
certification. The sensors are shipped to you either twice , three
times, or four times per year at your discretion.
Follow the instructions received with the Sensor, allow to stabilize,
and the instrument is ready for use. The factory recommended
procedure for calibrating all INTERSCAN analyzers, involves the
use of certified calibration gas or a permeation device. Besides
being essential for calibration, having a known certified gas
standard on hand allows the user to test the analyzer at any timeto
determine that it “really works”
Asindicatedonthecertificationsheet,theSensorExpress®.Itdoes
not certify the analyzer as a whole.Most importantly, the Sensor
Express® program is not a substitute for basic analyzer
maintenance, nor does it check for malfunction of the analyzer
components.

120-00008 REV D 4000 DIGITAL MANUAL –NEW OVERLAY Page 12 of 28
3.2 Sample Bag Calibration & Pressurized Cylinder
Calibration
Whatever the source of calibration gas, the recommended method
istocollectthegasinthepropersamplebag,whichisthenattached
totheanalyzerINLET. Thecalibrationgasisdrawnfromtheproper
sample bag through the sensor. An exception to the use of a
sample bag is for those gases, which are reactive with, or
chemisorbed by the bag itself (e.g. Chlorine, Hydrazine). Teflon®
or Tedlar® bags are suitable for H2S, SO2, NO and NO2. Several
bag materials are suitable for CO. Contact the Factory for
recommendations.
The sample bag method is the factory-recommended method for
calibration. Since an internal pump is used, the same flow rate
conditions during the sample andthe calibrate modes are assured,
eliminating errors due to flow rate differences. For most
applications, using a bag is the simplest procedure.
A regulated pressurized certified cylinder fitted with a tee-manifold
(fig. 6) and unrestricted vent is a good procedure in place of the
sample bag, as long as the flow rate of the gas is at least 140
percent that of the sample pump.
(fig. 6)

120-00008 REV D 4000 DIGITAL MANUAL –NEW OVERLAY Page 13 of 28
3.3 Calibration Procedure
Analyzer must be zeroed prior to calibration (sec 2.1).
1. For all gases, except Chlorine or other chemisorbable types, fill the 5 liter
sample bag with calibration gas, and attach it to the external inlet fitting.
This is best done by attaching a short length 4 inch (101.6mm) of 1/4 inch
(6.35 mm) O.D. Teflon tubing to the sample bag, then inserting into the
inlet fitting.
2. Set the FUNCTION switch to SAMPLE ACTIVE.
3. Allow 2 to 3 minutes for the reading to stabilize, and by using the
SPAN/CAL control, set the display to match the calibration gas
concentration being used.
4. Remove the sample bag from the analyzer and allow the display to
stabilize.
5. The analyzer is now calibrated and set up for operation.
NOTE: If you require additional information on Calibration
procedures, please contact the Service Department at 1-800-458-
6153 ext 121 or e-mail service@gasdetection.com

120-00008 REV D 4000 DIGITAL MANUAL –NEW OVERLAY Page 14 of 28
General Maintenance
4.0 Battery Life
Because of current requirements of the circuitry, “C” size alkaline
battery life should be check on a monthly basis, whether the unit is
operating or not. Note: Batteries vary in capacity by
manufacturer and may provide more battery life. Analyzer
malfunction, as a result of low battery, will be evident as either
inability to zero the monitor or clipping of the display at a fixed
reading below full scale.
Nickel-cadmium battery life is indeterminate. It is somewhat
dependent upon how well the charge level is maintained.
4.1 Battery Charging and Replacement
All models of the 4000 Series analyzers use two “C” size alkaline
batteries.Thesearelocatedonthehingeddoor,rightside(fig.4pg.
8). Polarity is marked on the door over the battery holder.
A few minutes warm-up/stabilization is needed before using the
analyzer if alkaline batteries are replaced before Battery Test “B”
indicates a low battery condition (100). Replace “C” alkaline
batteries and allow monitor to stabilize overnight if the batteries are
low or dead. The FUNCTION switch should be set to OFF during
this time. This is performed to allow the sensor time to stabilize.
The rechargeable batteries are ½ “C” size NiCd and are rated at
0.80 ampere hours. They are mounted on the hinged door, left side
(fig.4pg. 8). Polarity is marked on thedoor, over the battery holder.
All models use four ½ cell “C” size NiCd batteries. Condition is
shown in the BATTERY TEST “A”, FUNCTION switchposition.The
NiCd battery voltage changes quite rapidly as it approaches the
recharge point, which makes accurate display indication difficult. It
is recommended that the batteries be recharged if the reading in
BATTERY TEST “A” is at 100 (ignoring the decimal place).Allowing

120-00008 REV D 4000 DIGITAL MANUAL –NEW OVERLAY Page 15 of 28
the reading to drop below 100 is not recommended. Note: NiCd
batteries can develop cell memory. Cell memory is caused
by running the analyzer on battery power for a short period of
time REPEATEDLY i.e: Running the analyzer for 20 minutes
and then recharge. If this occurs repeatedly, the NiCd battery
life will only retain a 20 minute charge memory.
The charger is an external 9V DC, 500mA transformer and is
connectedto the rear of the unit prior to charging. The tip is positive
and the ring ground. The FUNCTION switch should be set to OFF
or SAMPLE INACTIVE when charging. The recommended charge
time is 16 hours.
4.2 Water loss in Refillable sensors.
(fig. 7)
All sensors provided with afill port require that the electrolytematrix
is maintained in a near-saturated condition in order to provide
optimum performance. This is achieved by injecting distilled or
deionized water into the sensor via the red plug, using the plastic
syringe (provided).
Refer to (fig. 7 pg. 16). Refillable sensors are identified by the red
fillpluginthesideofthesensor. Thefillpluglocationmayvaryfrom

120-00008 REV D 4000 DIGITAL MANUAL –NEW OVERLAY Page 16 of 28
(fig. 7 pg. 16). There are two types of refillable sensors. The S-
type is a shorter sensor of slightly over 2 1/2 inches ( 64 mm) in
height; the P-type is almost 4 inches (104 mm) in height. “P” and
“S” type sensors connect to the analyzer by different connection
methods.
For portable survey monitors, the sensor should be removed and
weighed every 1 to 2 months, depending upon usage. The weight
loss is indicated on the weight label on the side of the sensor.
Sensorweightisrestoredberemovingthesensorfromtheanalyzer
and comparing the current weight of the sensor with its original
weight (in grams). Sensor weight is indicated on a label located on
the side of the sensor.
There are three types of gas fittings used depending on the age of
the original sensor and the gas being measured.
(fig. 8)
Male elbow ¼ O.D.tubecompression fitting
This is a compression fitting comprised of the body, nut and two
ferrules(fig.8). Disconnectbylooseningthenutuntilthetubingcan
be pulled away from the body. To re-attach insert the tubing and
tightenthenut. DoNOT overtightenthenutasthiswilldamagethe
nut and fitting

120-00008 REV D 4000 DIGITAL MANUAL –NEW OVERLAY Page 17 of 28
(fig. 9)
Quick connect male elbow
This is a quick connect system comprised of the body, o-ring and
ferrule (fig. 9). Disconnect by pushing on the ring where the tubing
enters the fitting and gently pulling on the tubing. Re-attach by
inserting the tubing all the way in and then gently pull backward.
(fig. 10)
Barbed male elbow
Thefittinguses abarbedconnector system (fig. 10). Disconnect by
pulling on the tubing. Re-attach by pushing the tubing onto the
fitting until firmly seated.

120-00008 REV D 4000 DIGITAL MANUAL –NEW OVERLAY Page 18 of 28
Fig. 11
For P-type sensors refer to (fig. 11). Disconnect the 2 electrical
connections to the sensor. Disconnect the tubing from each gas
fitting. Loosen the screw indicated as “A”. Loosen the clamp screw
“B” until the sensor can be removed from clamp.
NOTE: DO NOT REMOVE ANYTHING ELSE!!!!!!
Restore the sensor to within 5 grams original sensor weight by
injectinganequivalentccofdistilledordeionizedwater(10g.weight
loss means add 10cc water).DONOTOVERFILL.If sensorwillnot
take on any more liquid (liquid starts coming out the fill port) do not
attempt to add additional distilled water.
Note: Weight loss in excess per sensor weight label may
prevent the restoration of the weight to within 5 grams of the
original weight. DO NOT OVERFILL. After weighing and refilling
replace the sensor in the analyzer, tighten screw “B” taking care
only to make it tight so as to secure the sensor. Thentighten screw
“A”, do not over tighten. Assure that all electrical and pneumatic
fittings are secure. The sensor should be allowed to stabilize for
several hours with power off.

120-00008 REV D 4000 DIGITAL MANUAL –NEW OVERLAY Page 19 of 28
(fig. 12)
For S-type sensors refer to (fig. 12). Disconnect the two electrical
connections to the sensor. Disconnect the tubing from each gas
fitting. Remove the two Sensor Screws (# 7).
NOTE: DO NOT REMOVE ANYTHING ELSE!!
Restore the sensor to within 5 grams original sensor weight by
injectinganequivalentccofdistilledordeionizedwater(10g.weight
loss means add 10cc water).DONOTOVERFILL.If sensorwillnot
take on any more liquid (liquid starts coming out the fill port) do not
attempt to add additional distilled water.

120-00008 REV D 4000 DIGITAL MANUAL –NEW OVERLAY Page 20 of 28
Note: Weight loss in excess per sensor weight label may
prevent the restoration of the weight to within 5 grams of the
original weight. DO NOT OVERFILL. After weighing and refilling
replace the sensor in the analyzer, tighten screws onthe rear of the
analyzer. Assure that all electrical and pneumatic fittings are
secure. The sensor should be allowed to stabilize for several hours
with power off.
4.3 Long Term Storage (one month or more)
TurnFUNCTIONswitch to “OFF” position. Disconnect charger from
analyzer. Detach 15 pin “D” connector from circuit board. Remove
alkaline batteries and cover analyzer to protect from dust.
4.4 Post Storage Start-up
24 Hours Before Using:
Uncover the analyzer. Install FRESH alkaline batteries. Reconnect
15-pin “D” connector from circuit board. Connect the charger to the
analyzer to charge NiCd batteries.
After 24 Hours:
Follow instructions in Section 2.0. Analyzer is ready to use or
calibrate.
Other manuals for 4000 Series
2
Table of contents
Other Interscan Corporation Measuring Instrument manuals

Interscan Corporation
Interscan Corporation 4000 Series User manual

Interscan Corporation
Interscan Corporation 4000 Series User manual

Interscan Corporation
Interscan Corporation GF1900 User manual

Interscan Corporation
Interscan Corporation GF1900 User manual

Interscan Corporation
Interscan Corporation GasD 8000 Series User manual
Popular Measuring Instrument manuals by other brands
TSI Incorporated
TSI Incorporated VELOCICALC 9525 Operation and service manual

Campbell
Campbell CS106 user manual

Geotech
Geotech Shallow Well Probe Scavenger Installation and operation manual

Autophix
Autophix OM126 user manual

Anritsu
Anritsu Series MS278XB Operation manual

shelyak
shelyak Alpy 600 user guide