Intova duo User manual

Thank you for purchasing an Intova Duo. Your Duo is
a tough and robust Sports Camera with a wide range
of features. Please read this manual carefully for usage
instructions and care tips.
Enjoy!
DUO
INSTRUCTIONS

TABLE OF CONTENTS
TABLE OF CONTENTS
3Buttons & Interface
4Getting Started Quick Start Guide
Remove/Replace Housing
Charge
Inserting & Removing Micro SD Cards
Power On/O
Choose Mode
Alerts & Important Messages
6Adjusting Settings Navigating Menus
Photo Mode Icons & Settings
Video Mode Icons & Settings
Playback Mode Icons & Settings
10 Maintenance &
Troubleshooting
Transferring Files to a Computer
Battery
Housing Maintenance
Troubleshooting
Support

Precautions
» Before using the camera, read the precautions to ensure correct use,
the best performance and longer lifespan.
» Do not leave or store the camera in direct sunlight, especially the lens,
as prolonged exposure to direct sunlight can damage the image sensor.
» Store in a cool, dry environment.
» During storage, note that battery must be recharged periodically
to maintain operating ability. Allowing total discharge may ruin the
battery.
» Clean with a soft dry cloth and take special care around lens.
» Format Memory Card prior to rst use
A. Power Button
» Power the camera on/o.
» Scroll to the right (select
menus and adjust EV).
B. Shutter Button
» Video mode: start/stop
recording.
» Photo mode: shutter button.
» Playback mode: start/stop
video.
» Setup Mode: conrmation.
Control
I. Housing Shutter Button
Control
J. Mini USB Port
K. Micro SD Card Slot
L. Lens
C
B
A
D
H
IJ
K
L
G
E
F
C. Indicator Lights
» Upper LED is a charging
indicator: In power-o state,
LED will be lit when the charger
is connected for charging.
» Lower LED is an operation
indicator: It ashes once during
image capture, and stays
constant when connected with
computer portable disk.
D. Mode Switch
Switch between photo, video,
and playback.
E/G. Up/Down Buttons
» Scroll up/down.
» Video/photo mode: Adjust
digital zoom.
» Playback mode: pause/play.
F. OK Button
» Open/exit menu.
» Replay Mode: Stop slideshow.
H. Housing Power Button
BUTTONS AND INTERFACE

DUO
QUICK START GUIDE
1.REMOVE FROM HOUSING
4. POWER ON
2.CHARGE
5. CHOOSE MODE (DEFAULT IS PHOTO)
3. INSERT MICRO SD CARD
6. PRESS SHUTTER TO SHOOT/RECORD
GETTING STARTED

HOUSING REMOVE/REPLACE
ALERTS & IMPORTANT MESSAGES
Missing SD card Notication:
POWER ON/OFF CHOOSE MODE
The camera is equipped with three modes: photo, video
and playback. The default mode is photo.
PHOTO
VIDEO
PLAYBACK
CHARGE
Prior to charging, remove the camera from its housing.
Charge the battery by connecting the camera to a
computer or other USB charging adapter using the
included USB cable. The camera charging indicator light
turns on during charging and turns o when charging is
complete.
When charging with a computer, be sure that the
computer is connected to a power source. If the camera
status light does not turn on, use a dierent USB port.
The camera does not come fully charged. No damage occurs to the
camera or battery if used without a full charge.
For more battery information, see Battery.
MICRO SD CARD USE
The DUO camera is compatible with micro SD memory cards with a
capacity up to 32GB (sold separately). Intova recommends using our
Intova memory cards for maximum reliability.
Insert the micro SD Card: Slide the memory card
into the card slot with the label facing the back of the
camera. When fully inserted, the card clicks into place.
Note: The card must be formatted prior to use.
To Remove the micro SD Card: Place your ngernail
against the edge of the memory card and lightly press
it further into the camera. The card springs out far
enough to be removed.
NOTICE: The camera is not equipped with built-in memory, a memory
card is required. Use care when handling memory cards. Avoid liquids,
dust and debris. As a precaution, power o the camera before inserting
or removing the card. Check manufacturer guidelines regarding use in
acceptable temperature ranges.
GETTING STARTED
Power-on: press and hold
POWER key for 3 seconds,
the screen starts up and
the camera enters startup
mode.
Power-o: click POWER
key, the camera turns o.
Unlock Housing: Rotate
housing lock switch
clockwise to unlock.
Lock Housing: Rotate
housing lock switch
counter-clockwise to
unlock.
Note: Automatic power-o will occur if no usage for 5
minutes. In case of extremely low battery, an icon of will
appear on the LCD screen indicating urgent charging
need. When the icon turns red and ashes, the camera
will automatically power o.
Notication that there is
no SD card in the camera.
A Micro SD camera is
required to capture
photos/videos and to
playback images. Insert
Micro SD card and this
notication will vanish.
Operation indicator: light illuminates when the
camera is capturing imagery or connected to a
computer.
Charger indicator: light illuminates when the camera
is charging.

CHOOSE MODE (DEFAULT IS PHOTO) USE UP/DOWN BUTTONS TO SELECT
PRESS OK BUTTON TO ENTER SUB MENU SELECT DESIRED SETTING IN SUB MENU
NAVIGATING MENUS TO ADJUST SETTINGS
Each camera mode has its own settings menu.
To navigate the settings for a given mode:
1. Verify that the camera is in the desired camera mode.
2. Press the OK button to open the settings menu for
the selected mode.
3. Use the up/down buttons to cycle through the
settings. (Continue to press the up/down buttons for
additional settings)
4. Press the OK button to enter sub menu.
5. Use the up/down buttons to cycle through the
setting options. (Continue to press the up/down
buttons for additional options)
6. Press the OK button to select the desired setting in
the sub menu.
Press the shutter button to go back/exit.
To navigate the general settings for the camera:
1. Press the OK button to open the settings menu for
the selected mode.
2. Press the power button to select the general
settings menu or press it again to return to the mode
menu.
ADJUSTING SETTINGS - NAVIGATING MENUS

ADJUSTING SETTINGS
PHOTO STATUS SCREEN
Your DUO camera displays the following information about modes and settings:
PHOTO MODE ICONS & SETTINGS
APhoto Photo mode
BWhite Balance Auto
Daylight
Cloudy
Fluorescent
Tungsten
CMetering Center
Multi
Spot
DExposure Value -2.0 to +2.0
+0.0 is the default
EResolution 5M: 2592x1944
3M: 2048x1536
2M: 1280x960
FQuality Super Fine
Fine
Normal
GImage Count Remaining
quantity of images
at quality setting.
HLoaded Micro SD Loaded card
IBattery Status Charge level
Self-Timer 2 Seconds
10 Seconds
Eect (lter) Nor
BW
Sep
Neg
Red
Gre
Blu
Normal
Black & White
Sepia
Negative
Red
Green
Blue
Date Stamp O
Date
Date & Time
B
C
A
I
D
E G
H
F

ADJUSTING SETTINGS
RECORDING INTERVAL REC INTERVAL
The recording interval enables the camera to
automatically stop recording video after 1 min, 3 min,
or 5 min and immediately start recording the next
section of the video (e.g. when 5 min is selected in the
menu, the camera will automatically stop after it has
recorded 5 min and start recording the next section
of video). When the memory card is full, the earliest
recoded section of le will be recorded over.
VIDEO MODE ICONS & SETTINGS
AVideo Video mode
BWhite Balance Auto
Daylight
Cloudy
Fluorescent
Tungsten
CMetering Center
Multi
Spot
EMovie Size
(Resolution)
HD
VGA
1280x720
640x480
Rec Interval O
1 Min
3 Min
5 Min
Eect (lter) Nor
BW
Sep
Neg
Red
Gre
Blu
Normal
Black & White
Sepia
Negative
Red
Green
Blue
Date Stamp O
Date
Date & Time
VIDEO STATUS SCREEN
Your DUO camera displays the following information about modes and settings:
B
C
A
D
E

ADJUSTING SETTINGS
PLAYBACK MODE ICONS & SETTINGS
APlayback Playback mode
BFiles Quantity of les in
current folder.
CVideo File Video File
Locked Lock/Unlock
Lock All
Unlock All
Delete Delete File
Delete All Files
Slide Show Play
Interval 1-10 sec.
Repeat
TO PLAY MOVIE CLIPS:
1. Select playback mode.
2. Press shutter button to play
Pause: Press up button.
Stop: Press shutter button.
PLAYBACK STATUS SCREEN
Your DUO camera displays the following information about modes and settings:
B
A
C

CAMERA CARE & TROUBLESHOOTING
TRANSFERRING FILES TO A COMPUTER
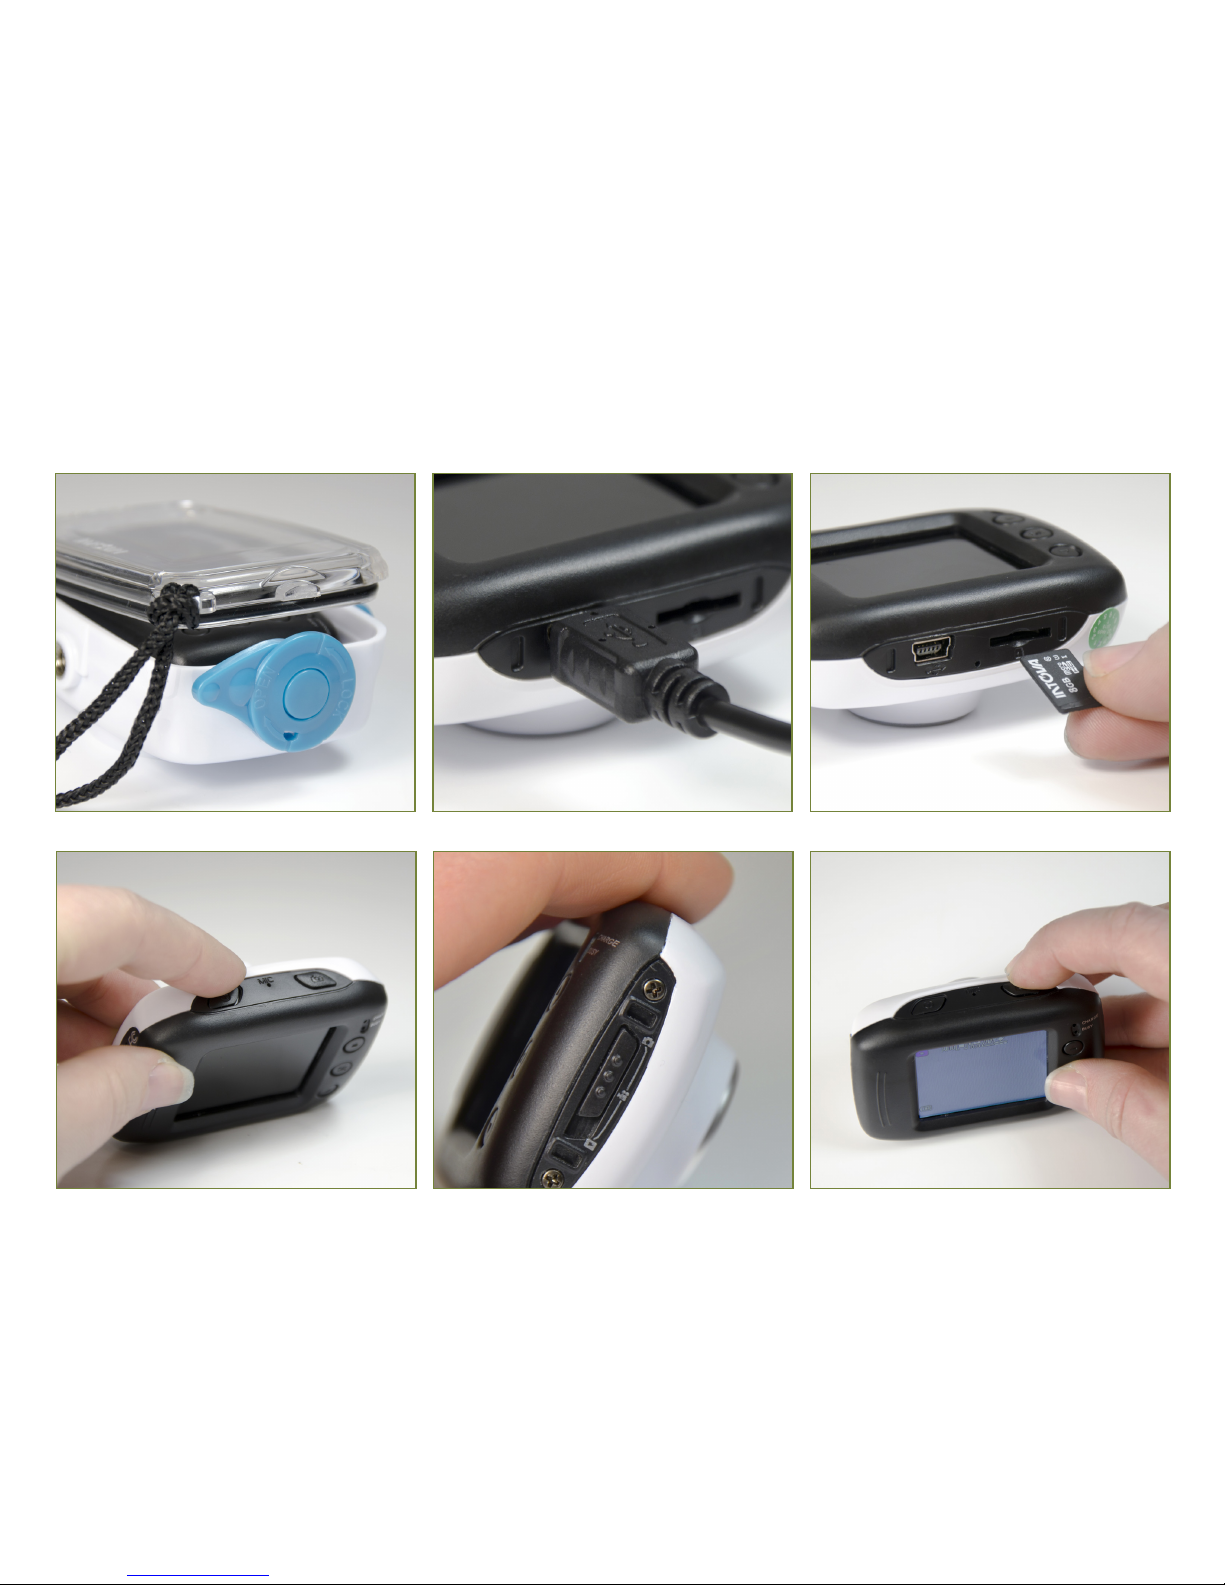
The DUO camera is plug and play.
1. Make sure camera is powered on.
2. Connect device to computer with USB cable.
BATTERY
Maximizing Battery Life:
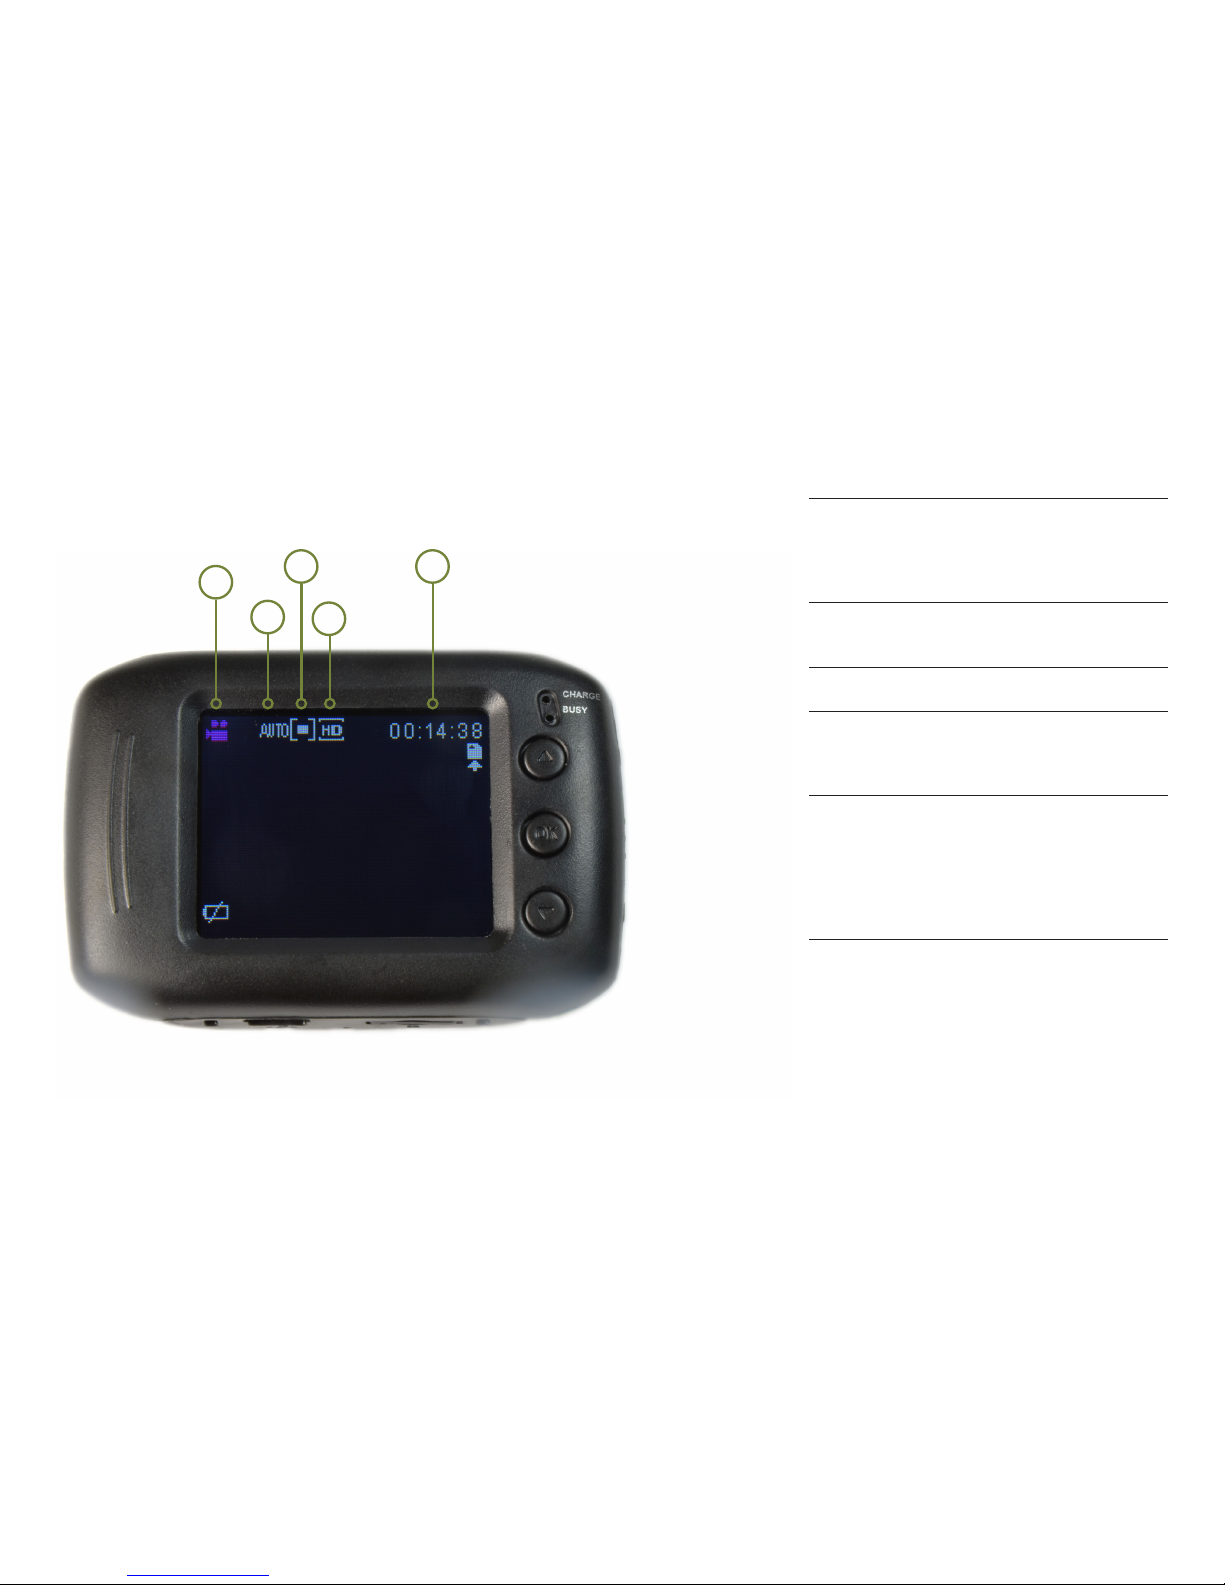
The battery icon has a line across it when the battery
is very low. If the battery reaches 0% while recording,
the camera saves the le and powers o. Extreme cold
temperatures can decrease battery life. To maximize
battery life in cold conditions, keep the camera in a
warm place prior to use. Shooting at higher frame rates
and resolutions increases power consumption.
The battery charges to 100% in approximately 6 hours
when using a USB-compatible Wall or Auto Charger.
Battery Storage & Handling:
The camera contains sensitive components, including
the battery. Avoid exposing your camera and battery
to very cold or very hot temperatures. Low or high
temperature conditions may temporarily shorten
the battery life or cause the camera to temporarily
stop working properly. Avoid dramatic changes in
temperature or humidity when using the camera, as
condensation may form on or within the camera.
The camera housing protects the camera from water
damage. For more information, see Camera Housing.
Do not turn on your camera if it is wet. If your camera
is already on, turn it o. Allow the camera to dry
thoroughly before using it again. Do not dry the camera
with an external heat source such as a microwave oven
HOUSING MAINTENENCE
Rinse housing in cool clean water after use.
Inspect O-ring carefully prior to each use: any debris on
O-ring can cause leakage.
Store in a cool dry area with housing door slightly open
to prevent O-ring deforming.
or hair dryer. Damage to the camera caused by contact
with liquid is not covered under the warranty.
Battery Disposal:
Most rechargeable lithium-ion batteries are classied
as non-hazardous waste and are safe for disposal in
the normal municipal waste stream. Many localities
have laws in place requiring battery recycling. Check
your local laws to make sure that you can dispose of
rechargeable batteries in your regular trash. To safely
dispose of lithium-ion batteries, protect terminals from
exposure to other metal with packing, masking or
electrical tape so they do not cause a re while being
transported. Lithium-ion batteries, however, do contain
recyclable materials and are accepted for recycling by
the Rechargeable Battery Recycling
Corporation’s (RBRC) Battery Recycling Program. We
encourage you to visit Call2Recycle at call2recycle.
org or call 1-800-BATTERY in North America to nd
a convenient recycling location. Never dispose of a
battery in a re because it may explode.
WARNING: Do not drop, disassemble, open, crush, bend, deform,
puncture, shred, microwave, incinerate or paint the camera. Do
not insert foreign objects into the battery opening on the camera.
Do not use the camera or the battery if it has been damaged—for
example, if cracked, punctured or harmed by water. Disassembling
or puncturing the battery can cause an explosion or re.
NOTE: You can also transfer les to a computer using a
card reader (sold separately). Connect the card reader
to your computer and insert the micro SD card into the
reader. You can then transfer les to your computer or
delete selected les on your card.

TROUBLESHOOTING
Problem Possible Cause Solution
Camera will not turn on Battery not charged Use supplied USB cable
and connect to powered-
on computer to charge.
Camera freezes, does
not operate correctly
or shows “card error”
message on LCD.
MicroSD card is improper
size or has les on it
recorded on another
device.
Use microSD card
maximum size 32GB
(class 10 recommended).
Format card if it has
les on it from another
device.
Photos are blurry Moving or shaking
camera when taking
photo.
Hold camera as steady as
possible when taking a
photo or use a tripod.
Video are shaky or
shows motion blur.
Moving camera in with
shaking motion or
panning too fast.
Move camera in even
slow movements when
taking videos.
Camera is not
recognized by
computer when
plugged in via USB
cable.
Connection failure or
defective USB cable.
Check to make sure
connections are secure,
restart computer or try
another USB cable.
Camera turns o
by itself after a few
minutes.
Power save is set to 1, 3
or 5 minutes or battery
charge level is low.
Turn o power save
function in camera’s
menu or make sure
battery has sucient
charge.
SUPPORT
www.intova.com
1 (808) 837-0074
INTOVA IS PART OF A FAMILY OF BRANDS:
Industrial Revolution, Inc.
5835 Segale Park Dr. C.
Tukwila, WA 98188
www.industrialrev.com
Other manuals for duo
1
Table of contents
Other Intova Action Camera manuals

Intova
Intova ConneX User manual

Intova
Intova EDGE X User manual

Intova
Intova X2 User manual

Intova
Intova DUB User manual

Intova
Intova X4K User manual

Intova
Intova EDGE X User manual

Intova
Intova HD2 User manual

Intova
Intova Sport HD Installation instructions

Intova
Intova duo User manual

Intova
Intova ConneX User manual