Intova HD2 User manual

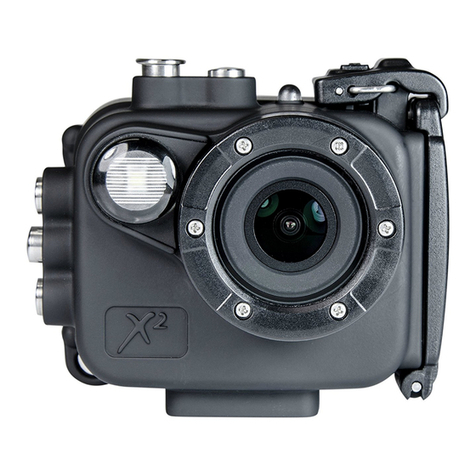
Thank you for purchasing the Intova HD2 marine
grade action cam! The rugged, durable and
waterproof HD2 will help you capture high quality
video and photos in many dierent venues and
environments. Please read this manual carefully
for usage instructions and care tips.
Enjoy!
HD2
INSTRUCTIONS

2
TABLE OF CONTENTS
TABLE OF CONTENTS
3Buttons & Interface
4Getting Started Quick Start Guide
Opening the Housing
Charge
Power On/O
Choose Mode
Inserting & Removing Micro SD Cards
Alerts & Important Messages
Action Video Light & Flash
2.4G Remote Use
Transferring Files to a Computer
8Interface & Settings Navigating Menus & Camera Settings
Video Mode Interface & Settings
Video Recording Status Interface
Picture Mode Interface & Settings
Additional Video & Picture Settings
13 Viewing Files Playback Videos/View Photos
Viewing les on an HDTV
14 Camera Care Battery
Housing Maintenance
15 Troubleshooting Troubleshooting
Support
Precautions
» Before using the camera, read the precautions to ensure correct use,
the best performance and longer lifespan.
» Do not leave or store the camera in direct sunlight, especially the lens,
as prolonged exposure to direct sunlight can damage the image sensor.
» Store in a cool, dry environment.
» During storage, note that battery must be recharged periodically to
maintain operating ability. Allowing total discharge may ruin the battery.
» Clean with a soft dry cloth and take special care around lens.
» Before each use, clean and maintain all O-rings in areas that have
been opened by removing any dirt, sand and any other debris.
» Format Memory Card prior to rst use.
FCC STATEMENT:
This device complies with part 15 of the FCC Rules. Operation is subject
to the following two conditions:
(1) This device may not cause harmful interference, and
(2) this device must accept any interference received, including
interference that may cause undesired operation.
This equipment has been tested and found to comply with the limits
for a Class B digital device, pursuant to Part 15 of the FCC Rules. These
limits are designed to provide reasonable protection against harmful
interference in a residential installation. This equipment generates, uses
and can radiate radio frequency energy and, if not installed and used
in accordance with the instructions, may cause harmful interference to
radio communications. However, there is no guarantee that interference
will not occur in a particular installation. If this equipment does cause
harmful interference to radio or television reception, which can be
determined by turning the equipment o and on, the user is encouraged
to try to correct the interference by one or more of the following
measures:
» Reorient or relocate the receiving antenna.
» Increase the separation between the equipment and receiver.
» Connect the equipment into an outlet on a circuit dierent from that
to which the receiver is connected.
» Consult the dealer or an experienced radio/TV technician for help.
Changes or modications not expressly approved by the party
responsible for compliance could void the user’s authority to operate the
equipment.
LIMITED WARRANTY: This product has a limited 1 year warranty, to the
original purchaser, to be free from defects in materials and workmanship.
Follow all product instructions and warnings as warranty does not cover
damage due to misuse, improper care, accidents, or alterations.
See www.intova.com for further details, limitations, and restrictions.
3
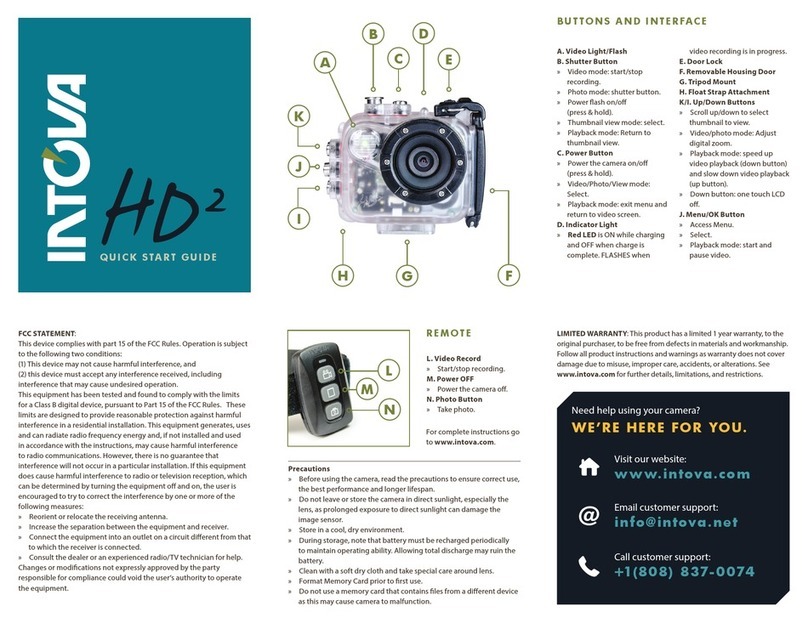
BUTTONS AND INTERFACE
A. Video Light/Flash
B. Shutter Button
» Video mode: start/stop
recording.
» Photo mode: shutter button.
» Power ash on/o
(press & hold).
» Thumbnail view mode: select.
» Playback mode: Return to
thumbnail view.
C. Power Button
C
D
E
M
O
L
R
Q
N
P
G
H
I
K
J
F
B
A
» Power the camera on/o (press
& hold).
» Video/Photo/View mode:
Select.
» Playback mode: exit menu and
return to video screen.
D. Indicator Light
» Red LED is ON while charging
and OFF when charge is
complete. FLASHES when
video recording is in progress.
E. Door Lock
F. Removable Housing Door
G. Tripod Mount
H. Float Strap Attachment
K/I. Up/Down Buttons
» Scroll up/down to select
thumbnail to view.
» Video/photo mode: Adjust
digital zoom.
» Playback mode: speed up
video playback (down button)
and slow down video playback
(up button).
» Down: one touch LCD o.
» Zoom in (Up) / out (Down).
J. Menu/OK Button
» Access Menu.
» Select.
» Playback mode: start and
pause video.
L. Mini USB Port
M. LCD Hood
N. LCD Screen
O. Battery Lock
P. Batter y
Q. Micro SD Card Port
R. Micro HDMI Video Out Port
S. Video Record
» Start/stop recording.
T. Power OFF
» Power the camera o.
U. Photo Button
» Take photo.
S
T
U

4
GETTING STARTED
1.OPEN HOUSING DOOR
4. INSERT MICRO SD CARD
2.INSERT BATTERY
5. POWER ON (press & hold)
3. CHARGE
PRESS SHUTTER (press & hold) FOR LIGHT6. PRESS SHUTTER TO SHOOT/RECORD
QUICK START GUIDE
(Up to 32GB class 10 microSD card)
HD2

5
OPENING THE HOUSING
ALERTS & IMPORTANT MESSAGES
Missing SD card Notication: Notication that there is
no SD card in the camera. A Micro SD camera is required
to capture photos/videos and to playback images.
Insert Micro SD card and this notication will vanish.
Operation indicator: light illuminates when the
camera is capturing imagery or connected to a
computer.
Charger indicator: light illuminates when the camera
is charging.
POWER ON/OFF
CHOOSE MODE
The camera is equipped with three modes: photo,
video and playback. To switch modes, quickly press the
power button.
CHARGE
MICRO SD CARD USE
Insert the micro SD Card: Insert card into Micro SD
card port with gold contacts facing towards LCD screen.
Push down until card clicks into place.
To Remove the micro SD Card: Lightly press the
memory card further into the camera. The card springs
out far enough to be removed.
NOTICE: The camera is not equipped with built-in memory, a
memory card is required. HD2 uses Micro SD card up to 32 GB. For
1080p HD video, speed class 10 is required. The card must be formatted
prior to use. Format a new Micro SD card before rst use or as necessary
after rst use such as when memory card becomes full. To format SD
card, press MENU, UP button, OK, UP button 8 times, OK, UP button, and
OK. Format will erase all data from card. Transfer and save any data prior
to formatting. Use care when handling memory cards. Avoid liquids,
dust and debris. As a precaution, power o the camera before inserting
or removing the card. Check manufacturer guidelines regarding use in
acceptable temperature ranges.
GETTING STARTED
Power-on: press and hold
POWER key for 2 seconds,
the screen starts up and
the camera enters startup
mode.
Power-o: click POWER
key, the camera turns o.
Unlock Housing:
» Slide lock towards
back of camera and
hold.
» Flip latch up away
from camera.
» Un-hook latch from
side door and pull
open door.
Note: Automatic power-o will occur if no usage for 5 minutes. In case
of extremely low battery, an icon of will appear on the LCD screen
indicating urgent charging need. When the icon turns red and ashes,
the camera will automatically power o.
Insert the Li-ion battery
into battery chamber
with gold contacts facing
lens port. Rotate battery
lock latch 90° to secure
battery.
Charge the battery by
connecting the camera to
a computer or other USB
charging adapter using
the included USB cable.
When prompted, select
“charge” from the menu.
The camera charging
indicator light turns on
during charging and
turns o when charging is
complete.
To recharge the battery
power and operate the
camera at the same time
select “open” from the
menu. When “open” is
selected, LCD will show
live view.
The camera does not come fully charged. Charging time is up to 6 hours. When charging with a computer, be sure that the computer is connected
to a power source. If the camera status light does not turn on, use a dierent USB port. No damage occurs to the camera or battery if used without a
full charge. For more battery information, see Battery.

6
GETTING STARTED
PHOTO FLASH
Built-in LED ash provide approximately 120 lumens of
ash power. Turn O/On by pressing and holding the
shutter for 2 seconds when in picture mode or through
the Picture menu, selecting the Flash submenu item
and then selecting OFF or ON.
VIDEO LIGHT
The video light provides approximately 100-150 lumens
of illumination. Turn O/On by pressing and holding
the shutter for 2 seconds when in video mode or
through the video menu, selecting the Flash submenu
item and then selecting OFF or ON.
ACTION VIDEO LIGHT & FLASH
HD2
PRESS SHUTTER (press & hold for 2 seconds) FOR LIGHT

7
GETTING STARTED
2.4G REMOTE USE
Start and stop video recording: press the video
record button
Shoot a photo: press the shutter button.
Power-o camera: long press (about 3 seconds) the
Power Button.
Replace batteries: Unscrew back cover and remove
spent batteries and replace with two fresh CR2016, 3V
batteries.
L. Video Record
» Start/stop recording.
M. Power OFF
» Power the camera o.
N. Photo Button
» Take photo.
TRANSFERRING FILES TO A COMPUTER
COMPUTER REQUIREMENTS FOR 1080P HD VIDEO
Minimum recommended setup for viewing 1080p 30fps video.
PC Mac
Windows® 7, 8, 10 Mac OSR X 10.6.3 or later
Intel® i3TM or faster Intel® i3TM or faster
DirectX 10.0 or later
Minimum 4GB of system RAM Minimum 4GB of system RAM
Video card with minimum 1GB
of RAM
Video card with minimum 1GB
of RAM
Monitor resolution 1920x1080 Monitor resolution 1920x1080
1. Make sure camera is powered on.
2. Connect device to computer with USB cable.
3. When prompted, select “MSDC.” The screen with
“USB CONNECTED” should appear and camera will
be detected by the computer. Files can then be
transferred.
NOTE: You can also transfer les to a computer using a card reader
(sold separately). Connect the card reader to your computer and insert
the micro SD card into the reader. You can then transfer les to your
computer or delete selected les on your card.
Pair replacement 2.4G
remote to camera:
1) Camera must be o.
2) Press and hold both video
record and photo buttons at the
same time until the red LED starts
to blink.
3) Turn camera on.
4) Remote is paired with the
camera after red LED stops
blinking.
IMPORTANT NOTE: Wireless transmission will not work underwater.
Wireless remote is for above water use only.
L
M
N

8
NAVIGATING MENUS TO ADJUST SETTINGS
The “Setting” menu controls the camera’s general
settings. Each camera mode, video and picture have
their own settings menu. To change the mode: Press
menu button and press up/down button to scroll
through main menu selections—Video, Picture, and
Setting. Press OK button to enter sub-menu selections.
To navigate the settings for a given mode:
1. Verify that the camera is in the desired camera mode.
2. Press the OK button to open the settings menu for
the selected mode.
3. Use the up/down buttons to cycle through the
settings. (Continue to press the up/down buttons for
additional settings)
4. Press the OK button to enter sub menu.
5. Use the up/down buttons to cycle through the
setting options. (Continue to press the up/down
buttons for additional options)
6. Press the OK button to select the desired setting in
the sub menu.
Press the power button twice to go back/exit.
INTERFACE & SETTINGS
TV System Congures the video le for playback on either an NTSC or PAL system
device.
NTSC
PAL
Time Setup Set date and time:
Date Format Layout of the date stamp. With sub-menu item highlighted, press OK button
to enter setting. Press up/down buttons to change number and press OK
button to scroll to next number. Press OK button to conrm.
YY/MM/DD
MM/DD/YY
DD/MM/YY
Flip Mode Corrects orientation when camera is mounted upside down. O/On
Format Format Micro SD Card.
WARNING: Format will erase all data from card. Transfer and save any
data prior to formatting.
Reset System Settings Resets camera to factory default settings.
LCD O Turns LCD o after selected time to conserve battery power. 30 seconds
1 minute
3 minutes
Volume Adjust beep volume. 0 (o) - 13 (high)
Language Select/change menu language. English
Chinese (traditional)
Chinese (simplied)
Japanese
French
German
Dutch
Portuguese
Spanish
Russian
Korean
Italian
Beep Sound Controls beep sound. O/On
Auto Power O Turns Camera o after selected time to conserve battery power. 30 seconds
1 minute
3 minutes
5 minutes
Firmware Version Indicates installed rmware version. Please note when updating rmware in
order to conrm new rmware has been installed.
CAMERA SETTINGS GENERAL

9
INTERFACE & SETTINGS
VIDEO MODE ICONS & SETTINGS
AVideo Video mode
BResolution 1920X1080, 30/25 fps HD
1280x720, 60/50 fps HD
1280x720, 30/25 fps HD
848x480, 60/50 fps WVGA
848x480, 30/25 fps WVGA
640x480, 30/25 fps VGA
432x240, 30/25 fps QVGA
CRecording Time Remaining recording time.
DWhite Balance Auto
Daylight
Cloudy
Fluorescent
Tungsten
EBattery Battery level
FQuality Super Fine
Fine
Normal
GDate Stamp O
Date
Date & Time
HMotion Detection
(records when motion is
detected in eld of view)
O/On
IMute
(Audio Status)
O/On
JExposure Value -2.0 to +2.0
+0.0 is the default
KAF Mode
(Metering)
Center
Multi
Spot
LLoaded Micro SD Loaded card
VIDEO STATUS SCREEN
Your HD2camera displays the following information
about modes and settings when in the video mode:
K
A
J
L
DB
E
G
H
C
F
I
G

10
INTERFACE & SETTINGS
VIDEO RECORDING INDICATORS
ARecording Indicator
(Blinking red dot)
Recording in progress
BPicture in Video
Indicator
To take a photo while
recording video (picture in
video), press OK button (“PIV”
will appear in the middle of
the LCD screen).
CRecording Time Length of time recording
current video
VIDEO STATUS SCREEN RECORDING
Your HD2camera displays the following information
about modes and settings when recording:
B
C
A

11
INTERFACE & SETTINGS
PICTURE STATUS SCREEN
Your HD2camera displays the following information
about modes and settings when in the Picture mode:
PICTURE MODE ICONS & SETTINGS
APhoto Photo mode
BResolution 12MP: 4000 x 3000
8MP: 3264 x 2448
5MP: 2592 x 1944
3M: 2048x1536
CImage Count Remaining quantity of images at
quality setting.
DWhite Balance Auto
Incandescent
Fluorescent
Sunny
Cloudy
Snorkeling
Dive
EBattery Status Charge level
FQuality Super Fine
Fine
Normal
GDate Stamp O
Date
Date & Time
HZoom 0-24x (digital)
ISelf-Capture 3 Seconds
5 Seconds
10 Seconds
JContinuous 3, 5, 10
KExposure Value -2.0 to +2.0
+0.0 is the default
LAF Mode
(Metering)
Average
Center
Spot
MLoaded Micro SD Loaded card
DB
L
AE
G
I
K
G
C
MF
H
J

12
Photo Flash O/On
Eect (lter) O
Art
Sepia
Negative
Black & White
Vivid
Flicker AUTO
60Hz
50Hz
Scene Mode O
Night
Sports
Landscape
Sunset
Sand/Snow
Water
Contrast Standard
Enhance
Soft
Sharpness Standard
Sharp
Soft
ISO AUTO, 100, 200, 400, 800, 1600, 3200
Edge Correct
(Corrects sh-eye eect)
O/On
ADDITIONAL PICTURE MODE SETTINGS
ADDITIONAL INFO ABOUT VIDEO & PICTURE SETTINGS
ADDITIONAL VIDEO MODE SETTINGS
INTERFACE & SETTINGS
Contrast Standard
High
Low
Sharpness Standard
Enhance
Soft
ISO AUTO, 100, 200, 400, 800, 1600,
3200
Edge Correct
(Corrects sh-eye eect)
O/On
Video Light O/On
Time Lapse
(Records video frames
with delays between each
frame corresponding to
selected time interval)
OFF
1 second
2 seconds
5 seconds
10 seconds,
30 seconds
1 minunte
Indicator LED O/On
Video Duration
(Records a video clip for
the selected time length
and continue recording
video clips of the same
time length one after
another unless operator
stops recording manually
by pressing the shutter
button)
ANY DURATION
3 minuntes
5 minuntes
10 minuntes
15 minuntes
Video Loop
(Records video after
memory card has become
full by recording over
previous video les from
the beginning)
O/On
Flicker
(prevent ickering caused
by uorescent lights)
AUTO
60Hz
50Hz
Scene Mode O
Night
Sports
Landscape
Sunset
Sand/Snow
Water
Eect (lter) Normal
Black & White
Sepia
Negative
Red
Green
Blue
WHITE BALANCE
This setting improves color accuracy when the ambient
light is either too cool (blue or green) or too warm
(yellow/orange). Examples of cool lighting situations
are cloudy day, diving at depths below 20 feet / 6
meters in either fresh or salt water, uorescent light, or
scenes in shade. Examples of warm lighting situations
are candlelight and tungsten light. Setting choices are
AUTO, INCANDESCENT (under lament lamp lighting),
FLUORESCENT (under uorescent lighting), SUNNY
(daylight situations), CLOUDY (cool light situations),
SNORKELING (saltwater depth between to 15 to 50 ft),
DIVE (saltwater depth below 50 ft).
ISO
This setting adjusts the camera’s sensitivity to light. A
higher ISO value will result in a lighter video/photo and
is useful in low light conditions. The choices are AUTO,
100, 200, 400, 800, 1600, 3200.

13
VIEWING FILES
PLAYBACK MODE ICONS & SETTINGS
AFile Number Image/Video Number
TO PLAY MOVIE CLIPS:
Play: Press OK button twice.
Stop: Press OK button.
CHANGE PICTURE VIEW:
Enlarge: Select photo you wish to enlarge. Press OK
button.
Thumbnail view: Press the shutter button.
DELETING FILES
1. Press up/down buttons to select a le and then press
the shutter button.
2. Press OK button to enter delete function.
3. Press OK button and up/down buttons to select
DELETE THIS FILE or DELETE ALL FILES.
4. Press OK button to conrm choice.
5. Press up/down buttons to select OK or CANCEL.
6. Press OK to perform deletion.
PLAYBACK VIDEOS/VIEW PHOTOS
Go to Playback mode by pressing the power button
twice when in Video mode. Press up/down buttons
to scroll through les. Press the power button to exit
playback mode and return to video mode screen.
A
VIEWING FILES ON AN HDTV
1. Connect the camera to to an HDTV with a micro HDMI cable (not included) . Plug the micro HDMI plug into the
camera’s HD output port and the other end with USB plug into the HDTV.
2. Turn camera on and conrm that TV SYSTEM (NTSC or PAL) in SETTING Menu is matched to TV.

14
CAMERA CARE
BATTERY
Important: DO NOT allow Li-ion battery to become
fully discharged. If not using camera for a prolonged
period, recharge every 3 months to prevent battery
from becoming fully discharged.
Maximizing Battery Life:
The battery icon has a line across it when the battery
is very low. If the battery reaches 0% while recording,
the camera saves the le and powers o. Extreme cold
temperatures can decrease battery life. To maximize
battery life in cold conditions, keep the camera in a
warm place prior to use. Shooting at higher frame rates
and resolutions increases power consumption.
The battery charges to 100% in approximately 6 hours
when using a USB-compatible Wall or Auto Charger.
Battery Storage & Handling:
The camera contains sensitive components, including
the battery. Avoid exposing your camera and battery
to very cold or very hot temperatures. Low or high
temperature conditions may temporarily shorten
the battery life or cause the camera to temporarily
stop working properly. Avoid dramatic changes in
temperature or humidity when using the camera, as
condensation may form on or within the camera.
The camera housing protects the camera from water
damage. For more information, see Camera Housing.
Do not turn on your camera if it is wet. If your camera
is already on, turn it o. Allow the camera to dry
thoroughly before using it again. Do not dry the camera
with an external heat source such as a microwave oven
or hair dryer. Damage to the camera caused by contact
with liquid is not covered under the warranty.
HOUSING MAINTENENCE
Rinse housing in cool clean water after use.
Inspect O-ring carefully prior to each use: any debris on
O-ring can cause leakage.
Store in a cool dry area with housing door slightly open
to prevent O-ring deforming.
Battery Disposal:
Most rechargeable lithium-ion batteries are classied
as non-hazardous waste and are safe for disposal in
the normal municipal waste stream. Many localities
have laws in place requiring battery recycling. Check
your local laws to make sure that you can dispose of
rechargeable batteries in your regular trash. To safely
dispose of lithium-ion batteries, protect terminals from
exposure to other metal with packing, masking or
electrical tape so they do not cause a re while being
transported. Lithium-ion batteries, however, do contain
recyclable materials and are accepted for recycling by
the Rechargeable Battery Recycling
Corporation’s (RBRC) Battery Recycling Program. We
encourage you to visit Call2Recycle at call2recycle.
org or call 1-800-BATTERY in North America to nd
a convenient recycling location. Never dispose of a
battery in a re because it may explode.
WARNING: Do not drop, disassemble, open, crush, bend, deform,
puncture, shred, microwave, incinerate or paint the camera. Do
not insert foreign objects into the battery opening on the camera.
Do not use the camera or the battery if it has been damaged—for
example, if cracked, punctured or harmed by water. Disassembling
or puncturing the battery can cause an explosion or re.

15
TROUBLESHOOTING
Problem Possible Cause Solution
Camera will not turn on Battery not charged Use supplied USB cable
and connect to powered-
on computer to charge.
Camera freezes, does
not operate correctly
or shows “card error”
message on LCD.
MicroSD card is improper
size or has les on it
recorded on another
device.
Use microSD card
maximum size 32GB
(class 10 recommended).
Format card if it has
les on it from another
device.
Photos are blurry Moving or shaking
camera when taking
photo.
Hold camera as steady as
possible when taking a
photo or use a tripod.
Video are shaky or
shows motion blur.
Moving camera in with
shaking motion or
panning too fast.
Move camera in even
slow movements when
taking videos.
Camera is not
recognized by
computer when
plugged in via USB
cable.
Connection failure or
defective USB cable.
Check to make sure
connections are secure,
restart computer or try
another USB cable.
Camera turns o
by itself after a few
minutes.
Power save is set to 1, 3
or 5 minutes or battery
charge level is low.
Turn o power save
function in camera’s
menu or make sure
battery has sucient
charge.
SUPPORT
www.intova.com
1 (808) 837-0074
INTOVA IS PART OF A FAMILY OF BRANDS:
Industrial Revolution, Inc.
5835 Segale Park Dr. C.
Tukwila, WA 98188
www.industrialrev.com
TROUBLESHOOTING
Other manuals for HD2
4
Other Intova Action Camera manuals

Intova
Intova EDGE X User manual

Intova
Intova X4K User manual

Intova
Intova HD2 User manual

Intova
Intova HD2 User manual

Intova
Intova EDGE X User manual

Intova
Intova DUB User manual

Intova
Intova NOVA HD User manual

Intova
Intova Sport HD Installation instructions

Intova
Intova X2 User manual

Intova
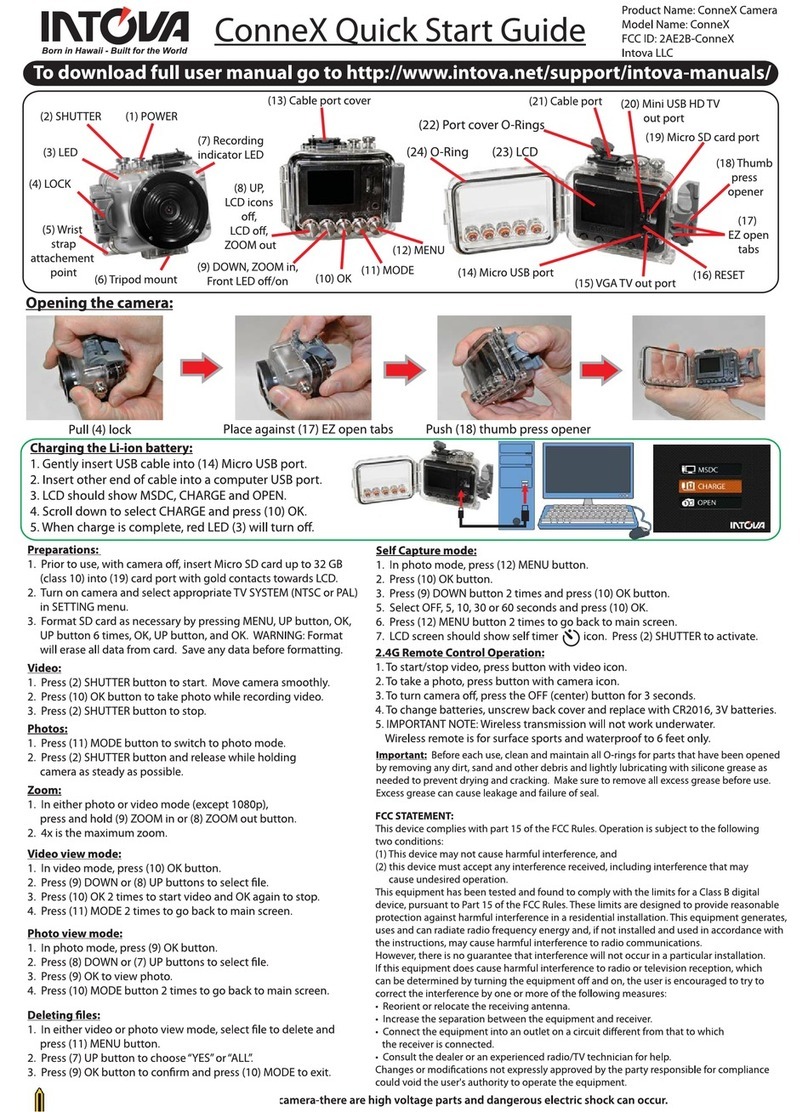
Intova ConneX User manual