Intova X4K User manual

USER MANUAL
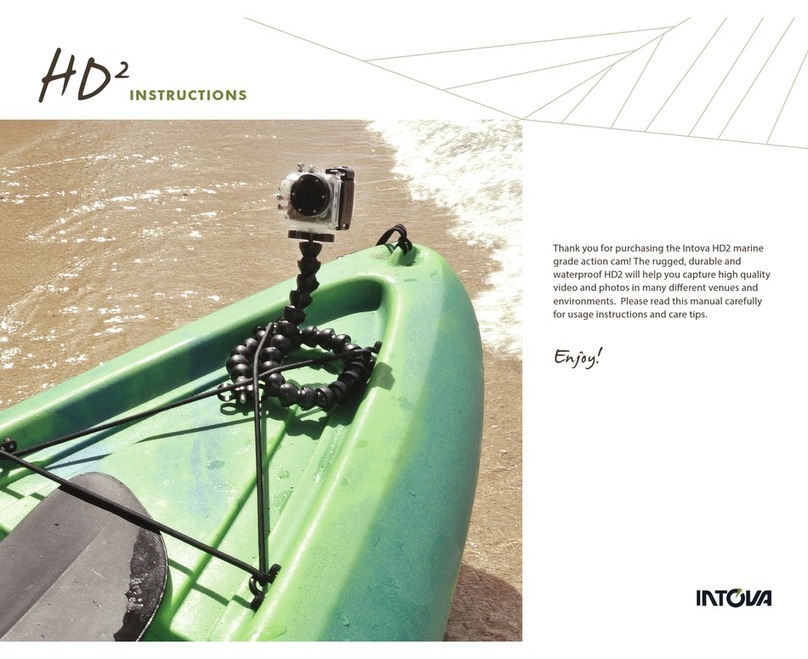
Thank you for purchasing the Intova X4K
Marine Grade Action Camera! The rugged,
durable and waterproof X4K will help you
capture high quality video and photos in
many dierent venues and environments.
Please read this user manual carefully for
usage instructions and maintenance tips.
Enjoy!
X4K

TABLE OF CONTENTS
X4K
Page Section
3 PREFACE
4 COMPUTER REQUIREMENTS AND PRECAUTIONS
5 SPECIFICATIONS
6 BUTTONS AND INTERFACE
7 BUTTONS AND INTERFACE continued
8 QUICK START GUIDE
9 GETTING STARTED
10 ACTION VIDEO LIGHT AND FLASH
11 WIFI REMOTE CONTROL
12 RF REMOTE CONTROL
13 VIDEO MODE
14 VIDEO MODE MENU
15 PHOTO MODE
16 PHOTO MODE MENU
17 PLAYBACK MODE
18 SETTINGS MENU
19 SETTINGS MENU continued
20 MAINTENANCE
21 TROUBLESHOOTING
22 INCLUDED ACCESSORIES
2

FCC STATEMENT
This device complies with part 15 of the FCC Rules. Operation is subject
to the following two conditions:
(1) This device may not cause harmful interference, and
(2) this device must accept any interference received, including
interference that may cause undesired operation.
This equipment has been tested and found to comply with the limits
for a Class B digital device, pursuant to Part 15 of the FCC Rules. These
limits are designed to provide reasonable protection against harmful
interference in a residential installation. This equipment generates, uses
and can radiate radio frequency energy and, if not installed and used
in accordance with the instructions, may cause harmful interference
to radio communications. However, there is no guarantee that
interference will not occur in a particular installation. If this equipment
does cause harmful interference to radio or television reception, which
can be determined by turning the equipment o and on, the user is
encouraged to try to correct the interference by one or more of the
following measures:
• Reorient or relocate the receiving antenna.
• Increase the separation between the equipment and receiver.
• Connect the equipment into an outlet on a circuit dierent from that
to which the receiver is connected.
• Consult the dealer or an experienced radio/TV technician for help.
Changes or modications not expressly approved by the party
responsible for compliance could void the user’s authority to operate
the equipment.
X4KPREFACE
LIMITED WARRANTY
This product has a limited 1 year warranty, to the original purchaser, to be free
from defects in materials and workmanship. Follow all product instructions
and warnings as warranty does not cover damage due to misuse, improper
care, accidents, or alterations. See www.intova.com for further details.
3

X4KCOMPUTER REQUIREMENTS AND PRECAUTIONS
PRECAUTIONS
• A microSD card up to 128GB maximum size and class U3, minimum 90MB/s
speed must be properly inserted into the X4K camera’s card port before use.
• If using a microSD card that was previously used in a dierent digital device,
FORMAT memory card in a computer and not in the camera prior to use since
previously existing les on a memory card may cause camera to malfunction.
Save any needed les to a computer before formatting.
• Use supplied mini USB cable plugged into a computer’s USB port to
recharging camera’s li-ion battery. If using a USB wall plug adapter, the
USB output must be 5V DC and 1A. Using a dierent output voltage can
cause damage to the camera and is not covered under warranty.
• If camera is not used for a prolonged period of time, the li-ion battery
must be recharged periodically (to full charge at least once a year)to maintain
operating ability. Allowing total discharge of the battery may cause it to
become non-functional and is not covered under warranty.
• O-ring on waterproof door must be properly maintained by inspecting
and removing any dirt, sand, hair, debris, etc. before and after use.
• Apply minimal amount of silicone grease to O-ring only when necessary.
Too much silicone grease applied at one time or a build up of excess
silicone grease can lead to leakage and is not covered under warranty.
• Do not leave or store the camera in direct sunlight. Prolonged exposure to
direct sunlight can damage the camera and is not covered under warranty.
• Do not aim camera directly into the sun for a prolonged period since this
can damage the image sensor and is not covered under warranty.
• Store camera in a cool, dry environment.
• Clean the housing/camera after each use by rinsing it in cool clean running
water to remove any salt, dirt, sand, debris, etc. Be sure that the waterproof
door is properly closed and sealed before rinsing.
• Do not use any solvents such as alcohol, acetone, etc. to clean the camera.
This will cause damage and is not covered under warranty.
MINIMUM COMPUTER SYSTEM REQUIREMENTS FOR
VIEWING AND EDITING 4K (3840X2160 30P) VIDEO
PC Mac
Windows 7, 10 Mac OS 10.10.X or later
4th generation Intel® Core™ 4th generation Intel® Core™
processor family processor family
(Intel Haswell based CPUs) (Intel Haswell based CPUs)
Monitor that can display Monitor that can display
3840x2160 (4K) resolution 3840x2160 (4K) resolution
Integrated Graphics solutions Integrated Graphics solutions
or a discrete graphics card or a discrete graphics card
that support 4K displays* that support 4K displays*
8GB RAM 8GB RAM
Software to playback 4K video Software to playback 4K video
Software to edit 4K video Software to edit 4K video
*For graphics hardware, refer to computer manufacturer’s recommendation.
4
X4KSPECIFICATIONS
Sensor type 1/ 2.3” 14MP CMOS
Sensor model Panasonic MN34112
Digital signal processor Ambarella A12S75
LCD Screen size 2”TFT-LCD
LCD Screen resolution 960x240 pixels
Video resolution, NTSC PAL
frame rate and (4K) 3840x2160 30P 16:9 (4K) 3840x2160 25P 16:9
aspect ratio 2880x2160 30P 4:3 2880x2160 25P 4:3
2560x1920 30P 4:3 2560x1920 25P 4:3
2560x1440 30P 16:9 2560x1440 25P 16:9
1920x1440 30P 4:3 1920x1440 25P 4:3
1920x1080 60P 16:9 1920x1080 50P 16:9
1920x1080 30P 16:9 1920x1080 25P 16:9
1280x720 60P 16:9 1280x720 50P 16:9
1280x720 30P 16:9 1280x720 25P 16:9
1280x960 60P 4:3 1280x960 50P 4:3
1280x720120P 16:9 1280x720100P 16:9
Video format MP4
Photo le size, pixel 14M (true) 4320x3248
dimensions and 11M (true) 4320x2432
aspect ratio 8M (true) 3264x2448
Photo le format JPG
Field of view D=153°, H=121°
Aperture F2.8
Focus Mode Fixed focus
Focus range 0.5m to innity
Digital Zoom x1 to x14 (when activated in camera’s menu)
WiFi and WiFi range 8.02.11b/g/n, up to approx. 10 meters
RF remote type and range 2.4G RF remote, up to approx. 30 meters
Built-in microphone Yes
Video Light/Flash lumens Video light is approx. 100~150 lumens
Flash is approx. 120 lumens
Light range Approx. 3m in air
Battery life Approx. 2 hours when video recording at 1920x1080 30P
with LCD, LED light and WiFi o
Battery voltage/capacity 3.7V/ 1600mAh
Charging input DC 5V/1A USB port
Charging time Approx. 3 hours
Ports microSD card port, USB 2.0, micro HDMI TV out
Depth rating Waterproof to 330 feet / 100M (using waterproof door)
Buoyancy Negative (attach red oating lanyard for positive buoyancy)
Operating temp -10°C to 55°C/14°F to 131°F
Weight 6.8 oz / 192g
Dimension 3.15" x 2.76" x 1.97"/8cm x 7cm x 5cm
Memory microSD card maximum 128GB size and minimum 90MB/s
type U3 card speed required for 4K video (not included)
Included Accessories Li-ion battery, mini USB cable, oating lanyard, audio door,
LCD hood, 2.4G RF remote, quick start guide
Product specications are subject to change without notice. For more information, visit www.intova.com 5

C
D
E
G
H
I
K
J
F
B
A
X4KBUTTONS AND INTERFACE
A. LED Video Light/Flash
B. SHUTTER Button:
>>Video mode: press to start/stop recording.
>>Photo mode: press to take photo.
>>View mode: enter Playback menu to set
Video Play mode or delete single/all les.
>>Video Light/Flash activation/deactivation
(press & hold 2 seconds).
C. POWER/MODE Button
>>Power camera on/o (press & hold 2 seconds).
>>Select Video/Photo/View mode (quick press).
>>View mode: view thumbnails, return to thumbnail
view, exit view mode/go to video mode.
>>Video/Photo Menus: exit menus/menu functions/
function choices.
>>Playback menu: exit menu and return to view
mode.
D. Indicator Light
>>Red LED is ON while charging and OFF when charging is complete.
>>Flashes red when video recording is in progress.
>>Flashes blue when remote control function is activated.
E. Door Lock
>>Flip lock latch upwards to open housing door.
F. Removable Housing Door
>>Use included waterproof door for underwater/wet conditions.
>>Use supplied non-waterproof audio door only on land/in air for better audio during video recording.
G. Tripod Mount
>>Standard 1/4” 20 tripod mount base for attaching accessories that have 1/4” 20 tripod screw.
H. Float Strap Attachment
I. DOWN Button
>>Scroll to select: menu/menu function/function choice/thumbnail.
>>In Video or photo mode: Digital zoom out.
>>Video playback: speed up video playback.
>>One touch LCD o/on.
J. MENU/OK Button
>>Access Menu.
>>Conrm choice.
>>One touch WiFi on/o (press & hold 2 seconds).
>>In Playback mode: start/stop video.
K. UP Button
>>Scroll to select: menu/menu function/function choice/thumbnail.
>>In Video or photo mode: Digital zoom in.
>>Video playback: slow down video playback.
6

X4K
M
L
N
O
P
Q
S
R
L. MicroSD Card Port
>>X4K requires a properly inserted microSD
card up to 128GB size and class U3 speed
(minimum 90MB/s).
M. Battery Lock
>>Rotate lock to horizontal positionto ensure
proper contact betweenbattery and camera is
maintained.
N. Micro HDMI Port
>>Connect a micro HDMI cable (not included)
between camera and an HDTV to allow playback
of videos and view photos on HDTV screen.
O. Microphone
>>Built-in microphone for capturing audio
during video recording. For better audio
on land/in air, replace waterproof door with
non-waterproof audio door (included).
Remove audio door and replace with
waterproof door when using camera underwater.
NOTE: Flooding/damage to camera due to use of non-waterproof audio door underwater is not
covered under warranty.
P. Mini USB Charger Port
>>Use supplied mini USB cable to connect camera to a computer to download images, charge li-ion
battery and to use camera while powered via the computer or an external power source.
Q. Li-ion Battery
>>The supplied rechargeable li-ion battery is removable and can be charged via optional external
charger, model I-CHARGER2 (not included).
R. LCD Hood
>>Attach the included LCD hood to help reduce glare on LCD screen from bright sunlight when
using camera on land/in air.
S. LCD Screen
>>Built-in LCD screen allows user to view subjects while recording video or taking photos. To
conserve battery power, turn o LCD screen by pressing the DOWN button and turn back on by
pressing DOWN button again (One touch LCD o/on).
>>LCD screen resolution: 960x240.
T. O-ring
>>O-ring on waterproof door must be properly maintained by inspecting and removing any dirt,
sand, hair, debris, etc. before and after use. Apply minimal amount of silicone grease to O-ring only
when necessary. Too much silicone grease applied at one time or a build up of excess silicone grease
can lead to leakage and is not covered under warranty.
T
BUTTONS AND INTERFACE continued
7

QUICK START GUIDE
X4K
1. OPEN THE HOUSING DOOR 2. INSERT LI-ION BATTERY
3. CHARGE BATTERY 4. INSERT MICRO SD CARD
5. POWER ON (press and hold 2 seconds) 6. PRESS SHUTTER TO SHOOT/RECORD
7. VIDEO LIGHT OR FLASH
To activate LED video light: in video mode press and hold
shutter button for 2 seconds until light bulb icon appears.
Video light will turn on when starting to record and turns o
when recording is stopped.
To activate LED photo ash: in photo mode press and hold
shutter button for 2 seconds until light bulb icon appears.
Photo ash will go o when taking a photo.
Note: Flash will only sync in extremely low light
to no light conditions.
8

GETTING STARTED
X4K
OPEN THE HOUSING DOOR
Flip lock latch up and
away from the camera.
Unhook latch from side
door and pull open door.
CHARGING THE BATTERY or USE WITH EXTERNAL POWER SOURCE
INSERT LI-ION BATTERY
Insert the Li-ion battery into battery
chamber with gold contacts facing
towards lens port/front of camera.
Charge the battery by connecting the camera to a computer or USB charging adapter
(output must be DC 5V 1A) using the included USB cable. Charging time up to 6 hours
for an exhausted battery. When charging with a computer, be sure that the computer
is connected to a power source. If the red LED indicator light does not turn ON, try a
dierent USB cable or port. The camera does not come fully charged. The camera can
be used with a partially charged battery.
When the screen with three
choices appears, scroll to
CHARGE and press MENU/OK
button. The red LED indicator
light turns ON and turns OFF
when charging is complete.
Scroll to OPEN and press the
MENU/OK button to operate
camera while connected to
external power. Useful when
recording time lapse video
beyond battery’s full charge.
INSERT MICRO SD CARD
The X4K camera does not come with built-in memory. A microSD card (sold separately)
up to 128GB in size and class U3 (minimum 90MB/s speed) must be properly inserted
into the card port before use. Insert card with gold contacts towards the LCD screen.
Push down until card clicks into place. To remove, press down on card again.
If using a microSD card that was previously used in a dierent digital device, FORMAT
POWER ON/OFF Press and hold POWER button
for 2 seconds. The POWER
button is also the MODE button.
Quickly press and release the
button to switch between video,
photo and view modes.
PRESS SHUTTER TO RECORD
Press and quickly release
SHUTTER button to start and
stop video recording or take
a photo.
TRANSFERRING FILES TO A COMPUTER
After recording videos or photos, image les can be transferred
to a computer using the supplied USB cable. The X4K camera is
“Plug and Play”, so no camera driver software is required.
When the screen with three choices appears, scroll to MSDC
and press MENU/OK button. The screen with “USB CONNECTED”
Rotate battery lock latch 90° to
secure the battery.
memory card in a computer prior to use since previously existing les on a memory card may cause camera to
malfunction. Please be sure to copy any existing les that you want to keep to your computer before formatting.
should appear. Files can then be trasferrred to your computer.
Note: Files can also be transferred to a computer by removing microSD card andinserting into a card reader’s
microSD card port or inserting microSD card into an SD card adapter and then inserting into an available SD
card port on a computer. 9

ACTION VIDEO LIGHT AND FLASH
X4K
The built-in LED video light and ash provides approximately
150 lumens of illumination. On land the LED video light/ash
will be eective to about 10 feet. Underwater in clear water,
the light will be eective to about 5 feet. To conserve battery
life, use the light only when needed.
The built-in LED video light and ash provides approximately
150 lumens of illumination. On land the LED video light/ash
will be eective to about 10 feet. Underwater in clear water,
the light will be eective to about 5 feet. To conserve battery
life, use the light only when needed.
To activate/use LED video light:
1. In video mode press and hold shutter button for 2 seconds
until light bulb icon appears.
2. Video light will turn on when starting to record and turns o
when recording is stopped.
3. To deactivate video light mode, press and hold shutter button
for 2 seconds until light bulb icon disappears.
To activate/use LED photo ash:
1. In photo mode press and hold shutter button for 2 seconds
until light bulb icon appears.
2. Photo ash will go o when taking a photo.
3. Flash will sync with shutter only in extremely low light
(such as in a room with the lights o and curtains closed)
to no light conditions.
3. To deactivate photo ash mode, press and hold shutter button
for 2 seconds until light bulb icon disappears.
10

REMOTE CONTROL VIA WIFI
X4K
1. INTOVA X4K WIFI APP
On an iOS or Android smart phone or tablet
download and install the Intova X4K WiFi app.
a) Link to app on Apple App store: https://itunes.apple.com/tw/app/intova-x4k/id1325421327?mt=8
b) Link to app on Google Play store: https://play.google.com/store/apps/details?id=com.intova.x4k&hl=en
4. OPEN INTOVA WIFI APP
After connecting the mobile device to the X4K’s WiFi signal, click on the INTOVA X4K WiFi app icon.
2. TURN ON CAMERA WIFI
Insert a microSD (up to 128GB and minimum 90MB/s U3 speed) into X4K and power on camera. For proper
WiFi operation, battery power level icon should have at least three bars. Press and hold MENU/OK button for
2 seconds to turn on WiFi. The “X” will disappear from the WiFi icon on lower left corner of LCD screen.
WIFI REMOTE FUNCTION
This feature allows camera to be connected
to an iOS or Android wireless device such as
a smart phone or tablet for remote operation,
live viewing and wireless le transferring*.
3. CONNECT TO WIFI SIGNAL
Go to the phone or tablet’s WiFi settings and connect to the INTOVA-X4K signal. The password is 0123456789.
For some Android devices, the “AUTO CONNECT” function in WiFi’s advanced settings needs to be disabled to
ensure proper connection with the camera.
Main control screen
with live view
Main control screen
with thumbnail preview of photo
Photo shutter
button
Video
recording
shutter button
Main control screen
with GPS view
GPS
button
Mode and
Quick Setting
button
Mode and
Quick Setting
screen
DO NOT USE
Video
Resolution
Settings
Other Settings
screen
Video Resolution
Settings screen
All les
Video les
Photo les
View and
download
les button
Download icon
View and download
les screen
*Due to their size, video les will take a considerably longer time to download compared to photo les.
Photo setting functions in mode and quick setting not available. Set manually in camera before using WiFi. 11

RF REMOTE CONTROL
X4K2.4G REMOTE (For use above water/on land only)
A. Video mode icon: Select this mode to record video at the camera’s
currently set video resolution.
B. Selected mode indicator: Align mode icon to triangle to select.
C. Mode selector ring: Turn ring to select a mode.
D. “Slow motion” mode icon: Selecting this mode will change the
camera’s current set video resolution to record video at 720p 120fps.
The 120fps high frame rate allows for smoother “slow motion” eect
when the video le is converted in a video editing program that has
slow motion function.
E. Shutter button: Press to start/stop video, take a photo.
F. Time lapse mode icon: Press to start/stop time lapse video. If time
lapse function is set to OFF in the camera’s menu, then mode will be
set to 1 frame per second. If time lapse function is pre-set in the menu,
then resulting time lapse video will use that frame rate.
G. Adjustable Velcro strap: To attach remote to wrist or arm.
H. Photo mode icon: Select this mode to take a photo at the camera’s
currently set photo le size. Also works with “Burst” mode.
Important warning: The 2.4G remote is not waterproof. Damage due to use underwater
or exposure to water is not covered under warranty.
B
C
A
F
D
E
G
H
CHANGING THE BATTERY
1. With Velcro strap removed, use
a #1 philips screwdriver to remove
the 4 screws on the back plate.
2. Remove back plate and carefully
lift out the battery assembly along
with the printed circuit board.
3. Battery/printed circuit board
assembly removed.
4. Hold the assembly by the edges
and use blunt end of a toothpick to
carefully push the battery out.
5. Dispose of exhausted battery
according to local laws/regulations
and use a fresh CR2032 3V Lithium
battery button cell to replace.
6. Carefully insert new battery with
positive side up and reassemble
remote.
12

N
M
L
J
I
HG
AE
D
C
B
F
K
O
P
Q
VIDEO MODE SCREEN
The X4K camera LCD displays the following information
about functions and settings when in video mode.
VIDEO MODE
X4K
R
T
VIDEO RECORDING SCREEN
The X4K camera LCD displays the following information
about functions and settings when recording video.
S
A. Video mode icon
B. Video resolution: horizontal x vertical
pixel dimensions and frame rate.
C. Time lapse mode: presence of icon
indicates time lapse activated.
D. White balance mode: icon indicates
activated white balance mode.
Auto
Incandescent
Fluorescent
Sunny
Cloudy
Snorkeling
Dive
E. Battery level icon
F. Video quality icon
G. Date/Time stamp icon: presence of
icon indicates date/time stamp activated.
H. Zoom level: indicates from x1 to x14
(not available in 4K and 720 120P).
I. Motion detection mode: presence of
icon indicates motion detection activated.
J. Audio recording staus icon: red “X” on
speaker icon indicates audio recording OFF.
K. Elapsed time
L. Date and time
M. LED video light icon: presence of icon
indicates LED video light activated. Light
will turn ON when video recording starts
and turn OFF when recording is stopped.
N. WiFi icon: presence of “x” below icon
indicates WiFi signal is OFF. To conserve
battery power, turn on WiFi only when
needed to connect with mobile device.
O. Exposure value: indicates from -3.0EV
(underexposure) to +3.0EV (overexposure).
P. Meter mode: metering area icon as
shown below.
Spot
Center
Average
Q. MicroSD card icon: a white icon
indicates a microSD card inserted.
R. Video recording indicator: blinking red dot.
S. Picture in Video: “PIV” will appear when
OK button is pressed to indicate that a still
image has been captured. Not available in 4K
and 720 120P resolutions.
T. Video recording time
A
13

VIDEO MODE MENU
X4K
1. RESOLUTION: sets the video recording’s pixel dimensions and frame rate. Factory default resolution is
3840x2160 30P.
2. QUALITY: sets video quality between SUPER FINE, FINE and NORMAL compression. Factory default is
SUPER FINE.
3. TIME LAPSE: sets the camera to record video clips with delays between each frame corresponding to
selected time interval in seconds. This produces a time lapse video without the need for post production.
Setting choices are OFF, 1 sec, 2 sec, 30 sec and 1 minute. Factory default is OFF. DO NOT activate this
function when using WiFi.
4. DIGITAL ZOOM: allows digital zoom feature for video mode to be activated. When digital zoom is
activated, use the UP button to zoom in from x1 to x14 and the DOWN button to zoom out. Factory
default is ON. Digital zoom is not available for 3840x2160 30P resolution.
5. DATE/TIME STAMP: sets the date only, time only or both date and time on the video clip which is visible
during playback. Setting choices are OFF, DATE, TIME, or DATE/TIME. Factory default is DATE/TIME.
6. VIDEO LIGHT: allows LED video light feature to be activated. When set to ON, light will turn on when
starting to record and turns o when recording is stopped. See section on ACTION VIDEO LIGHT AND
FLASH for more information.Factory default is OFF.
7. INDICATOR LIGHT: sets the blinking red LED on top of the camera to ON or OFF during video recording.
Factory default is ON.
8. VIDEO DURATION: sets the camera to record a video clip for a selected time length in minutes and to
continue recording video clips of the same time length one after another unless operator stops recording
by pressing the SHUTTER button. Choices are ANY DURATION, 3 MINUTES, 5 MINUTES and 10 MINUTES.
Factory default is ANY DURATION.
NOTE:
a) 3840x2160 30P resolution records a continuous video in segments of 7 minutes 15 seconds
maximum when set at ANY DURATION or 10 minutes.
b) 2880x2160 30P through 1920x1080 60P resolutions record a continuous video in segments of
10 minutes 0 seconds maximum when set at ANY DURATION or 10 minutes.
c) 1920x1080 30P and lower resolutions records a continuous video in segments of 30 minutes
0 seconds maximum when set at ANY DURATION.
9. VIDEO LOOP: Allows camera to continue capturing video after memory card has become full by
recording over previous video les from the beginning. Factory default is OFF.
10. MOTION DETECTION: sets camera to start recording video automatically when motion is detected in
its eld of view. Video will be recorded for 5 seconds and stop if no other motion is detected. Factory
default is OFF.
11. AUDIO RECORDING: allows camera to record sound during video recording. Factory default is ON.
12. HDR: sets the High Dynamic Range to ON or OFF. This function extends the capturing of detail in high
and low contrast areas. Factory default is OFF.
13. FOV: sets the eld of view (also know as angle of view) between WIDE, MIDDLE and NARROW. This
function is only available in 1920x1080 30P resolution. Factory default is WIDE.
14: EIS: sets the electronic image stabilization to ON or OFF. This function is available only in 1920x
1080 60P and 1920x1080 30P video resolutions. EIS function is only eective to smooth minor vibration
such as during video recording while walking with the camera.
While in video mode, press the OK/MENU button to enter
menu selection screen. With video camera icon highlighted,
press OK/MENU button again to enter video menu to adjust
or activate various video functions.
14

M
L
K
IH
GF
A
D
C
B
E
J
N
O
P
PHOTO MODE
X4KA. Photo mode icon
B. Photo le size: 14MP, 10MP and 8MP.
C. White balance mode: icon indicates
activated white balance mode.
Auto
Incandescent
Fluorescent
Sunny
Cloudy
Snorkeling
Dive.
D. Battery level icon
E. Photo quality icon
F. Date/Time stamp icon: presence of
icon indicates date/time stamp activated.
G. Zoom level: indicates from x1 to x14.
H. Self capture icon: “x” indicates self
capture function turned OFF. 3, 5 or 10
indicates seconds between shutter press
and taking of photo.
I. Burst mode: presence of icon indicates
burst mode activated. 3, 5 or 10 photos
per shutter press.
J. Photos remaining: number indicates
remaining amount of photos available
on microSD card.
K. Date and time
L. LED photo ash icon: presence of icon
indicates LED photo ash activated. Flash
will go o when taking a photo. Flash will
sync with shutter only in extremely low
light (such as in a room with the lights o
and curtains closed) to no light conditions.
M. WiFi icon: presence of “x” below icon
indicates WiFi signal is OFF. To conserve
battery power, turn on WiFi only when
needed to connect with mobile device.
N. Exposure value: indicates from -3.0EV
(underexposure) to +3.0EV (overexposure).
O. Meter mode: metering area icon as
shown below.
Spot
Center
Average
P. MicroSD card icon: a white icon
indicates a microSD card inserted.
PHOTO MODE SCREEN
The X4K camera LCD displays the following
informationabout functions and settings when
in photo mode. Press MODE button while in
Video mode to go to Photo mode.
A
15

PHOTO MODE MENU
X4K
1. SIZE: sets the photo le size’s pixel dimensions . Factory default size is 14 megapixel (4320x3248).
2. QUALITY: sets photo quality between SUPER FINE, FINE and NORMAL compression. Factory default
is SUPER FINE.
3. SELF CAPTURE: sets time delay in seconds between pressing of SHUTTER button and taking of photo.
To activate self-capture:
a. Enter PHOTO menu and highlight SELF CAPTURE.
b. Press OK/MENU button to enter function.
c. Select 3, 5, 10 seconds and press OK/MENU button to conrm.
d. Press MODE button 2 times to exit menu.
e. LCD screen should show self-timer icon.
f. Press SHUTTER button to start timer.
4. DIGITAL ZOOM: allows digital zoom feature for photo mode to be activated. When digital zoom is
activated, use the UP button to zoom in from x1 to x14 and the DOWN button to zoom out. Factory
default is ON.
5. DATE/TIME STAMP: sets the date only, time only or both date and time on the video clip which is visible
during playback. Setting choices are OFF, DATE, TIME, or DATE/TIME. Factory default is DATE/TIME.
6. PHOTO FLASH: allows LED photo ash feature to be activated. When set to ON, LED will ash when
pressing the SHUTTER button to take a photo. Flash will sync with shutter only in extremely low light
(such as in a room with the lights o and curtains closed) to no light conditions. See section on ACTION
VIDEO LIGHT AND FLASH for more information. Factory default is OFF.
7. BURST MODE: sets photo mode at 3, 5, 10 continuos photos per shutter button press. Factory default
is OFF.
8. ISO: adjusts the camera’s sensitivity to light. The default setting is AUTO. A higher ISO number will result
in a lighter video/photo and is useful in low light conditions. The choices are AUTO, 100, 200, 400, 800,
1600 and 3200.
While in photo mode, press the OK/MENU button to enter
menu selection screen. With photo camera icon highlighted,
press OK/MENU button again to enter photo menu to adjust
or activate various photo functions.
10”
16

A
B
PLAYBACK MODE and MENU
X4KPLAYBACK MODE SCREEN
The X4K camera LCD displays the following
information about functions and settings
when in playback mode and menu. Press
MODE button while in Photo mode to go to
Playback mode.
A. Video or photo le thumbnail: select
thumbnail by pressing UP or DOWN button
to highlight in yellow box and press OK
button to enlarge. Video les will start to
play automatically when thumbnail is
enlarged and then go back to thumbnail
view when playback is done. During video
playback, press OK button to pause and
press OK button again to resume playback.
During video playback, press DOWN button
to speed up playback and UP button to
slowdown playback.
B. Video or photo le name
C. VIDEO PLAY menu: press SHUTTER button
while in thumbnail view to enter playback
menu. When VIDEO PLAY is highlighted in
yellow, press OK button to enter function.
The function choices are:
1. VIDEO PLAY ONE
2. VIDEO PLAY ALL
3. VIDEO REPEAT ONE
4. VIDEO REPEAT ALL
D. DELETE FILE menu: press UP or DOWN
button to highlight DELETE FILE in yellow and
press OK button to enter function.
The function choices are:
1. DELETE THIS FILE which will delete
only the le of the thumbnail that was
highlighted in the yellow box.
2. DELETE ALL FILES will delete all video
and photo les on the microSD card.
TO VIEW FILES ON AN HDTV
Set TV SYSTEM function in SETTINGS menu
to either NTSC or PAL to match HDTV’s system.
Connect the X4K camera to an HDTV with a
micro HDMI cable (not included). Insert the
micro HDMI plug into the camera’s HDMI out
port and the other end with the standard HDMI
plug into the HDTV’s HDMI input port and go to
playback mode to view les.
C
D
17

SETTINGS MENU
X4K
1. TV SYSTEM: setting congures the video le for playback on an NTSC or PAL system device. Factory default
is NTSC.
2. DATE/TIME SETUP: allows current date and time to be set. With the function highlighted, press OK/MENU
button to enter setting. Press UP or DOWN button to change number and press OK/MENU button to scroll to
next. When done, press OK/MENU button to conrm and exit function.
3. FORMAT: function erases all les from the microSD card. WARNING: Format will erase all data from card.
Save to a computer any les that are needed prior to formatting card!
4: RESET SYSTEM: allows all camera settings to be reset to factory default.
5. AUTO POWER OFF: sets camera to power o after a selected time if not being actively used. Choices are
OFF (camera stays ON), 1 minute, 3 minutes and 5 minutes. Use this feature to conserve battery power.
Factory default is OFF.
6. WIFI: function turns WiFi signal ON or OFF. Factory default is OFF.
7. DATE FORMAT: sets date displayed on LCD screen and date stamp to YY/MM/DD, MM/DD/YY or DD/MM/YY.
Factory default is YY/MM/DD.
8. FLIP MODE: setting allows video le to be played back in correct orientation for videos that are recorded
with camera mounted upside down. Factory default is OFF.
9. LCD OFF: turns o LCD after a selected time even if camera is being actively used such as recording a video.
Choices are OFF (LCD stays ON), 30 seconds,1 minute and 3 minutes. Press any button to turn LCD back on.
This feature conserves battery power. Factory default is OFF (LCD stays ON).
10. LCD BRIGHTNESS: adjusts the LCD illumination between STANDARD, BRIGHT and DARK. Factory default
is STANDARD.
11. LANGUAGE: function choices are ENGLISH, 䭧ἺḔ㕮(simplied Chinese), 繁體中文(traditional Chinese),
日本語(Japanese), FRANçAIS (French), DEUTSCHE (German), NEDERLANDS (Dutch), PORTUGUES (Portuguese),
ESPANOL (Spanish), PYCCKий (Russian), 한국어 (Korean), ITALIANO (Italian). Factory default is ENGLISH.
12. BEEP SOUND: setting turns ON or OFF the beep sound when pressing a button. Factory default is OFF.
13. FLICKER: setting allows the camera to be adjusted to AUTO, 60Hz or 50Hz to prevent video ickering from
uorescent lights. Factory default is AUTO.
14. SCENE MODE: allows user to adjust camera exposure to various lighting or subjects.
a) OFF: normal exposure/factory default.
b) NIGHT: for low light situations or at night. Due to longer exposure time, mounting to a tripod is
recommended.
c) SPORTS: for fast moving subjects or during action activities. Camera uses faster (shorter) exposure
time to improve imagery.
d) LANDSCAPE: for distant subjects such as mountains, cityscape, etc.
e) SUNSET: uses slightly faster (shorter) exposure time to capture sunrise or sunset in the background.
f) SAND/SNOW: for situations where bright background causes subject to appear dark (silhouetted).
Camera uses slightly longer exposure time to improve imagery.
g) WATER: adjusts exposure to capture motion of moving water. Due to longer exposure time,
mounting to a tripod is recommended.
While in either video or photo mode,
press the OK/MENU button to open the
menu selection screen. Press the UP or
DOWN button to highlight SETTINGS
icon and press OK/MENU button again
to enter SETTINGS menu to adjust or
activate various functions.
>
~
18

SETTINGS MENU continued
X4K
15. WHITE BALANCE: adjusts color balance for various lighting situations.
a) AUTO: normal exposure/factory default.
b) INCANDESCENT: adjusts imagery to cooler (blue/cyan) color balance for scenes with warm
(red/yellow) indoor lighting.
c) FLUORESCENT: adjusts imagery to warmer color balance for scenes with uorescent lighting.
d) SUNNY: adjusts imagery to cooler (blue/cyan) color balance for warm outdoor lighting.
e) CLOUDY: adjusts imagery to warmer color balance for scenes with cool outdoor lighting.
f) SNORKELING: adjusts imagery to warmer (red/yellow) color balance for cooler (blue/cyan)
scenes in saltwater at depths between 10 to 25 feet/3 to 8 meters.
g) DIVE: adjusts imagery to warmer (red/yellow) color balance for cooler (blue/cyan) scenes in
saltwater at depths below 25 feet/8 meters.
16. IMAGE EFFECT: sets various special eects.
a) OFF: normal exposure/factory default.
b) ART: enhances sharpness and contrast in imagery.
c) SEPIA: adds reddish-brown monochromatic color to give imagery an “antique”/warm tone.
d) NEGATIVE: reverses imagery to make it appear like a lm negative.
e) BLACK/WHITE: removes color to create monochromatic imagery.
f) VIVID: enhances color saturation.
17. CONTRAST: setting increases or reduces the dierence between dark and light areas. Select HIGH to
make dark areas blacker and light areas brighter. Select LOW to make dark areas less black and light areas
darker. Factory default is STANDARD.
18. SHARPNESS: setting increases or decreases image sharpness. Select ENHANCE to increase sharpness
and SOFT to decreasesharpness. Factory default is STANDARD.
19. METER MODE: selects the general area in a scene that the cameras uses when estimating exposure.
CENTER mode uses an area towards the middle of the scene. AVERAGE mode uses the overall area in a
scene. SPOT uses a very concentrated area in the middle of the scene. Factory default is CENTER.
20. EXPOSURE VALUE: adjusts the brightness or darkness of the imagery between ±3 stops. Setting to
positive values will brighten exposure, while negative values will darken exposure. Factory default is 0.0.
21. FIRMWARE VERSION: shows installed rmware version. Please note current version if it becomes
necessary to update rmware in order to conrm new rmware version has been installed.
19

MAINTENANCE
X4K
LI-ION BATTERY
• If camera is not used for a prolonged period of time, the li-ion battery must be recharged periodically
(to full charge at least once a year) to maintain operating ability. Do not allow battery to become total
discharged which can cause it to become non-functional and is not covered under warranty.
• Do not expose the battery (and camera) for prolonged periods of time to temperatures outside the
recommended range of -10°C to 55°C/14°F to 131°F. Exposure to extreme cold or heat can shorten
battery life or damage the battery and is not covered under warranty.
• Do not allow the battery to become wet, dropped in water, exposed to high humidity, etc. which can
cause the charging terminals to become corroded resulting in non-functionality and is not covered
under warranty.
• Do not drop, disassemble, open, crush, bend, deform, puncture, shred, microwave, etc. the battery
which can cause an explosion or re. There are no user servicable parts inside the battery (or camera).
Do not use the battery if it is damaged.
• Store the battery (and camera) in a cool dry environment.
BATTERY DISPOSAL
• Dispose of the rechargeable Li-ion battery according to local laws and regulations. Many localities
require the battery to be recycled. In the USA, please visit https://www.call2recycle.org/ for more
information on recycling locations. Never dispose of a battery in a re because it may explode.
O-RING
• The O-ring on the waterproof door must be properly maintained by inspecting and removing any dirt,
dust, sand, hair, debris, etc. before and after use.
• Use a soft lint free cloth moistened with water to clean the O-ring. DO NOT use any solvents such as
alcohol, acetone, etc. to clean the O-ring. This will cause damage and is not covered under warranty.
• Do not remove the O-ring from the waterproof door unless it becomes necessary to clean under the
O-ring such as when the camera is accidentally dropped on the ground with the door open and dirt
becomes trapped between the O-ring and the door groove. Repeatedly removing O-ring can cause
it becoming stretched out. This can lead it to become crimped or pinched when the waterproof door
is closed and result in ooding and damage to the camera and is not covered under warranty.
• Apply minimal amount of silicone grease to the O-ring only when necessary. Too much silicone grease
applied at one time or a build up of excess silicone grease can lead to leakage and is not covered under
warranty.
• Use only 100% silicone grease made for O-rings. Use only one drop of grease on an applicator swab and
apply it to the surface of the O-ring. The purpose of silicone grease is to lubricate and moisturize it to keep
it from drying out and cracking and does not function to keep water out of the camera. It is the O-ring
itself that provides the waterproof seal.
• If it becomes necessary to replace the O-ring, please use a proper O-ring tool to remove and replace the
O-ring. Extra O-rings can be ordered by calling 1-888-297-6062 (USA only) or +1-425-285-1111.
CAMERA HOUSING/CAMERA
• The X4K camera and its housing are integrated so there is no separate camera to remove from the housing.
• Clean the housing/camera after each use by rinsing it in cool clean running water to remove any salt, dirt,
sand, debris, etc. Be sure that the waterproof door is properly closed and sealed before rinsing.
• Do not use any solvents such as alcohol, acetone, etc. to clean the camera. This will cause damage
and is not covered under warranty.
• Use a soft lint free cloth to dry the camera and store it (and the battery) in a cool dry environment.
• Do not drop, disassemble, crush, puncture, shred, microwave, etc. the camera which can lead to electric
shock. There are no user servicable parts inside the camera. Do not use the camera if it is damaged.
20
Other manuals for X4K
1
Table of contents
Other Intova Action Camera manuals

Intova
Intova Sport HD Installation instructions

Intova
Intova duo User manual

Intova
Intova DUB User manual

Intova
Intova X2 User manual

Intova
Intova HD2 User manual

Intova
Intova NOVA HD User manual

Intova
Intova X2 User manual

Intova
Intova duo User manual

Intova
Intova EDGE X User manual

Intova
Intova EDGE X User manual